Coral Reef Creation Station

Coral Reef Creation Station (6)

Here’s a fun way to make a pretty catch-all for art or school supplies, particularly if your child needs to keep everything handy for remote learning sessions this year.

To start, you’ll need any small box or shoebox; we recycled a Kiwi Crate. First, we lined it with blue construction paper to make an ocean background, adhering with a glue stick.

Coral Reef Creation Station (2)

Next, draw coral reef features on thick white paper. Travis enjoyed using pastels, but crayons or markers would also work.

Coral Reef Creation Station (1)

We soon had a few pieces of coral and one friendly-looking fish to cut out and glue to our blue backdrop.

Coral Reef Creation Station (3)

On the inside of the box, tape down plastic cups or similar containers (such as recycled yogurt containers). Fill up with all those supplies!

Coral Reef Creation Station (4)

Now everything under the sea is right where Travis needs it.

Coral Reef Creation Station (5)

Flour Piping Sensory Activity

Flour and Water Piping (8)

A word of warning parents: this game is a messy one, but definitely worth it. It combines food play, painting, sensory play, art, and more!

To start, I set out a bowl for Veronika filled with flour, which immediately grabbed her attention. We started pouring in water and she was fascinated watching it change from powdery flour into, well, goop!

Flour and Water Piping (1)

Keep adding water until your mixture is a thick paste, then use a ladle to scoop some into zip-top plastic bags. Veronika chose blue and green when I asked what colors of paint she wanted. Add a little drop of paint to each bag, then seal and show your toddler how to squish the bag so the color mixes.

Flour and Water Piping (2)

Snip a small hole in the bottom corner of each bag. Veronika could now “pipe” the paint onto sheets of thick craft paper I had laid down.

Flour and Water Piping (3)

Note: I recommend a tray or newsprint underneath the paper, since the flour mixture is quite messy.

Flour and Water Piping (4)

She absolutely loved this step, using great concentration as she dribbled out the contest of the bag. I would make our flour mixture a little thicker next time so that it required more squeezing on her part. With that said, she was pleased as punch watching the results of her work as she dribbled the bag back and forth across the paper.

Flour and Water Piping (5)

Inadvertently, her final “painting” almost looked like planet Earth!

Flour and Water Piping (6)

As the final touch, we added glitter because, well, everything is better with glitter. She loved shaking out lots of it from the jar and making her final work of art gleam.

Flour and Water Piping (7)

Coral Reef Kiwi Crate

Kiwi Coral Reef (9)

Travis kit from Kiwi Co this month was all about Coral Reefs. The focus was primarily on the science of a coral reef’s ecosystem, with a little bit of art and engineering (ratchets!) thrown in for good measure.

First up was the art component: to color in a Reef Scene.

Kiwi Coral Reef (1)

Travis loved the pastels that came with the kit for this step. There was also a blending stick to mix colors or make scratch-art, so kids can really have fun with this step if they’re feeling artsy.

Kiwi Coral Reef (3)

Next up he needed to Assemble the Jellyfish. The pastels are used again, this time to color the tentacles of the provided jellyfish shapes. Fold down these tabs of paper, then add strings as additional tentacles for wonderfully wavy creatures.

Kiwi Coral Reef (5)

A plastic cap (which looks like the top of an Easter egg) sits on top as the jellyfish’s bell. Thread a pipe cleaner through the holes in the plastic head and twist to make a loop. Wiggle eyes completed each wiggly fellow.

Kiwi Coral Reef (6)

Finally, it was time Build the Race Frame. Kids add a disc and ratchet to each of two bolts, which then screw into a spool on either side of the wooden race frame.

Kiwi Coral Reef (7)

When we came to the next step, it turned out we were missing the long strings to thread through the spool and onto the pipe cleaner loop of each jellyfish. Luckily this was an easy material to replace, and I grabbed twine from the craft bin.

Travis then attached the handles (pieces of wood which will hitch onto the teeth of the jagged ratchet). As we raced our jellyfish, we learned that whether you push or pull on a ratchet, it will always turn in only one direction; the left side grabs when you push, and the right side grabs when you pull . Once Travis got the hang of it, he loved having jellyfish races with me!

Kiwi Coral Reef (8)

For some final fun, Travis read facts in Explore magazine, solved a brain coral maze, and then made a quick Pet Jellyfish:

Cut a circle from a plastic bag and gather the center of the plastic to form a head; tie loosely with string. Snip the edges of the circle to make the tentacles.

Pet Jellyfish (2)

Fill a clear plastic water bottle with water and add a few drops of food coloring to turn it into a blue ocean.

Now fill the jellyfish’s head about halfway with water; you need enough room for an air bubble to form as well. Insert into the bottle and tilt it back and forth to watch your new “pet” swim.

Pet Jellyfish (3)

This didn’t work perfectly for us, but the kids liked the wavy tentacles in the bottle!

Pet Jellyfish (4)

Straw Windpipe Craft

Straw Flute (9)

This classic DIY instrument is a perfect one for toddlers, requiring no complicated steps or materials.

Simply line up brightly colored plastic or paper straws. I made some flutes that were 8 “pipes” long and a few smaller ones only 6 straws long, which were easier for Veronika to hold in her hands.

Straw Flute (2)

Secure with tape near the top and bottom third, then use scissors to snip in a diagonal so your pipes run from longest to shortest.

Straw Flute (4)

Toot toot toot! These were perfect to play during her at-home Zoom music class, adding to the hands-on fun!

Straw Flute (10)

It turned out that big brother Travis loved the windpipe, too, quickly incorporating it into his play.

Straw Flute (7)

The perfect instrument for a homemade marching band, in sum.

Straw Flute (8)

Messy Painting Two Ways: Kool-Aid and Food Color

Kool Aid Paint with Clean Up (3)

Sometimes, it feels good to have a day devoted to getting messy. To wit, Veronika played with bright bold “paint” colors in two ways today. Luckily, the second way has a built-in cleaning component, so be sure to save it for last!

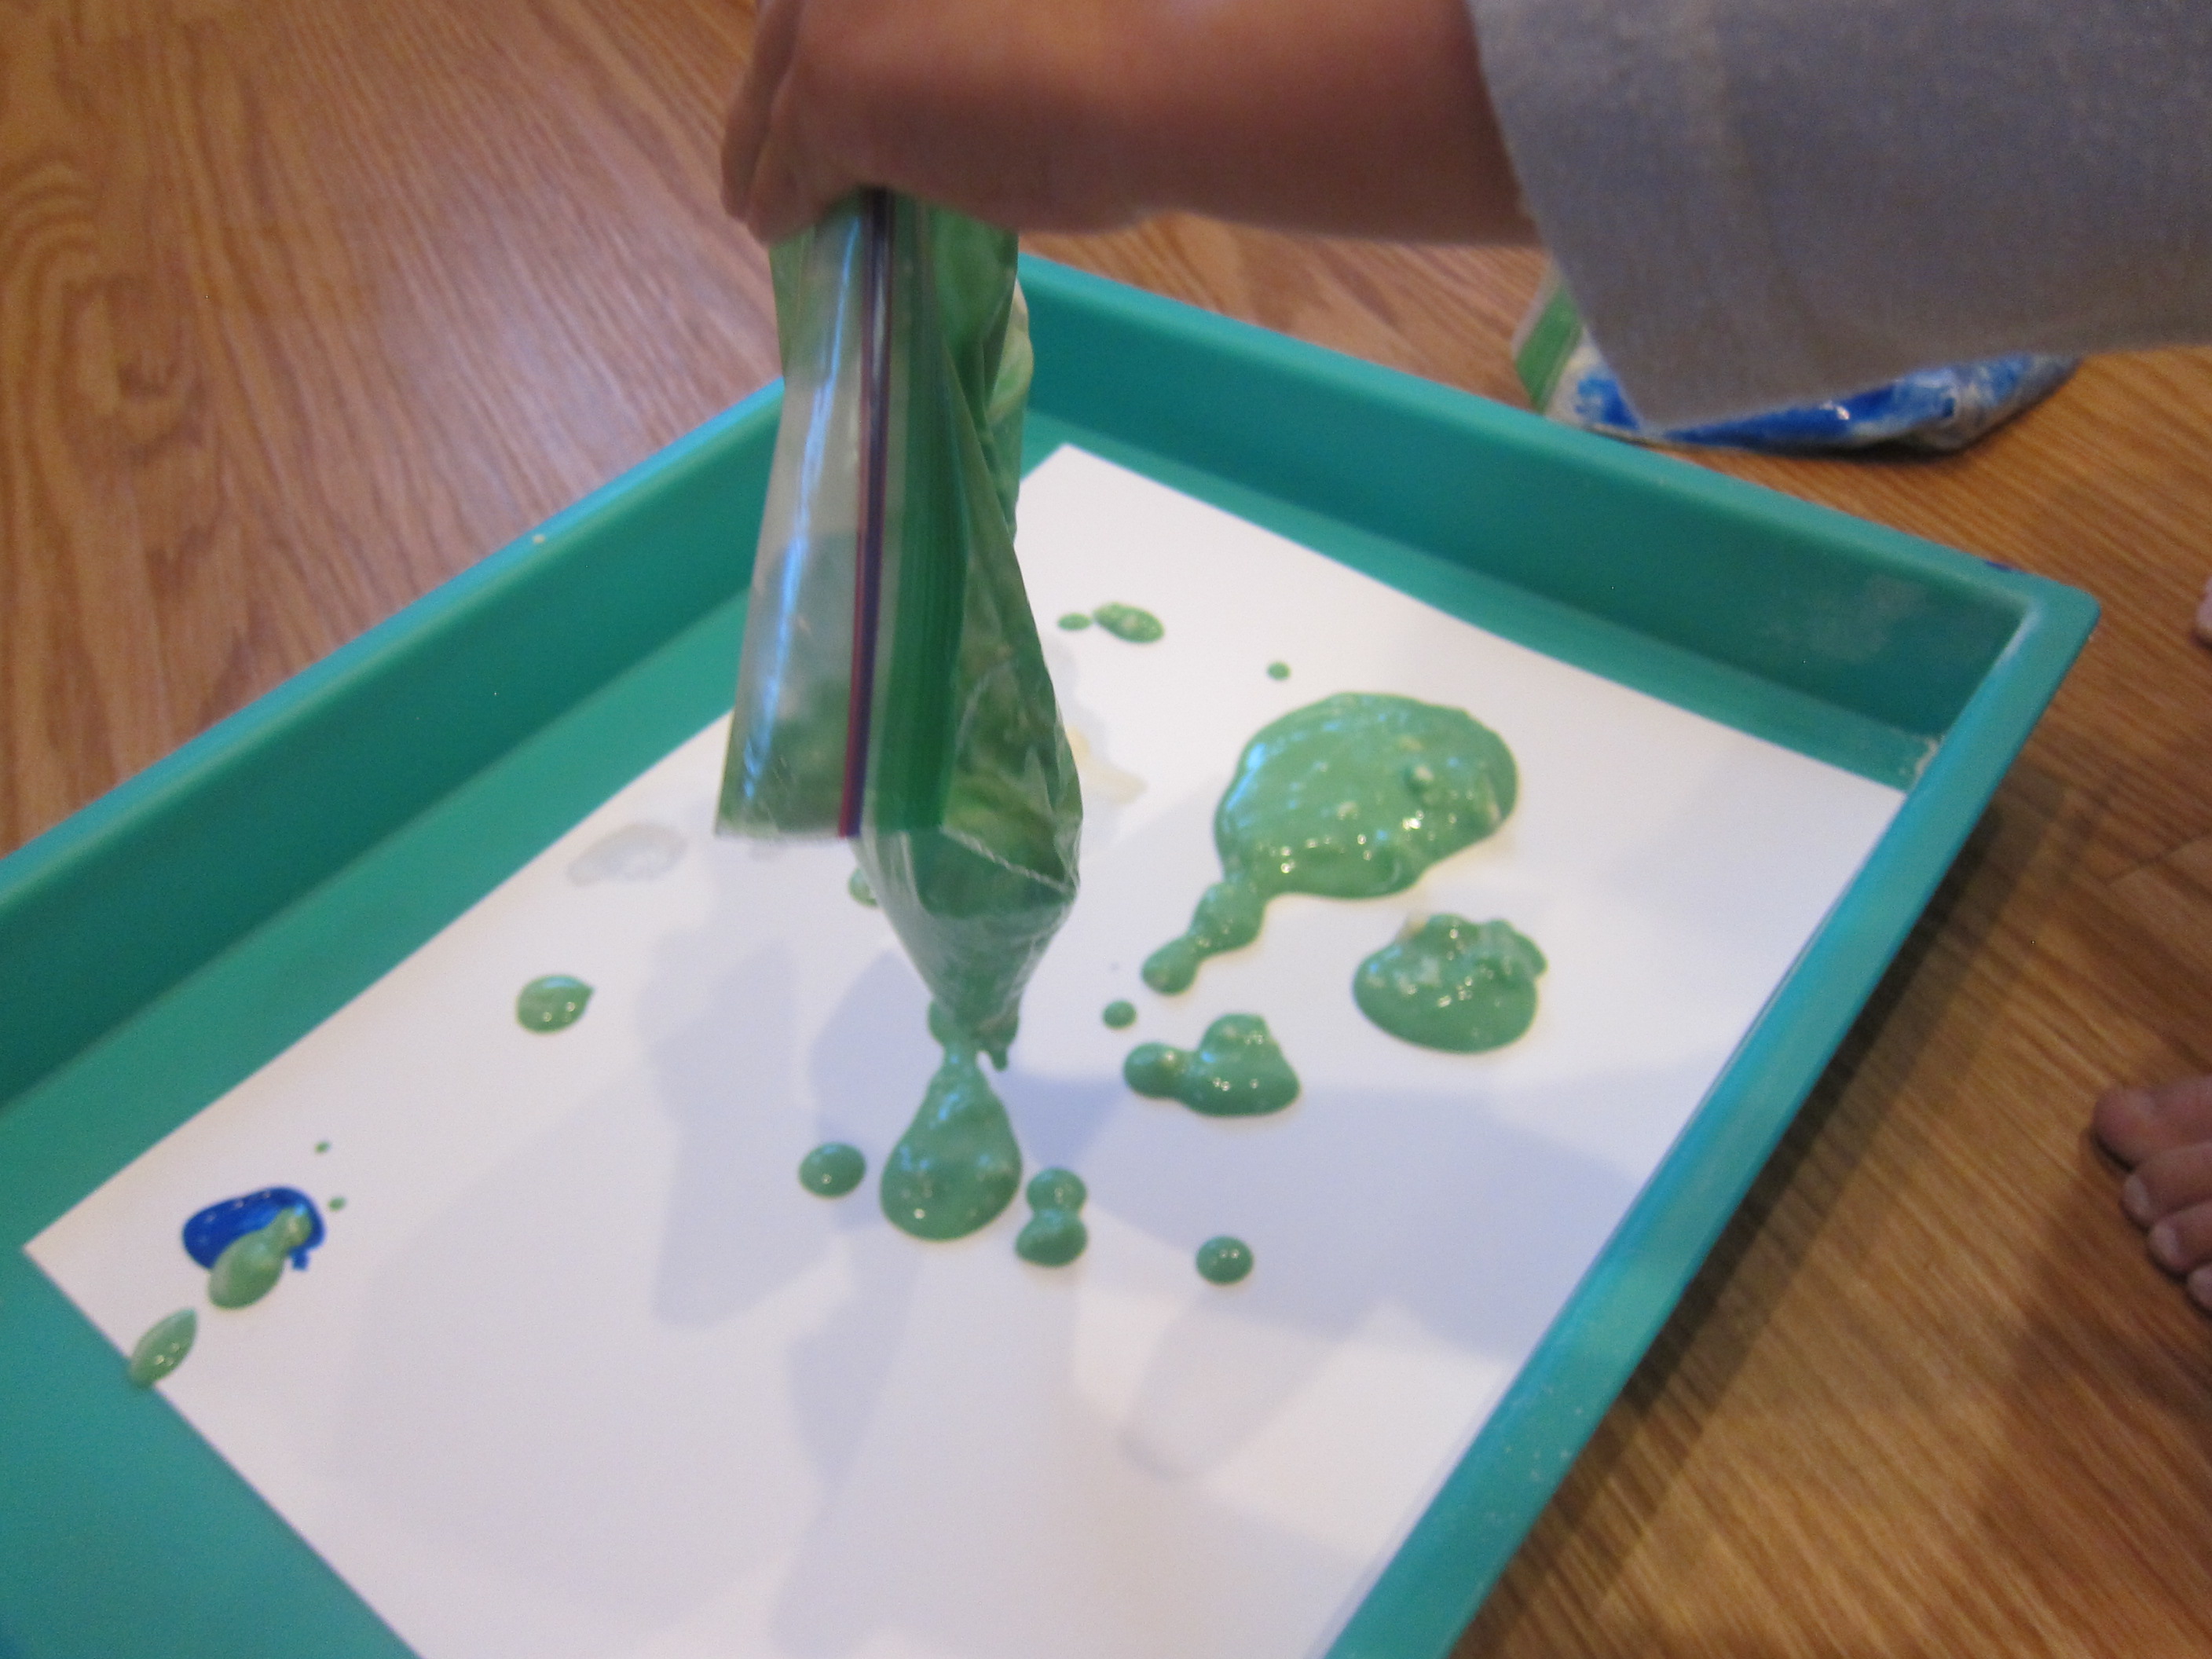
For the first version, I set out a tray lined with thick white paper and added a few ice cubes. Sprinkle on packets of powdered Kool-Aid.

Kool Aid Paint with Clean Up (1)

As soon as the ice begins to melt, the “paint” is magically revealed. We played in a bright sunny spot by our patio door so the sun helped the ice melt much faster.

Kool Aid Paint with Clean Up (2)

Veronika loved seeing the color appear. “It’s paint!” she said. She even got to observe some neat color mixing, since we started with a yellow powder and a red one, but pretty soon everything was shades of orange.

Kool Aid Paint with Clean Up (4)

She decided the ice cubes were much too cold to touch with her hands though, so I gave her two plastic spoons. Truth be told, she then lost interest in the paint and was far more intent on chasing around the ice with the spoons.

Kool Aid Paint with Clean Up (5)

It turned out that she was very skilled at picking a cube up on one spoon and transferring it to the other without it falling. Impressive!

Kool Aid Paint with Clean Up (7)

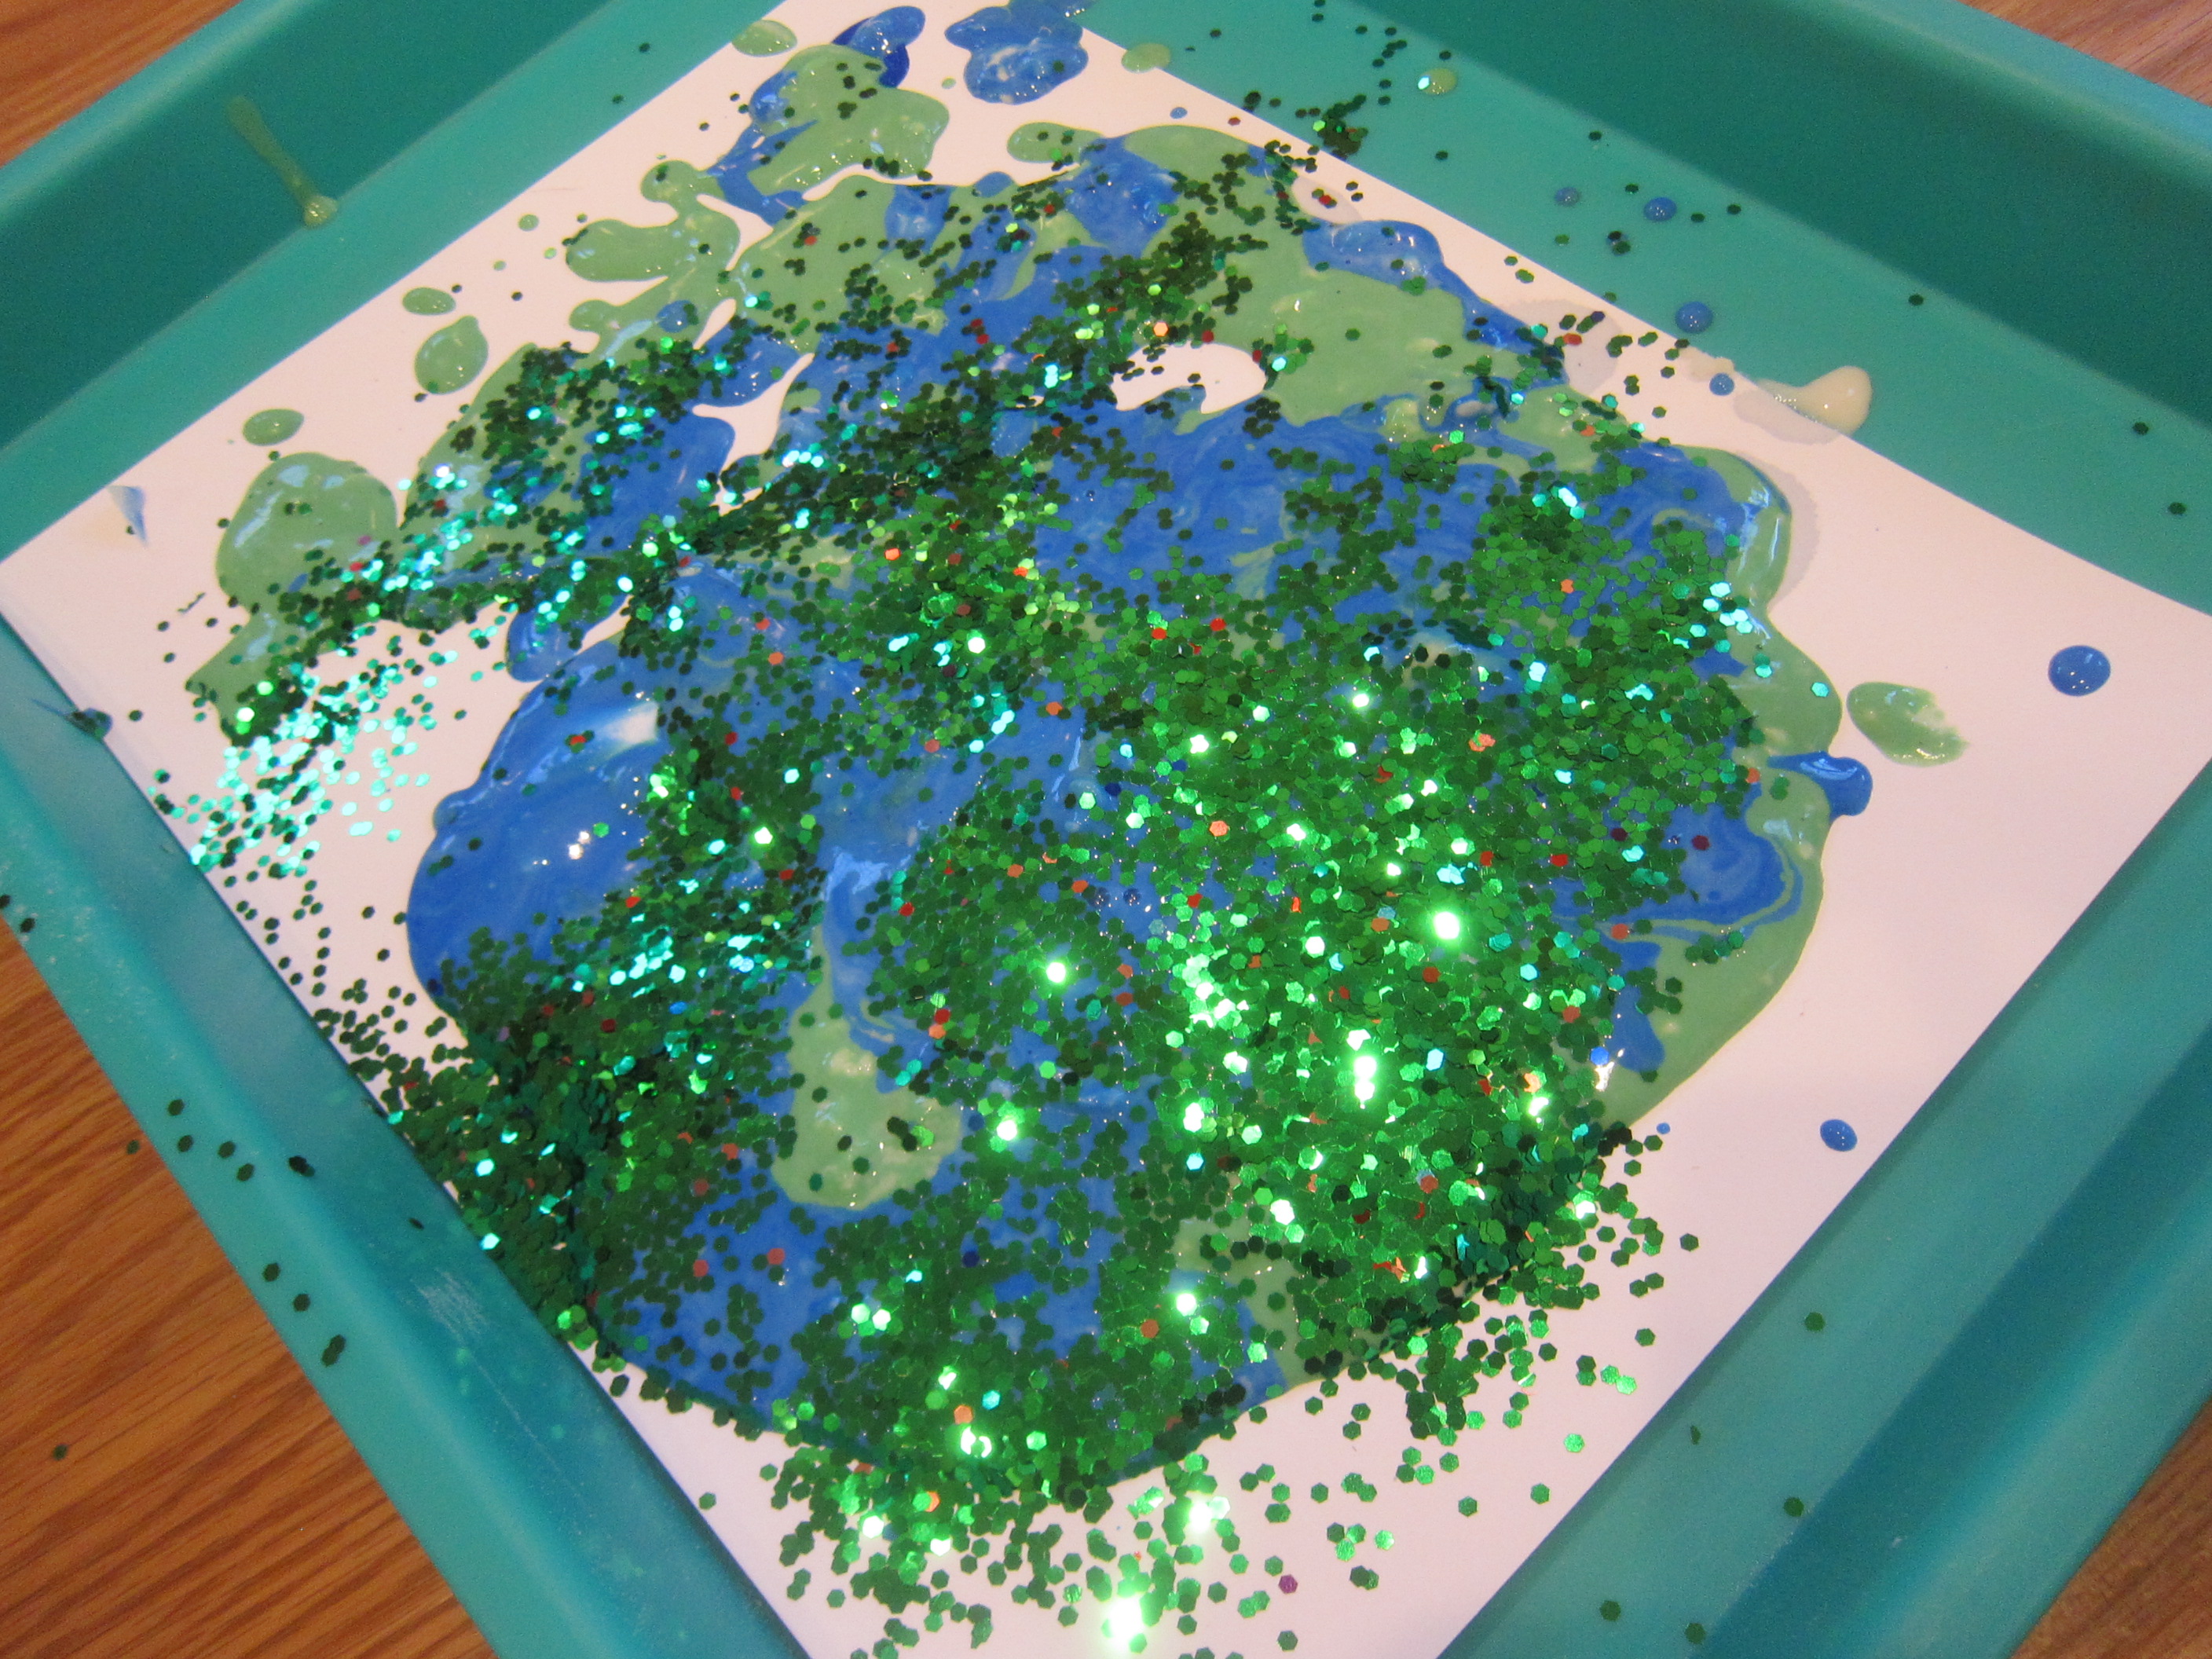
Once the ice had melted, we had a vivid painting to display.

Kool Aid Paint with Clean Up (8)

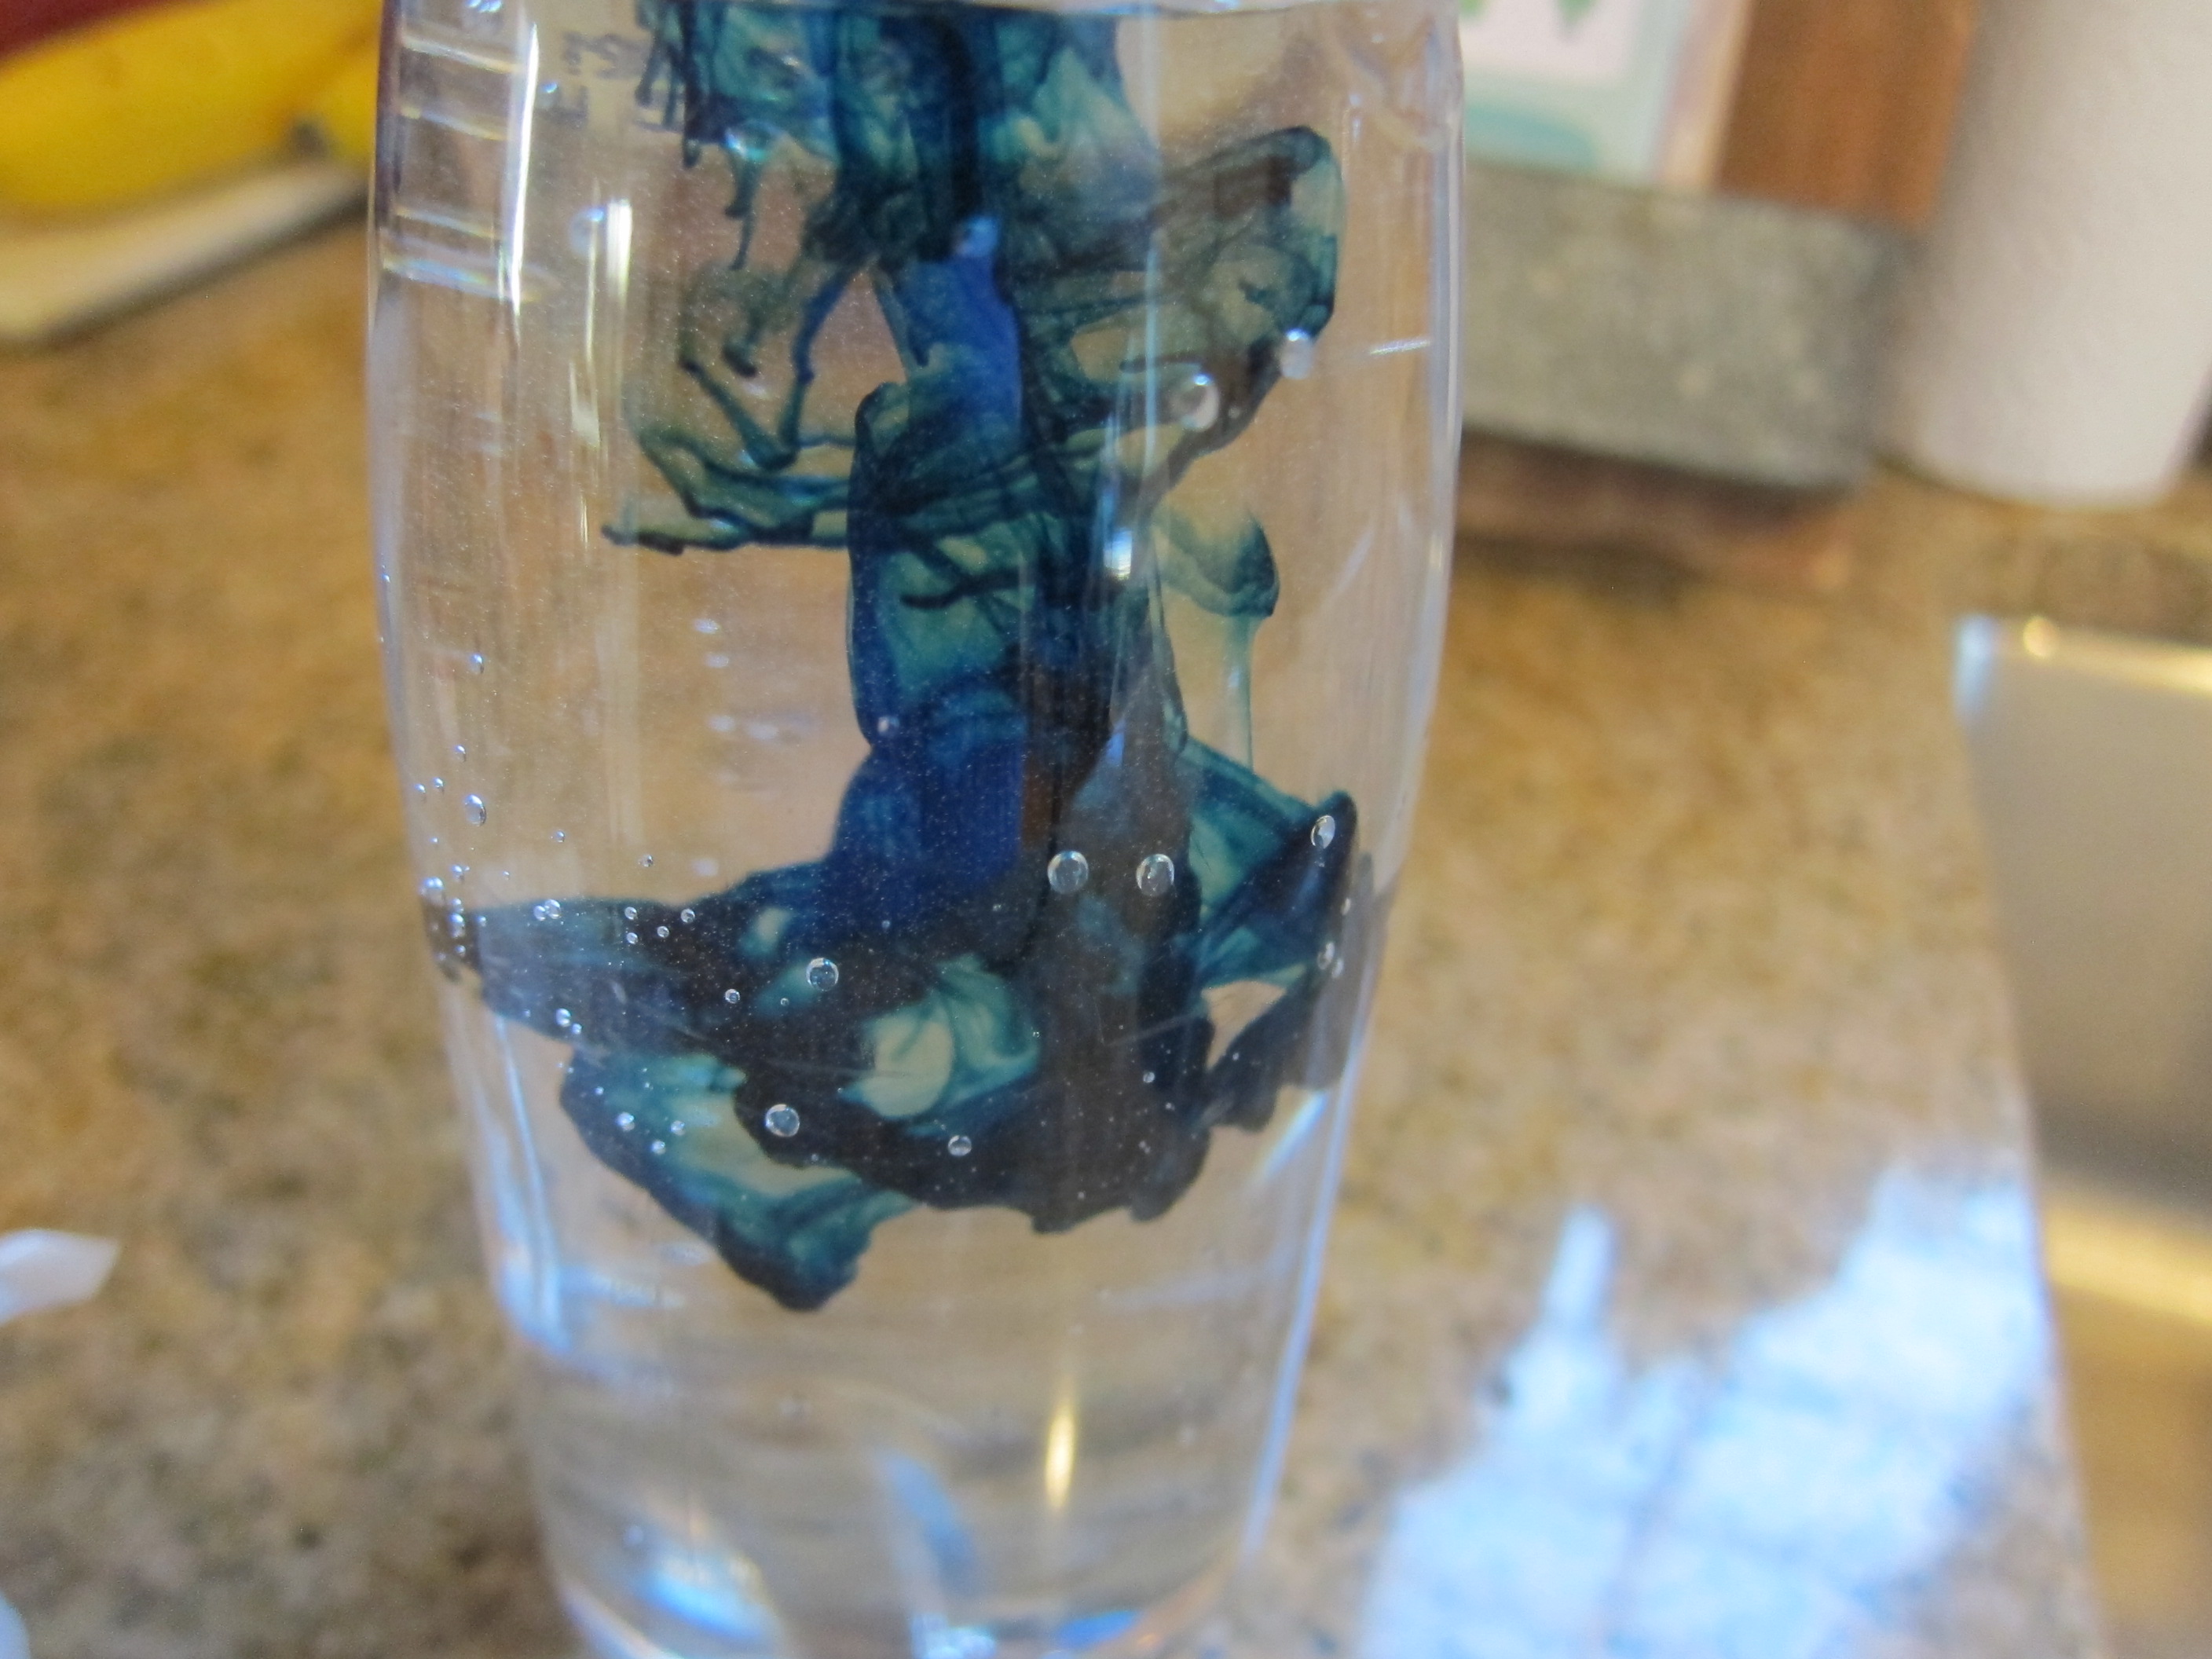
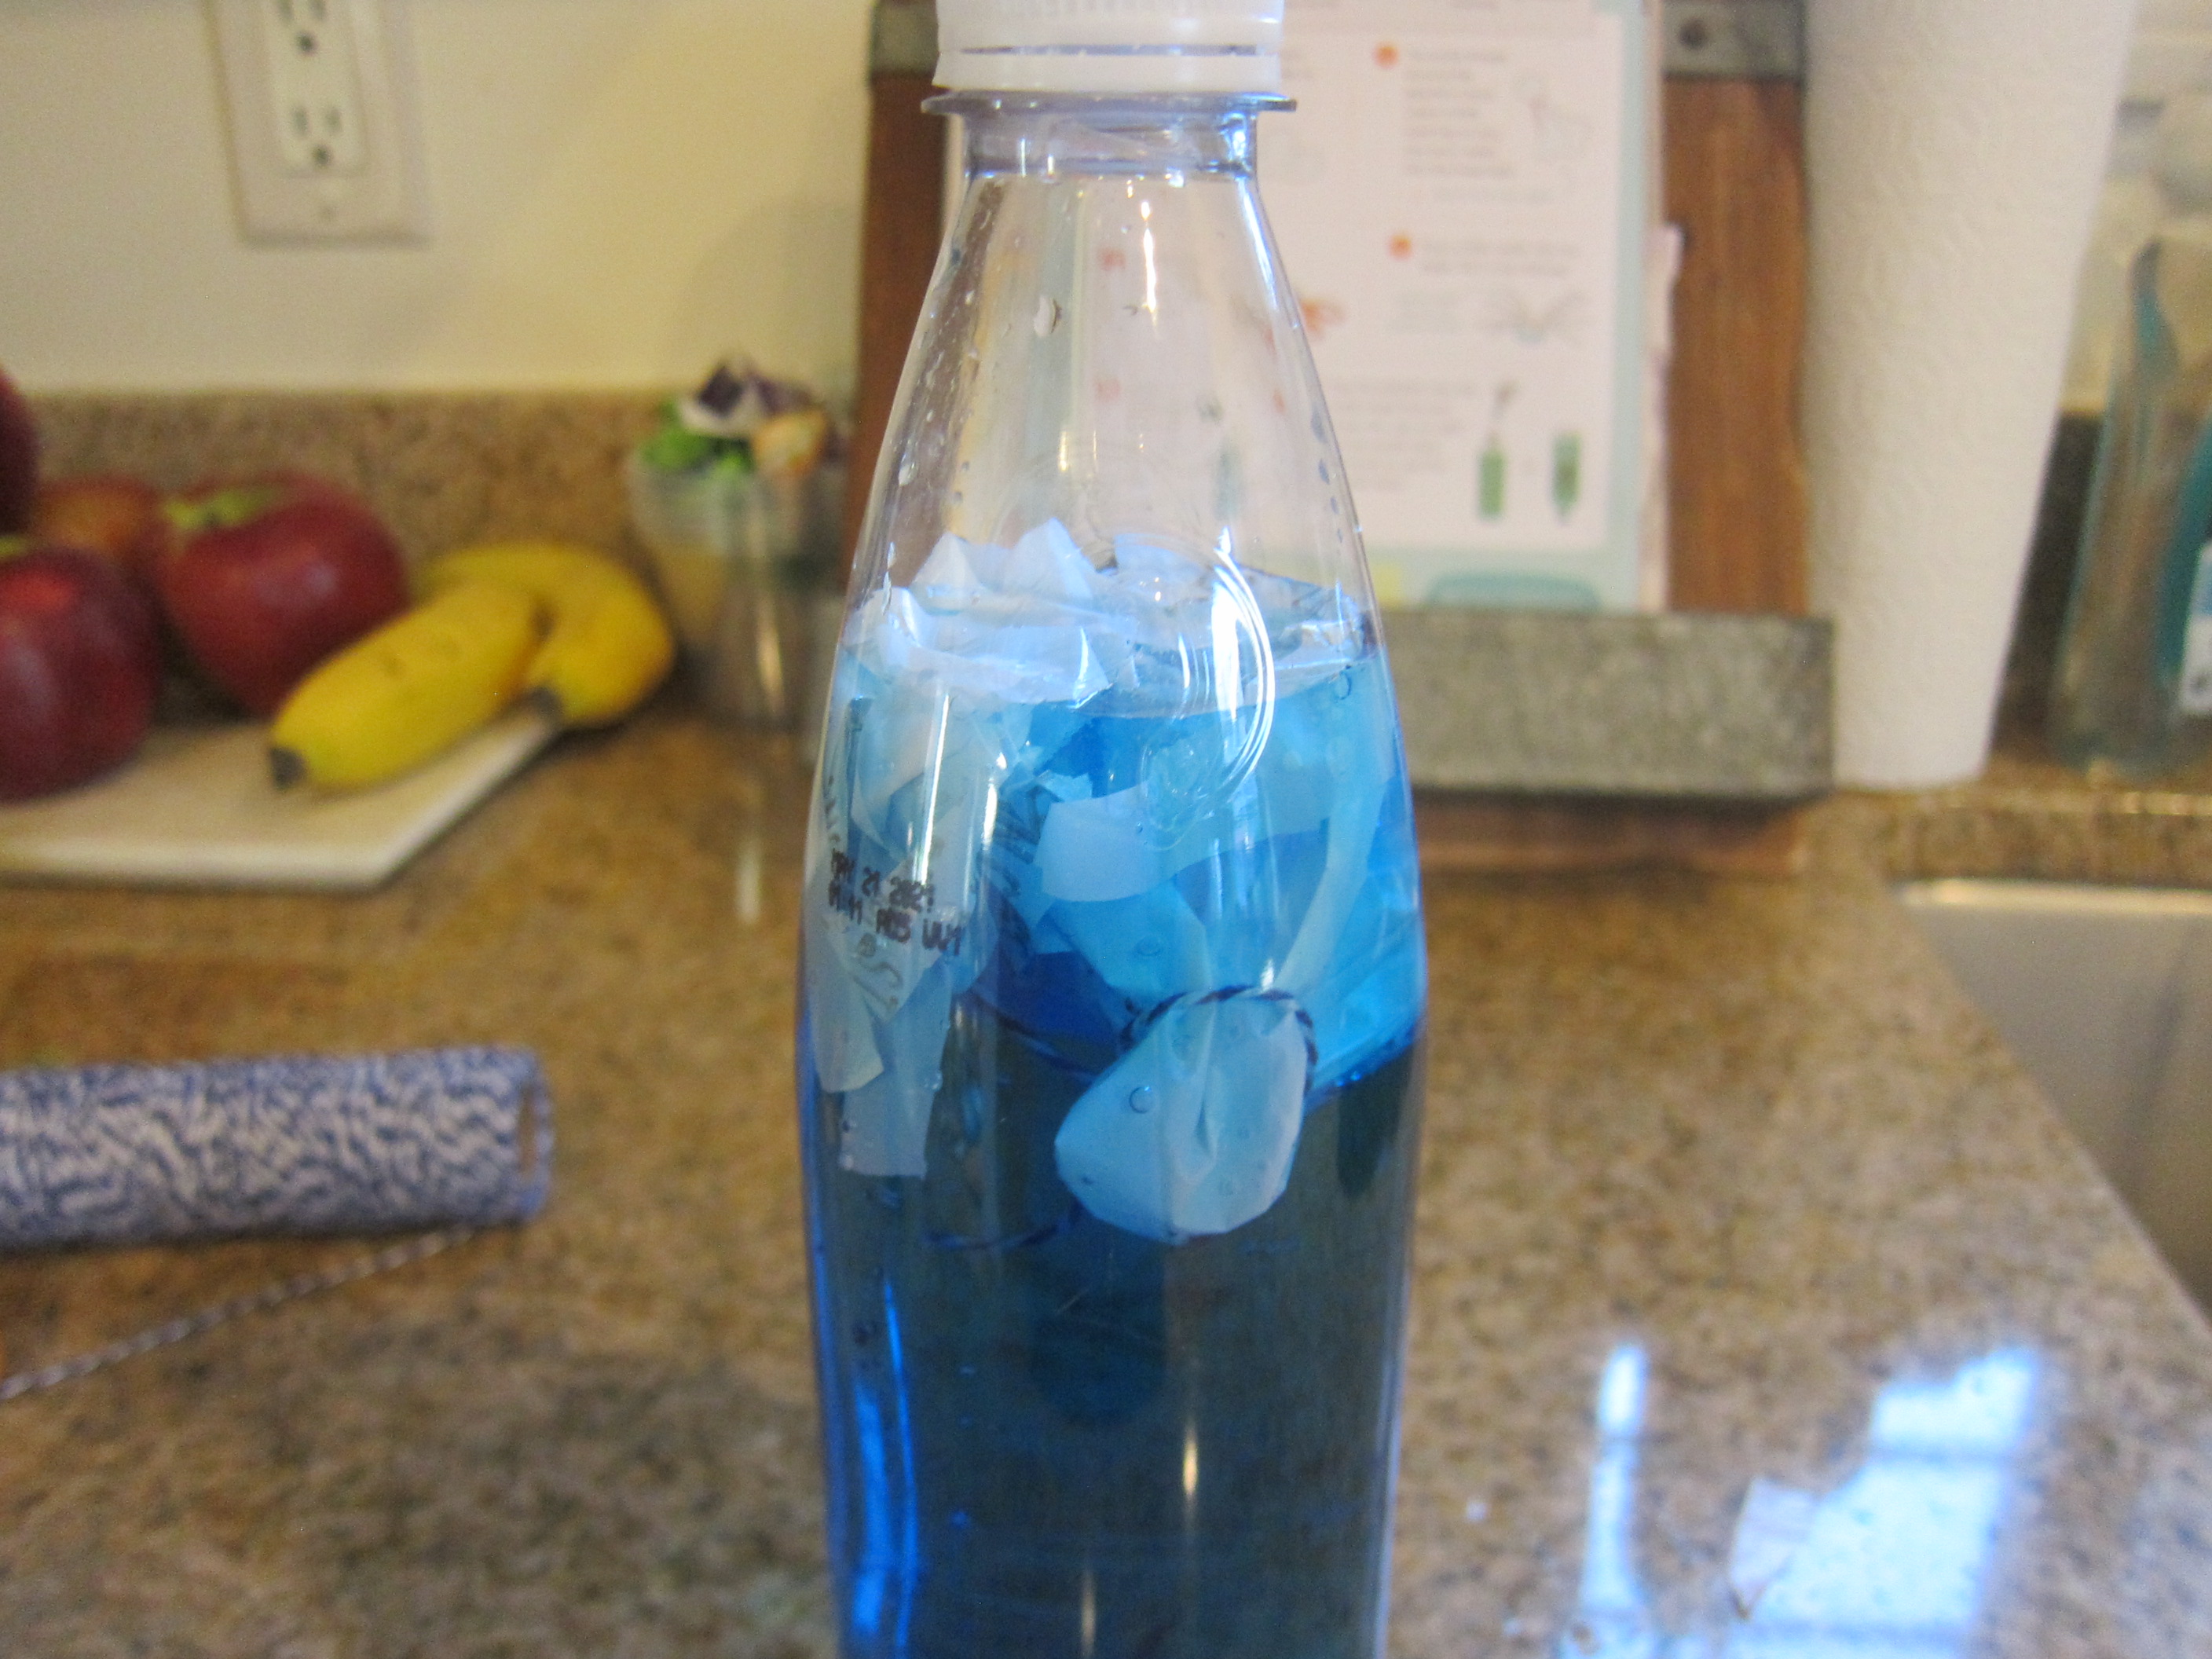
Time to move on to a second way to “paint” with bright, bold colors! I filled recycled baby food jars with a little dish soap and a few drops of food coloring, choosing blue and red, and we headed upstairs to the shower.

Kool Aid Paint with Clean Up (12)

At first she was just delighted to be sitting in mommy’s shower. Then she saw the little paint pots. We still had the two plastic spoons, and she liked dipping in the spoons and dribbling out some of the color.

Kool Aid Paint with Clean Up (13)

Then she wanted to dump the whole jar!

Kool Aid Paint with Clean Up (15)

It was a second chance for color mixing; now our blue and red made purple.

Kool Aid Paint with Clean Up (16)

She as hesitant at first, but soon was mushing her hands right in the dish soap mixture.

Kool Aid Paint with Clean Up (17)

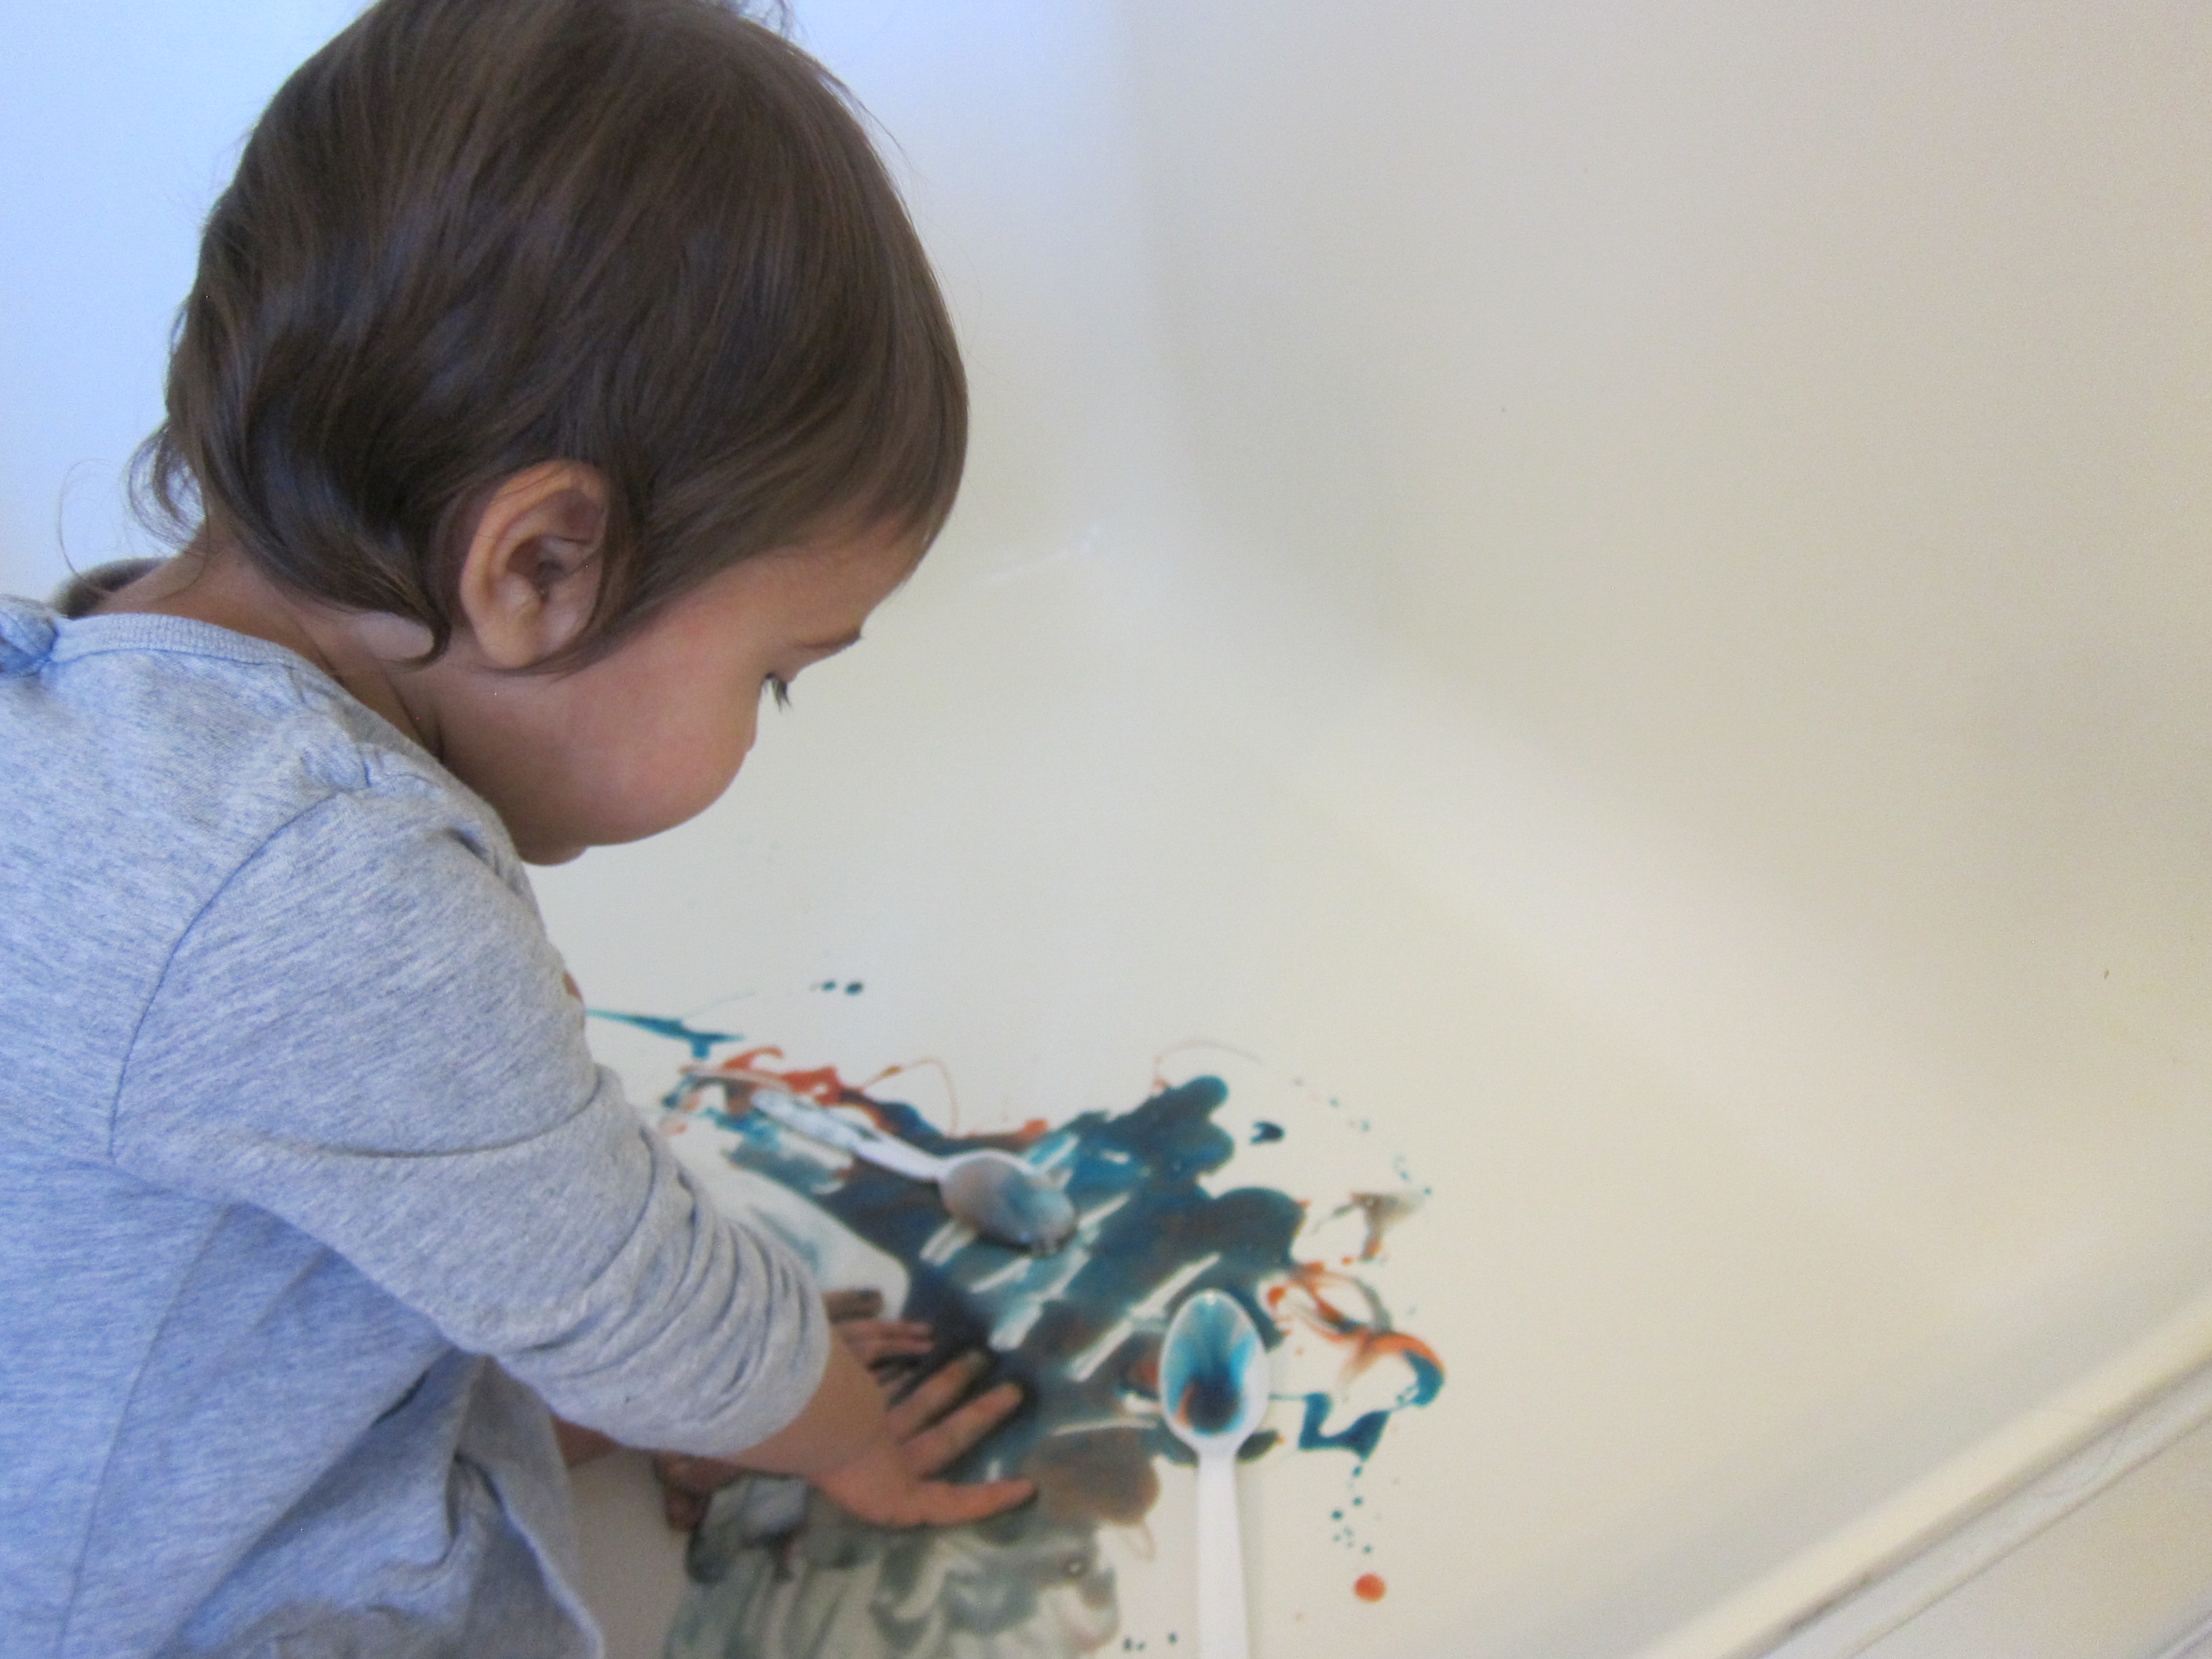
Her fingers made the most delightful squishy noise when she clasped her hands together. She loved running her fingers through the mess all over the shower floor.

Kool Aid Paint with Clean Up (18)

And now here’s the bonus to this activity: You might think the dark food coloring will stain, but because it was mixed with dish soap, it washes off like a dream… From kids’ hands and shower floors equally!

You might even have a cleaner shower as a result. Not to mention a very happy kid.

Kool Aid Paint with Clean Up (9)

Chase the Rainbow

Chase the Rainbow (7)

Here’s a great activity whether your goal is to encourage siblings to work together, or whether you just need to occupy your child the next time you hear: “I’m bored.” Task them with making a rainbow!

I laid out a few blocks to set the kids on the right track, arranging a few of each color in a circle, and then they were off and hunting for other items around the room that fit our rainbow.

Chase the Rainbow (2)

Veronika was so proud when she could add an item to the right color segment of our circle.

Chase the Rainbow (5)

There’s the green pile!

Chase the Rainbow (6)

Big brother Travis was very proud every time he could fill in where we needed a color the most, like a purple cape from the dress-up bin to beef up the purple pile.

Chase the Rainbow (3)

Soon we had a varied group of blocks, cars, animals, dollhouse furniture, and more.

Chase the Rainbow (4)

This was a great way for a toddler to see the various shades of a color, too, as opposed to standard bold primary colors. So go ahead and tell your kids to chase after the rainbow!

Brown Sugar Sand Castles

Brown Sugar Sand Castles (4)

If you’re missing the beach a few months out from summer, bring the beach to you with a material that molds almost as well as real sand… Brown sugar!

This game was part summer nostalgia, part sensory bin. I set out a big bowl of brown sugar, along with a tray to hold our “beach” and a few craft sticks to use as tools.

Brown Sugar Sand Castles (1)

I then gave Veronika a variety of paper cups that we could use like sand buckets and showed her how to pack the brown sugar in firmly. Upend the cups and you’ll have tiny sand castles!

Brown Sugar Sand Castles (2)

Of course it was equally fun to break apart the towers with the craft sticks.

Brown Sugar Sand Castles (5)

If your children have the patience, they can build up layer upon layer for an intricate sand castle. Around here, it was the breaking apart that won the day.

Brown Sugar Sand Castles (3)

Veronika loved that she could scoop up brown sugar on the edge of a craft stick and fill her little cups.

Brown Sugar Sand Castles (6)

She also loved pouring brown sugar from one cup to the other. And the best part about this “sand” is that it’s 100% edible and sweet. That means no tears if some ends up in your toddler’s mouth. And that sure beats summer sand!

Brown Sugar Sand Castles (7)

Butterfly Migration Map

Butterfly Migration (1)

As a final component of Travis’s Raddish Kids about the Day of the Dead in Mexico, he learned about the connection between the festival and the annual arrival of monarch butterflies. This made for a neat lesson on a day off from school.

We started with a read-aloud of Uncle Monarch and the Day of the Dead, helping Travis understand how the festival and butterflies were linked.

Butterfly Migration (2)

We then printed a map of the migration paths and Travis drew red arrows for the different flight routes. Older children can draw their own map showing the United States and Mexico, rather than simply coloring a template from online. You might also consider watching a nature show or Wild Kratt’s episode on the monarch migration to help kids appreciate the dangers undertaken on the journey!

Butterfly Migration (5)

Of course there was no better way to explain the migration than to make it hands-on. We’re lucky enough to live not far from a butterfly garden, so we took a special trip!

butterflies (2)

The kids marveled as they watched the delicate wings of the butterflies, or paused to see them sip nectar from flowers and soft fruit.

butterflies (8)

Travis’s favorite was whenever a butterfly landed on him!

butterflies (9)

He even brought wings home from the gift shop for further exploration  under the magnifying glass!

Butterfly Migration (3)

Now he could really appreciate what it meant for this delicate wings to fly 3,000 miles.

Little Passports: Argentina

LP Argentina alt

Travis quite enjoyed his Argentina package from Little Passports, particular how hands-on this particular country’s activities were.

LP Argentina (1)

He dove right into the usual fare (a passport stamp, a sticker for his suitcase). The booklet had a few activities that were right at his grade level (learning colors in Spanish, a dot-to-dot) and some that were tricky to grasp as a first grader (adding team scores for Argentina’s national game of Pato).

LP Argentina (9)

Souvenir:

Travis always wants to know what “Sam and Sofia” have sent right away, and this one did not disappoint. After learning that some of the world’s largest dinosaurs have been found in Argentina, kids will have a little fossil kit to dig up their own Gigantosaurus.

LP Argentina (4)

Travis loved alternating between the pick and the brush until he had carefully unearthed the skeleton.

LP Argentina (3)

Further Activities:

The optional add-on for Argentina was a Weather Lab kit, based on Argentina’s active Andean volcanoes and snowfall in Patagonia. We’re so glad we opted for it! First we made instant snow, which little sister Veronika loved playing with even more than Travis.

LP Argentina (6)

I read them facts about how ice crystals form as the kids played with the neat mixture. Next was a tornado jar which Travis could spin to watch a funnel cloud form.

LP Argentina (11)

But best of all were the provided materials to make a volcano. We mixed warm water into powdered clay (I was proud of Travis getting his hands in there!) and then shaped a little volcano around the provided plastic cups.

LP Argentina (7)

To be honest, this clay was hard to work with, but we got something vaguely resembling a volcano. Once it dried (which may take a few days), Travis painted it with the provided watercolors.

LP Argentina (12)

Time for an explosion! Fill that central plastic cup with 1 tablespoon baking soda. Add a few drops of red food coloring and liquid dish soap, then pour in 1/4 cup vinegar.

LP Argentina (15)

Whoa!

LP Argentina (17)

Online, the fun continued with an Argentine flag to color and a picture-search based on the prehistoric paintings in Cueva de las Manos. The latter was definitely aimed at older subscribers, requiring multiplication, but Travis still a learned a little something.

The final website activity was a bonus recipe for empanadas, yum!

LP Argentina (21)

Recipe:

At last it was time for dessert. The dulce de leche-filled cookies called alfajores were tough to make vegan, but we did our best.

Alfajores (2)

Ingredients:

  • 1 and 1/2 cups flour
  • 1/2 teaspoon baking soda
  • 2 teaspoons baking powder
  • 2 and 1/2 cups cornstarch
  • 1 and 1/2 cups Earth Balance butter, softened
  • 1 cup sugar
  • 3 tablespoon ground flaxseed
  • 8 tablespoons warm water
  • 1/2 teaspoon vanilla extract
  • 1 (14-ounce) can sweetened condensed coconut milk
  • Shredded coconut
  1. To prepare the dough, combine the flour, baking soda, baking powder, and cornstarch in a bowl ;set aside.
  2. In the bowl of a stand mixer, beat the butter and sugar until combined. Whisk the flaxseed into the warm water to make vegan egg yolks. Add to the butter mixture, along with the vanilla and beat until combined.
  3. Stir  the dry ingredients into the wet ingredients to form a soft dough. Wrap the dough in plastic wrap and refrigerate for 30 minutes.
  4. Roll the dough to about 1/4-inch thick and use a 2-inch round cookie cutter to make circles. Bake at 350 degrees F for 10 minutes; transfer to a wire rack to cool.
  5. Once cool, spread half of the cookies with a little of the sweetened coconut milk and top with the remaining cookies. Roll the edges in shredded coconut before serving.

Alfajores (5)

Empanadas

LP Argentina (23)

Frozen pie crust means these empanadas are easy enough for even a busy night!

LP Argentina (20)

Ingredients:

  • 2 tablespoons olive oil
  • 1 (12-ounce) package meatless crumbles
  • 1 chopped onion
  • 1 chopped red bell pepper
  • 3 minced garlic cloves
  • 1/2 teaspoon oregano
  • 1 teaspoon cumin
  • 1 teaspoon paprika
  • 1 teaspoon chili powder
  • 1 cup vegetable broth
  • 1 tablespoon brown sugar
  • 1/4 cup raisins
  • 2 (9-inch) prepared vegan pie crusts (Such as Wholly Wholesome)
  1. To prepare the filling, heat the olive oil in a large skillet over medium-high heat. Add the meatless crumbles and cook for 6 minutes.
  2. Add the onion, bell pepper, and garlic to the pan; continue to cook for about 5 minutes, until the onion is soft.
  3. Add the oregano, cumin, paprika, and chili powder; cook for 1 minute, then stir in the broth and brown sugar. Continue to cook for about 5 minutes, or until the liquid is nearly all evaporated.
  4. Stir in the raisins and remove from heat.
  5. Meanwhile, use a 4-inch round cookie cutter to cut circles from the pie dough. (Note: you’ll need to gather and re-roll your scraps several times).
  6. Spoon a heaping tablespoon filling into the center of each circle. Fold the dough over the filling and crimp the edges with a fork to seal.
  7. Transfer to a baking sheet and repeat with the remaining dough and filling. Bake at 375 degrees F for 20 minutes.

LP Argentina (22)