Crumple Crazy

Crumple Crazy (4)

Glue + crinkly tissue paper? This art project is a toddler’s dream come true!

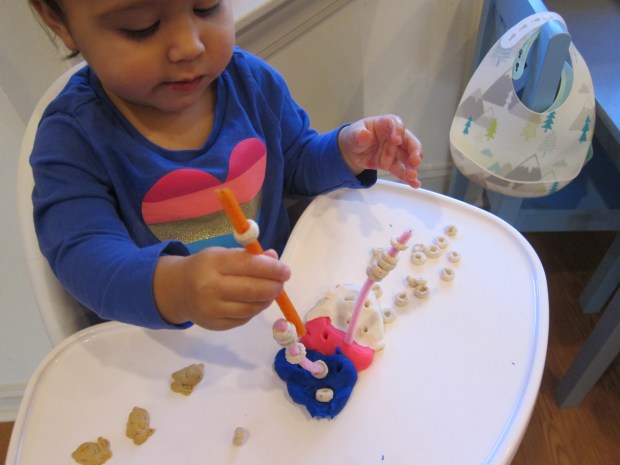
To make a glue solution that isn’t quite so sticky, I first mixed a little white glue with a splash of water in each compartment of a paint tray. This turned into a nice solution that was just sticky enough, but wouldn’t immediately do damage if Veronika got it on her hands or face.

Crumple Crazy (1)

She was wild about dipping a paint brush into it! I showed her how to smear the gluey mixture over cardboard. (Note: Use any piece of cardboard from packaging for this project, or an old cereal box, or even sturdy construction paper).

Crumple Crazy (3)

Next, I tore off pieces of white tissue paper and showed her how to crumple them into little pieces. These could stick perfectly onto her gluey cardboard. Could we hide all the glue?

Crumple Crazy (5)

It turns out that she loved lifting off the crumpled pieces, pulling them off the sticky surface and then putting them right back on again. Or tossing them to the floor!

Crumple Crazy (6)

Once there had been enough sticky glue play, the fun continued with extra tissue paper on the ground. Shake the pieces overhead, or crumple them close to the ear and talk about the sound it makes.

Crumple Crazy (7)

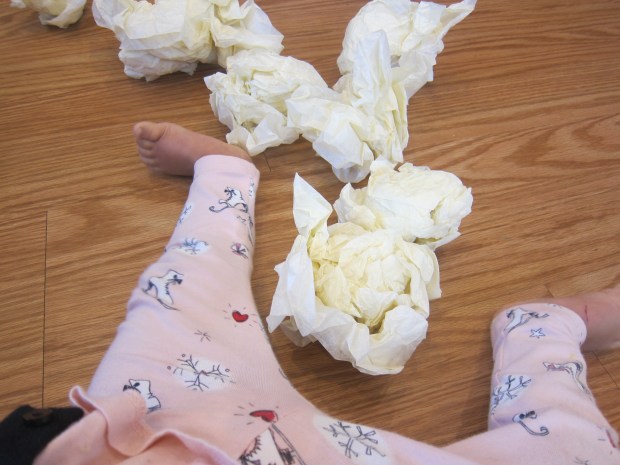
I thought for sure she would want to tear the tissue paper up, but that didn’t interest her. Instead, we crumpled them into tight balls that were great for tossing… and kicking!

Crumple Crazy (8)

How will your toddler play with tissue paper? Please share in the comments!

Tea Party Dough

Tea Party Dough (6)

Veronika adores her two dollies these days (or as she happily says, “Baby!”). So I thought today I’d set up a tea party for her and the dolls. This super-sugary dough can really be eaten, adding a new dimension to the pretend party!

To prepare the dough, stir together 1 cup almond butter (or peanut butter), 1 cup corn syrup, 1 and 1/2 cups powdered sugar, and 1 and 1/2 cups powdered milk. For a vegan alternative to the milk, I used a bag of vanilla protein powder I had on hand, which worked perfectly as a substitute. The dough comes together great, neither sticky nor gooey!

Tea Party Dough (!)

I set out tea cups and plates and made sure to serve everyone.

Tea Party Dough (3)

Veronika immediately leaped into the pretend play, helping to feed the dollies.

Tea Party Dough (2)

She was quite pleased when she realized the dough tasted delicious.

Tea Party Dough (4)

Candles were a wonderful addition to our play. I showed her how she could put them in the dough. It was far more fun to pull them out, of course.

Tea Party Dough (8)

And she tried to feed the candles to the dollies as little treats!

Tea Party Dough (7)

We also used cookie cutters, pressing fun shapes into the dough.

Tea Party Dough (5)

In sum, I love that she’s now at an age where sensory play and imaginative play are starting to intersect.

Bucket of Balls

Bucket of Balls (6)

While big brother and I were playing math games with balls, I tailored some ball play to Veronika. The set-up? Just grab a bucket and fill it with a variety of balls; that’s it!

From there, I had no agenda for her (like past games that worked on gross motor skills or vocab) but was interested instead to see what she would be inspired to do with this simple set-up.

Bucket of Balls (1)

First she dug through, pulling out the balls in turn. Then it was so much fun to upend the bucket and watch the balls go rolling.

Bucket of Balls (2)

I helped her scamper after the balls so we could add them back in one at a time with a “plink”!

Bucket of Balls (4)

Of course the bucket itself was a toy, too.

Bucket of Balls (3)

As she played, I did chime in with a few words about the texture of each ball. Some were squishy, some were hard, and there was lots of color variation to discuss, too.

The bumpy one on her belly was the most fun of all!

Bucket of Balls (5)

Mark and Erase Pictures

Mark and Erase (5)

Veronika loves to color now, especially whenever she sees her older brother doing coloring book pages. As a result, we’re quickly running out of white printer paper, as I give her sheet after sheet to scribble on. Here’s a great way to let your toddler draw over and over, without the waste!

I drew shapes and easy lines to follow on a few sheets of white paper, then slipped them into plastic lamination pouches.

Mark and Erase (2)

Veronika immediately began using markers on the plastic pouches. It fascinated her that there were already colors and shapes there to see, as she scribbled busily over them.

Mark and Erase (4)

I demonstrated how she could follow along over my easy shapes, either with the same color or a different one. Obviously she’s way too young for this kind of pen control, but you can introduce the concept now, and then it becomes a game that will grow with your child.

Mark and Erase (3)

When the pages were filled with her scribbles, I simple wiped clean with a damp paper towel. Now the fun could begin all over again, no wasted paper! I’m definitely going to bring along a couple sheets like this the next time we’re in a restaurant, too.

Mark and Erase (6)

DIY Lift the Flap Book

DIY Lift Flap (7)

If your toddler is at all like Veronika, then a) any lift-the-flap books you have in the house are dearly loved and b) the flaps have all been torn apart! Here’s a simple hack to make your own lift the flap book. All you need are post-its and board books.

Any kind of “First Words” book works particularly well for this game since there are lots of individual pictures to cover up. Technically, though, you could play it with any book on your child’s shelf!

DIY Lift Flap (1)

For variety, I left some of the post-it notes as full squares, and cut others into smaller squares or rectangles.

DIY Lift Flap (2)

Now simply let your child turn the pages (working those fine motor skills) and talk about the pictures he or she discovers as each post-it is ripped off (working those language skills)!

DIY Lift Flap (9)

A note of caution: You might want to avoid books that make noises. Veronika was so sidetracked by a cat meowing that she lost interest in the flaps for a while!

DIY Lift Flap (5)

But once she discovered the post-it notes could be pulled off, they were a hit.

DIY Lift Flap (3)

Plus she figured out they could double as “stickers“.

DIY Lift Flap (8)

This was a simple and novel way to engage a reluctant reader at storytime, and I highly recommend it.

DIY Lift Flap (6)

Seashell Sensory Bag

Seashell Sensory (4)

Veronika has never been to a tropical island, but chances are she’d be longing for a trip to one right now if she knew what she was missing! In a day that dipped down to 0 degrees, I brought some tropical warmth to her sensory play.

For this fun variation on a squishy bag, fill a gallon-sized zip-top bag with any blue goo from the drug store (blue hair gel, blue aloe vera, whatever you can find that has a nice aqua tint to it).

Seashell Sensory (1)

I added a handful of seashells from the craft store, sealed the bag, and simply mushed everything together.

Seashell Sensory (3)

The contrast of the hard seashells versus the gooey gel will fascinate your toddler, and the shells will mush around nicely in the goo if you don’t overfill the bag.

Seashell Sensory (5)

Those seashells might make you feel like you’re briefly on vacation, too!

Seashell Sensory (2)

Toys in Tin Foil

Toys in Tin Foil (2)

Similar to a recent game where I wrapped up old toys for Veronika, today I delighted her with little treasures she could unwrap from tin foil.

The exciting element here of course is the shiny foil, which might just fascinate your toddler more than the toys inside!

Toys in Tin Foil (3)

Then I showed her a sneak peak of what was inside.

Toys in Tin Foil (4)

She needed a little help with the unwrapping, but looked so proud when she reached the treasures (er, old toys).

Toys in Tin Foil (5)

Of course then she was busy with the toys; what’s old is new again when presented in this different context!

Toys in Tin Foil (8)

You can extend the fun by crumpling up the discarded foil into tight balls, which then become balls to shoot into a basket.

Toys in Tin Foil (6)

Unfortunately the game was short-lived thereafter because Veronika thought it was very funny to put the foil in her mouth, especially once she realized this earned a firm “no.” Hopefully you and your toddler can play a bit longer!

Toys in Tin Foil (7)

Threading Cereal on Pipe Cleaners

Cheerio Pipecleaner (2)

Veronika and I have been working our way through classic toddler activities lately; she’s at that tricky age between having developed the gross motor skills of a one-year-old, but not yet ready for the understanding or fine motor skills of an 18 month old. I remember this period feeling particularly tricky to fill with my older son, but this time around I’m prepared!

Hence, the emphasis on classic games lately. Today, I sat her down with a big blob of play doh on her highchair tray, but the play doh was only an anchor, not the point of the game.

Cheerio Pipecleaner (1)

Insert pipe cleaner pieces into the play doh base. Now show your little one how to thread o cereal onto them (we like the Morning O’s from Whole Foods 365).

Cheerio Pipecleaner (3)

Veronika quickly got the idea, although she loved lifting the cereal off to eat it more than she focused on threading it on.

Cheerio Pipecleaner (4)

That, of course, turns this activity into snack time, too, and there’s nothing wrong with that!

Cheerio Pipecleaner (5)

The pipe cleaners are also fun to lift in and out of the sticky play doh base.

Cheerio Pipecleaner (7)

Needless to say, it’s a great way to keep a toddler busy during meal prep.

Cheerio Pipecleaner (8)

The Scribble

The Scribble (2)

It was bound to happen: Veronika discovered that she can color on the walls (luckily with washable crayons!). So here’s an ingenious hack to foster your toddler’s artistic impulses with a safer way to color.

I used magnets to hang a large sheet of craft paper on the fridge and sat Veronika down in front of it with a few markers. She didn’t need me to tell her to start coloring; she immediately launched into the art of the scribble.

The Scribble (1)

Aside from one mommy stick figure, this drawing was 100% Veronika’s. She loved switching up the colors.

The Scribble (3)

She also was very focused on putting cap to marker in between colors, a great chance to work those fine motor skills!

The Scribble (5)

As she drew, I talked about how the color on the paper was a “yes” (use sign language here to reinforce the idea!), but that other places were a “no”, like the floor or her hands.

The Scribble (4)

This will help a toddler start to learn that art belongs on paper, for now at least!

As for those crayon marks on the wall, here’s an ingenious trick: Heat the area with a hair dryer for about 30 seconds to melt the wax. Then scrub off the remaining streaks with soap and water. Ingenious!

The Scribble (6)

Follow Me

Follow Me (1)

Today I focused on gross motor skills during Veronika’s play. The title of this post refers both to literally having your little one follow you (up, down, and all around an obstacle course), as well as the idea of following directions. Both are great skills for your little toddler!

I set up a few couch cushions for a standard obstacle course, but added a few new twists today, namely a laundry basket and balls. She trotted over immediately to see what was up!

First, I showed her how to roll balls down one of the cushions. She loved doing so, with a big push.

Follow Me (2)

Next it was time to follow me, modeling how to crawl down the ramp. Crawling down can be tricky for little ones, so supervise closely.

Follow Me (3)

We headed back in the other direction where she followed my lead to toss balls into the basket.

Follow Me (5)

Next we upended the basket and I turned it into a choo-choo train. I went first (“Follow me!”) but soon she was the thrilled conductor.

Follow Me (6)

She played games with the balls on the cushions even after I stopped being the leader.

Follow Me (7)

You can add so many more elements to an obstacle course like this, whether a jump rope (to walk a straight line), a box (to scoot around the room), or just about anything else that can work your toddler’s gross motor skills.

Follow Me (4)