Rainbow in a Bag

Rainbow in a Bag (5)

This is a neat, no-mess way for toddlers to paint a full rainbow!

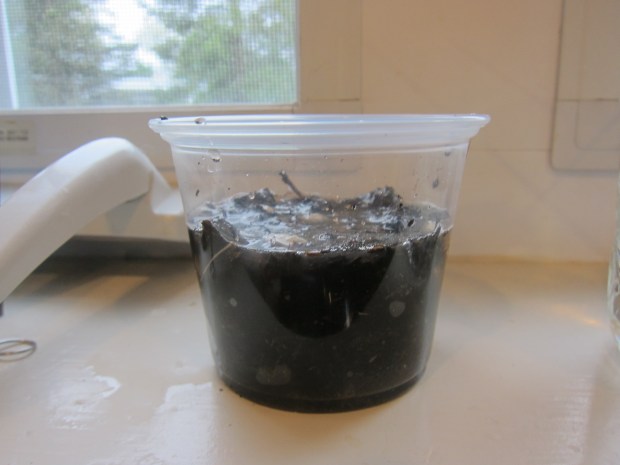
To start, I needed to make a thick goopy paint. Based on a recipe I found online, I combined 1 cup flour, 2 cups water, and 1 tablespoon salt in a saucepan, then cooked over medium-low heat, stirring with a whisk. It didn’t get as thick as I hoped, but stirring in 1 tablespoon cornstarch did the trick.

Rainbow in a Bag (1)

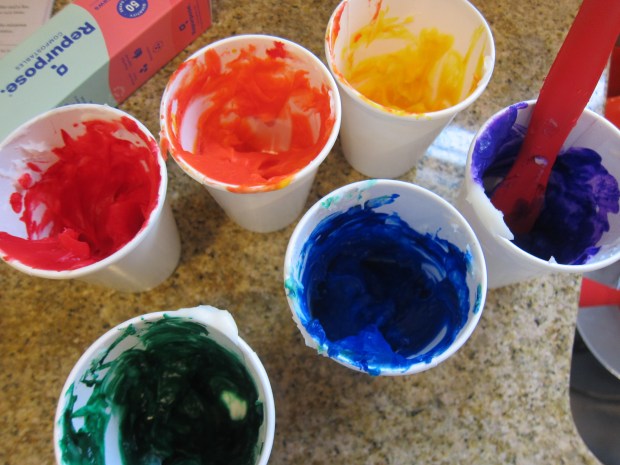
Once thick, I divided the mixture among 6 paper cups and added about 20 drops of liquid watercolor to each, one for each color of the rainbow. Note: If you are worried about staining, use food coloring instead of the watercolor. However, because I knew this project would be sealed in a bag, there would be no chance for Veronika to smear it on her clothes… Or taste it!

Rainbow in a Bag (2)

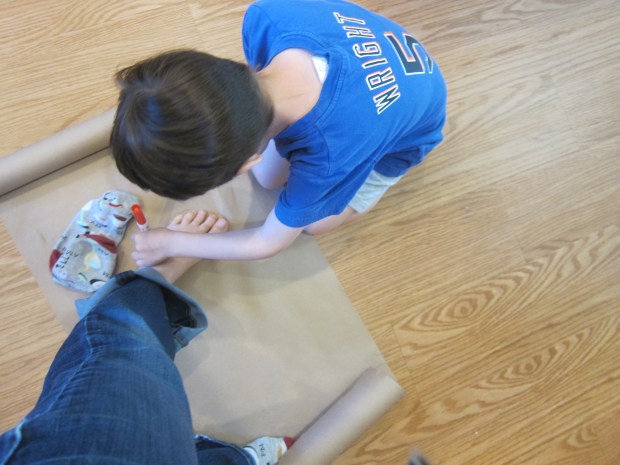
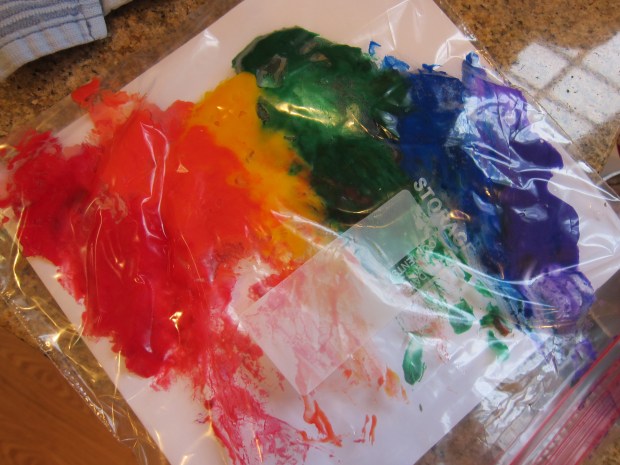
I placed a piece of thick white paper in a gallon-sized zip-top bag, then arranged the colors in rainbow order across the paper. Because the paint was so sticky, it grew harder to work as I went, so the colors sort of ended up at a diagonal! But this still worked fine; I sealed the bag and handed to Veronika.

Rainbow in a Bag (3)

At first she was frustrated she couldn’t touch the paint, looking at me with disappointment. Oh that toddler glare!

Rainbow in a Bag (7)

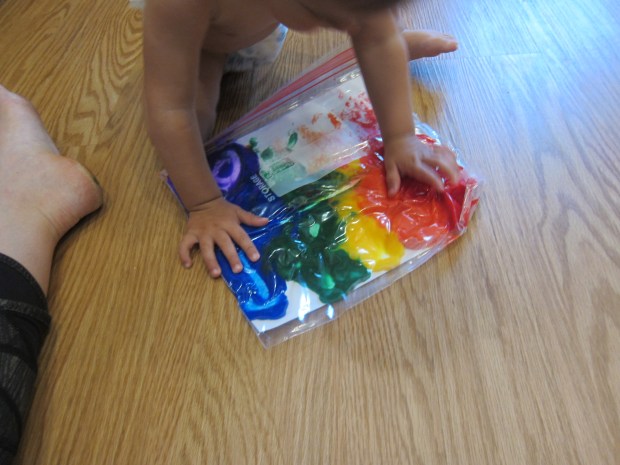
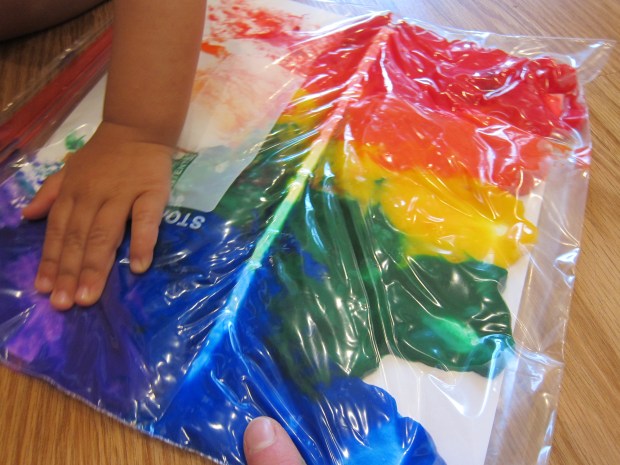
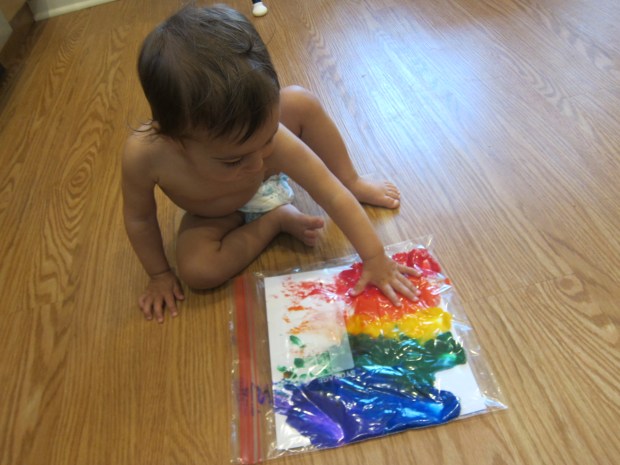
But then she realized the paint blobs felt mushy and squishy beneath her hands, and she loved poking around at them.

Rainbow in a Bag (4)

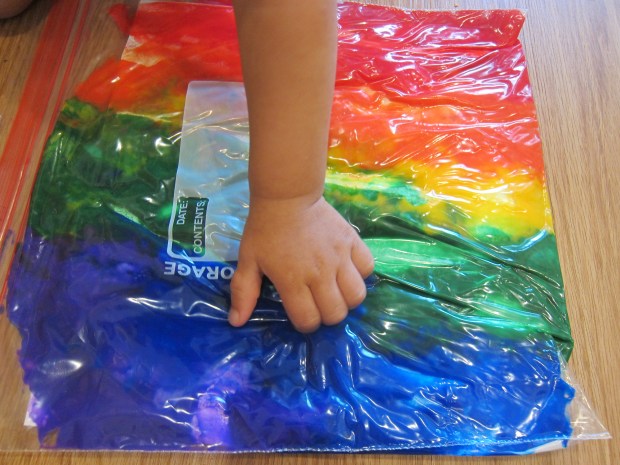
By the end she had smeared the paints in such a way that we had a full rainbow of stripes across the bag.

Rainbow in a Bag (8)It’s actually too bad that the paint was so goopy, or I would have pulled the white paper out to dry and hang on the fridge. Next time!

Ooey Gooey Noodle Worms

Ooey Gooey Noodle Worms (3)

I love activities that introduce new textures to a toddler, even if they might seem a little gross to us grown-ups. Veronika has no qualms about getting her hands dirty, so on today’s menu was mud worms!

I cooked up a batch of linguine for the “worms”, and then placed them on a shallow tray that we could take out to the patio. Now we just needed to bury them in “dirt” a.k.a. chocolate pudding.

Ooey Gooey Noodle Worms (9)

She gleefully began scooping through, using both fingers and a sand shovel

Ooey Gooey Noodle Worms (2)

In retrospect, I would have used a lot more pudding and a lot fewer “worms”, as this wasn’t really hunting or digging. We just had lots of worms crawling all over the tray! But of course the pretend play was a bit advanced for her anyway, and she loved scooping.

Ooey Gooey Noodle Worms (1)

We got our fingers in the mixture together and used words like “slimy” and “goopy” as we played.

Ooey Gooey Noodle Worms (4)

When the noodles landed on the patio, they did sort of look like little worms after a rainstorm.

Ooey Gooey Noodle Worms (5)

Then Veronika decided it was even more fun to scoop them up from the tray and toss them on top of other items on the patio.

Ooey Gooey Noodle Worms (7)

Admittedly that made clean-up a little tougher, but she was having so much fun I didn’t stop her! All in all this was good gooey fun.

Ooey Gooey Noodle Worms (8)

Safari Binoculars

Safari Binoculars (4)

Here’s a classic craft that I knew Veronika would love because it involves one of her current favorite things: stickers!

To assemble your toddler’s very own binoculars, start with two empty toilet paper tubes. I had bug and fish stickers, both perfect themes for this project, and she loved placing stickers all over.

Safari Binoculars (2)

I find it helpful to peel up the edges of stickers slightly at this age, so she can then pull them the rest of the way off the sticker sheets without frustration.

Safari Binoculars (5)

Resist the urge to correct your toddler’s sticker placement; it was just fine if a few overlapped, or if she clustered them in one spot!

Safari Binoculars (3)

I glued the tubes together (or you can use tape if you don’t have time to wait for the glue to dry), then punched a hole near the top of each tube on the outer edge. I threaded yarn through to make a loop so Veronika could wear them around her neck.

Safari Binoculars (6)

Now it was time to head out into the wilderness! Off she goes for her first safari.

Safari Binoculars (8)

Honestly she was probably more into them as an accessory than a viewfinder, but they were particularly neat for watching bugs up close.

Safari Binoculars (11)

Older siblings may just clamor for a turn, too!

Safari Binoculars (9)

If you prefer to have your safaris indoors, consider using these on a stuffed animal hunt instead.

Sponge Printing

Sponge Printing (12)

I recently introduced Veronika to the idea of stamping, by making Duplo prints. Today, we made sponge prints instead!

This was a great activity for outside on the patio, since first we needed to get the sponges wet. I misted them with a spray bottle until saturated, then showed her how to chalk all over the surface of the sponge.

Sponge Printing (4)

Press down firmly on a piece of thick white paper and the mark of the sponge will be left behind. The sponges have a bubbled appearance, with more surface twists and turns than you might expect!

Sponge Printing (1)

Next I cut a few of our sponges into shapes like hearts and plus signs.

Sponge Printing (10)

She liked seeing the various shapes in our prints.

Sponge Printing (6)

Then we discovered that if we used the chalk on wet pavement and then dipped the sponge in the colored water, we ended up with a more saturated print.

Sponge Printing (8)

The wetter the sponge the better the print, so eventually we used a bucket of water to dip instead of the mister bottle.

Sponge Printing (9)

Of course then Veronika just loved dipping the sponges in the bucket and squeezing them out, and lost interest in stamping!

Sponge Printing (11)

But this just fine; it meant this craft was a great way to spend some time making art and simply playing outside.

Sponge Printing (13)

Drawing with Cars

Drawing with Cars (6)

Kids love to paint with cars, but this time there was a twist on the activity! As opposed to letting the tires make the art, Veronika’s cars had passengers along. Crayon passengers that is!

To set up, I taped a long piece of craft paper to the floor so we had a good long “road”.

Drawing with Cars (1)

Use masking tape to attach jumbo crayons to the side of toy cars. The bigger the car, the better this worked; the crayons were a little wobbly on some of Veronika’s smaller cars.

Drawing with Cars (2)

I mostly tried to tape crayons to the same color car, but we had a few mismatches, like our yellow car with a black crayon.

Drawing with Cars (7)

Now it was time for Veronika to drive! She took the cars for a few spins around the road, and the crayons left fun scribbles in their wake.

Drawing with Cars (3)

To be honest, she was soon more interested in the pieces of tape than the crayons! But this was still a cute art project while it lasted.

Drawing with Cars (4)

Foam Blocks in Water

Foam Blocks in Water (3)

Veronika has a versatile set of foam building blocks that we play with all the time, whether purely for building or more for learning. But never before have we put them in water!

As soon as I spotted this idea online, I realized what a no-brainer it was. Of course the foam floats! I filled a plastic storage bin with just enough water for the blocks to float and placed it on the floor over a towel to catch any splashing. (Note: You could just do this outside on a water table on a hot day!).

Foam Blocks in Water (2)

Veronika was thrilled to see something old look new and different. She began reaching in immediately, delighted both to fetch out the blocks (“Triangle!” she said) and to feel the splashy water all around them.

Foam Blocks in Water (5)

Mostly I just let her play, but we also sorted the blocks by color at one point.

Foam Blocks in Water (4)

There was lots of splashing and lots of excitement as the blocks floated around almost like little boats. The water also makes the blocks stick to each other, which makes it perfect for building up little towers and castles.

Foam Blocks in Water (8)

We definitely ended with water all over the floor, making this messy but worth it.

Foam Blocks in Water (9)

Row, Row, Row Your Boat

Row Your Boat (3)

Row Your Boat is currently one of Veronika’s favorite songs, and I’ve always been partial to it myself. Part nursery rhyme and part song, it extends itself easily to movement play and more.

To start, I simply sang the song. If you need a reminder, here are the simple lyrics:

Row, row, row your boat,

Gently down the stream.

Merrily merrily merrily merrily.

Life is but a dream.

After singing, we added actions!

Row Your Boat (4)

I sat so that Veronika and I were facing each other and took her hands. As we sang, first I pulled her forward, then I leaned toward her so she leaned back. It was magical to watch the siblings giggle and row together!

Row Your Boat (5)

To reinforce the concept of a “boat” (which is not something we see daily around here!) I pulled out a few floating toys. Veronika loved playing with them in a shallow basin.

Row Your Boat (1)

You can always check out animated versions of the song online, too. You’ll likely encounter silly verses. An elephant wearing jeans? A lion eating green beans? Then see if you can make up your own, which is guaranteed to make your toddler laugh!

Row Your Boat (2)

Sidewalk Chalk Mark Making

Sidewalk Chalk Marking (5)

While big brother was busy using chalk for a school assignment, Veronika made chalk marks of her own today! Originally, I thought it might just be fun for her to use chalk on a bench, as opposed to pavement, for the novelty of the drawing surface. But this also turned out to be the first time that she announced she had drawn a specific thing!

First, we simply started chalking side by side. I made a few recognizable objects for her like a star and heart, and pointed them out.

Sidewalk Chalk Marking (1)

Moments later, she told me this red mark was a bird! “Tweet tweet!” she said. “Red bird!”

Sidewalk Chalk Marking (4)

I knew she was being deliberate, because she picked up blue next and said, “Blue bird!” as she scribbled.

Sidewalk Chalk Marking (9)

From there she was off and running. She told me she was drawing Daniel Tiger, rainbows, and more.

Sidewalk Chalk Marking (8)

Of course none of her marks would be recognizable as such, but it was the intent that amazed me coming from an eighteen month old.

Sidewalk Chalk Marking (7)

She looked so proud of her work. We’ll have to chalk on non-traditional surfaces more often!

Sidewalk Chalk Marking (3)

Big or Little Sorting Game

Big vs Little Games (4)

This is one of those activities that you shouldn’t expect your toddler to get ” right” on the first try. Rather, it’s about introducing concepts. Today, I set out a variety of items that come in two sizes: big, and little! It was up to Veronika to determine which was which.

You can play with just about anything, and I included: big book and small book, big car and small car, big ball and small ball, big dinosaur and small dinosaur, big sock and small sock, and more!

Big v Little alt

“This is the big ball,” I told her, emphasizing the word big with my hands apart and using a big voice, too.

Big vs Little Games (1)

“This is the small ball,” I told her next, and used a tiny high voice and put my hands close together. Then I asked her, “Can you hand me the big ball?” or, “Which is the small ball?” Repeat with all of the sets!

Don’t worry if your toddler pauses to play along the way. Veronika wanted to leaf through the books at one point, or drive the cars around. It’s fine if your child just wants to arrange items!

Big vs Little Games (2)

You can also add the interim step of “medium”. With nesting boxes, we lined them up in size order. At 18 months old, I had to do this for Veronika, but older toddlers can proudly solve the challenge themselves.

Big vs Little Games (3)

Then we got sillier and decided to make big feet and little feet. Big brother helped with the tracing on a long sheet of craft paper, and we labeled our prints big and small.

Big vs Little Games (5)

How have you taught the concepts of big and little? Please share in the comments!

Big vs Little Games (6)

Plant a Seed

Plant a Seed (8)

Although toddlers won’t grasp the idea of a plant life cycle yet, or how a single seed can grow into a full plant, toddlers do love the components of gardening, namely: water, dirt, and seeds. So today Veronika “planted” her first seed, partly as a sensory experience, and partly for a little science.

Plant a Seed (1)

First I set out a little cup of dried beans for her to play with, simply to explore. She loved transferring these back and forth between two cups.

Plant a Seed (2)

Using a little dirt from the yard outside, we began scooping dirt into one of the cups.

Plant a Seed (4)

I filled our watering can with just a little water so she could make the dirt damp but not soaked. Of course I knew this would turn into lots of play scooping dirt and pouring water, and that’s exactly what happened. But that was half the fun! A little bug even hitchhiked its way in with the dirt, and she loved watching it on the tray.

Plant a Seed (7)

Before she could tire of the game, I showed Veronika how to sprinkle a few of her bean seeds into the dirt, and press them in gently.

Plant a Seed (5)

We gave them a little extra water as a finishing touch.

Plant a Seed (6)

I don’t expect these to really sprout, since we didn’t germinate them properly). But the cup is in a sunny spot on our windowsill, and Veronika looks at it proudly! Either way, the whole process is a fantastic intro to gardening.

Note: If you want to include a little art, use a paper cup instead of a plastic one and have your toddler draw on it first. Or you could even decorate a proper clay pot!