Magnetic Puzzles

Magnet Puzzles (5)

Here’s a clever way to combine puzzle play with magnet play. It’s the perfect activity to engage any kid who loves to play with magnets at the fridge!

For the first round of the game, I took an old jigsaw puzzle and adhered a square of magnetic tape to the back of each piece. You could also set this up with regular magnets, but you’ll need to use hot glue to attach the magnets to each piece.

Magnet Puzzles (1)

Arrange on the fridge and let your little puzzlers go at it!

Magnet Puzzles (4)

It was readily apparent, though, that the jigsaw puzzle was much too complicated for Veronika, even though she liked moving the pieces around, so I quickly thought of an alternative that was more toddler-friendly.

Magnet Puzzles (2)

I encouraged the kids to draw their own puzzle on pieces of cardboard from a leftover cereal box. They both had fun drawing current favorite characters. Your kids can get quite creative with this part of the craft, using paint, stickers, glitter, or more!

Magnet Puzzles (3)

When the drawings were done, I cut each picture into 4 pieces, then added strips of magnetic tape to the back.

Magnet Puzzles (7)

Veronika loved that she could slot these puzzles together much more easily than interlocking jigsaw pieces.

Magnet Puzzles (8)

Puzzle solved!

Magnet Puzzles (9)

Crayon Slide

Crayon Slide (7)

It’s raining and it’s pouring… and we really miss the playground! So this morning, I surprised the kids by bringing our toddler slide in from the back patio, dried it off, and had it waiting for them after breakfast.

Crayon Slide (1)

My original intent was to turn this into a craft, too. I taped a long sheet of butcher paper onto the slide, and set out some crayons. The idea is that kids can hold a crayon as they slide down, in one hand or both, and leave a wiggly trail behind.

Crayon Slide (2)

It turned out that neither kid liked drawing on the descent. I tried taping together a bundle of crayons, thinking this might make it easier, but still they didn’t love the process.

Crayon Slide (3)

Instead, Travis and Veronika invented their own version of the game: they would slid down the slide, then scribble on the paper at the bottom, then race around to go again.

Crayon Slide (6)

I was so proud of their turn-taking!

Crayon Slide (8)

We had surrounded the slide with pillows to avoid any mishaps when falling, which meant the game turned into tumbling around on pillows, too. What a great way to bring an outdoor playground in!

Crayon Slide (4)

Eat Your Letters

Letter Sandwiches (2)

Veronika is fascinated with letters now, adding daily to the list of those she recognizes, and she loves pointing them out to me. “Letter C!” she said in the grocery store yesterday, spotting one on a sign. To reinforce her interest, I picked up a few grocery items with letters right on them!

My original plan was to buy Alpha-Bits cereal but couldn’t find it at the store. Instead, I purchased letter cookies from Earth’s Best, and letter-shaped pasta from Banza. For the cookies, I first spread peanut butter on toast slices to make them sticky, which turned them into little “easels”. I showed Veronika how to sort through the letters and spelled out simple words for her (love, cat), along with her name.

Letter Sandwiches (1)

I also held up one cookie at a time and asked what letter she saw. She knew some new ones from the last time I quizzed her, including H and D now!

Letter Sandwiches (5)

Big brother Travis quickly wanted to join in, eager to spell his name. We ran into a snag only because the kids were snacking, too, which meant we were soon missing letters we needed!

Letter Sandwiches (3)

After that, I dumped out the letter pasta onto a tray for Veronika to further explore. This was more like sensory play, but also great for learning. I again held up one letter at a time and asked her which it was.

Letter Sandwiches (6)

It turned out the pasta only came in five letter shapes, so we briefly sorted them, too. “Another S!” she said proudly, adding it to the pile.

Letter Sandwiches (7)

If you do find Alpha-Bits cereal, go ahead and arrange them on those peanut-butter bread slices, then finish up the activity by eating your open-faced sandwich!

Sorting Blocks as a Graph

Block Graph (3)

Veronika made her first graph today! Okay, so there was lots of mommy help involved, but large building blocks and a large sheet of butcher paper make this particular graph quite toddler-friendly.

First, I taped down a long piece of paper to the floor with painter’s tape, then marked off 4 columns using washi tape. At the bottom of the graph, I traced 4 of her block shapes. I chose ones that are newer to her (archways, semi-circles) now that she’s mastered early ones like triangles and squares. And of course you can include more than 4 categories if you’re doing this activity with a preschooler.

Block Graph (1)

Now it was up to Veronika to place each block in the right column. “Where does the semicircle go?” I could prompt her. “With the semicircles!” she chimed in. It wasn’t an activity that she was motivated to complete on her own, but if I asked a leading question for a block, she knew where to put it.

Block Graph (2)

Then we flipped over the paper and repeated the activity, but this time making a graph by color!

Block Graph (5)

This version was even easier for her to complete. “It goes with the yellow,” she might say, picking up a yellow block and adding it to the yellow column.

Block Graph (6)

Did she entirely understand that we were making a mathematical graph to compare the amount of blocks by shape or color? Not yet, of course, but it was a great early intro to sorting and graphing. The large visual at the end was neat to see.

Block Graph (4)

After that I challenged her to stack her blocks by shape, too. Preschoolers can get really creative with this part, perhaps attempting a tower all out of triangles, or all out of semicircles.

Block Graph (8)

One thing is for sure: this was yet another great way to get novel play out of our blocks!

Block Graph (9)

Toddler Valentine’s Day Treats

Valentines Cupcakes (5)

Valentine’s Day is full of sweet treats, and here are a few food ideas that even a toddler can help out with… or just enjoy!

Edible Valentines (4)

Edible Valentines: This first idea comes from the classic Toddler’s Busy Book. I tinted a little store-bought frosting pink with food coloring and showed Veronika how to smear this onto graham crackers (Nabisco’s original are vegan).

Edible Valentines (3)

Since candy hearts are not vegan, we topped the graham crackers with the seasonal gummy hearts from Annie’s bunny packs! This made for an adorable craft project and snack rolled into one.

Edible Valentines (2)

Valentine Cupcakes: What would Valentine’s Day be without a little chocolate? For this toddler-friendly baking project, I simply whipped up cupcakes from a dairy-free chocolate mix. The Valentine twist, though, is to make them heart-shaped. After spooning the batter into cupcake liners, place a marble at one edge of each liner which will indent it like a heart!

Valentines Cupcakes (3)

And of course Veronika loved playing with leftover marbles and liners.

Valentines Cupcakes (1)

The effect wasn’t quite as pronounced after baking, since the cupcakes rose so high in the liners, but we could still sort of see them as hearts. Veronika loved helping spread on chocolate frosting. In general, frosting cupcakes like this is a perfect toddler skill in the kitchen.

Valentines Cupcakes (4)

We added a few final decorations (like more of those Annie’s hearts). Sprinkles would look pretty, too!

Valentines Cupcakes (8)

Sweetheart Sandwiches: Next up, I made little sandwiches which are perfect for a snack or lunch on Valentine’s Day. For the first version, I stirred a little cinnamon into plain non-dairy cream cheese.

Sweetheart Sandwiches

For an alternate version, turn it pink! Use strawberry flavored non-dairy cream cheese (such as Kite Hill), or just tint plain cream cheese pink with food coloring, then stir in a little agave nectar. Finally, use a heart shaped cookie cutter to make a heart.

Sweetheart Sandwiches (2)

And for a final edible treat, I spelled out L-O-V-E for the kids’ Valentine breakfast, thanks to this sweet idea from Parents magazine.

Edible Valentines (7)

On a large plate, form an L from tater tots, an O from a kiwi slice, a V from a toasted waffle cut with a heart-shaped cookie cutter, and an E from raspberries. The kids’ reaction to all these goodies? They loved ’em!

Edible Valentines (5)


Learning with Blocks, Three Ways

Letter Blocks (2)

I love when I can draw Veronika’s attention to her blocks in novel ways, and here were three ways to grab her attention today. As a bonus, all of them involved different types of learning!

For the first, I typed up the alphabet in big letters and printed out the page, then cut it apart so each letter was an individual square. Tape one letter per one of your child’s building blocks, and each block becomes its own specific letter!

Letter Blocks (1)

As I taped them on, we said the name of each letter and its phonetic sound, and sang through the Alphabet Song several times. Then it was time for her simply to play! But as she built towers, I named the block she was holding. “Oh, you have the G block!” I could say, or, “B block is on top of A block!”

Letter Blocks (6)

I plan to leave these little labels on so that her familiarity with each letter symbol increases every time we dump out the bin of blocks.

Letter Blocks (5)

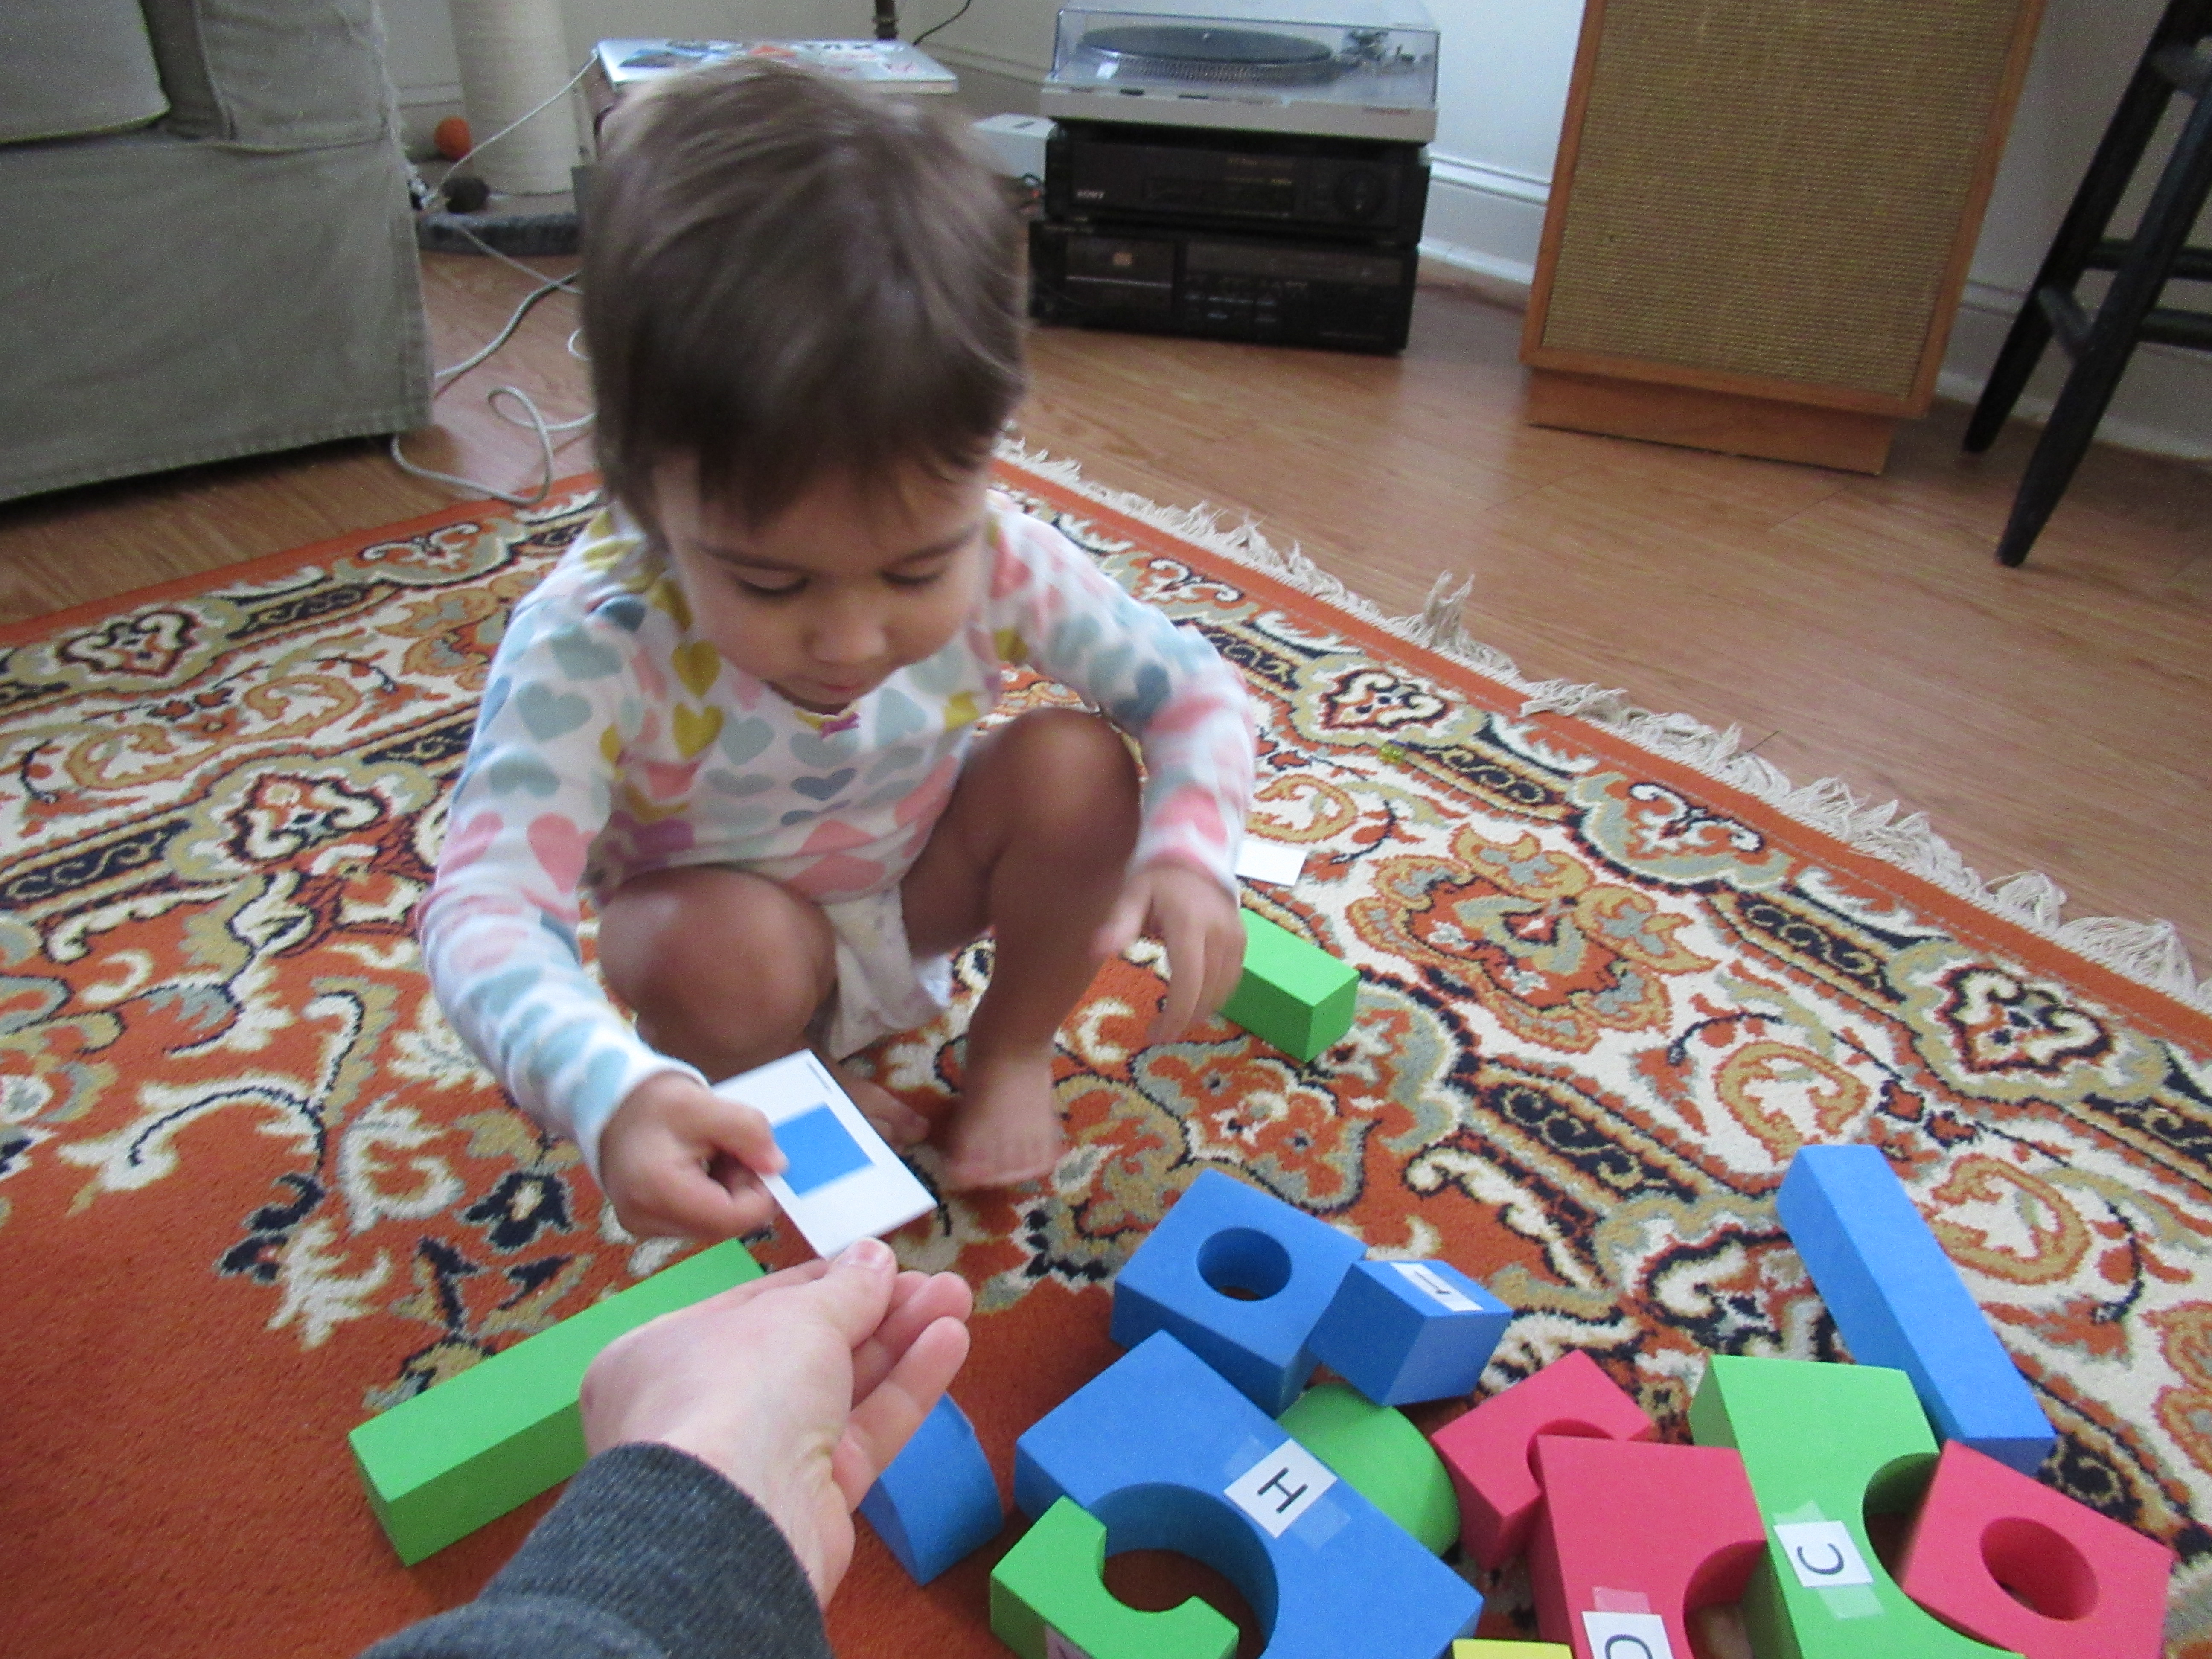
For the second novel way to play, we focused on two different skills: counting and listening to instructions. Thanks to a great tip from Hands on as We Grow, I used the cards from our Candyland board game to give her specific directions.

Listening with Blocks (1)

Draw a card and ask your toddler to hand across whatever appears on it. “Can you find me one blue block?” I asked her, holding up the Candyland card with one red square. She was an ace at handing me one block of the appropriate color, whether the green, yellow, or red that followed.

Listening with Blocks (2)

Things got a little trickier for her when I pulled a double color (a kid favorite when playing Candyland, of course).

Listening with Blocks (4)

“Can you hand me two red blocks?” I asked. She seemed confused, so I pointed to the squares on the card. “One, two!” and then lined it up with two blocks. “One, two!” I repeated. It was hard for her to focus on this challenge, so we turned to game number three…

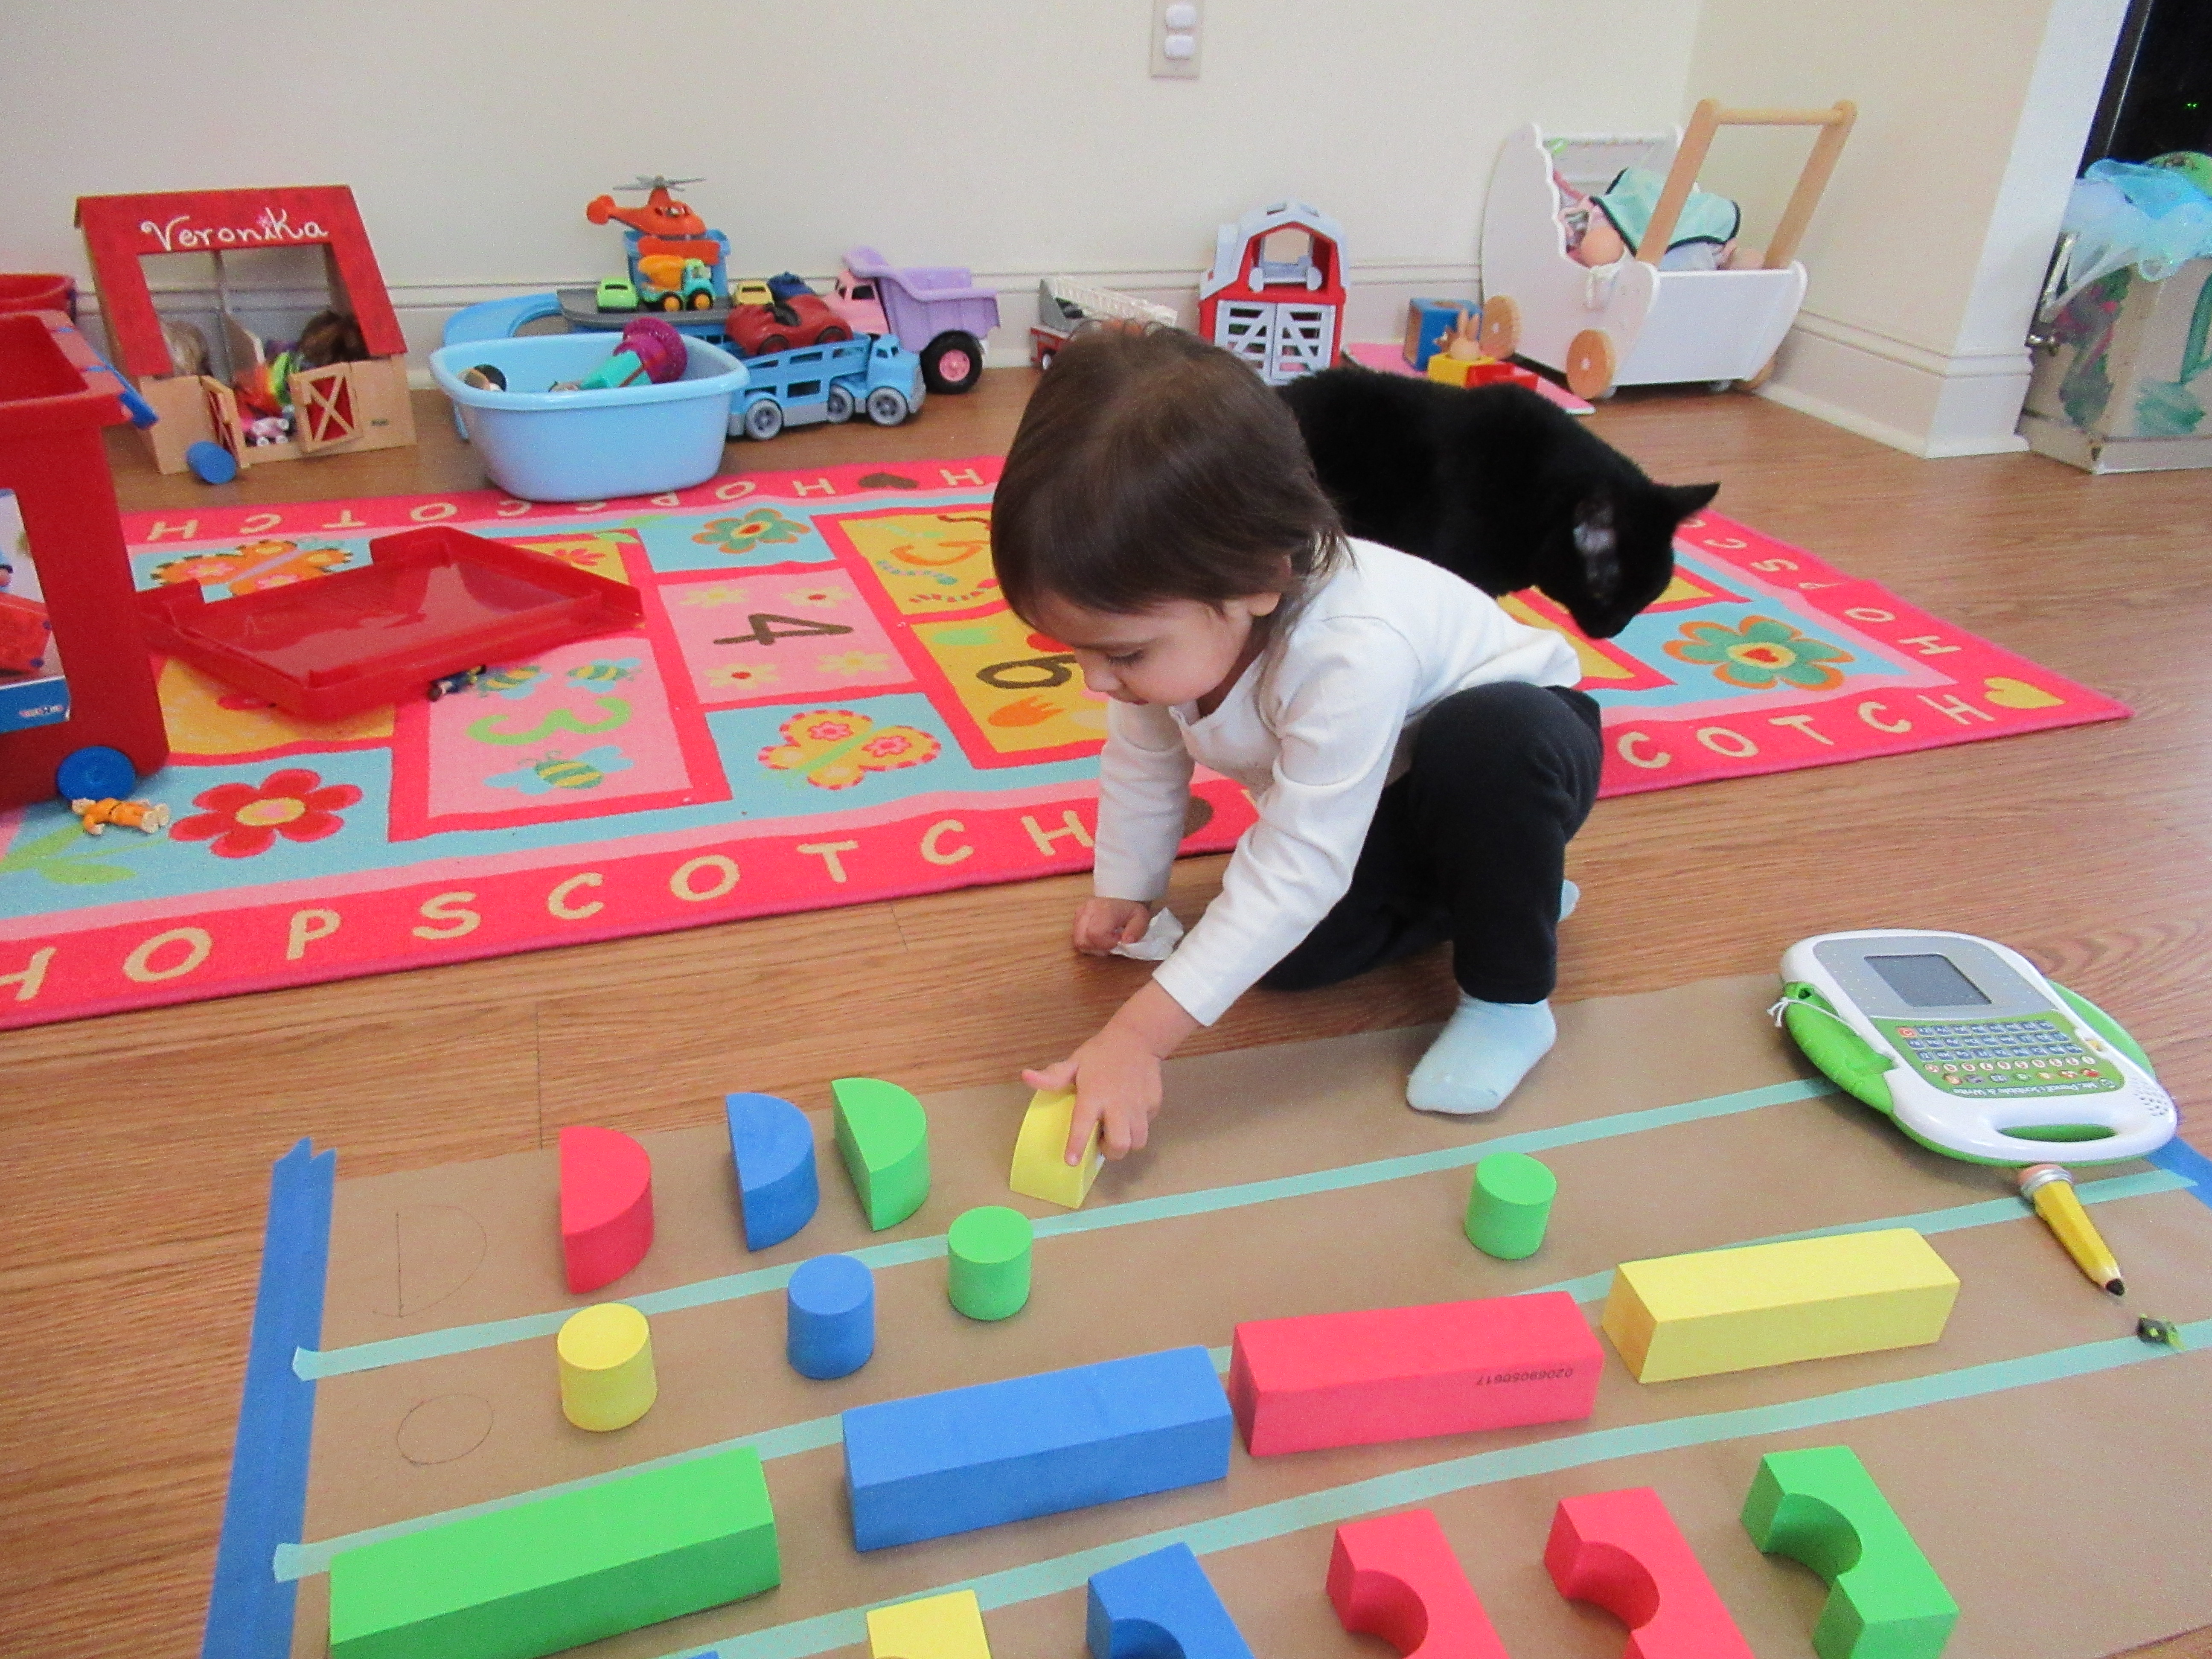
…which was actually a repeat of a block puzzle game we played a few months back, but last time I made the puzzle much too big. Tape out a small square or rectangle on the floor with painter’s tape and show your child how to arrange blocks in, puzzle-piece style!

Block Puzzle (1)

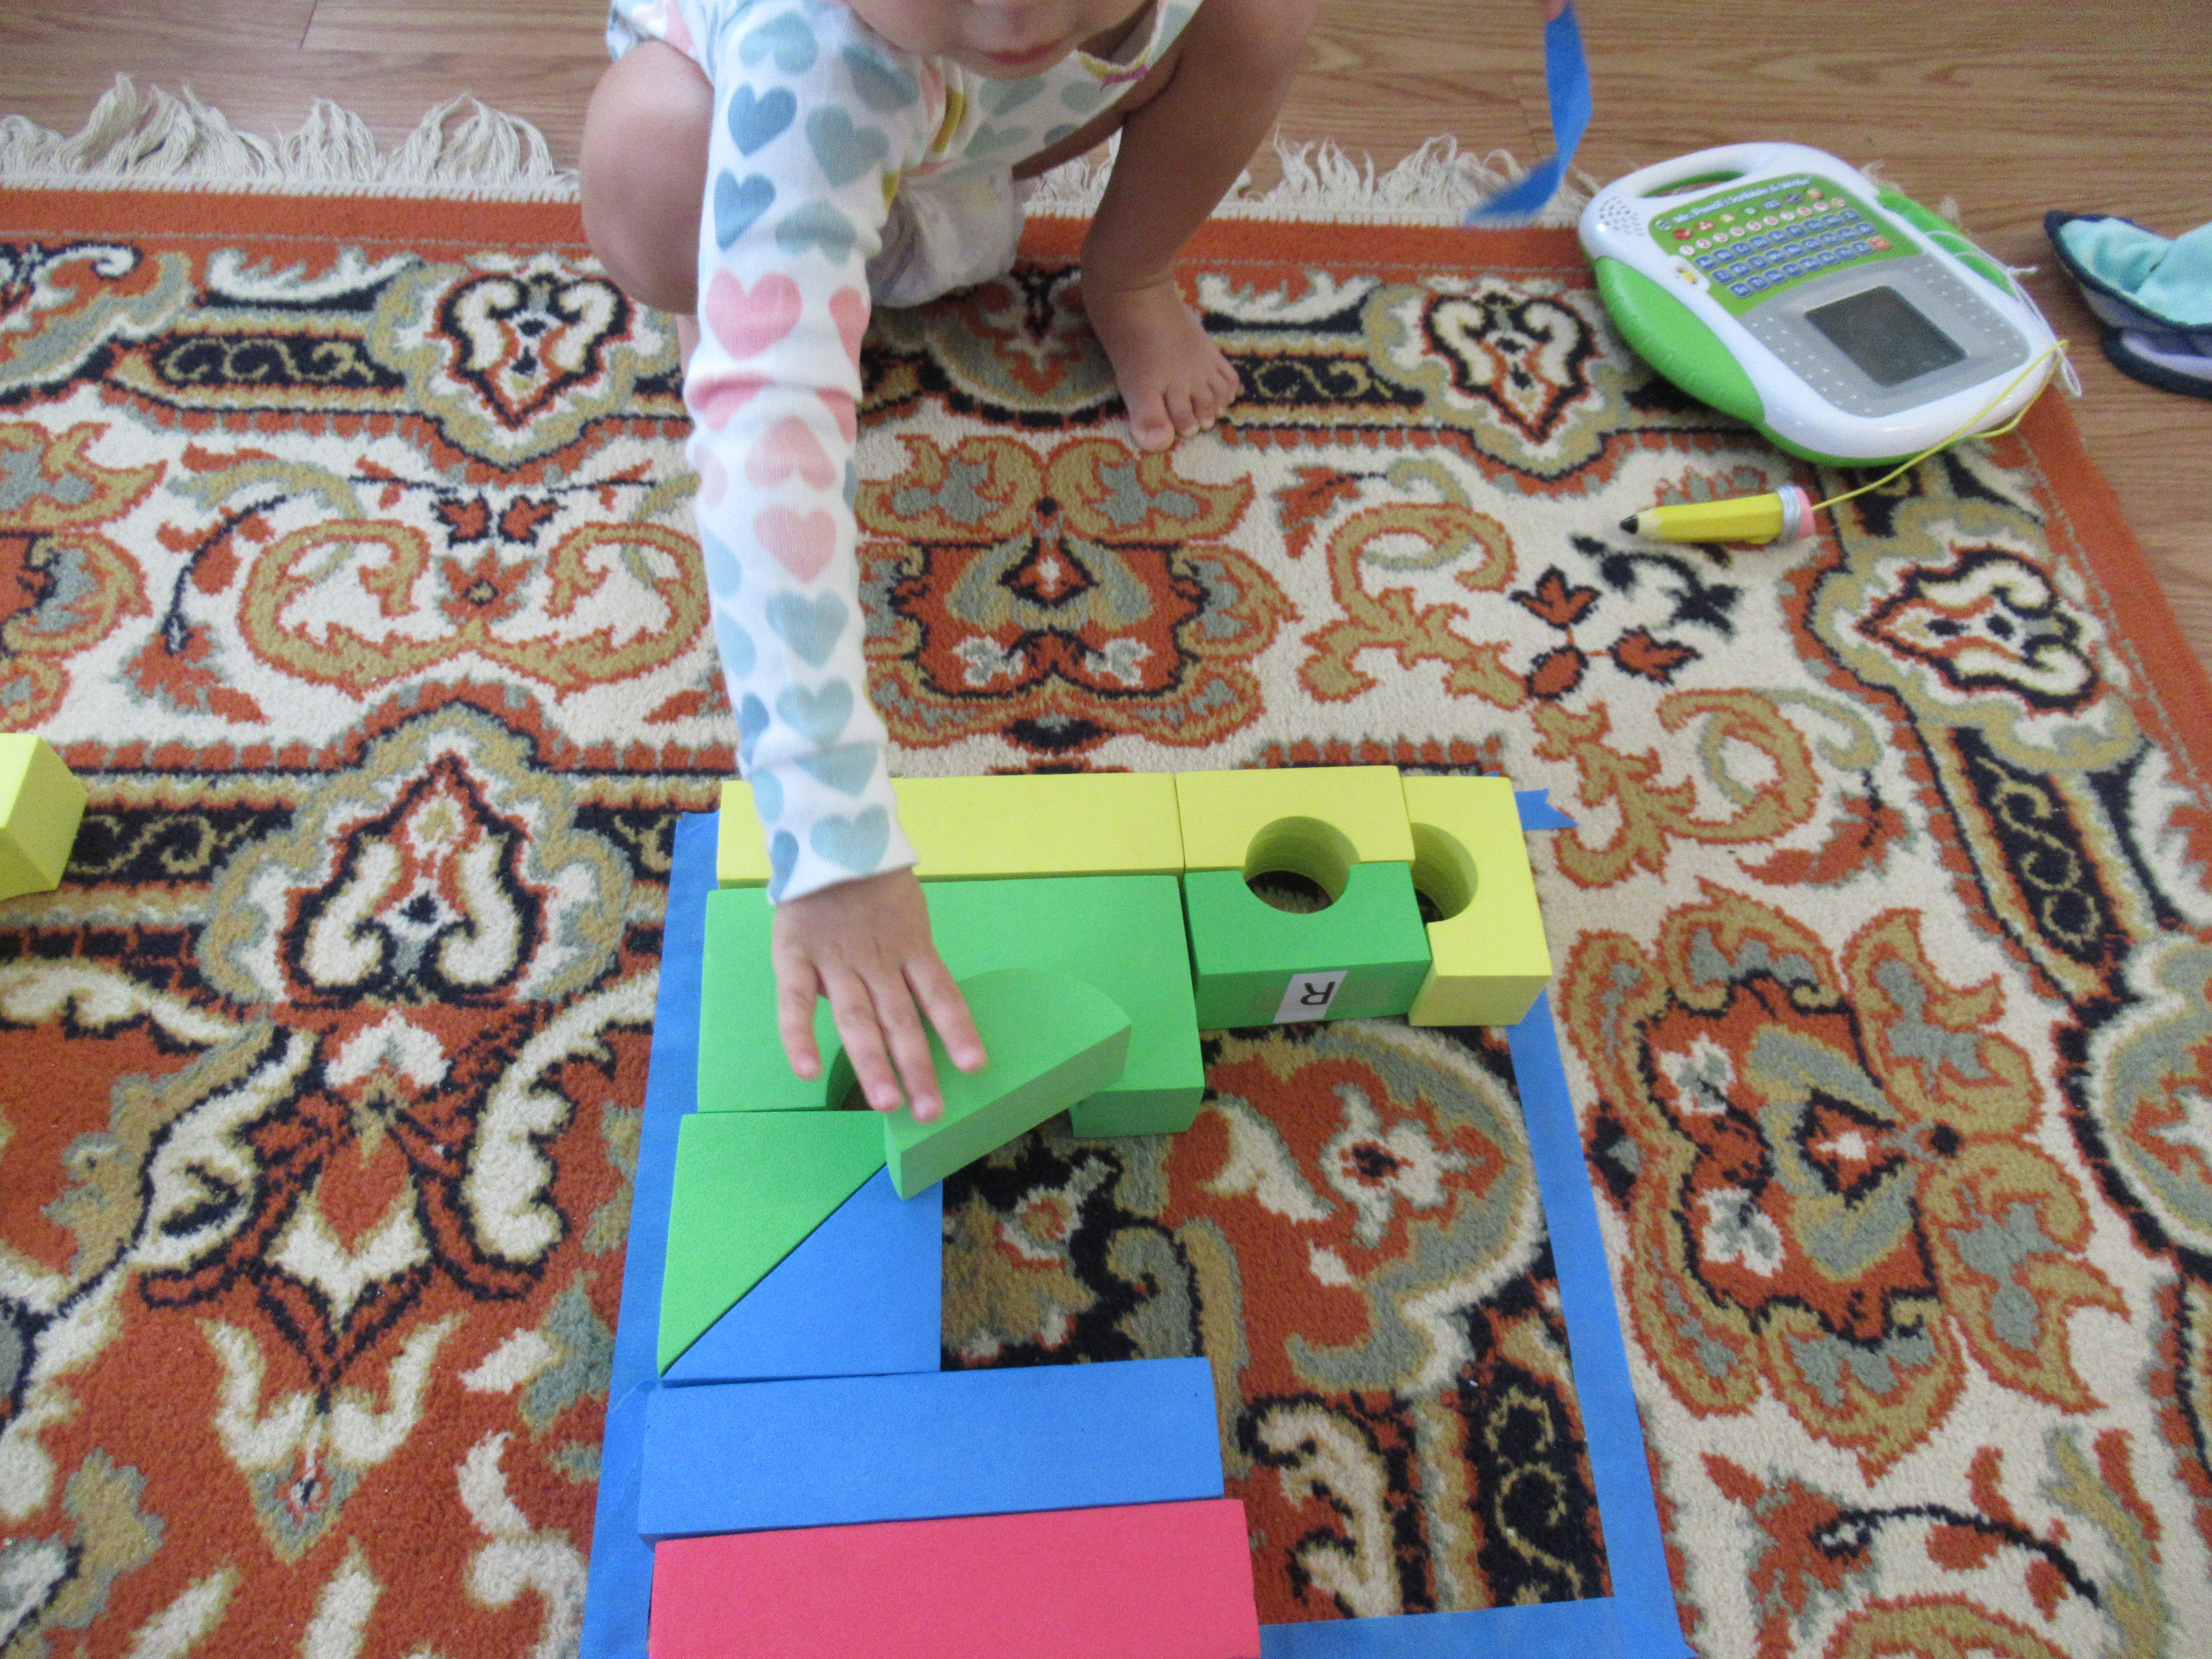
Veronika especially liked when there were small spaces to fill, like the semi-circle that completed an archway or a small circle inside a square block.

Block Puzzle (2)

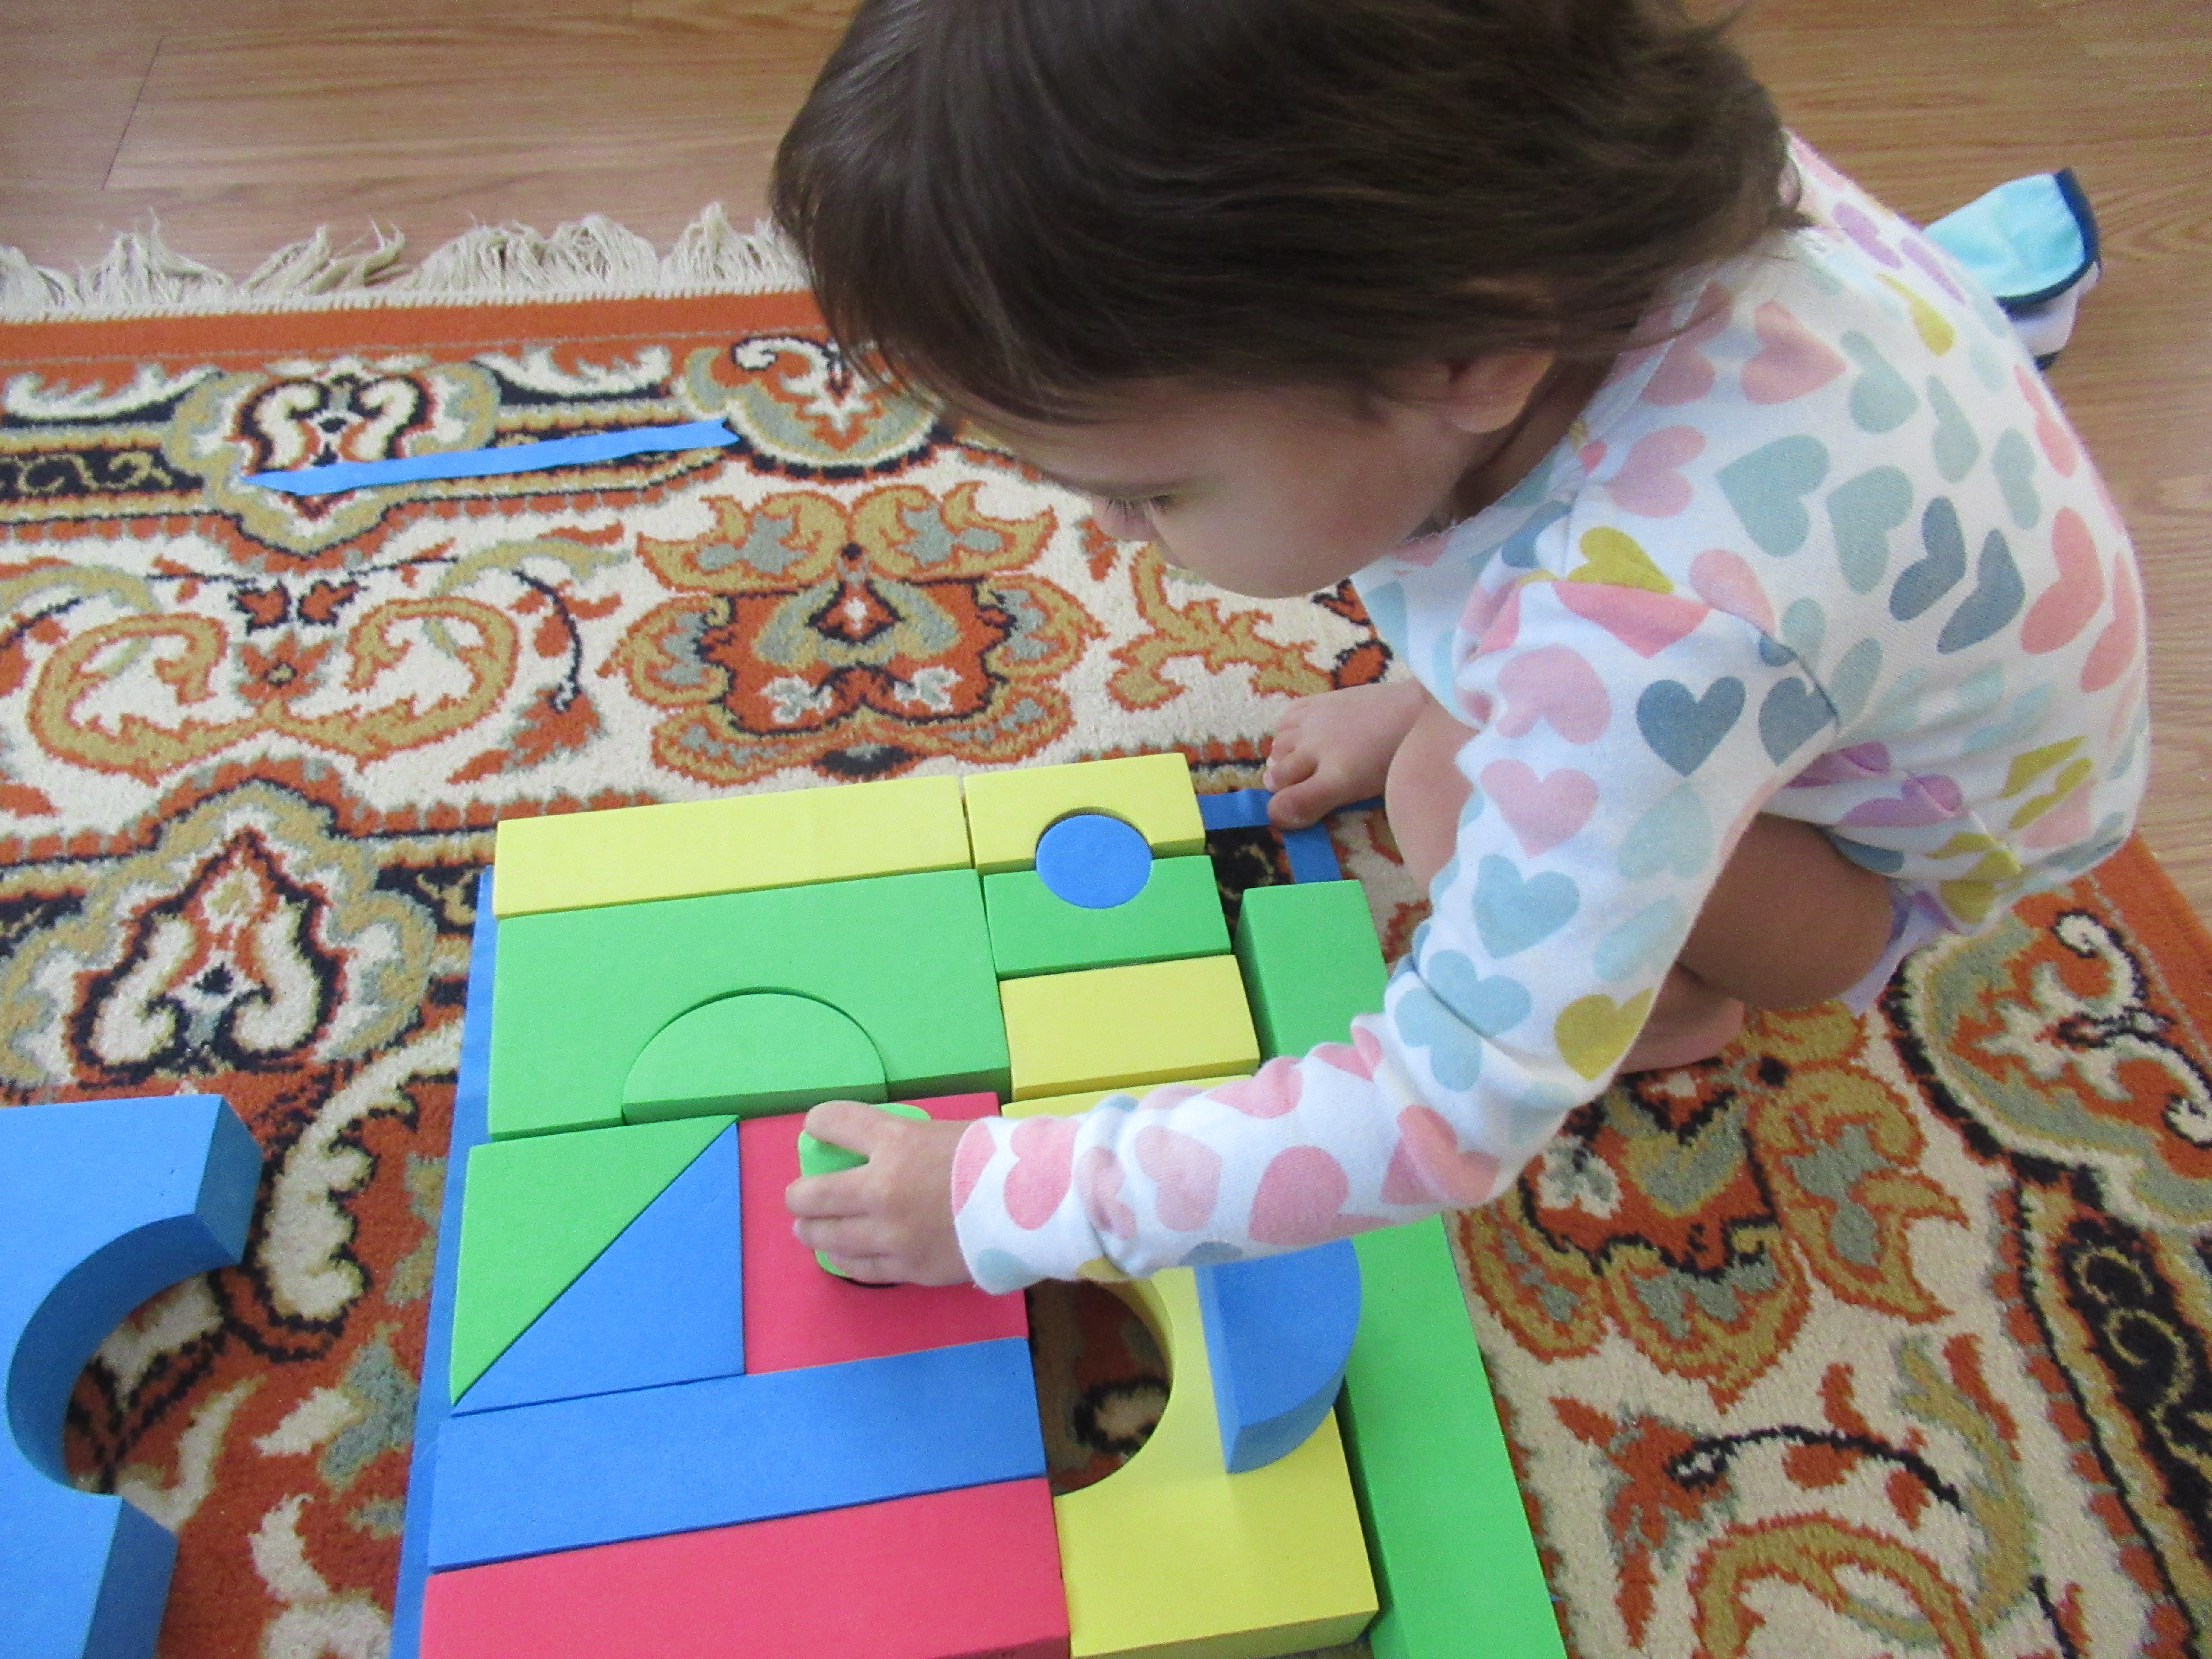
Not, bad, with a little mommy help! Older kids can make their taped areas progressively larger as they grow more skilled at this.

Block Puzzle (3)

How does your toddler learn with blocks these days? Please share in the comments!

Depth Perception Walk

Distance Walk (4)

It might seem like there’s less to seek and find on winter nature walks than in other seasons, but the opportunities to leran are still abundant! To wit, we had beautiful cold sunshine today, and used the walk to play with concepts of distance and balance for Veronika!

As we walked, big brother Travis and I took turns pointing out items that were either near (“These branches are so close!”)…

Distance Walk (2)

…or far. “Those leaves are far away!” Travis said. “Let’s race to them!” I was so proud of his teaching, because the racing was his own idea, and helped highlight the difference between items close by and those we needed to get to.

Distance Walk (1)

After that we played around with how fast or slow we could cover the distances. Travis loved leading Veronika with the trail of a stick in the snow, too, sometimes close to her…

Distance Walk (3)

…and sometimes far up ahead. For some final fun on the return walk, we collected a few nature treasures (winter-brown leaves were the most readily available!) and lined them up like a balance beam in the snow.

Distance Walk (5)

Veronika loved testing her balance as she walked along the line. Once the leaves scattered, she repeated the task but this time her footsteps took her in a zig-zag! All in all, these activities kept us warm and active on what could have been a frigid walk.

Distance Walk (6)

Valentine’s Day Vase

Valentines Vase (5)

This cute Valentine’s Day gift idea from Hands on As We Grow is a great way to recycle leftover plastic bottles! We used non-dairy smoothie bottles, which were the perfect size and shape.

Clean and dry the bottles thoroughly, then set out a tray filled with Epsom salt. We added red food coloring (naturally!) for Valentine’s Day.

Valentines Vase (1)

Next, I showed Veronika how to smear white glue all over the bottle with a paint brush.

Valentines Vase (2)

Once the bottle is completely covered, simply roll in the salt. It will cling on, and it sparkles so beautifully! Veronika thought it was so pretty that we added blue food coloring and made a second bluish-purple version. Let dry completely.

Valentines Vase (3)

Meanwhile, Veronika was still busy playing with the Epsom salt mixture, stirring it around with a paint brush or dipping her brush into the cup of glue and back again. Just be sure to supervise play closely, as Epsom salt is not edible.

Valentines Vase (6)

When the vases are dry, fill with roses and set out for someone special!

Valentine Window of Hearts

Toddler Hearts for Window (5)

Veronika has made lots of Valentine cards to give away this year, but we realized our house was lacking in decorations that we had kept for ourselves! I had leftover doilies from one of her projects, and these only needed a little toddler-friendly embellishment before we could hang them in the windows.

Toddler Hearts for Window (2)

First, Veronika used dot markers to decorate some of the doilies. We chose red and purple, to keep with a Valentine’s color scheme.

Toddler Hearts for Window (1)

I thought she might also enjoy painting some of the doilies, but she hasn’t wanted to get her hands messy lately. Instead, I placed a few of the doilies in a plastic container and added two balls, one big and one small. Squeeze in a few drops of red paint, then roll the balls around. Your toddler might want to do this with his or her hands and get nice and messy!

Toddler Hearts for Window (3)

Veronika preferred it when I showed her how she could til the container to and fro, making the balls scatter paint across the doilies.

Toddler Hearts for Window (4)

Let these painted ones dry before adding to the other doilies hanging in your window. This made the easiest toddler “garland” ever!

Toddler Hearts for Window (6)

Sponge Towers and Stamps

Sponge Towers (3)

Large kitchen sponges are easy to buy cheaply and in bulk, so consider stocking up the next time you’re at the store. I love keeping a few in the craft bin because they always come in handy, and not just for watery outdoor summer play.

Veronika and I found two fun ways to play with them this winter afternoon! First, I cut several of the sponges into strips so they made almost a soft foam version of Jenga blocks! I showed her to stack these into layers, and she loved helping add to each strata as our tower grew taller.

Sponge Towers (2)

And of course she loved knocking the sponges over.

Sponge Towers (4)

She also came up with her own way to stack them, simply one strip atop another, and I loved watching her concentration!

Sponge Towers (1)

Note: If building up the Jenga-style towers is too tough for your toddler, you can also make simple shape blocks. Aside from the obvious opportunity to talk about shapes or short by shape, toddlers will no doubt find many uses for these soft (danger-free!) blocks.

Sponge Blocks (2)

They were great fun for hauling around in her dump truck…

Sponge Blocks (4)

…or teaching an early intro to simple patterns, like alternating pink and blue.

Sponge Blocks (5)

When the stacking was done, we still had a few sponges left over so I wanted to use them for more of an artsy craft. Sponges make perfect “stamps” for painting and since we’re so near to Valentine’s Day, I cut them into heart shapes.

Sponge Heart Stamping (2)

These made great prints, and Veronika was especially intrigued with the fact that the color that appeared on the paper wasn’t the yellow or blue of the sponge…

Sponge Heart Stamping (3)

…but red paint! So this accidentally turned into a quick lesson on cause and effect.

Sponge Heart Stamping (4)

Want more ways to play with DIY sponge blocks? Check out what big brother Travis was doing with them 4 years ago!

Sponge Heart Stamping (5)