Monster Slime

Slime Monster (8).JPG

The slime craze isn’t over yet, and it seems like there’s always a way to make it new and novel for kids. Travis went bananas for this slime monster he could trap in a jar!

To make the slime, stir together 1/2 cup glue, 1 tablespoon baking soda, and a few drops of food coloring. We decided on an orange monster, so mixed together some red and yellow drops.

Slime Monster (2).JPG

Add 1 teaspoon contact solution and your slime will seize up right away.

Slime Monster (3)

Travis loved watching it stretch. And even better, capturing the beast in its jar!

Slime Monster (4)

To add monster facial features, we cut out shapes from white and black felt and glued on.

Slime Monster (6)

Eek, a monster!

Slime Monster (5)

If you like, make a whole batch of these and decorate a windowsill for the upcoming holiday.

Slime Monster (7)

Baseball Explored

Baseball Explored (7)

The final lesson to go with Travis’s Game Day recipes from Raddish Kids was an in-depth look at baseball… with a little art and drama thrown in!

First, I read Travis some facts about the game and we watched a quick video of the rules. Bedtime stories like Pete the Cat Play Ball! by James Dean, I Got It! by David Wiesner, and F is for Fenway by Jerry Pallotta all introduced the imagery and lingo of baseball and its stadiums.

Baseball Explored (2)

Even more fun was making a diorama of a stadium! I pulled together supplies, including a large box, construction paper, craft sticks, glue, markers, an egg carton, and tin foil.

We looked at images of Fenway and other baseball fields and I asked Travis what we’d need. Raddish included a full worksheet to fill out before beginning the diorama, but with an eager kindergartner and a one-year-old getting into all the supplies, we had to work a bit more quickly than that!

Baseball Explored (3)

Travis noticed what I hoped he would right away: We needed green on the bottom for the field. We glued down green construction paper, then I drew on the baseball diamond dirt with brown marker.

Baseball Explored (4)

The baseball field is a great chance to talk about shapes, in general. The dirt lanes form a diamond, the pitcher’s mound is a circle, and the bases needed to be squares. Travis chose shiny tin foil for the bases, a nice touch!

Baseball Explored (5)

I helped him think about what else his stadium needed. Soon we had an old egg carton glued on the sides as the bleachers with little pom pom “spectators”. Pipe cleaners were our players.

Baseball Explored (6)

Travis’s proudest contribution was adding a mini lantern to be the stadium spotlight.

The worksheet suggested adding food or drinks, which older kids can carefully craft. Travis was quite proud to glue together two craft sticks, crossed to look like soft pretzels.

Baseball Explored (8)

Next up: the drama portion! We watched a few suggested clips of movement in baseball, ranging from the best catches of all time, to how to slide into base, to how to throw peanuts in the stands. Travis then put on his acting shoes. Here is his baseball movie, in three parts:

Batting!

Sliding!

Tossing peanuts!

What a fantastic way to get kids up and moving on a rainy evening. There’s lots more that older children can do with this lesson, whether making a painting or collage representing baseball or reading biographies of famous players.

We intend to finish the lesson with a baseball movie (Angels in the Outfield is a great pick for younger kids) and a game on TV once the World Series starts!

Glow-in-the-Dark Croquet

Glow Croquet (9).JPGNights are getting longer, which means finally the sun sets before Travis goes to bed. That opens up whole realms of possibility for games we can play! To wit, put those glow-in-the-dark-sticks and bracelets (ubiquitous this close to Halloween!) to novel use with this game of mini croquet.

First, we painted a piece of large cardboard. Travis chose a sparkly blue, thinking that would look like a starry night sky against our glowing wickets. Paint two coats and let dry.

Glow Croquet (1)

Glue on paper straws around the entire rim of the cardboard as bumpers; let dry.

Glow Croquet (2)

At first, we made straw mallets by cutting a 2-inch piece of straw and gluing crosswise on a second straw to form a T. These didn’t hold up well, so read on for our quick fix.

Glow Croquet (3)

To make the wickets, poke holes in the cardboard. Activate 4 glow bracelets (or up to 8 if you want more wickets!) and insert into the holes, bending each one into an upside-down U.

Glow Croquet (4)

Add arrows with white-out or white paint showing the direction of play.

Glow Croquet (5)

Have each player select a different color pom pom for their ball. Now take turns whacking through the wickets and see who reaches the end first!

Glow Croquet (6)

As mentioned, our straw mallets didn’t hold up well. No problem! We snapped a few regular glow sticks to activate them, and used these as the mallets.

Glow Croquet (7)

Needless to say, Travis was smitten with the game. Anything that glows is always a hit!

Glow Croquet (8)


Rubbings Collage and Puzzle

Rubbings Collage (6).JPG

Here’s a neat way to create your own shadow puzzle, an advanced version of a game Travis and I played long ago. One child can challenge him or herself with the final product, or invite a friend or sibling fill in the puzzle once created.

First, Travis and I gathered metal items from around the house. We ended up with a coin, a paper clip, a hole punch, a spoon, and a key.

Rubbings Collage (1)

Place the items on a piece of paper and cover with a second sheet of paper. Rub with the side of a crayon to reveal the shadow of the images underneath.

Rubbings Collage (2)

It was interesting to see what worked well (the flatter things) and what didn’t; the spoon was quite tricky!

Rubbings Collage (3)

We removed the items and now Travis had to match everything up to its silhouette, a challenge he enjoyed.

Rubbings Collage (4)

Again, this was fun with one kid but would be a great game for two kids: one to make the puzzle and the other to fill it in.

Rubbings Collage (5)


Mosaic Art

Mosaic Art (7)

When I first spotted this craft idea online, the suggestion was to draw a picture and then cut into squares before gluing down to form a mosaic. It turns out Travis didn’t want to draw his own picture… but he did love making a mosaic from an existing Star Wars picture!

Mosaic Art (2)

I drew a grid on the page he selected and Travis loved cutting along the lines until we had 30 or so small squares.

Mosaic Art (3)

Note: It’s helpful to label these on the backside so that the mosaic comes together without frustration.

Mosaic Art (4)

We selected green construction paper as the background and then began gluing down the squares, leaving some green showing on all sides. This is also a great lesson in counting for kindergartners. Travis loved seeing the battle droids take shape again.

Mosaic Art (5)

At the end, we had a fun piece of mosaic artwork.

Mosaic Art (6)

Make Your Own Soccer Ball

Homemade Soccer Ball (6)

After reading about homemade soccer balls used by kids the world over, specifically in Zimbabwe thanks to a Highlights magazine article, Travis was inspired to make his own! We sort of winged it on this one, but our little ball turned out great.

We only needed three items: a plastic bag, old newspaper, and string.

Homemade Soccer Ball (1)

First I helped Travis wad up newspaper and stuff into one small (3 gallon) plastic bag.

Homemade Soccer Ball (2)

I knotted it when about half full and pulled the bag inside out around the knot for a double layer. This was our “core.” We then repeated with a second bag and more newspaper, securing with a second knot and fold over.

Homemade Soccer Ball (3)

Knead with your hands into a more round shape if your ball is looking a bit oval. Now tie string around the outside. Four strings held ours tight.

Time to go play!

Homemade Soccer Ball (4)

Travis loved playing pass and taking shots on a goal. We were both so pleased with how well it rolled and held up.

Homemade Soccer Ball (5)

Next time you find yourself without a ball, don’t be daunted: make one!

Football Math Touchdown

Football Math (4)

This math-heavy lesson from Raddish Kids was a little tough to tailor to a kindergartner, but I appreciated the challenge, and that Raddish had us thinking about new concepts and skills. We’re excited to make more ballpark fare to go along with the learning!

The lesson begins with brainstorming a list of sports. I put white poster board up on the wall just like a teacher and gave Travis a big sports-couch-voice, “Go!” He soon had a great list.

Football Math (1)

I told him today we would focus on football, and went through some of the facts that Raddish provided. Did you know that the first official football game was all the way back in 1869? We watched a quick overview of the rules and took a look at all the gear players have to wear.

Pause a moment and make a second chart with your child, focusing on what we learn from losing and what we learn from winning. I was proud of Travis coming up with items like, “You learn not to cheat” and “not getting upset when you lose”.

Now go over a bit of football facts and figures (6 points for a touchdown, 3 points for a field goal etc.) and set up some math problems with manipulatives. We used dried beans, and I talked Travis through three problems. First up, addition:

If the Dallas Cowboys scored 2 touchdowns and 2 extra points, how many points did they have altogether?

Travis counted out 6 beans for each touchdown, plus the extra two, then added them all up. This is a sophisticated problem for a kindergartner, and I don’t think he even realized it!

Football Math (3)

We next did subtraction:

Last night the Kansas City Chiefs lost to the New York Jets by a score of 7 to 10. How many fewer points did the Chiefs have?

Again, manipulatives made it a cinch. He counted out each team’s score in beans, then took away 7 from the Jets pile. How many were left? “Three!” he declared.

Football Math (5)

Finally, fractions:

If there are 4 quarters in a game and 2 have been played, how many are left?

Beans made the answer clear.

Football Math (6)

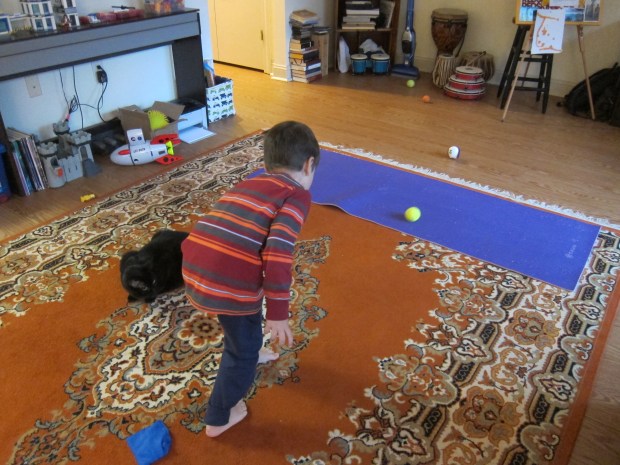
After that big brain workout, we needed a physical one! We played two fun variations on “football” that we found online, adapting them to be a mom-and-son game instead of requiring teams. For the first, I set up a yoga mat as the end zone. His job was to get as many balls as possible into the end zone in 1 minute.

Football Math (7)

For the second, he stood on a target (we used stacking rings) and had to catch a ball. If he caught it, he moved the target to his end zone for a point.

Football Math (8)

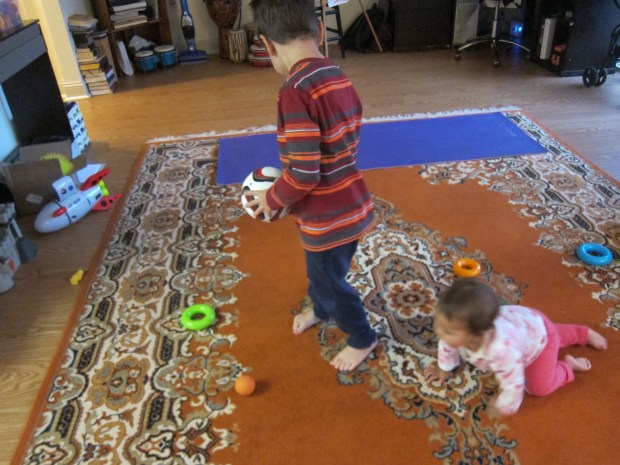
We even had an adorable cheerleader on the sidelines!

Football Math (9)

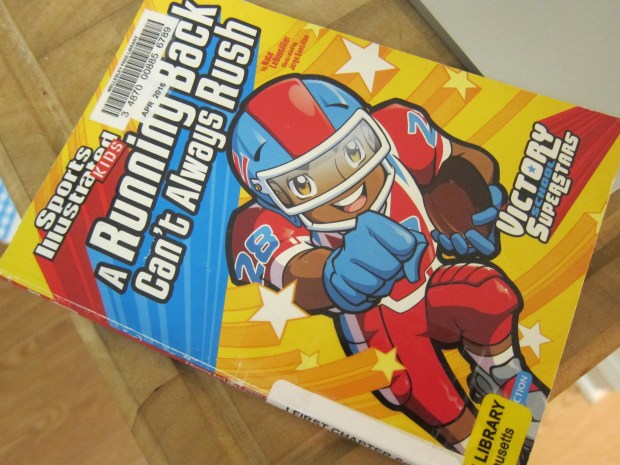
Finish up with a football read at storytime. Travis enjoyed A Running Back Can’t Always Rush, by Nate LeBoutillier
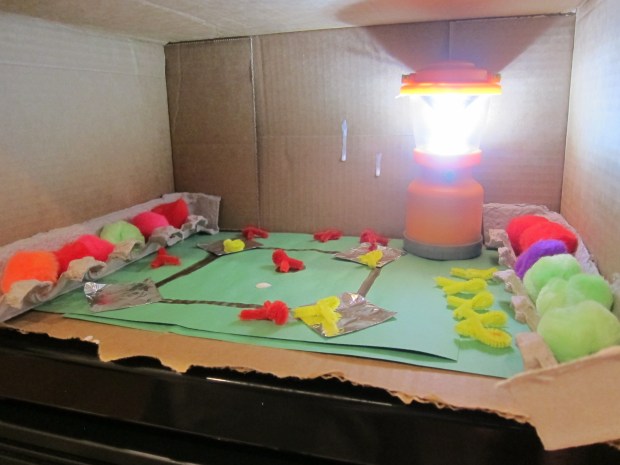
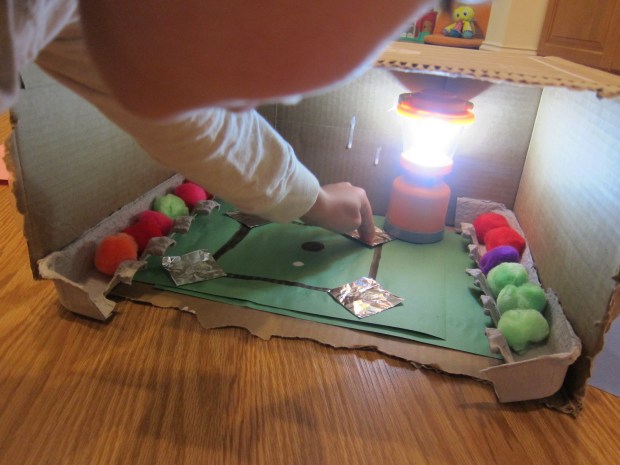
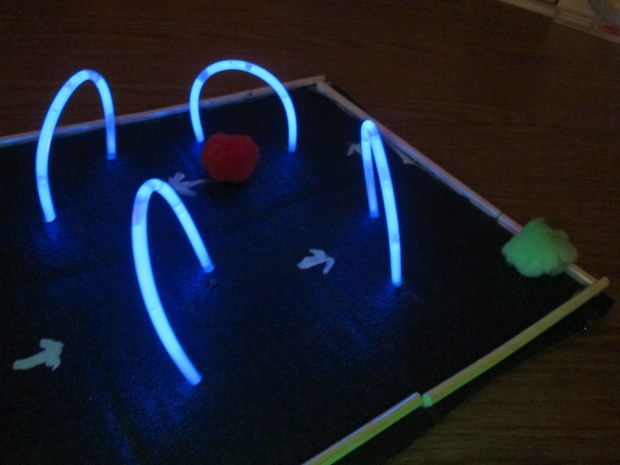
Football Math (10)


Poster Board Puzzles

Poster Puzzles (9).JPG

These giant puzzles are a cinch to make and just hard enough to put together. On other words, super fun.

On a large piece of poster board, draw any puzzle picture you and your kids like. I kept one simple for Travis with a heart shape in the middle and a squiggle around the outer edge.

Poster Puzzles (3)

He drew on the second piece of poster board, and I reminded him he’d need cues to know which pieces lined up where (and eventually added the circle in the center).

Poster Puzzles (2)

Draw 5 or 6 big lines from the outer edge to the center; cut along these lines to make your puzzle pieces.

Poster Puzzles (6)

Now put it all back together again! Travis was so pleased seeing his drawing line up.

Poster Puzzles (4)

Some of the pieces neededto be turned and fiddled, and then success.

Poster Puzzles (5)

You’ll notice that little sister Veronika loved the giant pieces of poster board and watching it all take shape! Feel free to give younger siblings a marker for scribbling, too, as long as you’re sure they’ll keep the ink on the big poster board pieces.

Poster Puzzles (1)

I had one happy scribbler, and one proud puzzle solver!

Poster Puzzles (7)

Geometric Refrigerator Magnets

Refrigerator Magnets (7)

We now officially have tangrams all over the house, whether felt versions to make in the playroom or this handy set for the fridge!

Travis loved making the magnets. You can purchase sheets of magnetic paper at the craft store with a sticky backing on the other side. We printed out and colored tangram shapes, and simply stuck these onto the sticky side.

Refrigerator Magnets (1)

Travis was fascinated with how it worked: where was the magnet? he wanted to know. How did the shapes stick?

Cut out your shapes (this was a lot of cutting for mama!) and transfer to the fridge.

Refrigerator Magnets (2)

At first Travis just played with them and made up his own designs.

Refrigerator Magnets (4)

For a challenge, print out a few tangram shapes and set your child loose. Bigger kids can work with just the outline; younger kids can rely on the answer code at the end of the pdf.

Refrigerator Magnets (3)

Now when I hear those whines of, “Is dinner ready yet?” I set him loose to solve a tangram at the fridge. Built-in kitchen entertainment!

Refrigerator Magnets (6)

Craft Stick Puzzles

Craft Stick Puzzle (5).JPG

This is a fast, easy way to make a puzzle at home, much more reliable than the cereal box version Travis and I tried earlier in the week!

Craft Stick Puzzle (1)

Cut a pretty greeting card into strips the width of a jumbo craft stick. I drew guiding lines for Travis, who so proudly cut straight along the lines. “This is fun!” he said, before we even got to the puzzling.

Craft Stick Puzzle (2)

Apply a layer of mod podge to each craft stick and glue on a piece of your puzzle. Let dry completely, then apply a second layer of mod podge over the strips.

Craft Stick Puzzle (3)

Once dry, I numbered the craft sticks 1 through 7.

Craft Stick Puzzle (4)

This numbering allowed him to puzzle in two ways; the harder way was simply to put it together relying on the picture. For a little assistance, Travis only had to refer to the numbers at the bottom!

Craft Stick Puzzle (6)

Happy puzzling!

Craft Stick Puzzle (7)