Painting Bag

Painting Bag (4)

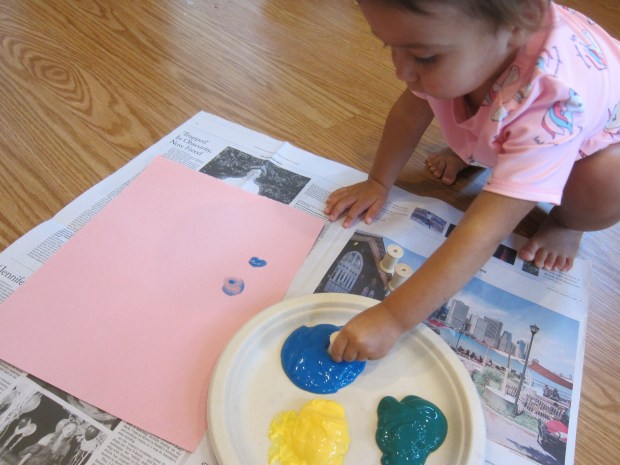
Here’s a quick variation on an old idea, a safe way to let a toddler paint with no mess. In the past, I’ve sealed paint in a zip-top bag for Veronika, but this time there was a secret piece of colored paper underneath. A colorful surprise was waiting with each line she made!

To set up, place a piece of colored construction paper in a gallon-sized zip-top bag. Squirt in paint, making sure it is a different color from the paper. The higher the contrast the better, like yellow paint with blue paper or green paint over red.

Painting Bag (1)

Seal the bag tightly, then show your toddler how to make marks in the squishy paint with a finger. The colored paper underneath will be revealed!

Painting Bag (3)

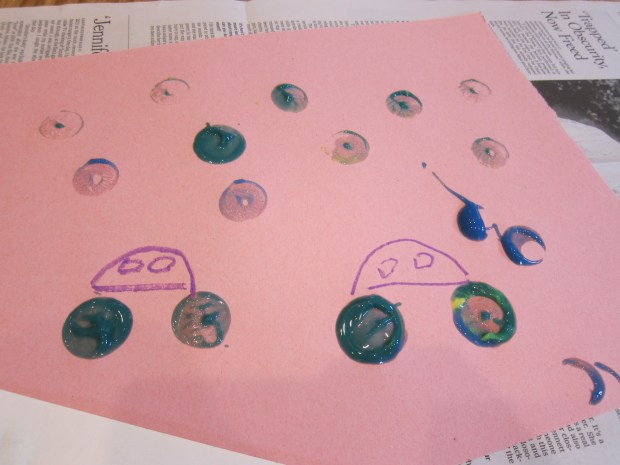
This definitely earned little sounds of surprise, and Veronika liked making shapes and wiggles appear. Of course she also just liked squishing it.

Painting Bag (7)

Or stepping on it.

Painting Bag (6)

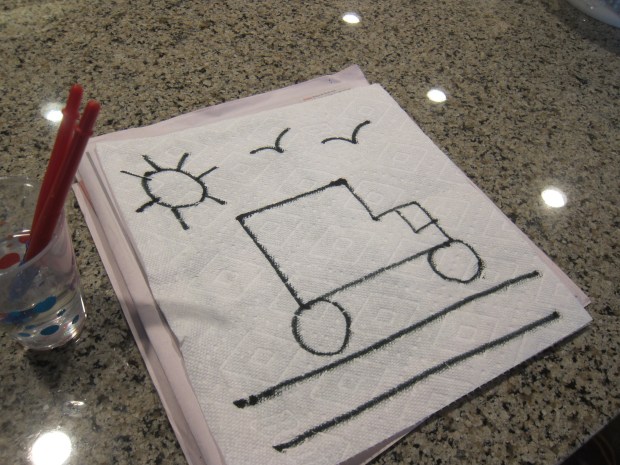
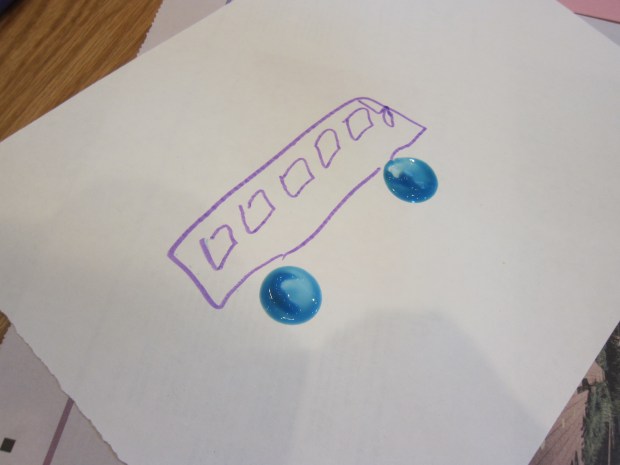
Since she’s becoming more sophisticated with her own drawings and understanding of art, she also really enjoyed when I “painted” trucks or other recognizable shapes in the bag.

Mostly, though, I let her entertain herself with this one!

Painting Bag (5)

Abstract Couch Art

Abstract Couch Art (2)

If you want to challenge your child to make art but don’t have craft supplies on hand, here’s an alternative: raid the couch and make sculptures!

To help Travis understand the idea, I first challenged him to make a burger.

With a pile of clean laundry on hand, we used two pillows as the buns and then layered in lettuce (a green shirt), carrots (an orange shirt), cheese (a white shirt), and tomato (a red shirt).

Abstract Couch Art (1)

Now it was up to Travis to think of which sculpture he could make next. This time he chose a Star Wars character, and although not the direction I would have gone in, I was proud he came up with the idea on his own.

Abstract Couch Art (3)

Pillows formed the head and body, and he added accessories (a mask, cape, and gloves) to complete the work of art.

Abstract Couch Art (4)

What will your child make from couch pillows? Please share in the comments! 

Make a Mini Troll

Troll Statue (5)

After reading in Highlights magazine about an artist who makes troll sculptures from wood and recycled materials, Travis was eager to make his own. A walk to a nearby beach was the perfect opportunity to collect pieces of bark, branches, and wood shavings on the ground.

Troll Statue (1)

We returned with a plastic bag full of pieces and now needed to design the troll! Travis loved setting this out, initially with the troll lying down.

Troll Statue (2)

He carefully arranged arms, legs, and a head.

Troll Statue (3)

I then used hot glue to make his creation stand up in 3D. We even added a little orange peel as a hat!

Troll Statue (4)

What a ferocious little troll it was, and a neat concept to boot.

Paint with Water

Paint with Water (3)

If you have a toddler who wants to paint, but you’re either some place where paint isn’t available or would be too messy, here is the perfect trick: paper towels + marker + water.

I drew a picture for Veronika on a paper towel using thick lines of black marker. The image featured a truck, since right now she’s obsessed with all things that Go!

Paint with Water (1)

I showed her how to dip a paintbrush in water, swipe it along the black line, and “paint” the picture.

Paint with Water (2)

The water will make the marker color spread on the paper towel. It’s particularly neat because the black separates out into a spectrum, leaving blue and purple hues behind too. So your toddler might really think he or she is adding color!

Paint with Water (4)

Veronika loved the way this looked, painting along the truck, the road, the sun, and more.

Paint with Water (5)

So in sum, this “painting” activity is simple but fun, with a cute resulting work of art.

Paint with Water (7)

Shark Ball Toss

Shark Ball Toss (7)

Here’s the perfect sport to bring along to your family’s next day at the beach. The homemade charm has a leg up on all the koosh ball competition!

To assemble, cut about 2 inches off the ends of two empty (1 L) soda or sparkling water water bottles. The edges were rough, so we sanded them until smooth with squares of sandpaper. Travis thought this was neat, wondering if the roughness of sandpaper can ever be completely worn away.

Shark Ball Toss (2)

Paint the bottles with two coats of blue acrylic paint; let dry overnight.

Shark Ball Toss (3)

In the morning, we drew shark features on craft foam, including jagged teeth, dorsal fins, and eyes.

Shark Ball Toss (6)

Because our wiggle eyes had long lashes and our foam was pink and purple, our sharks had a decidedly feminine appearance!

Shark Ball Toss (5)

Now simply head to the beach (or another outdoor location) and bring along a tennis ball. Toss back and forth, catching the ball in the shark “mouths”.

Shark Ball Toss (8)

A word of caution: This is hard! The players really should only be a few steps apart and it takes some practice to give the ball the right toss out of one shark’s mouth and into the other.

Shark Ball Toss (9)

So don’t worry if kids just end up rolling the tennis balls into the shark bottles. That was fun, too!

Shark Ball Toss (11)

Octopus Bottle Buddies

Octopus Bottle Buddies (10)

Travis has been a little bit homesick at camp, so we made a “buddy” to go along with him today… attached right to his water bottle!

The first step was to draw an octopus outline on craft foam, and this was tricky even for me.

Octopus Bottle Buddies (3)

I copied an example in Highlights magazine and still needed a few tries, so I didn’t expect Travis to master the shape. But he sure loved drawing on extra craft foam (little sister, too!), making this a great art session even before we moved on to assembling the rest of the craft.

Octopus Bottle Buddies (1)

As you draw, make sure the top two arms of the octopus reach up over its head and nearly touch; you’ll need to glue them into a loop that will hold on to the water bottle.

Octopus Bottle Buddies (7)

Once you’ve drawn the octopus shapes, cut them out. Next, draw accessories on additional craft foam and cut out. These shapes will be simpler for kids to help with. We included a surfboard, sunhat, and a little ukulele. Think anything beachy and tropical!

Octopus Bottle Buddies (8)

Use tacky glue or hot glue to add wiggle eyes and the foam accessories to each octopus, and glue the top two arms into a ring.

Once the glue dries, your new “buddy” slides right onto a water bottle.

Octopus Bottle Buddies (9)

Travis chose the blue one to take to camp!

Octopus Bottle Buddies (5)

Mailbox

Mailbox (8)

Veronika is very into the mail truck lately, wanting to watch our postal worker deliver the mail every chance she gets. She even got to peek inside the back of the truck! So today we recycled an old toddler favorite, with a homemade mailbox. Now that she’s older, she understands the role play involved, too.

First was the arts & crafts portion of the game: we needed to decorate a mailbox! I set out stickers and construction paper, along with an old box. She loves glue sticks and happily smeared onto strips of colored paper, which we then stuck onto the box.

Mailbox (2)

I had ocean-themed stickers, which felt appropriate here in the summertime. What a beautiful mailbox!

Mailbox (3)

I cut a slit in the top with a craft knife, and then showed Veronika how to stuff old junk mail through the slit.

Mailbox (4)

Sometimes she had to turn a letter a little to make it fit…

Mailbox (5)

…or give it an extra push to slide all the way through…

Mailbox (10)

…but she was delighted with each success.

Mailbox (9)

Time to open up the mailbox and see what she received!

Mailbox (11)

One pamphlet just happened to have images of sheep and cows, and she was so happy. “Cow is in the mail!” She wanted to send and receive this “letter” over and over.

Mailbox (6)

She also loved being able to take the lid off and put it back on all by herself, a big important toddler feeling of accomplishment.

Mailbox (13)

We then decided to write a few of our own letters for big brother Travis. She loved scribbling with marker before adding her notes to the mailbox.

Mailbox (12)

I could tell she was so proud to have her very own mailbox today, and left it out so she could return to it over the course of the afternoon.


Spool Printing

Spool Printing (6)

Veronika loves cars and trucks and all things that go, so today we had fun making prints that look just like wheels, then turning the prints into little vehicles. The perfect tool for the job? Spools!

You can use empty thread spools, or wooden ones from the craft store. I set out a paper plate with a few different colors of paint, along with sheets of craft paper and some of the spools.

Spool Printing (1)

I showed Veronika how to dip the end of the cylindrical spool into the paint, then press onto paper.  At first she just loved that this was a way to make dot paintings.

Spool Printing (2)

Next I showed her that if we drew marker shapes around a few of the dots… they looked just like wheels!

Spool Printing (4)

We made a bus and lots of silly little cars.

Spool Printing (7)

She soon decided she wanted to use marker to draw more cars. What else might the circular spool prints turn into? Please share your toddler’s creation in the comments!

Spool Printing (5)

National Lighthouse Day

National Lighthouse Day (5)

Happy National Lighthouse Day! Yes that’s a thing, and it feels appropriate that the “holiday” falls in summer, when beaches and shorelines are on everyone’s mind. Here’s a cute craft that Travis put together to celebrate.

Use white tape (or any light-colored decorative tape), to make two rings around a red plastic cup. This will be the base of your lighthouse. Turn the cup upside down.

National Lighthouse Day (1)

Cut a door and windows from black construction paper and glue on to the cup.

Now place a battery-operated tea light on top. Cover with a small plastic cup (clear is probably best, but we had a yellow one that looked neat, too!). Your lighthouse is ready to shine.

National Lighthouse Day (3)

Another fun activity? Have your child climb onto a stool (carefully!) and rotate around, flashing a flashlight. This is especially neat after dark.

Of course you’ll want to make story time all about lighthouses. Try Hello, Lighthouse or The Lighthouse Cat.

And if you can, take a trip to a real lighthouse!

mattapoisett (13)

We visited one close to home for a day trip full of fun pics and salty sea air.

National Lighthouse Day (4)

Pulled String Paintings

Pulled String Painting (7)

Travis loved testing out this novel painting method; not only was the process new and different, but the final product is a truly beautiful work of art, worthy of framing and keeping around!

To set up, fill small plastic cups with a little bit of liquid watercolor.

Pulled String Painting (1)

Cut pieces of string, and dip them into the cups, one for each color, making sure the string is completely saturated.

Pulled String Painting (2)

Working with one string at a time, place on a piece of thick paper. Cover with tracing paper, then place a small (empty) picture frame on top.

Pulled String Painting (4)

Pull quickly on the end of the string that is dangling out, and the liquid watercolor will splash down in the frame.

Pulled String Painting (5)

Travis was captivated! We repeated with three more colors, and then he decided it was finished. He loved that our red looked like a funnel, and that we had just a hint of purple.

Pulled String Painting (6)