Noodle Knowledge

Noodle Knowledge (2)

Travis’s latest Raddish Kids included this cute lesson, a chance to learn more about noodles and pasta – and the difference between them!

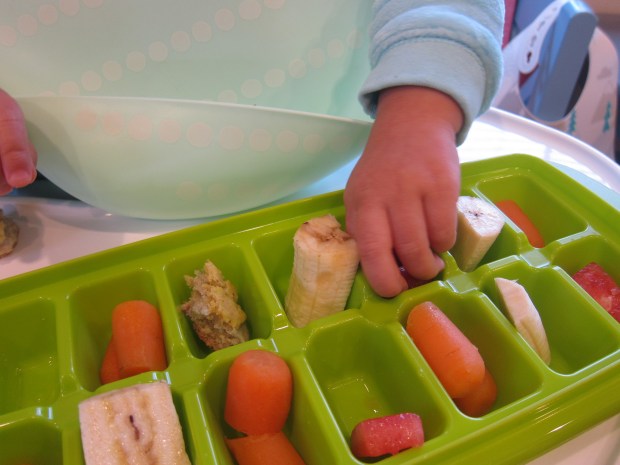
To start things off, I set out a station where he could explore a wide variety of pasta shapes and sizes.  Our array included: rotini, cavatappi, spaghetti, elbow macaroni, small shells, and penne.

Noodle Knowledge (3)

I challenged him to talk about the differences and similarities that he noticed. Some were long (spaghetti), some were short (cavatappi). Some were straight (penne), some were curly (rigatoni), etc.

Noodle Knowledge (8)

This is a fun chance to introduce your kids to the idea of a Venn diagram, showing how categories can overlap. Older kids, especially, might enjoy drawing detailed diagrams, although we kept ours simple.

Noodle Knowledge (7)

Once the exploration was done, we set up a game! Travis’s goal was to match up each pasta shape with its name, using yarn to connect them. This was also great for sight-reading!

Noodle Knowledge (6)

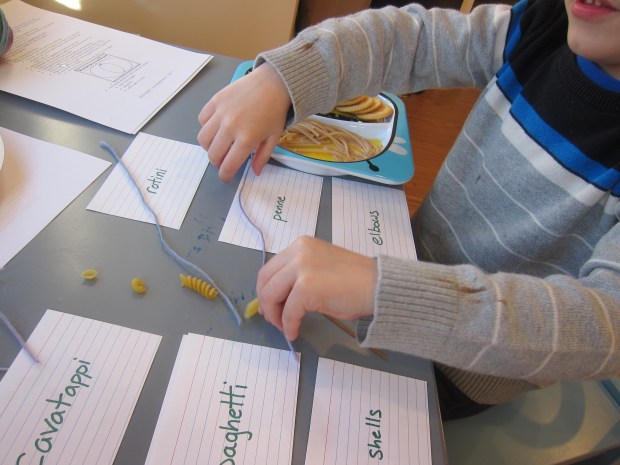
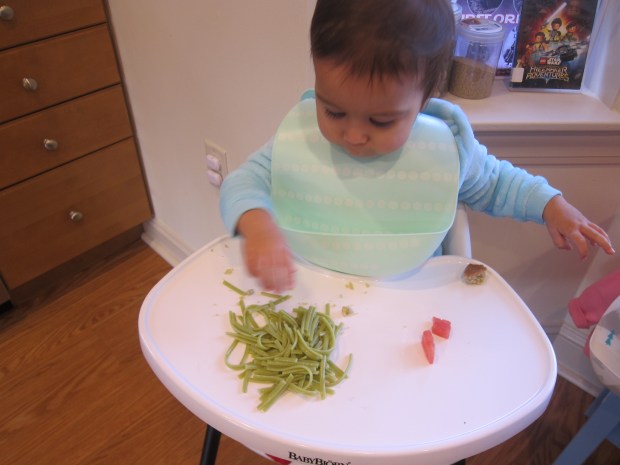
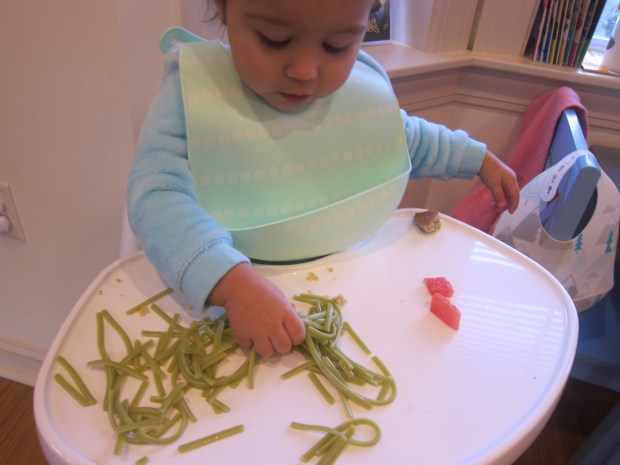
He was so into it that he wanted to snack on cooked spaghetti. This made for the perfect nosh while we watched a few suggested videos that delved deeper into the history of pasta.

Noodle Knowledge (5)

Make sure to check out a world map for a visual of key countries, like China and Italy.

Noodle Knowledge (4)

We had to finish with fun stories, of course. Raddish suggested The Great Pasta Escape by Miranda Paul and Noodle Magic by Roseanne Greenfield Thong, among others.

Noodle Knowledge (1)

I was surprised to see no mention of Strega Nona, the most classic spaghetti story I can think of, so we added that in. Afterwards, both kids wanted to play “Strega Nona” with a magic pot and leftover dry spaghetti, which was perhaps the best part of the whole lesson.

Noodle Knowledge (9)

Rainbow Jello Sensory Play

Rainbow Jello (5)

I originally intended this as a sensory project for Veronika, but it turned out that my kindergartner loved it just as much; it was a nice reminder that even though he’s into battling Star Wars Lego figures, he’s still a little boy at heart.

First you’ll need to make jel dessert in all colors of the rainbow. Regular jell-o is available in every color, but not the vegan brands. I can find vegan jel dessert in red, orange, and yellow, but for the other colors, I use clear jel dessert and add food coloring.

Rainbow Jello (1)

Prepare all the colors, then set in the fridge until firm. (Note: the green never did firm up, which may have been because I used too much food coloring and made it too watery. As a result, our sensory play had a variety of textures).

Rainbow Jello (2)

Spoon the jel desserts onto a tray in rainbow order. It won’t stay this way for long…

Rainbow Jello (4)

I placed the tray over a few towels and stripped Veronika down to a diaper – no worry about sticky clothes here – then let her loose with spoons and spatulas. She immediately got started!

Rainbow Jello (8)

As mentioned, big brother Travis wanted an equal share of this project. He couldn’t wait for a jello snack.

Rainbow Jello (7)

And just to play!

Rainbow Jello (6)

Soon the kids were scooping and stirring and mushing. They layered rainbow “cakes” and stirred up rainbow “soup”. “Soup!” Veronika proudly repeated back when Travis used the word.  There were lots of fun vocab words to use, like soupy and lumpy and blobby and wobbly.

Rainbow Jello (9)

Plus: “Yummy!” she said, whenever she got a little taste. A perfect way to fill over 30 minutes of play.

Rainbow Jello (10)

Hot Cocoa Sensory Tub

Hot Cocoa Sensory (4)

Disclaimer: This is by far the messiest sensory play I’ve undertaken with either of my children, and that’s saying a lot. But it’s worth it!

In retrospect, I would have done this activity around Christmas. Something about it felt very seasonal, perfect for the holidays, although technically it is still winter which means hot cocoa season. The original version of this game called for a container of hot cocoa mix, but it’s very hard to find a brand with no milk powder. Instead, I mixed together a tub of cocoa powder but added about 1/2 cup vanilla-flavored protein powder. This meant the mix wouldn’t be too bitter if Veronika happened to lick her fingers (which she did!). Straight cocoa powder probably won’t appeal to your little one.

To complete the set-up, I added a few gingerbread people ornaments. in keeping with the cocoa theme. If you want to keep the bin fully edible, use mini Dandies marshmallows instead. Or try gingerbread men cookies, if in stock around the holidays.

I added a funnel and a few scoops and rakes, and Veronika went to town!

Hot Cocoa Sensory (5)

This was like indoor dirt, except it smelled divine. I held the scoop up to her nose a few times to fully enjoy that chocolate-y scent, which prompted little “mmm’s” of delight.

Hot Cocoa Sensory (8)

Mostly she loved scooping through it.

Hot Cocoa Sensory (2)

Once I showed he how to fill up the funnel, she became an expert at that.

Hot Cocoa Sensory (9)

The gingerbread men were fun to put in the cocoa and bury, then dig up again. Again, I wish I’d thought to use edible marshmallows, though!

Hot Cocoa Sensory (3)

By now she had completely spooned cocoa powder all over her pants and socks. Another mea culpa: wear only a diaper next time!

Hot Cocoa Sensory (7)

Well, since we were already this messy, I figured why not take our sensory bowl from indoor “dirt” to “mud”. I poured in a little oat milk, which made the whole thing smell even better. She loved stirring and watching the powder dissolve in big bubbles.

Hot Cocoa Sensory (10)

Okay, playtime complete; now it was immediately upstairs for a wash and a change!

Kitchen Boxes

Play Kitchen (1)

Toddlers love to be your helpers, which can be adorable, but which also sometimes places them squarely under foot and in the way… like when you’re cooking in the kitchen! Encourage their eager need to be involved by setting up a play kitchen right alongside yours.

There’s no need to buy a fancy store-bought kitchen; chances are you have everything you need right at home for this game.

I saved up empty snack boxes over the course of a week and taped them shut to be Veronika’s pantry staples and “groceries”. (Note: The youngest toddlers might be happy just with these boxes and nothing else! They make great towers).

Play Kitchen (2)

Then I set up two toddler chairs side by side as her kitchen counter. Use empty large boxes if you don’t have chairs that are the right height. Her kitchen was soon outfitted with brightly colored measuring cups, a set of measuring spoons we use just for play, and other accessories like whisks and rolling pins.

Play Kitchen (3)

Soon she was very busy “cooking”!

Play Kitchen (4)

Veronika was in luck today because I finished up a bottle of vegetable oil making my recipe. This was quickly added to her kitchen. Build up a similar stock for your little one over time, adding old aprons, dish cloths, empty bottles, spare utensils, and more.

Play Kitchen (7)

As I filled muffin tins with real batter, I gave her an old cake pan to “bake” her recipe in.

Play Kitchen (10)

She was so busy and happy by my side playing this game, and never in the way!

Play Kitchen (11)

Easy Edible Paint Made with Real Fruit

Edible Fruit Paint (3)

Veronika wants to paint every time big brother gets paints and brushes, but I worry still that she’ll put the paintbrush in her mouth. With this fruit paint, there’s no need to fret; these brushes were made for tasting!

To prepare three colors of paint, I pureed a batch each of: blueberries, bananas, and kiwi. For the bananas and kiwi, I thickened the “paint” slightly with a little applesauce from a pouch, and then added a few drops of all-natural food coloring (in yellow and green, respectively) to amp up the color. Here’s the before of the kiwi:

Edible Fruit Paint (1)

Versus the after:

Edible Fruit Paint (2)

I used frozen blueberries, which pureed into a deep, thick purple that needed no embellishment. If you use fresh blueberries, you may find you also want a squeeze of applesauce and a few drops of blue food coloring.

I set out all three colors in paper cups for Veronika, along with paintbrushes and a thick piece of watercolor paper.

Edible Fruit Paint (4)

Say no more, she absolutely loved it! First she just wanted to dip the paintbrush into the blueberry paint over and over. I prompted her to think about her sense of smell as she played, the fresh fruit filling her nostrils.

Then she moved paintbrush to paper experimentally. She loved discovering she could make blobs and swirls.

Edible Fruit Paint (5)

I worried that the blueberry would stain little fingers and clothes, so I gently pushed the banana and kiwi into prime position. She was equally entranced!

Edible Fruit Paint (6)

She kept busy with this for quite some time before eventually dumping some of the kiwi paint onto the paper.

Edible Fruit Paint (9)

At this point I simply moved the paper aside and it was fun for her to smear.

Edible Fruit Paint (10)

Did she taste it? Not really, actually! I think she might have gotten a tiny lick of the banana once, but mostly she seemed happy to paint with it.

Edible Fruit Paint (7)

It was fantastic to see her so engaged with this artistically, and to know that even a nibble was worry-free.

Edible Fruit Paint (8)

Food Exploration Station

Food Explore Station (3)

The compartments of an ice cube tray are just the right size for setting up a station that allows your toddler to touch, taste, poke at, and other wise explore food! This game is great for soon after a meal so that the emphasis is on all the senses, not just on eating.

I wanted to fill the tray with a variety, but not an overwhelming amount of different objects for Veronika. I included warm cooked carrots, chilled slices of watermelon just out of the fridge, soft chunks of room temperature banana, and a crumbly cookie.

Food Explore Station (2)

Veronika wasted no time getting her hands in there! “Hot!” she said to me, feeling the carrot, quickly follow by a surprised, “Cold!” to the watermelon. She smooshed one of the banana pieces in her hand, but mostly passed that over in favor of the watermelon.

Food Explore Station (4)

The cookie certainly got a few nibbles, too. You can use any fruits or veggies (or cookies!) for this activity, or play multiple times with seasonal fruits at different times of the year. Because all of the foods were about the same size, they are fun for stacking, too.

For some slipperier tactile play, I cooked up green linguine noodles. These were great both for the texture (somewhat slimy, which can take toddlers a while to get used to) and for the color.

Food Explore Station (5)

I thought she might hesitate, but she loved mushing through the noodles with her fingers. Once she took a nibble, she looked at me with recognition. “Pasta!” she said.

Food Explore Station (6)

Don’t forget, toddlers learn about food when exploring like this. So the next time this happens…

Food Explore Station (1)

…don’t scold. It’s all about the process! And kind of like an art project, too.

Sensory Play with Frozen Veggies

Edible Frozen Veggies (3)

Not only is this game great for toddler sensory fun, it doubles as a comforting way to soothe all those teeth coming in. Veronika is currently getting 8 new chompers, in addition to the 8 front ones she’s already got, which made the timing just right.

To play, I simply opened up a bag of frozen mixed vegetables and emptied them onto an pizza tray.

Edible Frozen Veggies (2)

I added a big ladle for her to scoop with, but the lip of it was too tough to get under the veggies, so soon we switched to a regular dinner spoon.

Edible Frozen Veggies (4)

She took it from there! She loved the sound that the spoon made in the pan, shoveling through the veggie pile, and of course pushing them to the floor.

Edible Frozen Veggies (5)

The small carrots, peas, and corn will thaw pretty quickly, but remain cold enough to soothe, which means she was thrilled when she lifted the spoon to her mouth and got a taste.

Edible Frozen Veggies (7)

This became an impish game, testing if mommy was going to chide her for eating her “toys”. Not this time!

If you want to throw in some quick learning, talk about the colors of the different veggies!

Edible Frozen Veggies (6)

Mostly, though, I let her play solo; the veggies kept her happy on the kitchen floor for almost a half hour, a big win in my book!


Fruit-Filled Jigglers

Fruit Jigglers (3)

Jell-o desserts might just be the perfect sensory material for toddlers, equal parts play and edible snack! Here’s a fun twist on how Veronika has played with jell-o in the past. As always, I use the vegan jel dessert from Simply Delish.

Prepare the dessert according to package directions (we used strawberry), and pour into very shallow plates or containers as a mold.

Fruit Jigglers (1)

I added a few raspberries as “treasures” for Veronika to dig up. Any other berry or small pieces of fruit would work, too. Consider a fruit your little one hasn’t tried yet, as this game encourages taste exploration!

As I prepared dinner, I sat Veronika down in her high chair and scooped out the thin layers of jell-o. I gave her an assortment of cookie cutters, and let her go to town!

Fruit Jigglers (4)

It was fun to talk about the shapes she could make with the cookie cutters, and she did lots of poking and prodding.

Fruit Jigglers (2)

When she discovered the raspberries, she was delighted! She seemed a bit overwhelmed by the amount of jell-o on her tray, so I pared it down to one portion per cookie cutter shape.

Fruit Jigglers (5)

She grinned when she discovered the taste! This is the perfect activity to fill time while you cook.

Fruit Jigglers (6)

Melon Balls Edible Sensory Bin

Melon Sensory (1)

This sensory bin didn’t turn out quite as attractive as I hoped, but the goal of course was fun, not Instagram worthiness, and Veronika sure had fun with it. Originally I hoped to arrange the tricolor visual of round honeydew, cantaloupe, and watermelon balls in a small tray. But with all my small Tupperware in the dishwasher and short on green honeydew, I set the balls only watermelon and cantaloupe on a baking sheet instead.

I added a few scoops and spoons, as well as a chopstick spear, and set Veronika loose!

Melon Sensory (2)

She loved using the spoon first.

Melon Sensory (3)

The chopstick was novel, and she lifted the pieces of melon up and down on it.

Melon Sensory (5)

I encouraged her to get right in there with her hands, showing her how we could squeeze and squish the melon.

Melon Sensory (4)

Of course this led to the delightful discovery that it tasted good.

Melon Sensory (7)

And that it made a satisfying “splat!” when thrown against the floor.

Melon Sensory (6)

In sum, this kept my thirteen-month-old busy for quite a while, filling cups, nibbling, and enjoying.

Melon Sensory (8)

Cheery O’s!

Cheerios (4).JPG

O cereal is the deservedly one of the best first cereals for babies, and for so many reasons. The circles are easy for a little one to pick up with little fingers; they dissolve easily in the mouth, and those cute circles are just begging to be played with, too!

To wit, today at snack time I didn’t just set o cereal on Veronika’s tray; instead, I gave her two cups, one empty and one full, to turn it into a pouring and scooping game.

Cheerios (1)

She took right to it, and loved learning to pour directly from one cup to another, her best success with pouring yet.

Cheerios (3)

She also loved the small plinking sound that the cereal made if she dropped it into a cup by hand.

Cheerios (5)

And of course there is happy nibbling that takes place throughout the game! This is fast, fun, easy entertainment for any young toddler.

Cheerios (2)