Nature’s Palette

Natures Palette (9)

This beautiful activity from High Five magazine combines a craft and a way to get outdoors. It’s quite similar to a rainbow hunt we did late last summer, but sometimes it’s fun to repeat an activity as your children age; they’ll reap different rewards from it each time!

This time we started by making a proper artist’s “palette,” which immediately had Travis excited. Cut a palette shape from a file folder (I did this step for Travis, since he wasn’t sure of the shape).

Nature Palette (1)

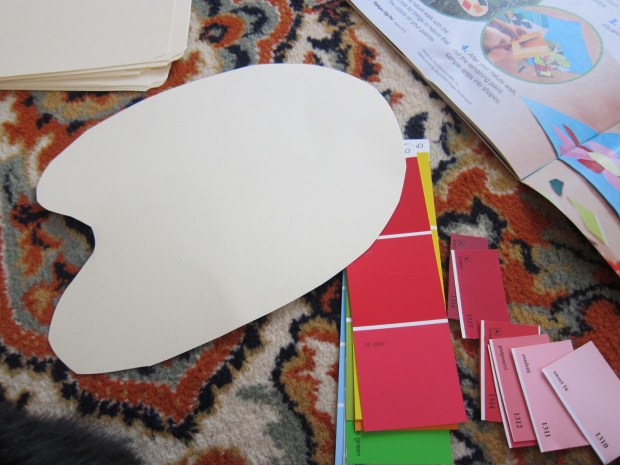
Next, cut paint chip samples (available for free at paint stores or home good stores) into pieces, and arrange on your palette. Travis was thrilled to use grown-up scissors, with a guiding hand.

Nature Palette (2)

Little drops of color!

Nature Palette (7)

Travis immediately seized upon the fun to be had with the remaining paint chips and extra file folders, and was soon making collages and creations.

Nature Palette (8)

He mostly cut squares and rectangles, but I helped him cut a few nature shapes like leaves and flowers, and we arranged them in pretty nature pictures.

Nature Palette (6)

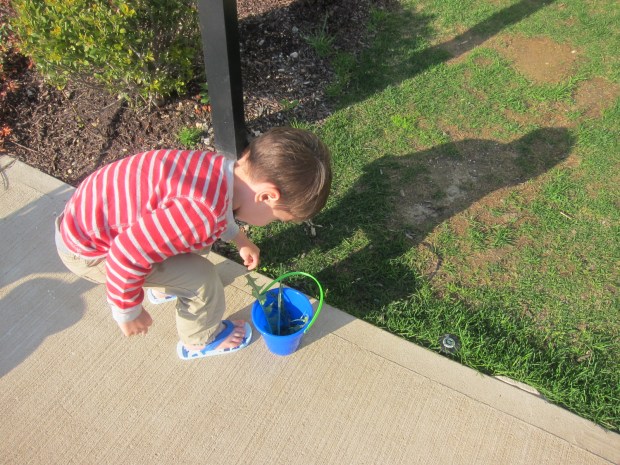
Then came the real nature walk! Instead of going into the forest, I detoured us to a local botanical garden, knowing we’d find the full rainbow of colors there. Travis loved seeking out different shades on his palette.

Natures Palette (10)

We thought we might have to use the sky as our blue, until stumbling upon the perfect hydrangea!

Natures Palette (12)

In sum, this activity served as the prompt for a perfect mother-son summer afternoon.

Natures Palette (11)


Bird Cafe


Bird Cafe (7)

Our latest project (from High Five magazine) wasn’t as big a hit as past crafts, perhaps because Travis and I have made bird feeders before and it felt a bit ho-hum to him. But there’s never anything wrong with learning a new way to feed our feathered friends, and this one is easy to put together!

Save any clear plastic food container; shallow is better, like the kind used for nuts or dried fruit. Rinse and dry.

Cut a rectangle from the center of an 8×5-inch piece of craft foam. This step was a bit tricky for Travis, but he loved cutting separate pieces of craft foam into free-form shapes while I worked.

Bird Cafe (1)

Tape the foam around your container, then wrap the top of the craft foam around the lid and tape in place. The craft foam now acts as the “wall” connecting the bottom and the lid roof.

BIrd Cafe (4)

Hole punch the foam near the lid on each side, and thread through yarn or string to hang your feeder.

BIrd Cafe (5)

As the final touch, tape on a second sheet of craft foam bent into a “roof”.

Bird Cafe (6)

We’re hoping to get many a summer visitor!


Green Time: Go to the Park

Go to Park (3)

Sometimes the simplest moments with our kids can be the most beautiful, and this “Green Time” suggestion from our May issue of Ranger Rick Jr. was a reminder in just that!

The task? Simply to go to the park. This might sound like something you do with your kids anyway, but this time we made things different.

I deliberately chose a park without any facilities – no playground, no swings, nothing built up. Instead, we showed up with a blanket to sit on and only a few other goodies.

Go to Park (6)

Based on Ranger Rick’s suggestions, we brought along Travis’s tricycle to ride through the grass:

Go to Park (1)

A kite for flying:

Go to Park (2)

And a mitt and soft balls to practice playing catch.

Go to Park (7)

Nothing makes the afternoon better than an iced tea snack with mama. And reading a few Ranger Rick Jr. stories of course.

Go to Park (4)

We easily spent an hour in this park, just the two of us (and a new ladybug friend!).

Go to Park (8)

What’s your favorite (non-playground) park activity with your kids? Please share in the comments!

Wooden Spoon Garden Stakes

Garden Stakes (4)

Several weeks back, we got ambitious and planted a shoebox vegetable garden. I had little hope that our garden would yield real results, without deeper soil to transplant into, but that hasn’t stopped Travis from loving the vegetable stalks and leaves that managed to sprout!

We started to forgot what was what, so decided to make these cute garden stakes to label the veggies. If you have a real vegetable garden, make as many as you need to label all your plants!

I encouraged Travis to think about what each veggie really looked like, so he proudly painted up and down with orange for carrots:

Garden Stakes (1)

And with green for zucchini.

Garden Stakes (6)

On the other side of each spoon, I painted a slightly more recognizable version of each veggie. We had no red paint, or I would have added tomatoes as well.

Garden Stakes (3)

Travis very proudly planted the stakes in our small “garden”, which we continue to water. As always, it’s great to teach kids where their food comes from!

Garden Stakes (5)


Alphabet Rocks

Alphabet Rocks (3)

I’ve been wanting to make these adorable letter-learning rocks for Travis for weeks now, but it required finding 26 relatively smooth stones, and we simply hadn’t had a chance to get to the beach. Finally on a sunny spring weekend we headed to the shore, perfect for collecting rocks.

Sands (3).JPG

Travis adored the collection process, finding rocks and shells and other treasures along the way. Do take care in selecting your rocks. You need them to be large enough and flat enough to paint the letters of the alphabet. Ultimately some of mine worked better than others!

Alphabet Rocks (1)

Once home, we washed the rocks and left them to dry overnight. The next day I painted them with lower case letters using acrylic paints. You can alternate several colors if you prefer. My original plan was to alternate blue and gold paint, but the gold didn’t show up well on several rocks, so all blue it was!

For a decorative touch, add dots of white paint around each letter. Once dry, make a black dot in the center with a sharpie.

Alphabet Rocks (2)

Now the rocks were ready for play!

Alphabet Rocks (4)

There’s so much you can do with these. In addition to just spelling sight words (your child’s name, go, stop etc.) we used the rocks for two specific purposes.

The first was as a learning aid to our Usborne Starting to Read Pack.

Alphabet Rocks (5)

Travis is very tactile, so having to select the rocks that went with each word on the page helped reinforce what he was seeing.

Alphabet Rocks (6)

We also loved using the rocks as a supplement to activity worksheets from Education.com. If you’re not familiar with the site, it’s full of activities and lesson plans for children, ages preschool through middle school. For example, kids will love to discover and learn new words with reading-to-picture match up sheets. Be sure and check out Education.com more learning resources just like the one we used.

For our purposes, Travis first found the alphabet rocks that corresponded with each word before we matched it with its picture.

Alphabet Rocks (8)

This made it so much more tactile and engaging for him than a two-dimensional activity.

Alphabet Rocks (9)

Overall, these rocks are a fantastic tool to reinforce letter learning and early reading. How do you plan to use the rocks? Please share in the comments!

Nature Hide and Seek Game

Nature Hide (5).JPG

I love activities that combine a nature walk with a later project or game, and this one does precisely that. We set off to find brown and green items from nature that would camouflage two empty toilet paper tubes.

Okay, maybe walking around our apartment complex doesn’t quite count as a nature walk… But there’s always green things to find!

Nature Hide (1)

We returned with a bucket full of treasures, and I laid them out on the table so Travis could take stock.

Nature Hide (2)

He loved using glue and deciding which leaves should go where.

Nature Hide (3)

We left our little camo tubes to dry overnight, then headed off on a walk the next afternoon.

Nature Hide (4)

Travis was the hider first… Perhaps he didn’t find the most secretive hiding place, but it was adorable to watch him try.

Nature Hide (6)

Mommy hid the treasures next, and Travis set off to find them.

Nature Hide (8)

Gotcha!

Nature Hide (7)

Overall this was simple, fun, and a neat way to throw in a little lesson about how animals and insects use camouflage to hide in the wild, too.

Water Blast Game

Water Squirt (5)

We headed outside this morning for some good old-fashioned fun in the sun – and what could be easier than a squirt gun?

To set up a simple target practice, all you need is a piece of Styrofoam and golf tees. Travis loved setting the pegs up in the Styrofoam!

Water Squirt (1)

Balance ping pong or golf balls on the pegs, then let your little one take aim.

Water Squirt (2)

Travis loved trying this from far back…

Water Squirt (4)

…and sometimes from right up close!

Water Squirt (3)

Then he told me he’d invented a new game: “Look, Mom, I’m moving the ball around in the grass!”

Water Squirt (6)

Of course then there was just the delight of shooting the water gun for a while. A great way to get some sunshine!

Water Squirt (7)

Make a Nest

Nest (1)

Here’s just a quick little idea for the next time you’re out in the yard – make a springtime reading nest!

We wanted a well-defined base, so I saved some brown packing paper and wound that into a nest shape. If you prefer, even the outline of your nest can come from nature!

On top we added finds from nature – sticks, a few dandelions, and leaves. Add pine cones, pine needles, or anything else you can find as well.

Nest (3)

We lined our “nest” with blankets and added our favorite book about on nature. Now sit in the sun and enjoy!

Nest (2)

Green Time: Counting Walk

Counting Walk (5).JPG

Well, here we are in April but we’re just now getting the chance – a sunny, warm day! – to go on our Green Time adventure from March’s issue of Ranger Rick Jr. – a counting walk!

The magazine included a list of suggested things to count as you take a walk outside, including mailboxes, fire hydrants, and squirrels. We wanted a nice warm day so we’d be more likely to see a couple items on the list like dogs (out for a walk) and bicycle riders.

As we kept a tally of each item, I helped Travis decide what number was one higher than the number we’d said before.

By far we found the most mailboxes – 10!

Counting Walk (1)

Meanwhile Travis loved spotting hydrants – 2!

Counting Walk (3)

We nearly thought we’d end the walk with zero bicycles until a man went cycling past us. Travis was very proud to make the tally.

Counting Walk (4)

And because he loves them, Travis decided we needed to count pickup trucks in driveways as well – for a grand total of 7.

Overall, this was a great exercise – not just for the legs but for the mind as well!

Counting Walk (2)


Pinecone Hedgehog

Pinecone Hedgehog (4).JPG

Finally we have treasures from our first foray into spring nature walks! What animal did we bring home from our little “safari”? We decided to turn these pinecones into hedgehogs!

First, cut pipe cleaners into pieces about 2 inches in length and set out a cup or dish of white glue.

Pinecone Hedgehog (1)

Travis worked to dip the end of each pipe cleaner into the glue and we nestled them between the scales of the pinecone.

Pinecone Hedgehog (2)

A few finishing touches were all the hedgehog needed. A little glue helped us add a pom pom nose and felt pieces for ears.

To affix googly eyes, we first bent a small piece of pipe cleaner in half, then glued on an eye. Wedge the pipe cleaner ends into the pinecone with a little more glue to hold in place.

Pinecone Hedgehog (3)

What a cute critter – a little prickly though!

Pinecone Hedgehog (5)