Little White Duck

little-white-duck-2

Our recent play with a Farm kit from Koala Crate inspired this little craft. I always love crafts that feature handprints, turning the duck into a memento instead of just another crafty project.

To start, trace your child’s hands and one foot on paper; cut out.

little-white-duck-3

Glue the pieces down so the foot is the body of a duck and the hands are his two wings; toddlers will need help with this step to get the alignment right, but preschoolers can do so on their own!

little-white-duck-5

Now came Travis’s favorite part: ripping up toilet paper or tissue paper into small pieces to be the duck’s feathers. We dolloped glue all over our white duck, and pressed on his feathers.

little-white-duck-4

Once the feathers dried, Travis painted on two black eyes and orange “feet”, although he got a bit creative with the placement of the feet. Again, part of the charm of these projects is seeing the way kids interpret them!

little-white-duck-1

Overall, super cute and sure to adorn our fridge for a while.

Peanut Butter-Topped Bananas

peanut-butter-banana-3

It’s National Peanut Butter Lover’s Day, so we topped our bananas with peanut butter frosting, almost like cupcakes!

Travis loved helping to slice a banana. Give your child one banana to practice on, while you cut another into pieces about 1-inch wide.

peanut-butter-banana-1

Place peanut butter in a zip-top bag and cut a hole in one corner of the bag; squeeze like frosting onto the banana pieces.

peanut-butter-banana-2

Hint: Fill a second bag with peanut butter for your child to squeeze all over the cutting board, just for fun!

We topped our “cupcakes” with a sprinkle of shredded coconut and a raspberry.

What peanut butter creation do you love to make? Please share in the comments!

E Week!

E week (24).JPG

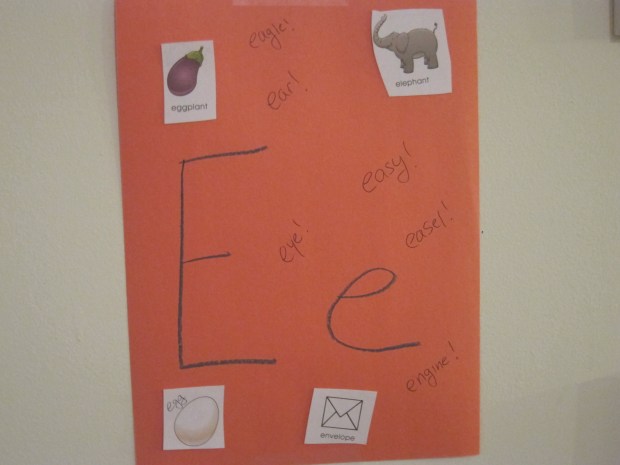
We’re back where we left off a few weeks ago, and closing in on the end (er, beginning) of the alphabet on our Letter of the Week journey! Read on for what filled our E week…

e-week-22

Envelope/Email: This is the perfect week to play games involving both the old-fashioned and new-fangled ways of sending and receiving letters. Travis loves his toy mailbox, and I pulled out old business envelopes for him to play with and decorate as well.

e-week-18

But kids also need to know how to use keyboards in this era, so why not make it a game? Travis loves typing “emails” in big font and colors on my computer, and then we printed them out! Whether you have toy keyboards or old real ones for your child to type away at, doing so encourages imagination and early computer skills.

e-week-1

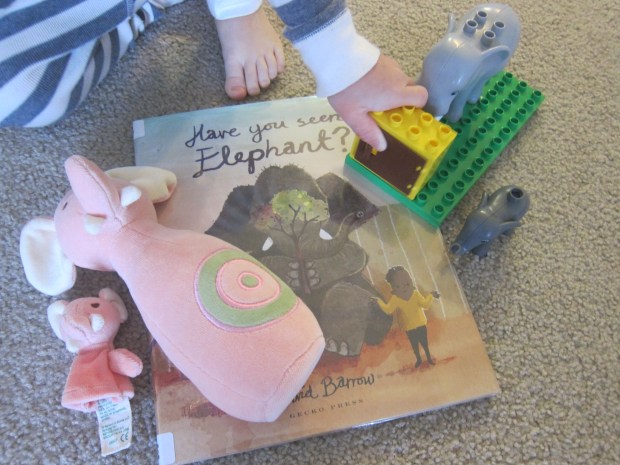
Elephant: I pulled out all the random elephant toys around the house (Duplo, a few stuffed ellies, etc.), but better yet, get some exercise and pretend you’re an elephant. Need the perfect song to dance to? Check out this classic, and get some exercise!

e-week-11

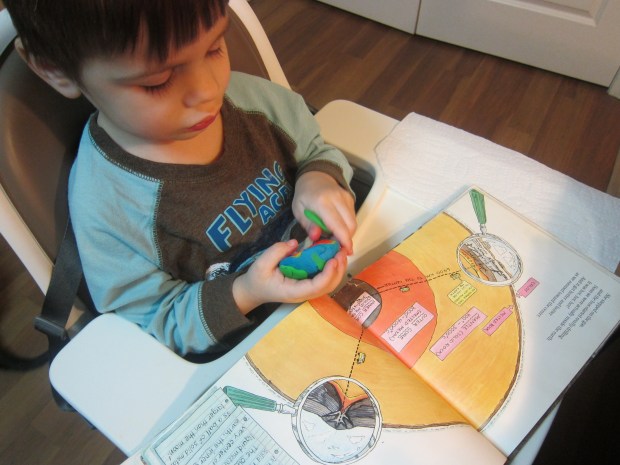
Exercise: Speaking of exercise, we happened to have the perfect action game in an issue of High Five magazine, pictured above, but do any motions that get your toddler exercising this week – jumping, running, waving, hopping, you name it.

e-week-10

Don’t forget stomping like an elephant! In sum, the perfect way to release some energy here in the winter.

e-week-19

Empty/Everything: In a quick little game, I illustrated the concepts of empty versus everything, using toy cars and little toy garages. One was empty, and one had every car, and then it was up to Travis to make the latter empty and the former full. Use whatever toy will most engage your child’s interest to play with these concepts.

e-week-5

Ear: Play name that tune, using only your ears to guess a song after a few bars. This is a great game for car rides, incidentally. You can also emphasize the other things you hear with your ear this week. Some prominent sounds in our week included a piano metronome and a loud dump truck!

easy-collage-5

Easy: Parenting can be hard… so this week, do something easy. An easy project that is! Travis made a collage with no glue required when I laid out a sheet of sticky contact paper for him. He was very deliberate with his placement of the materials I left out.

easy-collage-8

When he declared it finished, I folded the contact paper over itself and he could carry it around – no waiting for glue to dry!

e-week-3

Engine: Toy trains came out of the toy bin this week of course. Cap off any engine play with a reading of the beloved classic The Little Engine That Could.

e-week-23

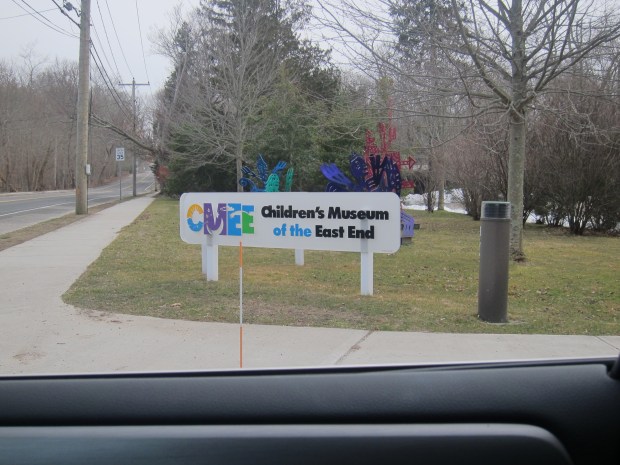
East: I gave a tiny lesson on north/south/east/west, since Travis has a compass he loves. So take a field trip to the east side of your town, whatever that means where you live… This was the perfect excuse for us to drive to a rather appropriately named museum:

100-happy-54

And onto our weekly e-e-extras:

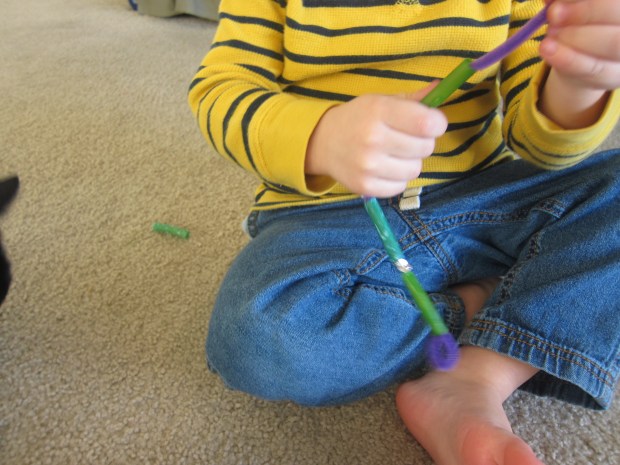
Fine art: Travis was not at all into the project I laid out, a recycled egg carton to be made into an egg carton caterpillar. Your kid may love it though! Cut an egg carton in half and discard the flat top. Decorate with pompoms to make a fuzzy little caterpillar. We added two pipe cleaner antennae, and I thought it would be fun to color it in with crayons as well, but this proved tricky on the bumpy surface; next time I would use paint before gluing on the pom poms.

e-week-15

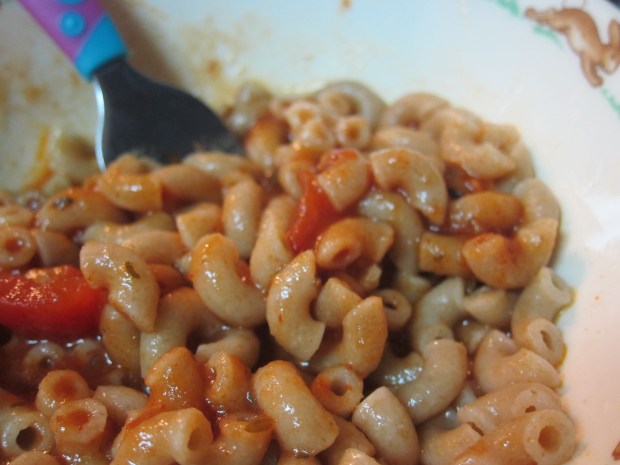
Food: Save some of the elbow macaroni from your estimating game (see Math, below) for dinner one night. I also made breaded eggplant sticks. And of course, you can emphasize the word EAT every time you do so all week.

e-week-16

Books: Travis laughed so hard for Egg Drop, by Mini Grey, that I thought we might never return it to the library. Other cute picks included Toes, Ears, Nose by Marion Dane Bauer, A Bald Eagle’s World by Caroline Arnold, The Eye Book by Dr. Seuss, and Have You Seen Elephant? by David Barrow

e-week-12

Songs: Travis got the giggles listening to The Elephant Song, and also loves Everything Grows by Raffi, a heartwarming classic.

Math: It was a little advanced, but I introduced Travis to estimating. Don’t estimate just any old item though – use elbow macaroni. Rather than estimate exact numbers, Travis was able to estimate if there was closer to 1 or closer to 10 in a cup, or to estimate if the cup had a little or a lot.

e-week-6

Preschoolers can practice estimating exact numbers! Either way, you’re sure to have fun with a dish or cup full of elbows for a while afterwards, because #toddler.

e-week-9

We’ll see you next week for the letter D!

Earth Exploration

earth-explore-5

Since Travis loved volcano play so much recently, this week I took him deeper inside the Earth, to discover all the layers that sit under and produce that molten lava.

In perfect timing, we just received Usborne Books & More’s Children’s Encyclopedia, which not only had a section featuring the Earth’s layers, but is also QR linked. That meant we could further explore neat (and quirky) videos describing Earth’s layers: from inner core to outer core to mantle to crust to oceans/land.

earth-explore-3

Now it was time to model that out for Travis! I used play dough, starting with a tiny red ball for the inner core, wrapping that in orange for the outer core, yellow for the mantle/crust, and then blue ocean and green continents.

earth-explore-1

Travis was busy playing with play dough on his own while I worked, but then got very excited when I asked if he wanted to slice into the Earth.

earth-explore-4

We used floss to neatly slice it open, so Travis could point to all the different layers.

earth-explore-6

I will confess that it wasn’t long before our planet Earth looked like this:

earth-explore-7

He then wanted to make many mini planets of his own though, and sliced them open with a plastic knife. Although the topic was a bit advanced for a 2.5 year old, it’s never too early to introduce the idea that the Earth isn’t flat, right?

earth-explore-8

Continue your exploration with other kids’ books, including Magic School Bus Inside the Earth, or Usborne’s Shine-a-Light Secrets of Our Earth and See Inside Planet Earth.

IMG_0026.JPG

Breaded Eggplant Sticks

Breaded Eggplant (1).JPG

If you haven’t found a way to get your kiddos to eat eggplant, try this recipe, which mimics mozzarella sticks.

Ingredients:

  • 1 medium eggplant
  • 1/2 cup flour
  • 2 Ener-G eggs
  • 1/3 cup dry breadcrumbs
  • 1/4 cup nutritional yeast
  1. Peel the eggplant and cut into strips, about 1/2 inch wide by 2 inches long. Set aside.
  2. Arrange 3 bowls on the counter: one with the flour, one with the Ener-G eggs, and one with a mix of the breadcrumbs and “nooch”.
  3. Working with one eggplant piece at a time, dip in the flour, then the egg, then the breadcrumb mixture, and place on a wire rack coated with cooking spray. Repeat with the remaining eggplant. Place the wire rack directly over a baking sheet.
  4. Bake at 400 degrees F for 25 minutes, until lightly browned. Serve with lots of pizza sauce for dipping!

Pasta & Beads Bracelets

pasta-bracelets-12

Using that big batch of Kool-Aid dyed pasta we made, Travis helped put together beautiful food art jewelry over the weekend!

When our batch of pasta was first dry, he simply loved stirring through it with his hands, so I let him have fun that way for some time before even introducing the notion of bracelet making.

pasta-bracelets-3

When the novelty wore off, I asked if he wanted to thread the pasta onto pipe cleaners. I made a small loop on one end of each pipe cleaner so the pasta wouldn’t slip off.

pasta-bracelets-2

To my surprise, he was very deliberate about choosing which items to use. Our blue pasta came out a little funny (the Kool-Aid powder sort of clumped together), but that turned out to be Travis’s favorite, so he wanted to make an all-blue bracelet!

pasta-bracelets-5

He loved threading the pasta so much that he wasn’t that interested in the beads I had laid out until the very end; your jewelry maker can alternate pasta and beads as much as they like!

pasta-bracelets-11

When the bracelets are done, simply twist the end of the pipe cleaner around the loop you created to start (you can tuck the pokey bit inside a ziti tube to avoid any metal pricks for the wearer).

pasta-bracelets-9

Travis also made up his very own creation – a “headband”!

pasta-bracelets-10

Overall, this kept us busy for quite some time – a great weekend family project.

pasta-bracelets-8


Ice Excavation

ice-excavate-4

This morning we had some fun with a little dinosaur skull we recently purchased. Ahead of time, I put the skull into a dixie cup and filled the cup with water, then left it in the freezer overnight. I did the same with a rock to be a “fossil” and a little plastic lizard, for lack of any other dinosaur “bones”!

In the morning, I asked Travis if he wanted to be a paleontologist and excavate dinosaurs from the ice. How, I asked him, would we get them out?

ice-excavate-1

He loved the puzzle behind this game more than I thought, asking me which tools we could use. I gave him cups of warm water, a spoon, an eye dropper, and a little (child-safe) chisel.

ice-excavate-5

I was so proud of how patient he was with our “excavation! I thought he might just pour the warm water onto the ice, but he loved spooning it carefully, and watching the toys be freed little by little.

ice-excavate-3

The best was when our T-rex was nearly out, but a final chunk of ice remained in its jaws – Travis loved reaching in to pull it out.

ice-excavate-7

A cute game for the imagination and for a tiny intro to archaeology.

Pudding Paint

pudding-paint-2

Travis has surprised me recently, more into messy, hands-on activities than educational ones, but I’m more than happy to indulge him. What could be a better, more rewarding mess for tots than pudding paint? When you’re done playing, you’ll have a portion left over for a tasty snack!

I made vanilla pudding from European Gourmet Organic’s mix. It was easy to whip up in the evening, and then I let it chill overnight.

When we were ready to play, Travis helped me divide the pudding into 4 containers – 3 to color and 1 to set aside for snack time! He was practically shaking with excitement when I asked him to help me add food coloring – we used the yellow, red, and green from Color Kitchen.

pudding-paint-1

To my surprise, he was way more into just playing with the pudding than painting with it, even though I laid down paintbrushes and paper.

pudding-paint-3

Instead, he loved pouring the pudding from one cup to the other and seeing what colors he made, scooping it out with a teaspoon, and stirring it.

pudding-paint-5

Inevitably, he also dipped his fingers in!

pudding-paint-6

When this led to clean-up in the bath, we decided why not… and brought in the remainder of the pudding paint to paint the tub. It was easy to rinse off with water and a quick wipe after!

Finally, it was time to enjoy the final pudding portion as a snack, resulting in huge smiles. A great activity all around. If we do it again, I’ll be curious to see if he’s more into the painting itself!

pudding-paint-4

What does your child like to do with pudding paint? Please share in the comments!

“Be Mine” Fro-Yo Bark

Be Mine Bark (3).JPG
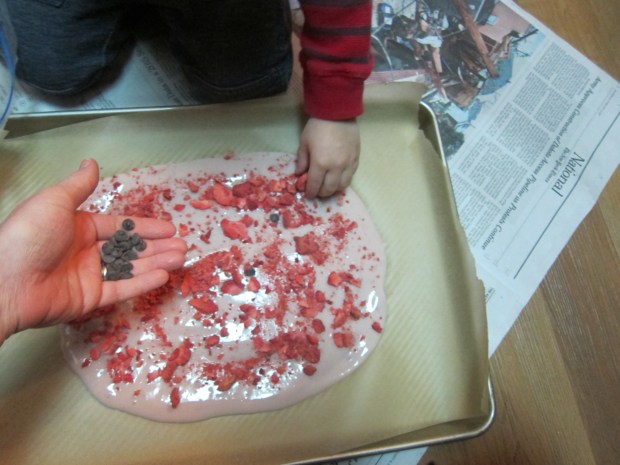
A pink-hued frozen treat that’s just right for Valentine’s Day, the base of this “bark” is made with non-dairy yogurt. For an even healthier twist, use plain unsweetened yogurt (such as Nancy’s) and then stir in pureed fresh raspberries for the pink coloring. However, I took a shortcut and used the soy raspberry yogurt from Stonyfield Farm. There are lots of steps that kids will love helping with – crushing the strawberries and sprinkling on the toppings, especially!

Ingredients:

  • 1 and 1/2 cups non-dairy raspberry yogurt
  • 3 tablespoons agave nectar
  • 3/4 cup freeze-dried strawberries
  • 1/4 cup vegan chocolate chips
  • 2 tablespoons shredded coconut
  1. In a bowl, whisk together the yogurt and agave. Spread the mixture into a thin rectangle on a baking sheet lined with parchment paper.
  2. Place the strawberries in a zip-top bag and seal; pound with a mallet until crushed.
  3. Sprinkle the strawberries evenly over the yogurt, along with the chocolate chips and coconut.
  4. Transfer the baking sheet to the freezer and freeze for 3 hours.
  5. Break the bark into about pieces, and then quickly transfer to a zip-top plastic bag. Store in the freezer until ready to share with your Valentine.

A super sweet recipe idea from Parents magazine!

be-mine-bark-1

Chunky Monkey Smoothie

chunky-monkey-smoothie

This is a power-packed smoothie that my son and husband both love! One batch makes enough for about 2 adult portions or about 4 child-sized portions. Look for vegan protein powder brands such as Vega or Biochem Fitness.

Ingredients:

  • 2 cups frozen banana slices
  • 1 cup loosely-packed baby spinach
  • 1/4 cup cashew butter
  • 3 tablespoons chocolate protein powder
  • 3 tablespoons shredded coconut
  • 2 tablespoons cocoa powder
  • 1 tablespoon maple syrup
  • 2 cups plain coconut milk
  1. Combine all of the ingredients in a blender and process until smooth. Enjoy!