Flying Paper, Two Ways

Flipping Fish (6)

Here are two fun ways to harness the power of paper and watch things take flight.

Both of these projects are far less involved than the rockets and planes Travis and I have made recently, but sometimes you just need something simple to fill a lazy morning.

First we made a school of  “flipping fishies”.

Flipping Fish (2)

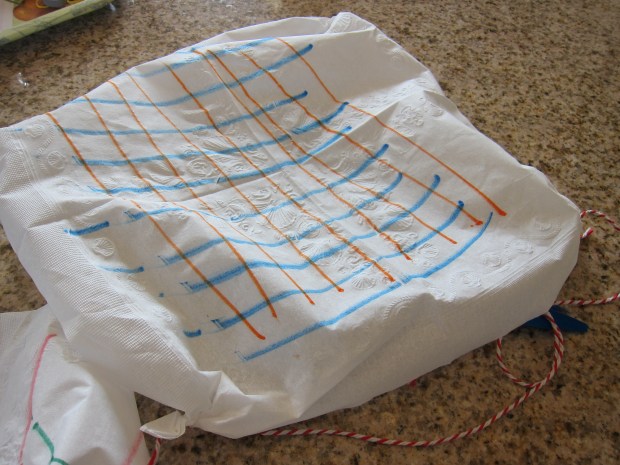
Draw rectangles on white paper and color in. The more colors the better!

Flipping Fish (3)

Cut out the rectangles, and cut a notch on each end, facing in opposite directions.

Flipping Fish (4)

Slot these notches together and you have fish. Soon we had mommies, daddies, and baby fish.

Flipping Fish (7)

Toss them in the air and watch them whirl!

Flipping Fish (5)

Interestingly, we discovered that our baby fish swirled much better than the bigger ones we made.

Flipping Fish (8)

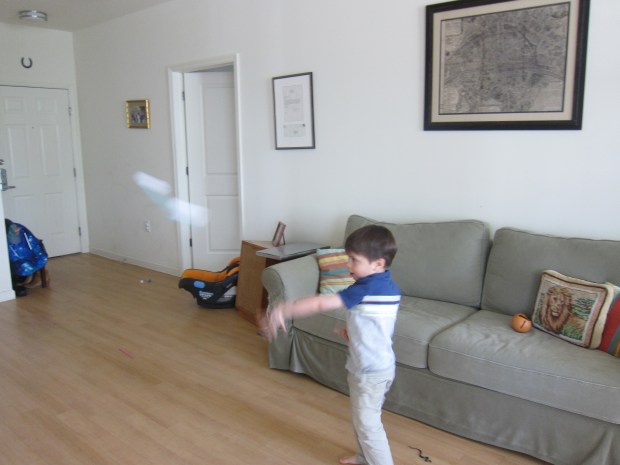
Next up, we did a repeat of a flying straw we’d made recently with a Kiwi Crate; as with our repeat of the Balloon Rocket, this time we used wide (“milkshake”) straws for better effect.

Cutting out rectangles was great practice for Travis to cut in straight lines!

Flying Straw (1)

For each straw, make one long rectangle, and one short; tape these into circles, and tape onto the straws.

Flying Straw (2)

Hold your straw so the small circle is at the front – and let it soar!

Flying Straw (4)

Those paper circles really catch the wind, and will carry your straw across a room. It’s fun to compare these to a plain old straw, which nose-dives right down.

Flying Straw (5)

Happy flying!

Paper Parachutes

Paper Parachutes (3).JPG

Travis and I recently made fabric parachutes that were a bit complicated and tangled easily while soaring down. Today we wanted something simpler, because the goal wasn’t so much about the parachute itself as it was to test how to make a parachute fall faster.

For our experiment, we quickly put together paper napkin parachutes.

Decorate your napkins with markers first.

Paper Parachutes (1)

Travis quickly learned that you need to be gentle drawing on napkins, and was proud when he got the hang of it!

Paper Parachutes (4)

Cut 4 equal lengths of string for each parachute, and tie around the napkin corners.

Paper Parachutes (2)

Gather the four lengths of string together in the center, and tie around any small object. Our “contestants” were a feather and a rock. But if you want, multiple toys can get in on the action; this game would be great with Lego people!

Paper Parachutes (5)

Travis made his hypothesis: that the rock parachute would fall faster than the feather one.  So we headed outside to test it out! A fenced-in overlook made the perfect launch site.

Paper Parachutes (6)

Even in a still photo you can see the feather parachute lazily drifting down as the rock plummets to the ground.

Paper Parachutes (7)

The difference here was extremely stark, of course. As mentioned, your kids might want to do multiple launches with items closer in weight. Enjoy the discoveries!

Hands Day

Hands Day (4)

One fun exercise to do with your baby is to pick a body part and devote the day to it. So today, it was all about hands for me and Veronika!

To start, I sang nursery rhymes that prominently feature hands. Examples include Where is Thumbkin or If You’re Happy and You Know It.

Hands Day (1)

For the latter, I changed the words so all the versus applied to hands: if you’re happy wiggle your fingers; shake your hands; etc.

Hands Day (3)

Next we read books that featured hands. There are lots of great body parts books for babies, so turn to the relevant pages and focus on those.

Hands Day (7)

I pointed to the hands of the people in the illustrations.

Hands Day (5)

I also pointed out hands throughout the day. Mommy is cooking with her hands. Mommy is writing with her hands.

Hands Day (2)

If you have paintings around the house with hands, show baby those, too!

Hands Day (8)

Sidewalk Constellations and Mini-Books

Sidewalk Constellation(5).JPG

It was a beautiful morning for sidewalk chalk art, and to add purpose to Travis’s art, I decided to throw in a little STEM learning, too!

We headed outside with our book of constellations, and I challenged him to lay out shells (rocks would work well, too) to represent each star in the pictures. We started with the Big Dipper.

Sidewalk Constellation (6)

Could he now connect the lines, following along with the picture in our book? This was a bit of a challenge for Travis, who had to consult the picture between each line, but he ended up with a great dipper.

Sidewalk Constellation (7)

The Southern Cross was next. He loved using big shells for two of the stars, and had an a-ha moment when he figured out which way he should draw his chalk lines.

Sidewalk Constellation (8)

Then we got silly and made up new constellations. I let his imagination run wild, and soon we had a snake constellation:

Sidewalk Constellation (1)

And a ninja constellation:

Sidewalk Constellation (9)

Make sure you take pictures of all your artwork before you head inside! I then had these printed so we could put them into a booklet.

Sidewalk Constellation(3)

Add one picture per page, along with a fact or two about that constellation.

Sidewalk Constellation (b)

We left a page blank, for future imaginative additions!

Sidewalk Constellation (c)

These mini-books will serve both as a memory capsule of your day and for storytime down the road.

Sidewalk Constellation (d)

Try a Hike with a Carrier

Try Carrier (7).JPG

Today was hiking day for Veronika!

A baby carrier is such a great investment for experiences like these; whether the one you choose is worn on the front or the back, and whether it has baby tummy-facing or facing out, I highly encourage a hike. There is so much for your baby to learn about in nature!

Although Veronika has had plenty of moments in the carrier, today we made a big event of a family walk in the woods. Big brother Travis loved heading off on the adventure!

Try Carrier (5)

Stop to point out marvels of nature, like the face in this tree.

Try Carrier (6)

Or the dappled sunlight on these roots.

Try Carrier (8)

We spotted lots of little chipmunks and she loved watching them scurry.

Eventually the motion did lull her to sleep, and this will likely happen to your baby on a hike too… And that’s not a bad thing! Let baby nap while you take in the calm of nature. Once she was up about forty-five minutes later, her big eyes drank in the surroundings.

Try Carrier (3)

What an adventure!

Try Carrier (1)

Where have you taken your baby in a carrier? Please share in the comments!

Introduce Books with Texture and Noise

Books with Texture (2)

Veronika already has a few books in her library that feature texture and noise, but I gifted her with a few new ones because she can approach them in a different way these days: reading solo! Interactive touch and sound will keep a seven-month-old happily entertained, even if you’re busy getting things done around the house, or on the go.

But first we read them together, of course. She loved the bright pictures and her fingers immediately went for textural elements, like soft fur or shiny metal.

Books with Texture (1)

I pressed each sound button, which got a look of wonder from her each time, and described what she was hearing and seeing.

Books with Texture (4)

Pretty soon, she was flipping through the pages and narrating this book to herself – a sight that makes my heart stop every time!

Books with Texture (8)

I also bought a smaller book that’s perfect for car rides or stroller rides. The soft pages fit in her hands perfectly.

Books with Texture (5)

Some pages rattle and some crinkle.

Books with Texture (6)

The first time through, I described these sounds, and the textures she could feel like the soft fluffy cover. She will happily “read” this one to herself for ages.

Books with Texture (7)

What interactive books does your baby like? Please share in the comments!

Books with Texture (3)

Start Swimming

Start Swimming (1)

Babies seem to love the water (I have a pet theory that they can still remember all that watery time in the womb, not so many months ago!). Whatever the reason, starting your children in the water young can have big benefits, helping them feel ready when the time comes to truly learn swimming and water safety.

Today, we got Veronika’s toes wet – literally!

pool (5)

Start small if you think your baby will be nervous. However, you’ll probably be surprised at how calm a young baby is in the water – more so even than a toddler. A few recommendations: Make sure the pool you choose is clean. I do recommend chlorine rather than salt-water pools, because big brother Travis has fallen sick after swimming in the latter.

Go at off-peak hours, whether mid-week or at a non-crowded time on the weekends.

Finally, don’t forget the swim diapers! When Travis was little, I thought an overnight diaper and a swim diaper were the same thing – whoops. His little bum would inflate with tons of water instantly. Veronika, on the other hand, was swaddled in proper swim attire.

Now for the fun! I started out just dipping Veronika’s toes in.

Start Swimming (3)

Pretty soon she loved kicking her legs and trailing her fingers through the water.

Start Swimming (2)

This is great muscle work for a baby, and can also help tire him or her out if you’re hoping for a nap after. To wit, the very first thing she did after she was dry was fall asleep for her afternoon nap.

Swing Rhythm

Swing Rhythm (1).jpg

Today was Veronika’s first time in a baby swing!

As a veteran parent, I was ready with a few tricks to sure this first ride in a bucket swing went smoothly. 7 months old is still pretty tiny, so come prepared with a nice soft blanket. This can act as a wedge so your baby doesn’t slide around in the swing (and is also handy for drying off any rain from the night before, in a pinch!).

Well this little lady took to it right away! She looked about as at ease as if the swing were a hammock on a tropical island.

Swing Rhythm (4)

For a few fun games, I tickled her toes whenever she swung toward me.

Swing Rhythm (3)

You can also greet your child with a playful, “boo!” on each swing.

Swing Rhythm (2)

She also loved when I pushed slightly harder and said, “higher higher higher!”

But in general, today was about gentle pushes, often letting momentum take over after only 1 or 2 pushes. She loved exploring the texture of the swing, too.

Does your baby like to swing? Please share in the comments!

Together Time

Together Time (8)

Veronika is seven months old today! These little monthly birthdays are great moments to take stock as a parent; you can marvel at how far your baby has come, and also pause to think about what’s working and what maybe isn’t anymore.

To wit, Veronika’s bedtime routine has shifted considerably since she was a newborn (when, by “routine”, I mean there completely wasn’t one!)

Now, she has a set bedtime (6.30) which allows us as a family to decide how we want to spend that last hour before bed.

No matter what your routine looks like, I highly recommend making sure there are no phone calls and no visitors. Where is my phone during all of this? Charging and on silent!

Together Time (5)

So first up, it’s time to eat a yummy dinner!

Together Time (1)

Next up is bath and jammies.

Together Time (2)

It’s okay to invite a stuffed animal friend over, of course.

Together Time (3)

We pause to read a story. Veronika likes to help turn pages.

Together Time (4)

Then she watches big brother take a bath – her dry tub makes a perfect play pen!

Together Time (7)

And that first little tooth needs a brush!

Together Time (9)

Then it’s lullabies and lights out.


Play with Finger People

Finger People (2)

Well, here’s an activity that I thought would be adorable, but as it turns out… it terrified Veronika!

The idea was to make simple “people” on your fingertips, who can then interact with your baby. Draw eyes and a smile with pen.

Finger People (1)

If you want, tape on a little bit of cotton ball hair. This one looked a bit like Mozart! Or perhaps Benjamin Franklin.

Finger People (3)

One by one, hold your fingers and have them talk or interact with baby. You can have them say bye-bye and hello, or give each one a funny voice and a different name. It’s also a great way to sing the sing the Daddy Finger song, holding up each finger in turn (pointer = mommy, tall man = daddy, ring finger = brother, pinkie finger = sister).

But did Veronika enjoy it? Nope! Her face crumpled into a frown or – worse! – tears every time I popped up a finger. Her expression went from quiet alarm:

Finger People (6)

To suspicion:

Finger People (5)

To outright anger!

Finger People (4)

Perhaps it was just too creepy to see mommy’s fingers talking. But if your baby likes this game, please share your success in the comments!