Beanbag Toss

Beanbag Toss (6)

Beanbags are such a versatile toy for kids of all ages and I highly recommend having a pile of them on hand. Today, Veronika used them both for target practice and shape learning.

I loved that the first part of this game was a chance to make art together. I unrolled a long piece of craft paper and set out markers.

Beanbag Toss (1)

I had just started a green square when Veronika said, “Let’s draw a blue rectangle!” So a blue rectangle it was. She drew “shapes” alongside me while I made larger ones all over the paper, including purple hearts, orange circles, and more.

Beanbag Toss (2)

Now it was time for some toddler sports! I asked her if she could toss a beanbag onto the blue rectangle. Easy shot! It was harder for her to throw towards shapes further back on the paper, so this game was great for strengthening little muscles.

Beanbag Toss (4)

Sometimes she preferred to run and stand on the shape I named, instead of tossing the beanbag.

Beanbag Toss (5)

Leave out your big piece of paper and the pile of beanbags, and no doubt your toddler will find ways to play with it solo throughout the day, too.

Beanbag Toss (3)

Out at the Park Math

Out at Park Math (11)

It’s never too early to start talking math with a toddler, yes even for those under age 2. The perfect place to do it? At the playground!

Chances are you’re going to be at a playground anyway, so why not throw in a little math? Once you start looking, you’ll realize just how many shapes there are to talk about. Today with Veronika, we found everything from the obvious, like a neat set of squares to climb…

Out at Park Math (1)

…or a circle wheel to drive…

Out at Park Math (6)

…to the subtle. There were tiny circles in the platform beneath her feet, for example, or rectangles outlined in the rungs of a ladder.

Out at Park Math (4)

Playgrounds are also great places to teach the concept of counting. “How many times can you go down the slide?” I asked her. With each whoosh down, we counted. One time! Two times! Three times!

Out at Park Math (9)

Or count the steps your toddler climbs, the bars on the monkey bars, the number of swings…

Out at Park Math (7)

…or the keys on a giant xylophone (and hey, more rectangles)!

Out at Park Math (8)

This simple game is a great way to make math an everyday concept for your little one.

Out at Park Math (10)

Shape Mail Carrier

Mail Carrier (8)

Today I made a shape matching activity for Veronika, and it turned into a game of playing a mailman who was making deliveries! She was the mail carrier and had to deliver the right shape to the corresponding “mailbox”. I loved that this game was equal parts learning and introduction to imaginative play.

To start, I covered construction paper with sticky contact paper on both sides for durability, and cut out shapes: rectangles, hearts, circles, triangles, and squares.

Shape Match (1)

So first up was a simple game of shape matchup. If I had one of the pair, could she find the other?

Shape Match (3)

She quickly proved to be an ace at this test, not just picking up the right shape…

Shape Match (4)

…but naming them, too.

Shape Match (2)

I wanted to make the game more exciting, so turned it into the mail carrier game. We have a set of toy boxes, each one a different shape with items of the same shape nested inside (i.e. a pizza wedge and watermelon wedge inside the triangle box). We scattered all the shapes on the ground, along with the construction paper set I’d just made, and I placed the empty boxes in front of her.

Mail Carrier (1)

“Special delivery!” I called. “Which mailbox should the triangle go in?”

Mail Carrier (3)

She was so proud making these deliveries!

Mail Carrier (2)

Note: If you don’t have a toy like this, simple cut out and laminate each shape from paper, then tape or glue onto an empty shoe box. These can be your mailboxes!

Mail Carrier (7)

After we’d filled the mailboxes, she decided to get a little impish. I could see the wheels in her brain turning as she deliberately placed the shapes in the wrong box, and then looked at me for a laugh.

Mail Carrier (6)

But if you think about it, this was showing her understanding of shapes on a whole new level.

Mail Carrier (5)

She thought this was hilarious and kept it up for quite some time.

Mail Carrier (9)


Tape Shapes

Tape Shapes (6)

Veronika loves shapes and she literally squealed with delight when I set up this easy learning activity on the floor this morning.

Using colored masking tape, I made four giant shapes on the floor: a triangle, square, star (her favorite!), and circle. Note that the circle is a little tough to make with tape, and shapes with straight sides will be easier.

Tape Shapes (1)

Not only was this great for shape recognition, but also counted as our gross motor play for the morning. First she hopped to the triangle!

Tape Shapes (2)

Then she ran to the square.

Tape Shapes (3)

Then she twirled in the star.

Tape Shapes (7)

You get the idea! For each shape, give your toddler a new action to perform, simultaneously testing their shape recognition and their listening skills.

Tape Shapes (5)

She’s off to the circle, folks! This was so easy, but she absolutely loved it. Definitely a game we’ll repeat soon.

Tape Shapes (4)

Stab That Shape Foam Trays

Stab That Shape (5)

Veronika has shown an early interest in shapes and can now readily recognize triangles, stars, hearts, and circles. We’re working on squares and rectangles next!

To foster her interest in the topic, I made this easy shape recognition tray for her today, using a leftover foam tray from the grocery store. I simply drew 4 shapes, three that she knows well, and one less familiar (the square).

Stab That Shape (1)

I then handed over the tray and a plastic fork. First she just loved stabbing at the tray!

Stab That Shape (7)

It was a tougher than I thought for her to poke the tines of the fork directly down, so the game was great practice for fork skills at the dinner table, too! Soon she started to get the hang of it.

“Can you poke the heart?” I asked her. Yup! She also easily followed directions for the circle and triangle.

Stab That Shape (2)

When I asked her to poke the square, she just played around aimlessly with the fork, which reinforced my sense that she doesn’t know the word yet. But she still was having lots of fun!

Stab That Shape (3)

Older toddlers and preschoolers will enjoy this tray, too. Encourage them to “stab” along the lines of each shape so it is covered in dots, a precursor to tracing.

Stab That Shape (4)

Meanwhile, Veronika had fun stabbing the tray all over. The dots feel bumpy once the tines of the fork have poked through, and she carried the tray around happily for a while.

Stab That Shape (6)

Shape Search

Shape Search (4)

Chances are you’re looking for ways to keep outdoor excursions new and interesting during this period of social distancing. One easy way is to turn a walk into a shape search.

For this activity, we headed to the park. Though the playground remains off limits for play, we could at least look at it! I challenged Travis to search for simple shapes first: squares, triangles, and circles.

He found examples that ranged from the big (the circle on the ground)…

Shape Search (1)

…to the small (circles incorporated into the play structure).

Shape Search (5)

Triangles formed the roofs, and squares were in the platforms and rungs of the ladder.

Shape Search (3)

Though I hadn’t intended to ask about 3-D shapes, he started to notice those, too. “Mom I see a cone!” he exclaimed. We even stopped by the diamond shapes of a fence on the way back to the car.

Shape Search (6)

How are you keeping walks different and educational? Please share in the comments!

Shape Search (2)

Simple Sorter

Simple Sorter (2)

Veronika has started to recognize shapes. Although right now she calls almost all of them “stars”, what she’s exhibiting is an awareness that the world is made of shapes. She’s just starting to say triangle and circle, too! So I grabbed at the chance for some early learning today, by making a shape “sorter” with only one shape.

She has a toy bucket and lid that features a variety of shapes, but this can make it confusing for toddlers who are just learning the vocab. Instead, the sorter I made her only contained circles. I cut holes in the lid of a clean non-dairy yogurt container. Ideally you want your cut-outs to be a perfect circle, although this was tough to achieve with the knife I used.

Simple Sorter (1)

I gave Veronika the can and lid, along with soft yellow golf balls to push through.

Simple Sorter (5)

Since it was all circles, I could help her say “circle, circle, circle” over and over as she pushed each one through.

Simple Sorter (3)

She used a round milk carton cap a few times, too, which roughly fit the circle theme.

Simple Sorter (6)

The golf balls were just the right size though, such that she had to give each one a little push to make it pop in. She seemed to enjoy that sensation!

Simple Sorter (9)

It seems like we’re all about inserting into containers and dumping these days, but whatever keeps her toddler hands busy is fine with me!

Simple Sorter (8)

Serious Secrets of the Circle

Secrets of Circles (6).JPG

Travis was bit young for the lesson on Pi that accompanied his Jack-O’-Pot Pie recipe from Raddish Kids, but there were plenty of suggested activities for younger kids. Without the advanced math, you can still explore circles and their properties with those in Pre-k or kindergarten.

First, check out a copy of Lois Ehlert’s Color Zoo from the library. Go to the first page with a circle, and cover behind it with a piece of paper.

Secrets of Circles (1)

Ask your child what animal it might be, then remove the white paper for the reveal of a tiger face. We went through the rest of the book, each animal’s face featuring a different shape.

Secrets of Circles (2)

I reminded Travis how everything in the world is made up of shapes, but today we’d be focusing on circles… Circle detectives!

I set out a plate (itself a circle!) with other circular items on it, including a ring, coin, cucumber slice, and bottle cap. Other easy ideas would be a button, slice of orange, or wheel.

Secrets of Circles (3)

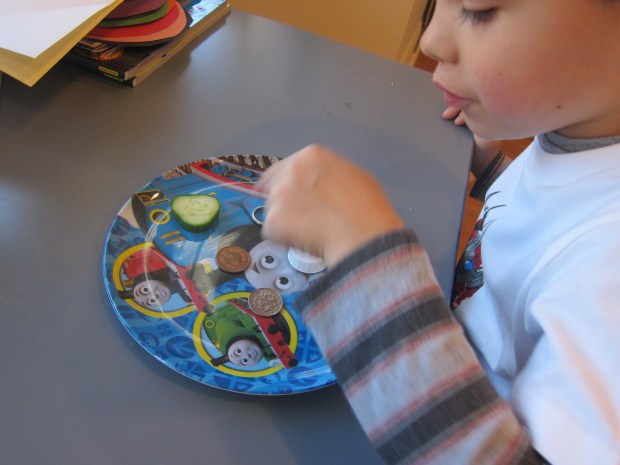
I invited Travis to investigate the items. What did he notice? He noted how they all had no corners, they were round, they were flat (don’t use spheres like balls!) and they could spin or roll. He had helped define a circle!

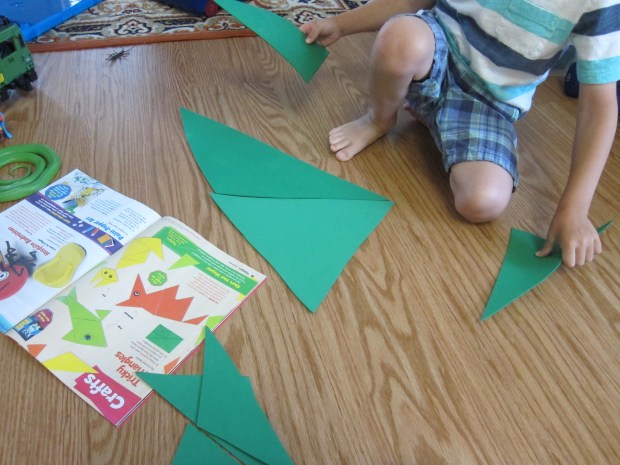
With the detective work complete, it was time for circle art. I had pre-cut lots of different sizes and color circles from construction paper. His challenge was to make a picture or shape of something, but only using circles!

At first he seemed stumped. I showed him an animal face and we quickly decided it was a mouse.

Secrets of Circles (4)

Once he had the idea, he began gluing down circles as a Star Wars space craft.

Secrets of Circles (5)

But then when he saw there were more than just black circles to work with, he became excited and began piling them up. It turned out to be a building!

Secrets of Circles (8)

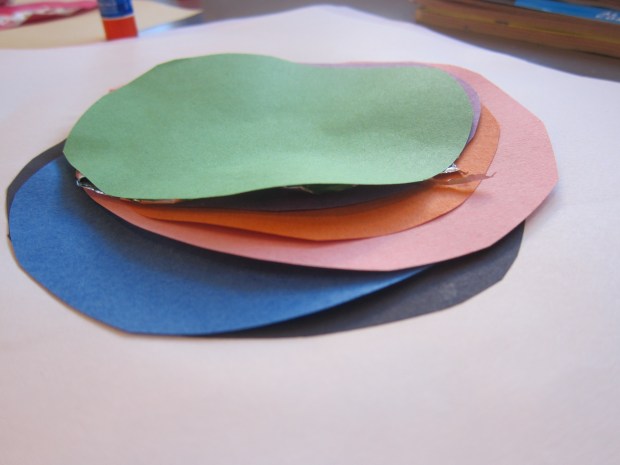
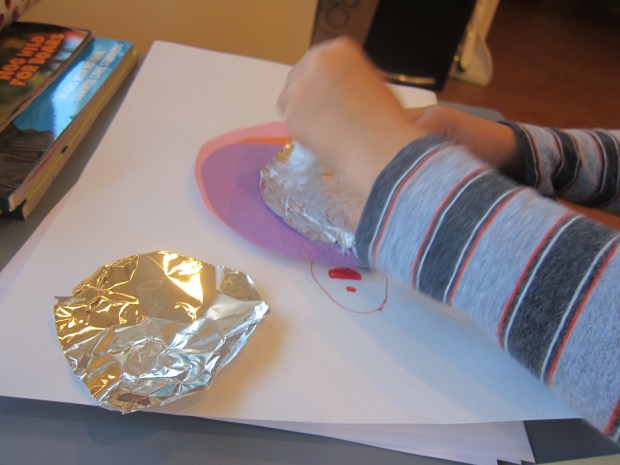
You can use other materials like tin foil circles, wrapping paper, or tissue paper for embellishment. Have fun with this part!

Secrets of Circles (7)

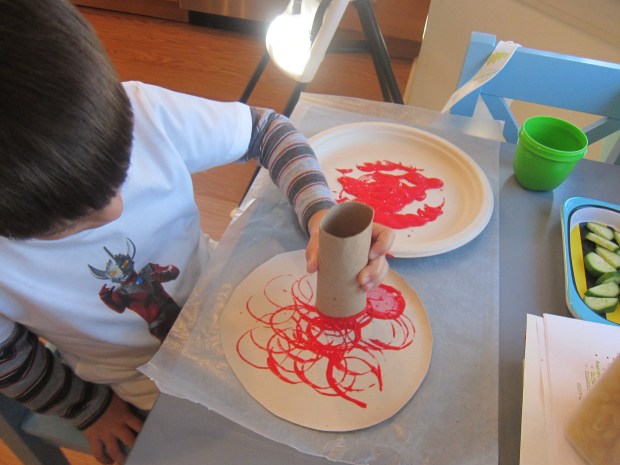
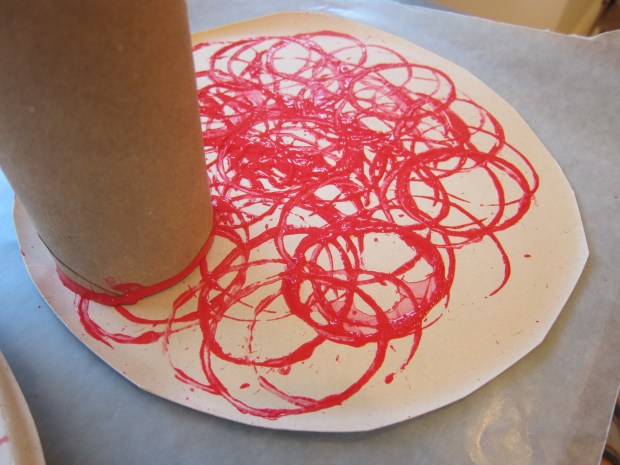
For extra circular art, I cut the bottom from a paper plate. The challenge was to cover this plate with red circles using only the end of a toilet paper tube as his paint brush, stamping only circles over it!

Secrets of Circles (10)

He decided he liked his with some plate still showing through, but your kids might enjoy seeing how long it takes to completely cover the circle with, well, circles.

Secrets of Circles (11)

Now we became detectives again. He selected two favorite books and we had a competition. Whose book had more circles in it? We marked each page with circles with a post-it note, then tallied them up. Mommy’s book won, with 21 pages of circles!

Secrets of Circles (12)

(Note: you could also tally up every circle in the images, but this would have taken us into the 100s).

For some final fun, we extended the lesson into story time, reading the following:

  • So Many Circles, So Many Squares by Tana Hoban
  • Around the Park: A Book About Circles by Christianne Jones


Tangram Toast

Tangram Toast (3)

Travis had a tricky time of it with tangram puzzles recently, so I made things a little more accessible in the best way possible: edible tangrams!

Toast slices of bread first until nice and crispy, making as many as you’d like for the project. Cut into shapes as shown:

Tangram Toast (2)

In a bowl, stir together 1/2 cup softened Earth Balance butter, 1 teaspoon cinnamon, 1/2 teaspoon vanilla extract, and 4 tablespoons sugar. Travis loved mixing all this up!

Tangram Toast (1)

Through trial-and-error, we found it easiest to make the tangrams while the toast was plain, otherwise our fingers got messy (as we learned while designing a slightly-lopsided house).

Tangram Toast (6)

So instead, we spread the cinnamon butter on after, but first Travis helped design a rocket…

Tangram Toast (4)

…and what could this jumble be?

Tangram Toast (7)

Aha a bird!

Tangram Toast (8)

After the puzzling, he was so proud I gave him a real butter knife to spread our cinnamon-sugar mixture over his own toast pieces.

Tangram Toast (11)

He proudly served up triangles, squares, and trapezoids. This was a great way to get kids puzzling while thinking it’s just a messy fun snack!

Tangram Toast (9)

Tricky Triangles

Tricky Triangles (5).JPG

These fun foam triangles are a homemade version of a tangram puzzle! We followed a template from Highlights magazine, which made for great puzzling on a Saturday morning.

First, follow the lines provided to divide a large sheet of craft foam into 8 triangles. Big kids can help with the lines and the cutting, but this was more of a craft that I set up for Travis than one we prepared together.

Tricky Triangles (1)

Soon I had 3 sets of triangles for him, in orange, green, and yellow foam.

Tricky Triangles (2)

We looked at the shapes in the magazine and he wanted to make the fish first: green triangles! Tangrams are wonderful for helping children think spatially and translate what they see on the page to a real model.

Tricky Triangles (3)

Travis needed help with the orientation of a few triangles, but mostly could see how the fish came together.

Tricky Triangles (4)

Next up was an orange fox! I had Travis point out where the biggest triangle went first as a starting point, and we worked our way outward from there.

Tricky Triangles (6)

He was quite proud when he saw the fox take shape.

Tricky Triangles (7)

Finally, he made the yellow cat. Add big googly eyes to any or all of these, if you have them!

Tricky Triangles (8)

As your child becomes skilled at copying the provided designs, branch out and make up your own! Next time I’m going to cut up a smaller version since these would be perfect to slip in a zip-top bag and turn into a take-along toy for car rides or waiting rooms.