Recycled Jet Pack Costume

Jet Pack (12)

We’ve been having fun with empty cereal boxes lately. Combine that with Travis’s current interest in the moon and space exploration, and what better item to turn our cereal container into than a jet pack?

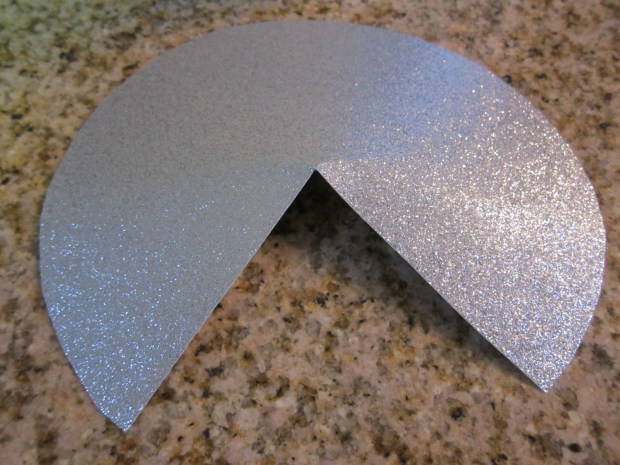
To start, cut the ends of two toilet paper tubes and fold them outward; they’ll look almost like little octopuses.

Jet Pack (1)

Wrap the tubes in foil, then duct tape them to the ends of the cereal box.

Jet Pack (2)

Note: Ideally you’ll have silver duct tape. Unfortunately, I only had yellow duct tape on hand… but it was nothing that a little silver paint couldn’t solve in a pinch!

Jet Pack (4)

Next, wrap the cereal box in aluminum foil, and tape the edges with duct tape. (Add your silver paint to cover any duct tape, if needed, at this point).

Jet Pack (5)

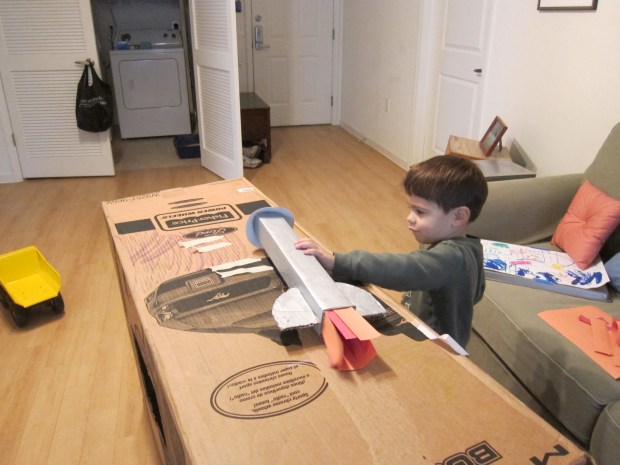
It’s up to your little explorer how they want to decorate the jet pack. Travis always needs lots of glue of course.

Jet Pack (7)

We added construction paper buttons and glitter glue, because of course a project this silver needs glitter glue.

Jet Pack (8)

Use hot glue to attach ribbon or string onto the top and bottom corners of the box; these will be the shoulder straps.

Jet Pack (13)

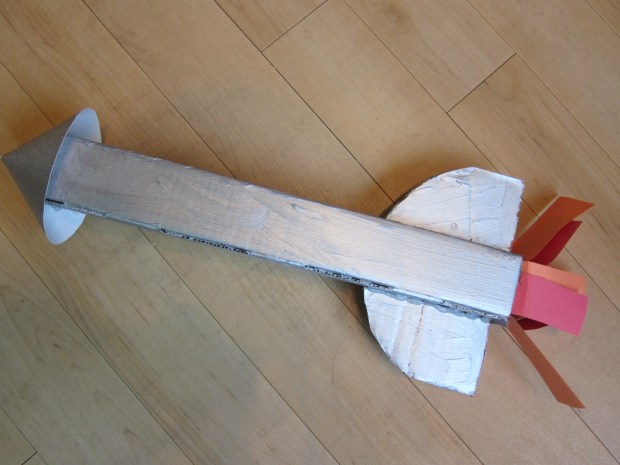
Our jet pack couldn’t launch without flames, of course! A few strands of tissue paper glued into each tube solved that problem.

Jet Pack (9)

And now we’re ready to fly.

Jet Pack alt

What else might you make from empty cereal boxes? I’d love to hear ideas in the comments!

Jet Pack (10)

Cereal Box Racetrack

Cereal Racetrack (9)

The next time you polish off a box of cereal, think twice before tossing it into the recycle bin. Cereal boxes make for fantastic upcycled crafts! Proof? This easy car racetrack.

To start, begin cutting down the long side of the box, about two inches in from the edge. Continue to cut all the way down, around the bottom, and back up the other side.

Cereal Racetrack (1)

Now snip the corners where the sides meet the bottom, so the piece lies flat. Repeat this step on the other side of the box, again two inches in from the edge. Join those two pieces together and you’ll have one long track. We did this with two cereal boxes, so the image below shows the resulting tracks from both boxes.

Cereal Racetrack (3)

Line your race tracks with colored duct tape to create the perfect racing surface.

Cereal Racetrack (4)

You can add embellishments such as pipe cleaner hoops for your cars to travel through.

Cereal Racetrack (5)

Later, we were feeling especially fancy and cut construction paper into decorative “flames,” which we then taped onto the pipe cleaner hoops.

Now ladies and gentlemen, start your engines!

Cereal Racetrack (8)

Travis got the hang of giving his cars a push (rather than keeping a hand on them) quite quickly, and in fact his cars beat mine in many races!

Cereal Racetrack (7)

A super easy and super fun way to race inside on a winter day.

Cereal Racetrack (6)

Egg Carton Boat

Egg Boat (5).JPG

Travis has been having so much fun with the foam and cork canoe we crafted a few weeks back that we decided to add to our upcycled bathtime collection!. Half of an egg carton from my in-laws’ house was the perfect base for our boat.

Cut an egg carton in half; save the remaining half for another use.

Egg Boat (1)

Decorate the carton with markers or paints. Markers will probably work fine on a cardboard egg carton, but since ours was Styrofoam, we used dot markers. Travis loved making each tip of the boat a different color.

Egg Boat (2)

I cut a triangle from white paper, which we decorated as well, then taped to a wooden stick. Voila! A sail.

Egg Boat (3)

Stick your mast into the base of the boat, and it’s time to set sail.

Egg Boat (4)

Use any toy figures you have, such as Duplo people, to be your sailors. Ahoy mateys!

Egg Boat (6)

The verdict is that this boat didn’t last very long (the sail is toast the minute it gets wet), but Travis had so much fun with it that bath was double its normal length in time! I don’t post bathtime pictures, but needless to say there was lots of capsizing, splashing, rescue games, motor boats running out of gas, storms at sea, and more.

Making a Rocket

Rocket (9).JPG

An extra mailing tube from the post office spurred this idea, and turned out to be a huge hit.

Rocket (1)

To turn a simple mailing tube into a rocket, the first thing you’ll need to do is paint it silver using a metallic acrylic paint. Travis has his own agenda more and more these days, a busy three-and-a-half year old. He normally isn’t so into painting, but when I told him we were using “big boy paint” (i.e. non-washable) like real astronauts, he leaped to the task!

Rocket (2)

Cut two fins for the rocket from cardboard and paint those as well. Let dry completely.

Rocket (4)

For the flames of the rocket, you can trim lengths of orange and red fabric into strips, hot glue the edge of the fabric onto plastic piping, and insert into the bottom of your rocket. Or you take a vast short-cut, cut strips of orange and red construction paper, and glue them in. Yup, we went the simple way!

As the final step, I hot glued the two cardboard fins to the body of the rocket, and then made the cap. Cut a piece of shiny craft paper into a circle, and cut out 1/4 of the circle. Fold into a cone, and hot glue onto the top of the rocket.

Rocket (5)

As soon as the glue was cool, it was Travis’s toy to zoom, and oh boy was he exited!

Rocket (7)

It was his suggestion that we launch the rocket off a launch pad, so we repurposed an old cardboard box as our launch site.

Rocket (8)

Definitely a big hit with this three-nager.

Color Mixing

Color Mixing (5)

I’ve recently discovered the all-natural, all vegetable-based food coloring from Watkins, which I am loving for their consistency and ease of use (no mixing required, as is the case with many natural pigments).

To have fun with the colors, we pulled out this simple game – it’s also a great way to discuss primary (yellow, red, blue) versus secondary (green, purple, orange) colors.

First we mixed our colors in 4 clear cups, one each of red, yellow, green, and blue. Add a pipette or spoon to each. Either one is good fine-motor skills practice.

Color Mixing (1)

We used an upcycled egg carton for the color mixing, giving ample opportunity to make new colors in the multiple compartments of this one container. Place a little clear water in each compartment, then begin adding your colors and see what happens.

Color Mixing (2)

I thought Travis might consider the game a little old-hat (we did something similar back in the spring) but he was so into his creations.

Color Mixing (7)

Watching purple and orange form were big hits.

Color Mixing (6)

He also was very interested in how he could make brown (which he says is his favorite color!), and intrigued when I said he could create it just by mixing all the colors together.

Color Mixing (4)

An easy and fun diversion for a rainy afternoon.

String Roller Print

String Print (9)

You can upcycle your empty toilet paper tubes and enjoy some messy fun with this project.

To create the rollers for our prints, first squeeze glue onto a disposable plate or tray. Add pieces of string and have fun squishing the string through the glue until coated.

String Print (1)

Travis was actually a bit squeamish about this step, so my fingers got good and messy; I finally cajoled him into winding some of the gluey strings around our two empty toilet paper tubes.

String Print (2)

We set the tubes aside to dry – nap-time was the perfect pause.

String Print (3)

To make our prints, I splattered several colors of paint onto parchment paper. First we needed to swirl them together a bit with a paintbrush.

String Print (8)

Then it was time to roll through our rollers. The whole project was neat because it made me think of roll printing on fabric.

String Print (7)

Travis was a little hesitant about getting his fingers covered in paint, but soon the rollers were rolling about on a piece of poster board.

String Print (6)

He decided to add a few brushstrokes with the paintbrush to finish his creation. Overall, very Jackson Pollock-esque!

String Print (10)

Tree Jewels

Tree Jewels (7)

Here’s the perfect upcycling project for all your old CDs. This pretty and easy craft will make any tree sparkle.

Travis adores gem stickers, so I simply provided him with a few sheets of them and a pile of old blank CDs. He didn’t even pause before going to town.

Tree Jewels (4)

If you want to get more craft-y, you could glue on sequins as well, but we stuck with the sticky-back gems.

Tree Jewels (3)

We added a little bit of glitter glue as a final sparkling touch!

Tree Jewels (5)

Now find the perfect tree to hang them!

Tree Jewels (6)

If you save these for the winter, they would look fantastic on bare winter branches, or a Christmas tree.

Tree Jewels (2)

Tin Can Wind Chimes

Tin Wind Chime (7)

Before you toss those cans of beans or soup, save a few for this adorable project.

Over a few days, we rinsed out three cans and set aside until dry. Then it was time to cover them with paint!

Tin Wind Chime (1)

Travis particularly loved how the paint went over the ridged parts of the metal.

Tin Wind Chime (2)

Once the paint dried, it was time to attach our chimes together – a decidedly mommy job. To make a hole in each can, I held a screw to each and hammered until perforated.

Tin Wind Chime (5)

Travis was a big help hammering along next to me with his toy tools!

Tin Wind Chime (3)

Threading the cans together proved to be tricky even for adult fingers – I had to use very fun sewing thread.

Tin Wind Chime (4)

Eventually we had our three cans in a row and they were ready to chime!

Tin Wind Chime (6)