Early Explorers Transportation

LP Transportation (14).JPG

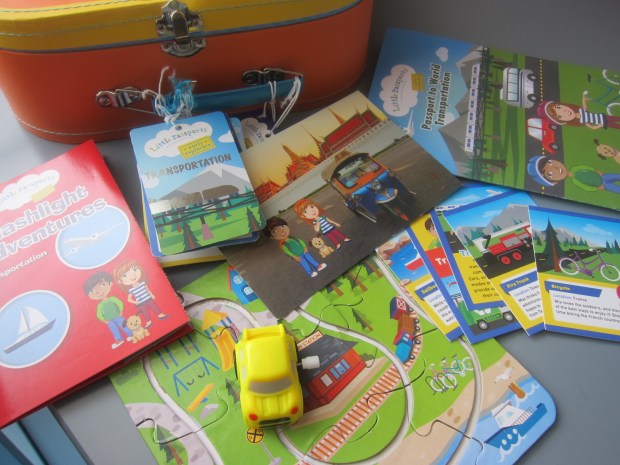
Boy was this month’s theme from our Little Passport’s subscription right up Travis’s alley – the blog title says it all! The booklet was chock-full of info on some of Travis’s favorite things in the worlds (trains, planes, firetrucks) plus fun new ones like tuk tuks and tobaggans.

Transportation Craft:

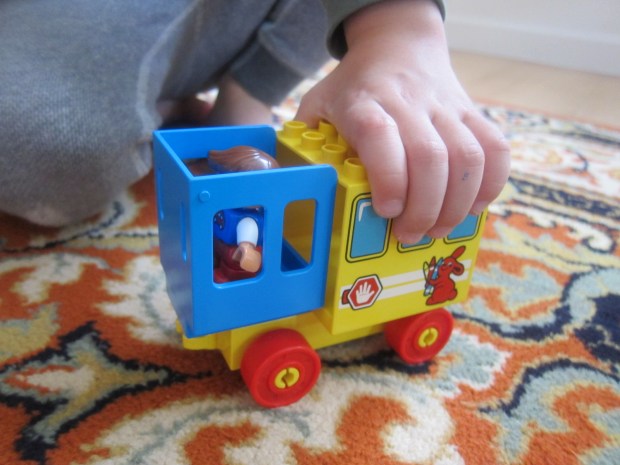
Without a suggestion for an art project in this month’s booklet, we turned to Little Passport’s blog to further our exploration about cars. Bigger kids can truly tackle a Lego Technic car, but we had fun simply designing cars with our Duplo. Travis created this hybrid train/bus.

LP Transportation (13)

Transportation Science:

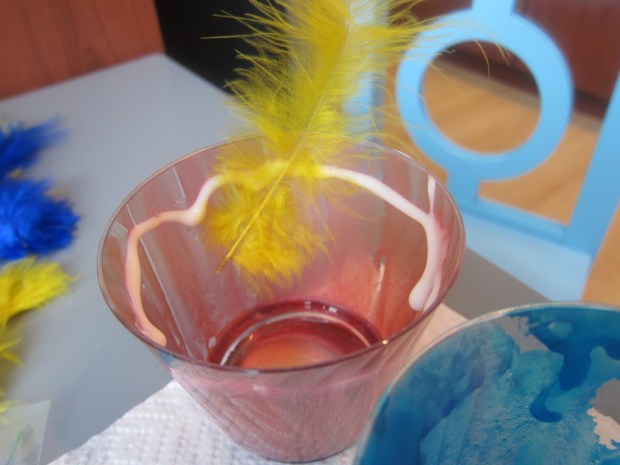
Next up we tried out balloon-powered racing. Much as with the juice-pouch stomp rocket we made recently, this project runs on compressed air. That’s the science behind it; now here’s the fun.

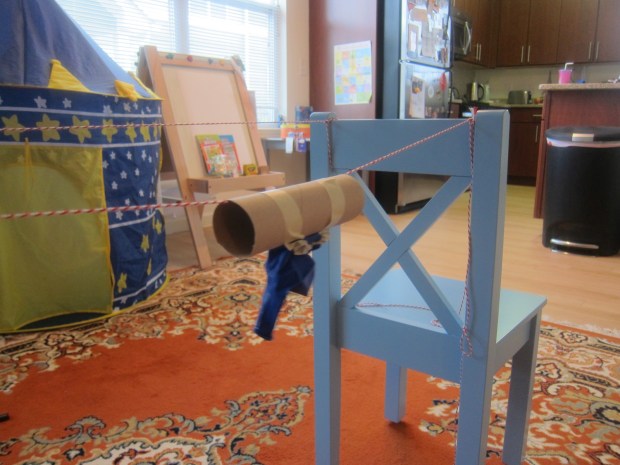
First, cut a paper towel tube in half; set aside.

Tie two lengths of string (about 4 feet long) to the back of one chair. Position a second chair about 3 feet away, but don’t tie the second end of the strings yet.

LP Transportation (6)

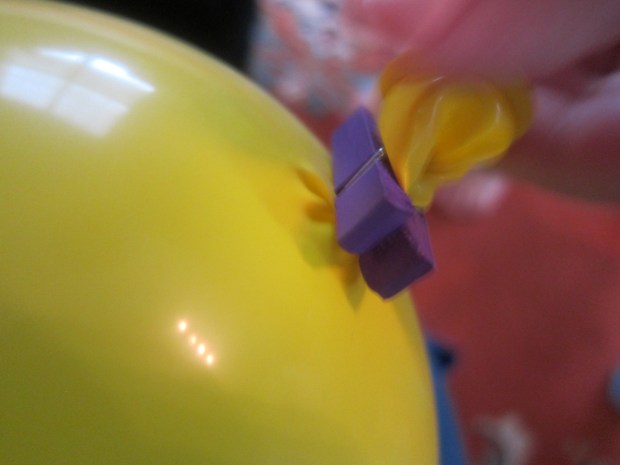
Next inflate two balloons. Instead of tying off, secure with clothespins.

LP Transportation (7)

Tape each balloon to half of the paper towel tube and slide the tube onto one string; tie to the other chair, making sure the strings are taut.

LP Transportation (8)

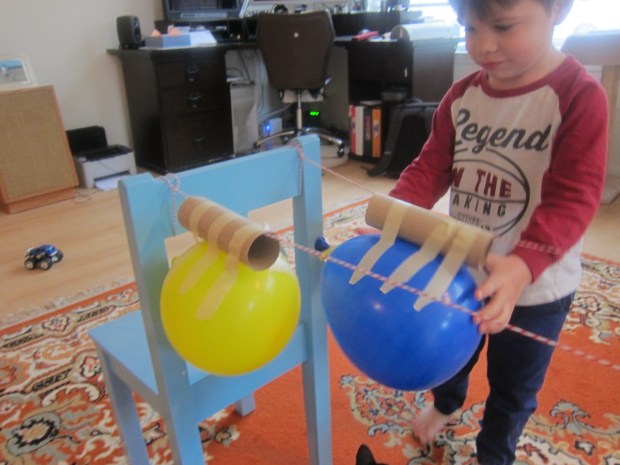
To race, position the balloons near one chair. Release the clothespins, and watch them fly forward. Does one balloon win? We found this worked best when the balloons were inflated big to begin with, and when you release the clothespin very quickly.

LP Transportation (9)

Transportation Keepsake:

The souvenir for this kit was a puzzle featuring a track that a wind-up car can zoom about. The wind-up car was a huge hit.

LP Transportation (4)

The puzzle was a little uneven in places – a fact I’ve noticed with several of the keepsakes from Little Passports – so the car didn’t run on it very well. That didn’t stop Travis from vrooming it all about the floor!

LP Transportation (3)

Transportation Field Trip:

We had to double-dip on transportation-themed excursions, since there was so much to do! First, I recommend visiting any transit museum near you, whatever is closest – a car museum? Plane museum? Fire station? We opted for the New York Transit Museum since it focused on a type of transportation not in our booklet – the subway!

Transport (11)

Travis loved it, that and “driving” NYC buses.

Transport (12)

Finally we couldn’t resist a trip to the NY Auto Show – taking the train there to double up on transportation!

car (1)

Transportation Further Activities:

The booklet suggested a family bike ride, which would have been ideal, but my husband and I don’t have bikes! We settled for the next best thing, taking a walk while Travis used his tricycle.

Caumsett (2).JPG

Calmer, at-home activities included inventing our own mode of transportation. Travis dictated as I drew: a double decker car with a propeller, which he made sure included carpets on the floor.

LP Transportation (11)

You can also have fun coloring in pictures of your favorite transport modes (that meant trains over here!) or drawing the pictures if your kids are older.

LP Transportation (10)

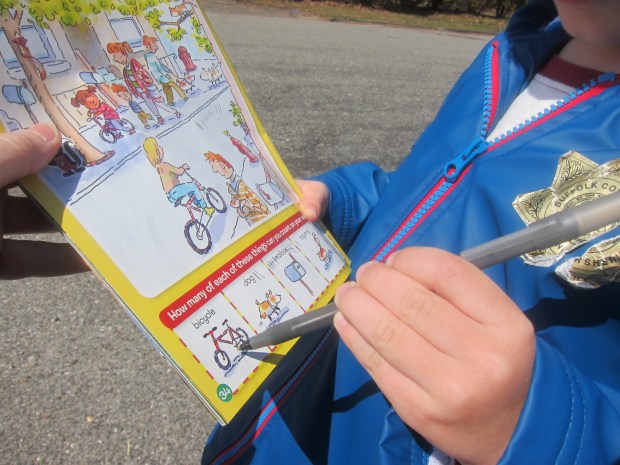
Next up, we made a tally of what transportation modes we saw in our neighborhood – coming up with a list of 8. No tuk tuks or toboggans though!

LP Transportation (12)

Finally, we checked out books from the library to continue our exploration, on everything from snow plows to race cars.

Asparagus Fried Rice

Asparagus Fried Rice.JPG

I more aptly call this recipe “picky preschooler fried rice” because it has only three ingredients – asparagus, rice, and soy sauce. Older kids and adults might like a few additions: Add a teaspoon each of garlic and fresh ginger to the mix while it cooks, and a drizzle of sesame oil at serving time.

Ingredients:

  • 1 tablespoon olive oil
  • 1 bunch asparagus
  • 2 cups cooked and cooled white rice
  • 2 tablespoons soy sauce
  1. Heat the olive oil in a large skillet over medium heat.
  2. Chop the asparagus and add to the pan; cook for 4 minutes.
  3. Stir in the rice and soy sauce; cook for a final few minutes, until warmed through.

King of the Castle

castle (11)

I first spotted this homemade castle in Family Fun magazine months ago, and knew it was something I just had to make for Travis eventually!

Parents, it may seem like a lot of work, but the castle comes together remarkably easily in very few steps. My advice is to tackle one portion per day, so that it never seems overwhelming.

First, purchase (or reuse!) three large boxes. Use large (about 20×20 inches) for the two sides, and extra large (22×22 inches  – or more!) for the center portion.

For the center section, trace a drawbridge shape onto craft paper, and tape down to the largest box. Cut out the shape.

Castle (1)

To attach the drawbridge cutout, you’ll need two lengths of plastic chain (ask them to cut these to size at Home Depot) about 2 and 1/2 feet in length. Poke a pipe cleaner through the end of the cardboard further from the castle, and thread the pipe cleaner through; attach to one end of a chain. Repeat on the other side. Make two small holes next to the drawbridge cut-out in the castle box, and thread each chain through, securing with hot glue or tape.

castle (12)

For the two side pieces of the castle, cut out window shapes, leaving the “shutters” attached. Peek-a-boo!

Castle (3)

You can use scissors or an x-acto knife to crenellate the tops of all three boxes. We taped one roof flat with the anticipation of adding a “bell tower” down the line – if we do, I’ll update this post!

Cut a side door in each side section so your kids can crawl from “room” to “room” within the castle; now tape all three sections together with a few pieces of duct tape.

Next up, we needed to apply a coat of paint!

Castle (7)

For some fun extras, we didn’t stop there! To make banners, attach pieces of triangular cardstock or poster board to dowels, and tape at the top of the castle.

castle (10)

For ivy, hot glue leaves cut from green tissue paper or construction paper onto twine.

castle (9)

For a torch, hot glue the bottom of a paper towel tube shut. Stuff with tissue paper, and then add gold or white tissue paper up top to stick out as flames. Position a battery-operated tea light just behind the tissue paper and your torch will really light up!

castle (13)

That’s as far as we went, but there’s so much more you can do! Consider painting old shoeboxes and positioning below the windows as sills, stuffing with additional green tissue paper as greenery. You can also hot glue an old blanket or piece of cloth into the drawbridge opening, or hang strips of crepe paper as a “portcullis”.

castle (14)

Inevitably, games in the castle involved Travis’s sword and our homemade shield. What else will you add to the castle for your king or queen? Please share in the comments!

Juicy Blueberry Smoothie

Blueberry Smoothie (5)

This month’s recipe offering from High Five magazine involved lots of fun equipment. Juicers and blenders and spoons, oh my!

Ingredients:

  • 1 orange
  • 2 cups fresh blueberries
  • 1 cup white grape juice
  • 1 cup water
  • 1 teaspoon ground cinnamon
  • Plain non-dairy yogurt
  1. Adults, cut the orange in half, and then help your child squeeze on a juicer to extract 1/4 cup fresh orange juice – definitely my son’s favorite step!Blueberry Smoothie (1)
  2. Combine the orange juice in a blender with the blueberries, white grape juice, water, and cinnamon. Process until blended.Blueberry Smoothie (3)
  3. Pour the smoothie into cups. If desired, spoon a dollop of non-dairy yogurt on top just before serving.

Blueberry Smoothie (4)

Green Time: Counting Walk

Counting Walk (5).JPG

Well, here we are in April but we’re just now getting the chance – a sunny, warm day! – to go on our Green Time adventure from March’s issue of Ranger Rick Jr. – a counting walk!

The magazine included a list of suggested things to count as you take a walk outside, including mailboxes, fire hydrants, and squirrels. We wanted a nice warm day so we’d be more likely to see a couple items on the list like dogs (out for a walk) and bicycle riders.

As we kept a tally of each item, I helped Travis decide what number was one higher than the number we’d said before.

By far we found the most mailboxes – 10!

Counting Walk (1)

Meanwhile Travis loved spotting hydrants – 2!

Counting Walk (3)

We nearly thought we’d end the walk with zero bicycles until a man went cycling past us. Travis was very proud to make the tally.

Counting Walk (4)

And because he loves them, Travis decided we needed to count pickup trucks in driveways as well – for a grand total of 7.

Overall, this was a great exercise – not just for the legs but for the mind as well!

Counting Walk (2)


Ribbit Ribbit Toast

Ribbit Toast

We brought a spring pond in to snacktime today!

Toast one slice of whole wheat bread; meanwhile, mash half of an avocado. Spread the avocado evenly over the toast.

Cut two round pieces of carrot for the frog’s front legs, and a carrot ribbon for a smile.

Add circles up top for eyes – cucumbers or green olives work well!

Finally, for the big back legs, slice pieces from a green bell pepper and place one on each side.

This recipe hopped very quickly into my son’s tummy!

Egg Carton Baby Animals

Egg Chick (6)

We upcycled our relative’s Easter egg carton to make these cute spring-themed animals. In all honesty, Travis lost interest very quickly, but I still made the animals because we need signs of spring around here! (Yup, there’s more snow in the forecast for tomorrow…)

There are plenty of steps for kids to help out with – cutting out the carton sections and animal templates, gluing everything on, and adding marker decoration if they would like.

First, cut an egg carton into segments. Cut out as many as you’d like, to have a whole menagerie of baby spring animals!

Egg Chick (2)

I used pastel-colored paper and free-handed the shapes to add on to each animal – long ears and rounded paws for a baby bunny; pointed toes, a crest, and wings for a baby chick.

Glue on the paper pieces and let dry.

Egg Chick (4)

Finally, I used permanent marker to make eyes, a white pom-pom for the bunny’s nose, and a diamond shape cut from paper for the chick’s beak.

Egg Chick (5)

What animals would you and your kids make? Please share in the comments!

Egg Chick (7)

Bird Puppets for Racing

Bird Puppets (6).JPG

Here’s a silly game to play in the backyard, using just a few craft supplies from home!

First, we painted the inside of plastic cups… this was novel for Travis to paint the inside of something, and he took great care adding layers of blue, red, and purple paint.

Bird Puppets (1)

Once the paint dried, we glued a few feathers inside each cup as tail feathers.

Bird Puppets (2)

Two more feathers went on the outside of each cup as the wings, along with a construction paper triangle for a beak and two eyes.

Bird Puppets (3)

In the morning, we set up the race! Cut plastic straws to about the size of your cups, and tape on.

Bird Puppets (5)

Thread long strings anywhere outside like a tree branch, fence, or gate. Slip the other end of each string into the straw of a bird. Now bounce and jiggle your birdies down their strings all the way to the end. Which bird will win?

Bird Puppets (7)

Crispy Asparagus Fries

Crispy Asparagus Fries.JPG

After I prepared this dish, my son turned and told me he prefers “regular asparagus” – simply roasted in a little olive oil that is! But for those of you whose kids might like a change of pace, crisp asparagus stalks become almost like french fries in a few simple steps!

Set out three bowls on the counter: the first with a layer of flour, the second with 4 Ener-G eggs, and the third with a mix of panko and vegan Parmesan sprinkles.

Wash and trim one bunch of asparagus. Dip the spears in all three bowls, starting with the flour, followed by the Ener-G eggs, and ending in the panko mixture. Transfer to a baking sheet lined with parchment paper.

Bake at 450 degrees F for 10 minutes, until crisp.

Easter Nest Cookies

Easter Nest Cookie (2).JPG

I meant to post this recipe yesterday, but the Easter holiday ran away from me! Luckily, the nest-themed cookies work great for any point during the spring, as baby birds make their way into the world.

Prepare one package of vegan sugar cookie mix according to package directions and bake.

Immediately after the cookies come out of the oven, indent the centers with a spoon. Transfer to wire racks and cool completely.

Fill the centers of each cookie with frosting (any flavor will do!) and sprinkle with shredded coconut as the “twigs” of the nest.

Easter Nest Cookie (1)

Finally, nestle in jelly beans or your favorite round vegan candies as “eggs.”