Birth Recovery

Birth Recovery (4)

My activity today with Veronika was profound on so many levels: relaxing us both after the birth a few days ago; taking a quiet a moment to bond, and providing a moment of physical comfort. I highly recommend making time for this simple exercise; it will be a moment of pure bliss in your day.

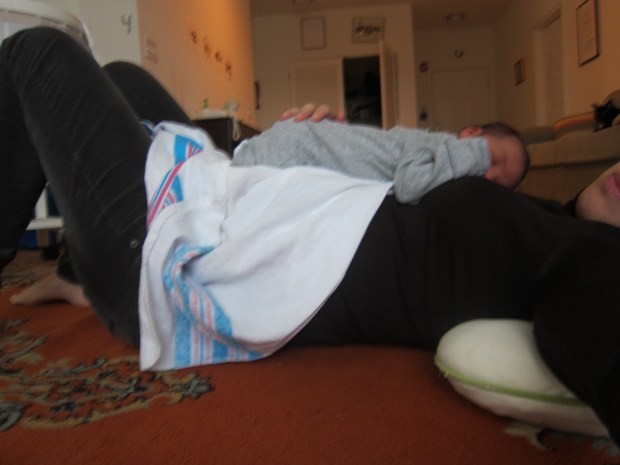
Lie on the floor (on a carpet) on your back with knees up, head on a pillow, and your baby on your chest (the baby’s face should be turned to face one side). Admittedly it was difficult to take pictures of us in this position, but I did my best!

Birth Recovery (6)

Inhale, then as you exhale, press the base of your spine and your shoulder blades into the floor, holding for a few seconds. You’ll feel a great release of tension in your back, if you’ve been holding it there since delivery.

Birth Recovery (2)

In between reps, simply lie with your baby and breathe, feeling your stomachs and diaphragms against each other as you both inhale and exhale. I would have stayed this way forever if I didn’t have a preschooler to fetch from school!

How do you relax with your newborn? Ideas like this are so simple, but so vital as a reminder to slow down in the precious first few days of life. Please do share your thoughts in the comments!

Advertisement

Animal Hammock (and Other Stuffed Animal Solutions)

Animal Hammock (3)

This activity for a newborn can be done even before your bundle of joy arrives in the home, or is a great one to do in the first days upon return from the hospital, that moment when you wonder… Well, what do we do next? New parents so often express this sentiment to me: The new baby is in the car seat on the floor, and now there are days and days to fill! It’s also an activity that is great for veteran parents who want to involve a big sibling.

To wit, I told my son I needed his help in the nursery, and we emptied out all of the stuffed animals from where they’d been in a basket, untouched, for years. Not only did he have fun going through old favorites, but he was also fascinated watching as I selected a baby blanket (chances are you have one too many!) and thumb-tacked it to the wall. Make sure the thumb tacks are very secure, or at the least some place where they can’t land on the baby in case one pulls free.

Animal Hammock (1)

Once you have all four corners tacked up, fill the hammock gently with the stuffed animals. Be sure not to overcrowd or make the blanket too heavy.

The result is adorable! Stuffed animals are easily visible to pick out for playtime, but also up off the floor and out of the way. This especially makes sense in the first year of life, when baby is too young to have any stuffies in the crib for naps or nighttime.

Animal Hammock (2)

A second idea is to buy a large wreath from a craft store, and attach stuffed animals with floral wire. I like this solution for larger animals that were a bit too heavy in the hammock. Poke the wire through a bit of the stuffing in their backs (don’t worry, they won’t feel it!), and attach securely around the frame.

Bear Wreath (2)

This is a great way to display stuffed animals, functioning almost like a mobile or visual stimulus near the crib.

Bear Wreath (4)

If you’re feeling truly ambitious, here’s a third solution. (Note: we skipped this one!).

Buy a 2-inch thick dowel from your local Home Depot, cut to measure the height of your baby’s room. You’ll need to set the pole in wooden brackets on the floor and ceiling of the nursery. Use screw-in hooks along the length of the pole for stuffed animals to climb the “tree.”

If you attempt this third stuffed animal idea, I’d love to see pictures or hear how it went in the comments!

Leaf Chromatography

Leaf Chroma (9)

You can show your children a visual rainbow of molecules with this simple science experiment. It’s a great way to explore what happens to leaves in the fall!

Travis and I had been waiting to do this activity all season, but the leaves were stubbornly slow to change. Finally we spotted a landscape of vibrant reds, oranges,  and yellows, and couldn’t wait to take them home and experiment.

Leaf Chroma (1)

First, tear up the leaves into pieces, and divide into glass bowls, one color per bowl. Travis loved the tearing!

Leaf Chroma (3)

Mash the leaves slightly using a pestle or muddler.

Leaf Chroma (4)

Ooh, next up was a grown-up ingredient: Rubbing alcohol. Travis very carefully helped me pour enough in each bowl just to cover the leaves. Place the bowls in a baking dish and add a few inches of hot water.

Leaf Chroma (6)

Now cut a coffee filter into strips, and drape over chopsticks (or kebab skewers, or pencils – anything long and straight), letting one side dangle down into the rubbing alcohol. Place the entire baking dish some place dark and let sit overnight.

Leaf Chroma (7)

In the morning, you’ll see bands of color on each filter strip! This shows the layers of color that were in each leaf, slowly revealed as chlorophyll breaks down in cold temperatures. To be honest the yellow and orange were a bit underwhelming, but it was neat to see several layers of color exposed in our red leaves.

Leaf Chroma (8)

In sum, a neat science experiment!