Bubble Wrap Printing

Bubble Wrap Printing (7)

Extra bubble wrap is always great for play, and today we even turned it into part of an art project.

To start, I taped down various pieces of bubble wrap to the craft table securely. We’ve gotten a nice variety in packages lately, meaning our bubbles ranged from the very tiny to puffy big ones.

Bubble Wrap Printing (1)

I then set out cups of paint for Veronika (in shiny metallics just for fun).

Bubble Wrap Printing (2)

She trotted over immediately and started painting. “Ooh, pink! Ooh blue!” she said as she worked.

Bubble Wrap Printing (3)

I could tell she enjoyed the bumpy feeling of running her brush over the bubbles. She stopped now and then to pop some, too.

Bubble Wrap Printing (5)

Once our bubbles were covered in a nice layer of paint, I pressed a piece of poster board on top, then lifted it up to show her the print. “Bubbles!” she said with delight.

Bubble Wrap Printing (8)

We repeated the process so we ended up with two neat prints. This is a simple craft, and perfect for toddlers.

Bubble Wrap Printing (4)


Little Passports: South Africa

LP South Africa (17)

There was lots to like in the latest from Little Passports, all about South Africa. With an emphasis on the country’s amazing animals and safaris, there was also plenty to learn about the country’s history, crafts, archaeological significance, and natural wonders.

LP South Africa (8)

Travis enjoyed this kit’s booklet, including a color activity to learn some Afrikaans, a bit about Nelson Mandela, and a tricky safari animal count! It was all quite doable for a 6 year old, with grown-up assistance.

LP South Africa (14)

Souvenir:

This month’s package from “Sam and Sofia” included not one but two souvenirs. The first was a dehydrated washcloth in the shape of an elephant. Travis was agog with the way it expanded into a square after we placed it in a dish of warm water, and it featured a beautiful indigenous print. He seemed so touched by the gift!

LP South Africa (6)

The second souvenir was more of a craft, a basket to weave. Travis did the first round of weaving the provided raffia around the cardboard frame, though I did then jump in to help out (there was a lot of raffia!).

LP South Africa (10)

As I wound, he was fascinated to learn that many cultures still make baskets like this, and by the idea that in some places you can’t just go to a store to buy a basket. He wanted to know what these villages might look like, or how the doors and houses would look.


LP South Africa (11)

Further Activities:

There were fewer crafts suggested in the booklet and online than with previous countries we’ve explored, but Travis enjoyed learning to draw a crocodile step-by-step, a pattern activity about traditional Zulu baskets, and coloring in the country’s flag for his garland.

LP South Africa (16)

Finally, I surprised Travis with this month’s add-on: 3-D puzzles of safari animals. He not only loved piecing together the giraffe, lion, and other animals the first time through, but then wanted to take them apart and do it again.

LP South Africa (3)

And then again!

LP South Africa (4)

As a bonus, the puzzle comes with an informative book from Nat Geo kids. There was true quality to this product, an excellent add-on option from Little Passports.

LP South Africa (1)

Recipe:

Now all that was left was to explore the country with our bellies! We learned that this particular recipe is the national dish of South Africa, with regional variations throughout the country. Unfortunately, as with previous recipes from Little Passports, it wasn’t very kid-friendly either in preparation or taste (this one is spicy!).

Bobotie (1)

But Travis enjoyed helping shred the apple, and bravely gave it a taste test before deciding it had too much curry powder.

Ingredients:

  • 2 slices of bread
  • 3/4 cup plain almond milk
  • 1 tablespoon Earth Balance butter
  • 2 tablespoons canola oil
  • 1 and 1/2 cups chopped onion
  • 2 tablespoons curry powder
  • 1 tablespoon brown sugar
  • 1 teaspoon salt
  • 2 (12-ounce) packages meatless crumbles
  • 2 Ener-G eggs
  • 1 peeled and grated apple
  • 1/2 cup raisins
  • 1/4 cup blanched almonds
  • 6 bay leaves
  1. Crumble the bread into a small bowl and cover with the almond milk. Let stand for 10 minutes.
  2. Meanwhile, heat the butter and canola oil in a large skillet over medium heat. Add the onion and cook for about 5 minutes, until softened.
  3. Stir in the curry powder, brown sugar, and salt. Add the meatless crumbles into the pan, breaking apart into pieces, and cook for 5 minutes, until browned. Remove from heat and set aside.
  4. Meanwhile, remove the bread from the bowl of milk, squeezing out the excess milk. Set the bread aside, and whisk the Ener-G eggs into the milk.
  5. Add the bread crumbles, grated apple, raisins, and almonds to the skillet. Spoon the whole mixture into a 13×9-inch baking dish. Pour the milk mixture on top, and top with the bay leaves.
  6. Bake at 350 degrees F for 30 minutes.

Bobotie (2)

Rocks-to-Gems Treasure Hunt

Rocks to Gems (1)

Here’s a fun at-home camp activity, if your kids can’t get to real camp this summer! It starts as an art project, and ends with a hunt outside.

To start, we gathered lots of tiny rocks, and then used shiny metallic paints to turn them into gems. Because Travis doesn’t love to get his fingers messy, the painting did end up being mostly a mommy step. But he loved the shiny blues and greens and purples we had as a result.

Rocks to Gems (2)

While he was distracted, I hid clusters of the “gems” around the yard.

Rocks to Gems (4)

Little sister Veronika was my accomplice to hide them! Then it was time for a treasure hunt.

Rocks to Gems (3)

Veronika is of course too young to get in on the hunt in a truly competitive way, but if you’re playing this game with more than one big kid, you can assign point values for different colors, and make it a true competition.

Rocks to Gems (7)

Travis, meanwhile, enjoyed the hunt and the satisfaction of finding all the sparkling “gems” and bringing his treasure home.

Rocks to Gems (9)

These were so pretty we decided to leave one out as a lucky find for a neighbor!

Rocks to Gems (10)

Tape Collage

Tape Collage (5)

If your toddler is at all like Veronika, then he or she loves tape. Sticking it onto things, making roads from it, you name it. The only problem? She gets impatient waiting for me to tear off a new piece for her!

Today, to head off the problem, I made her a tape holder of her very own. I used an empty frozen juice can, which are nice for kids because they have no sharp edges. Any similar can or container would work fine. I stuck pieces of colorful tape all around the rim, using tape with different textures, such as washi tape in several colors, masking tape, and duct tape.

Tape Collage (1)

Then I gave Veronika her new tape dispenser and a piece of construction paper, and it was time to create.

Tape Collage (2)

She looked so pleased that she could pull the pieces off solo! Occasionally she still needed a little grown-up rescue when a piece of tape get stuck on her fingers.

Tape Collage (3)

She concentrated hard on where each strip of tape should go on her paper, and then she jumped up and declared, “Markers!” I love that she had decided all her on her own what her artwork needed next.

Tape Collage (4)

A little blue marker and her masterpiece was finished.

Mango Cole Slaw

Mango Coleslaw alt

Mango adds a fun tropical note to this summery side dish. If your kids are older, you can prepare it raw like a traditional coleslaw. I like to cook the cabbage mixture first, though, so it’s easier for my toddler to chew. For an added nutrition boost, stir in chopped collard greens, too.

Ingredients:

  • 5 cups packaged coleslaw mix
  • 1/4 cup chopped red onion
  • 3 cups chopped mango
  • 2 tablespoons olive oil
  • 1 tablespoons balsamic vinegar
  • 1 tablespoon agave nectar
  1. Heat a large skillet coated with cooking spray over medium heat. Add the coleslaw mix and red onion; cook for about 10 minutes, until tender. If desired, add the mango in the last 5 minutes of cooking.
  2. Combine the coleslaw mixture with the remaining ingredients in a large bowl, tossing to coat. Chill until ready to serve.

Mango Coleslaw

Tissue Paper Collage

Tissue Paper Collage (8)

You won’t get a lasting piece of artwork with this toddler project, but you will introduce your little one to interesting materials and novel methods of making art!

First, lay a long sheet of aluminum foil down on the ground. This immediately caught Veronika’s attention, and she wanted to walk across the shiny sleek surface.

Tissue Paper Collage (1)

Then I gave her a little cup filled with oil. Baby oil would work well, or any neutral kitchen oil like canola. I showed her how to use a paint brush to smear this on the foil.

Tissue Paper Collage (4)

I started tearing bits of tissue paper for her (although your toddler might prefer to tear these him- or herself!), and showed her how it instantly stuck to the oil on the aluminum.

Tissue Paper Collage (2)

She liked sticking them down and picking them back up again, and looking at the smears of oil left behind.

Tissue Paper Collage (6)

Trial and error showed that flat pieces of tissue paper adhered to the foil much better than crumpled pieces, although the crumples did add fun texture.

Tissue Paper Collage (5)

She also loved dropping bits of the crumpled tissue in her cup of oil and stirring them around!

Tissue Paper Collage (7)

In sum, there was lots to like about this one, both in terms of texture and creativity.

Tissue Paper Collage (9)

Make Your Own Reading-Inspired Activity

MYO Reading Activity (1)

I am loving storytime with Veronika these days; at long last she’ll sit in my lap and snuggle for a story (although she still prefers to “read” solo!). One other way to keep her engaged in a book is to add a hands-on element, bringing the story to life. Books about food are especially fun for this, so here’s how we played today!

We started out with a read of Blueberries for Sal, one of my personal favorites. I gave Veronika a plastic cup and some blueberries, intending for her to ka-plink ka-plank ka-plunk along with the book. Lots of dumping and pouring of blueberries, ensued!

MYO Reading Activity (2)

I had enough extra berries on hand that my intention was to make blueberry muffins thereafter, cooking in the kitchen just like Little Sal and her mother. But a certain big brother ate all the blueberries!

MYO Reading Activity (3)

Oh no! I had already promised the kids muffins, so I searched online for a recipe that was quick and used only pantry staples. Veronika loved scooping flour and spices with a set of kitchen utensils while I did the real baking.

MYO Reading Activity (5)

Well, it turned out these last-minute muffins were so good that the kids delighted in running back and forth from living room to kitchen for bites with huge grins on their faces, while shouting out, “Mama Moose’s Muffins!”

MYO Reading Activity (8)

That made us think of another kiddie lit classic, If You GIve a Moose a Muffin. So we read that book over our muffin snack!

MYO Reading Activity (7)

As a result, here is my recipe for “Mama Moose’s Muffins”, which might just become a classic around here.

Ingredients:

  • 3 and 1/2 cups flour
  • 1 and 1/3 cups sugar
  • 4 teaspoons baking powder
  • 1 teaspoon baking soda
  • 1 teaspoon salt
  • 1 and 1/2 teaspoons cinnamon
  • 1 teaspoon nutmeg
  • 2 tablespoons apple cider vinegar
  • Scant 2 cups plain almond milk
  • 1/2 cup melted Earth Balance butter
  • 2 Ener-G eggs
  • 2 teaspoons vanilla extract
  • 2/3 cup raisins
  1. In a large bowl, combine the flour, sugar, baking powder, baking soda, salt, cinnamon, and nutmeg.
  2. Pour the cider vinegar into a liquid measuring cup, and add almond milk to equal 2 cups. Let stand for 5 minutes. Add the almond milk mixture to the dry ingredients, along with the melted butter, Ener-G eggs, and vanilla. Stir in the raisins.
  3. Divide the mixture evenly among 12 jumbo muffin cups coated with cooking spray.
  4. Bake at 350 degrees F for 30 minutes, then transfer to a wire rack to cool.

MYO Reading Activity (6)


Dance Ribbon

Dance Ribbon (6)

This easy dance ribbon made the perfect rhythmic accessory for Veronika’s at-home music class today! I put it together just before class, and she continued to play with it long after the Zoom session had ended.

First, tie lengths of colorful ribbon to a ring that your toddler can easily hold. I used a canning ring for this, but a shower curtain ring or even key chain would work, too!

Dance Ribbon (1)

I alternated strands of green and pink ribbon. You can make your dance ribbon with one color, two, or a full rainbow!

Dance Ribbon (7)

I handed the ring to Veronika and showed her how to wave it through the air to the rhythm.

Dance Ribbon (3)

A lilting, slow tune felt just right for making big beautiful ribbon circles. Your toddler can take it from there!

Dance Ribbon (5)

She loved waving the ribbons around and dancing with them, and requested a tutu to be a ballerina!

Dance Ribbon (9)

She also later found other uses for it, like pretending it was her doll’s swing on the playground! I always love watching the way toddlers can invent worlds of imagination from just a few simple materials.

Dance Ribbon (8)

Rhyming Treasure Hunt

Rhyming Scavenger Hunt (1)

I’m wary of the summer learning slide that inevitably occurs a little, and realized today that Travis needed some brushing up on rhyming words. What better way to engage him in summer learning than by turning it into a scavenger hunt?

I had to set this up the night before because the clues were scattered all over the apartment. You’ll need to plan carefully, using words that rhyme with easy-to-spot items in your house. As your child arrives at each new item, the next flash card will await them.

You can draw all your words on index cards, but I took a shortcut and used picture flashcards from a school workbook, given my limited drawing skills! So when Travis came down in the morning, there a picture of a fish was waiting at the foot of the stairs. He immediately wanted to know what it was for.

Rhyming Scavenger Hunt (4)

“What rhymes with fish?” I asked. He wracked his brain, and when he spotted a dish on the kitchen table, he made the connection.

Inside the dish was the next card, a picture of a duck. Duck and… truck! (Note: I made this easier by having the truck within sight on the highchair tray. You can make it more of a challenge for older kids, but given all the rhyming options for each word, I knew visibility would act as a prompt for my six-year-old).

Rhyming Scavenger Hunt (2)

The truck was atop a picture of a nest. Now Travis was getting the idea, because there was a suspicious vest lying on the couch in the middle of summer. A clue! Jar led to car…

Rhyming Scavenger Hunt (5)

…and a toy car was on top of an image of a queen.

Rhyming Scavenger Hunt (6)

This one was tough for him, so I guided him through several rhyming options until he got to…

Rhyming Scavenger Hunt (3)

…Green! Now there was a sock. Rock! And outside on the patio, under a few painted garden rocks, was a packet of new bubble gum.

You can make the prize big or small, anything at all that will delight your child and reward this summer learning game.

Summer Boredom Bucket List: Day 6

Boredom 28 a

Welcome to the final installment of boredom busting ideas for your summer. I’d love to hear how any of these suggestions have gone for your family. Or, you can share additional ideas in the comments, because uh oh… there’s a full month of no-camp summer left.

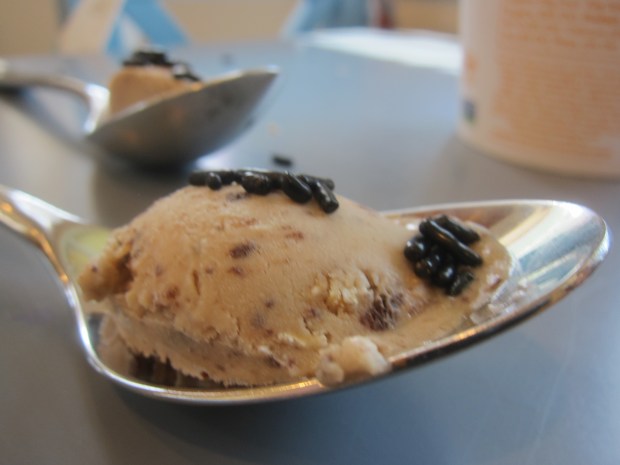
Idea 22: Make a Mini Sundae on a Spoon. Want the best way in the world to cheer up kids who are complaining that they are hot and bored and tired? Tell them you’re going to make sundaes. But not just any sundaes. The smallest sundae in the world. Travis was gleeful as we pulled out tablespoons to use as the “bowls”.

Boredom 26 a

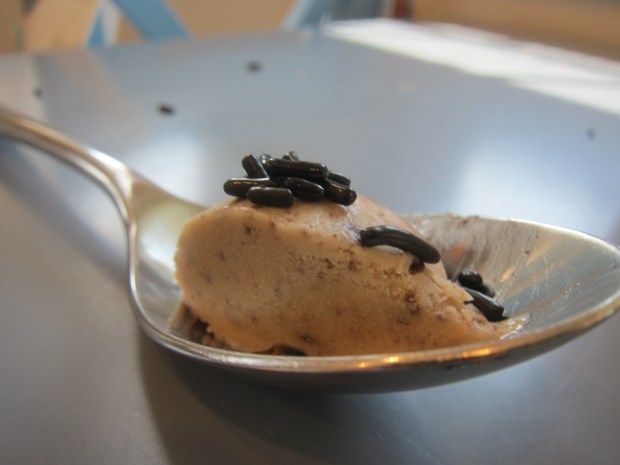
We scooped a tiny portion of ice cream onto each spoon. Top with sprinkles of course, or cherries or any other favorite sundae toppings. Then repeat, because these are so small you can tell the kids they get to have three sundaes. Seriously, the trick will work every time. Cue up the cooled off and happy kids.

Boredom 26 b

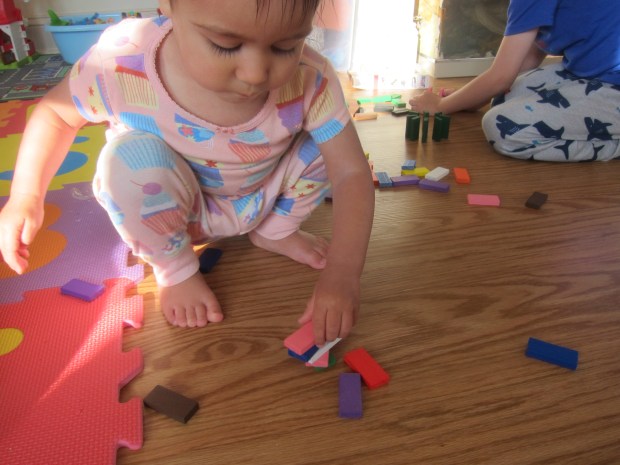
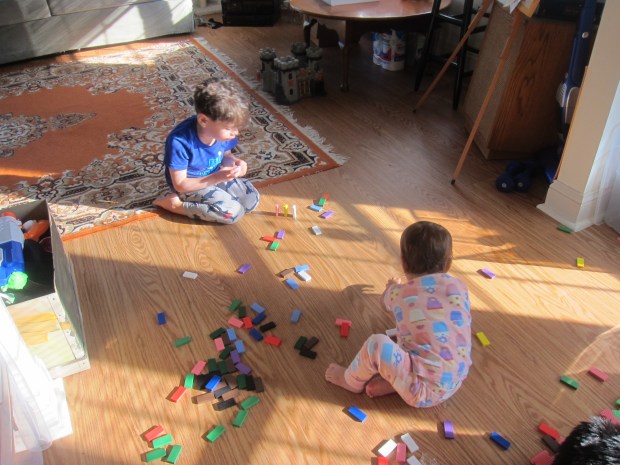
Idea 23: Play with Dominoes. If I had to pick one activity from all 26 of these suggestions to occupy my kids, this one would be it.

Boredom 27 a

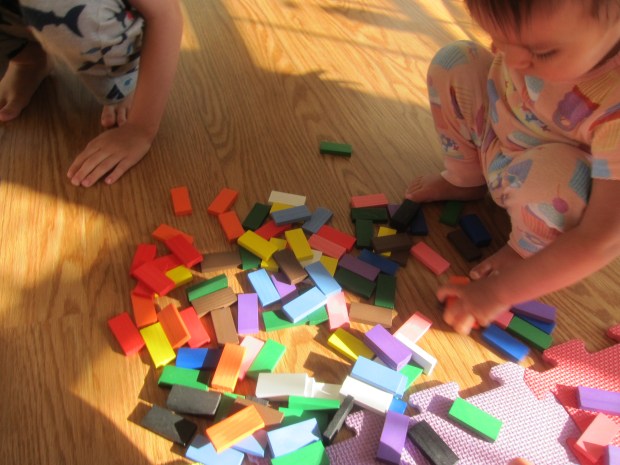
A set of domino blocks in all the colors of the rainbow was so worth the purchase. The kids can literally play with them for hours!

Boredom 27 b

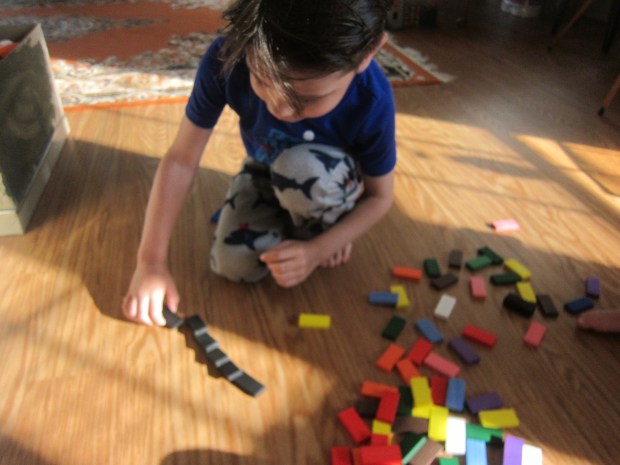
Veronika is in her own world when I set them out. “Let’s build!” she says. “Rectangle!” She’ll build up a stack of them, then knock them down and scrabble them across the floor, and then start over.

Boredom 27 f

Travis, meanwhile, loves the challenge of copying designs from the box, as well as seeing how long a line he can make.

Boredom 27 e

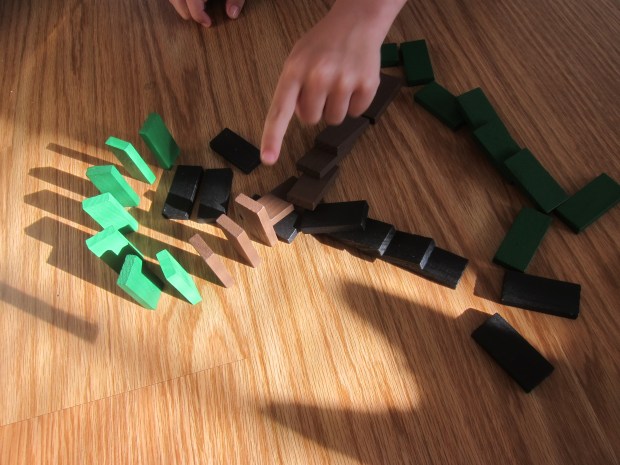
By the end of his first night trying, he could line up 20 or more before an errant fingertip made the line come tumbling down.

Boredom 27 g

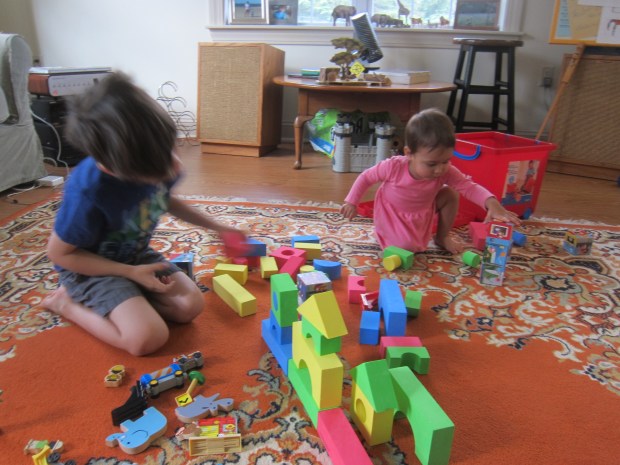
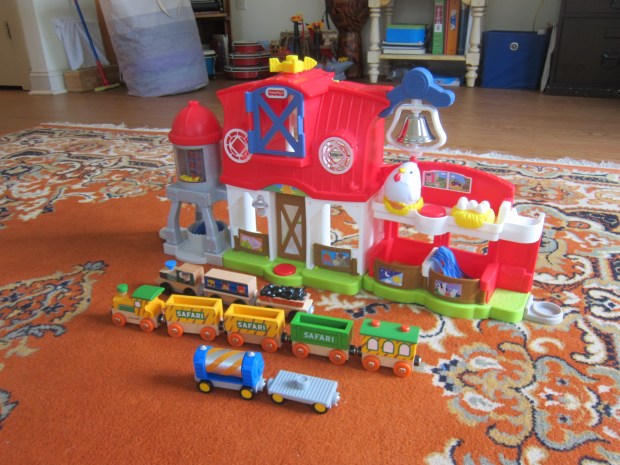
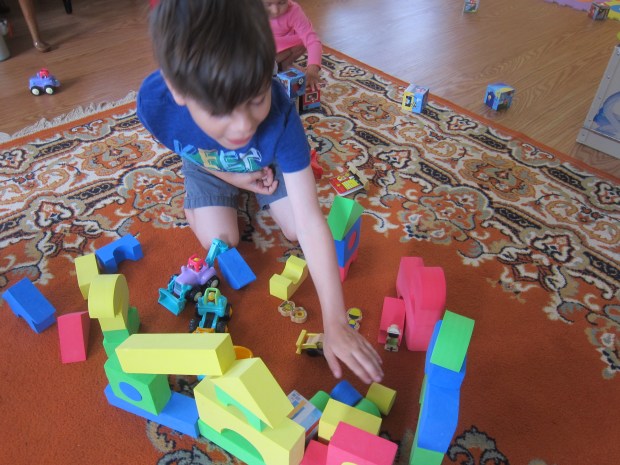
Idea 24: Make a Mini Town for Trains and Cars. This was another Highlights prompt that went from simple suggestion to loads of play. First we pulled out the toy trains and a box of blocks. Both kids were immediately building.

Boredom 28 b

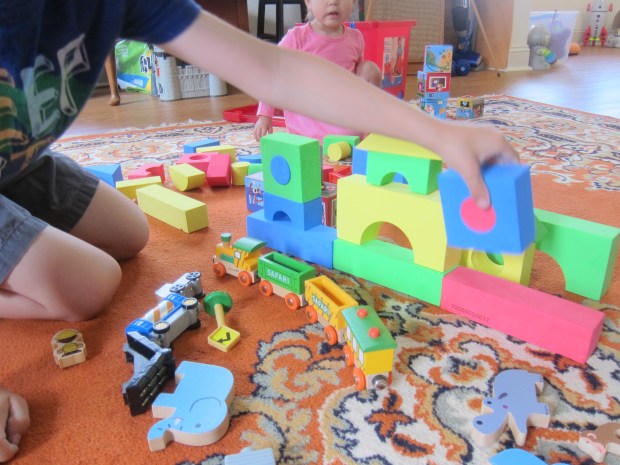
Travis designed a “farm” as little sister set to work on a tall tower. Then we added a few construction vehicles to the farm site, so now it was a construction site! Travis moved the blocks like rubble and began making his design more sophisticated.

Boredom 28 c

We needed a residential neighborhood down the road. Magna-tile houses soon followed!

Boredom 28 d

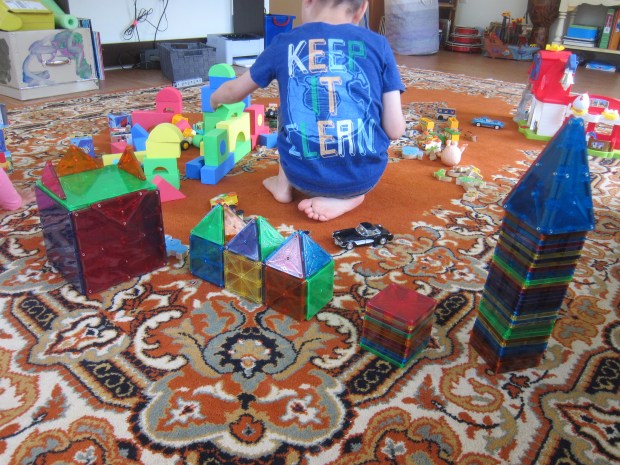
Then we needed a train station for the train to pull up to.

Boredom 28 f

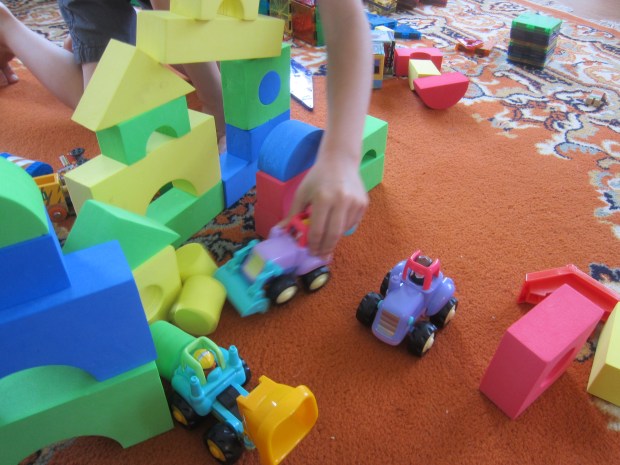
Then all the toy cars came out, so we needed roads! Masking tape did the trick.

Boredom 28 h

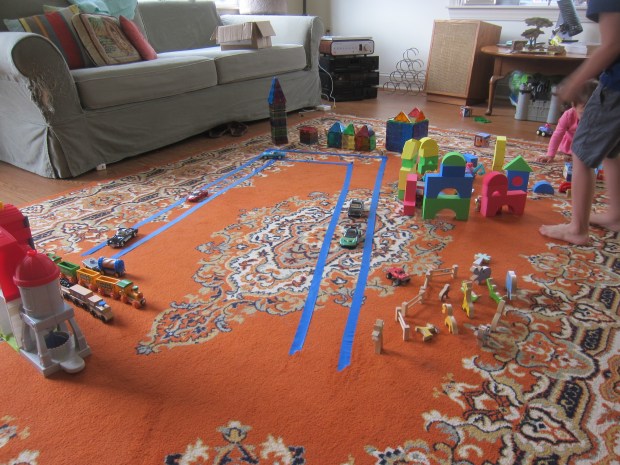
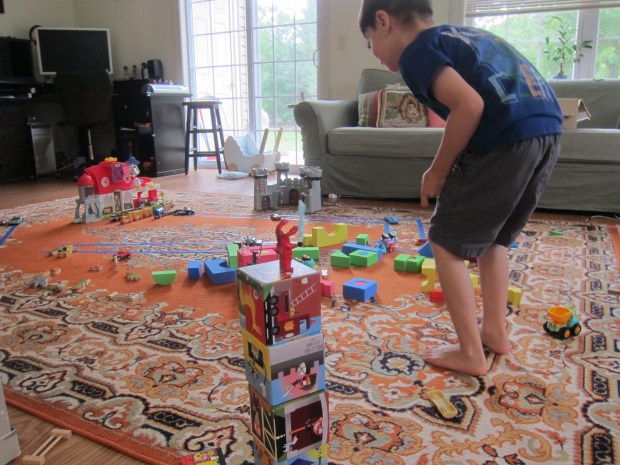
Pretty soon it was a thriving city.

Boredom 28 g

It’s a good thing I got pictures when I did because you can guess what happened next to a 6-year-old boy’s city. It was destroyed by evil Lego snakes of course.

Boredom 28 i

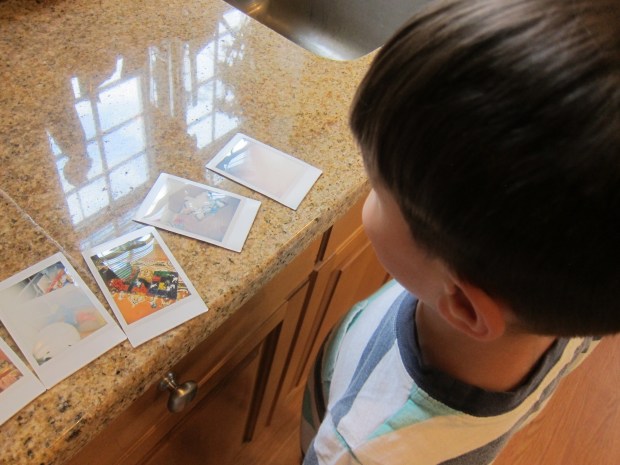
Idea 25: Make a Time Capsule. This was a suggestion we worked on over the course of a few days. First, you may need to explain the concept of a time capsule to your kids, something you’ll create now and then seal up to open at a later date. Travis was in charge of taking pix with our instant camera!

Boredom 29 b

The Instax was half the fun, though I had to direct him towards photos of things that exemplified our summer, not just silly shots of his toys.

Boredom 29 a

When we had enough photos, we decorated a shoebox. Travis proudly wrote Summer 2020, and drew flowers and bugs, and then we tucked all the photos inside.

Boredom 29 e

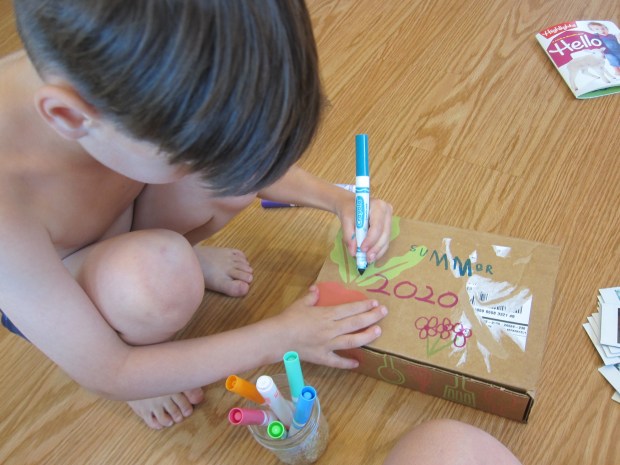
I asked him if he wanted to add other summer mementos, but his answer was no. Your kids might consider tucking in newspaper clippings, tickets from museums, or anything else that reminds them of this time period. Now the shoebox is tucked on a closet shelf to open in Summer 2021!

Boredom 29 c

Idea 26: Make Up Your Own Boredom Buster. Well after all that, it was now up to Travis to think of an idea! His answer? He wanted to chew bubble gum, a rare treat around here. If you have proper bubble gum, you could even turn this into a bubble blowing contest! Unfortunately, I’ve never found a vegan brand that works well for this. But wouldn’t you know it, just chewing gum kept him happy long enough for me to have a little moment of summer peace and quiet.

Parents gum