Free the Toys

Free the Toys (4)

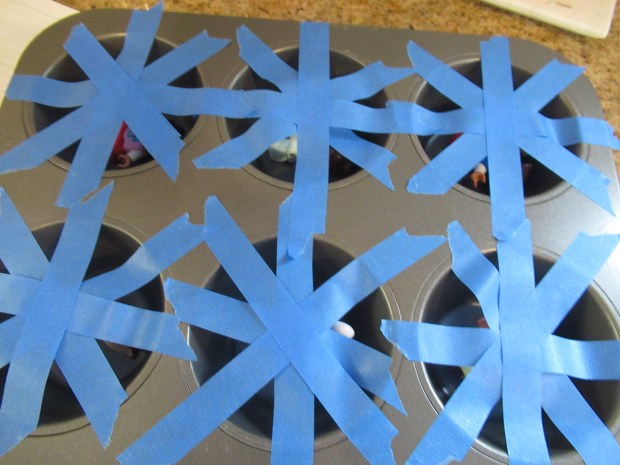
In my experience, toddlers love tape (tearing it, sticking it on things, ripping it back up again), and here’s a way to give purpose to all that ripping: trap small toys in the compartments of a muffin tin, then cover over with painter’s tape. Then tell your toddler it’s time to free the toys!

You can use just about any small toy for this game. I used a mix of Veronika’s Calico Critters and Duplo figures. Counting bears would also be great, as suggested on the blog Days with Grey, or tiny Shopkins figures if you’re using a mini muffin tin.

Free the Toys (1)

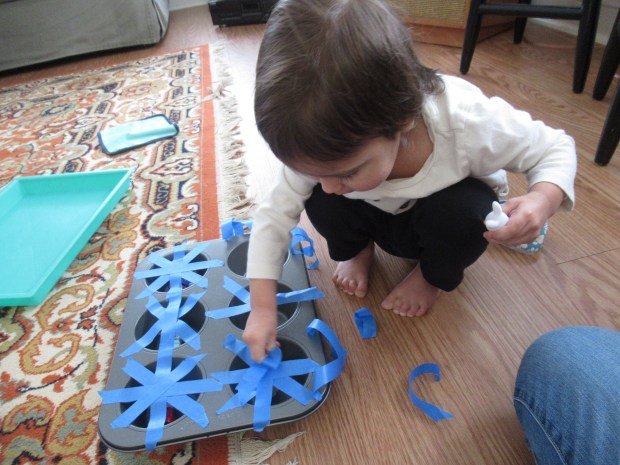
I placed one toy in each compartment and then covered with about 6 pieces of overlapping tape. I wanted to leave some gaps so Veronika would see that there was a toy inside, but consider making a complete cover of tape for older toddlers or preschoolers. Or, make only a few lines of tape for older kids, but have them use scissors instead of their hands!

Free the Toys (2)

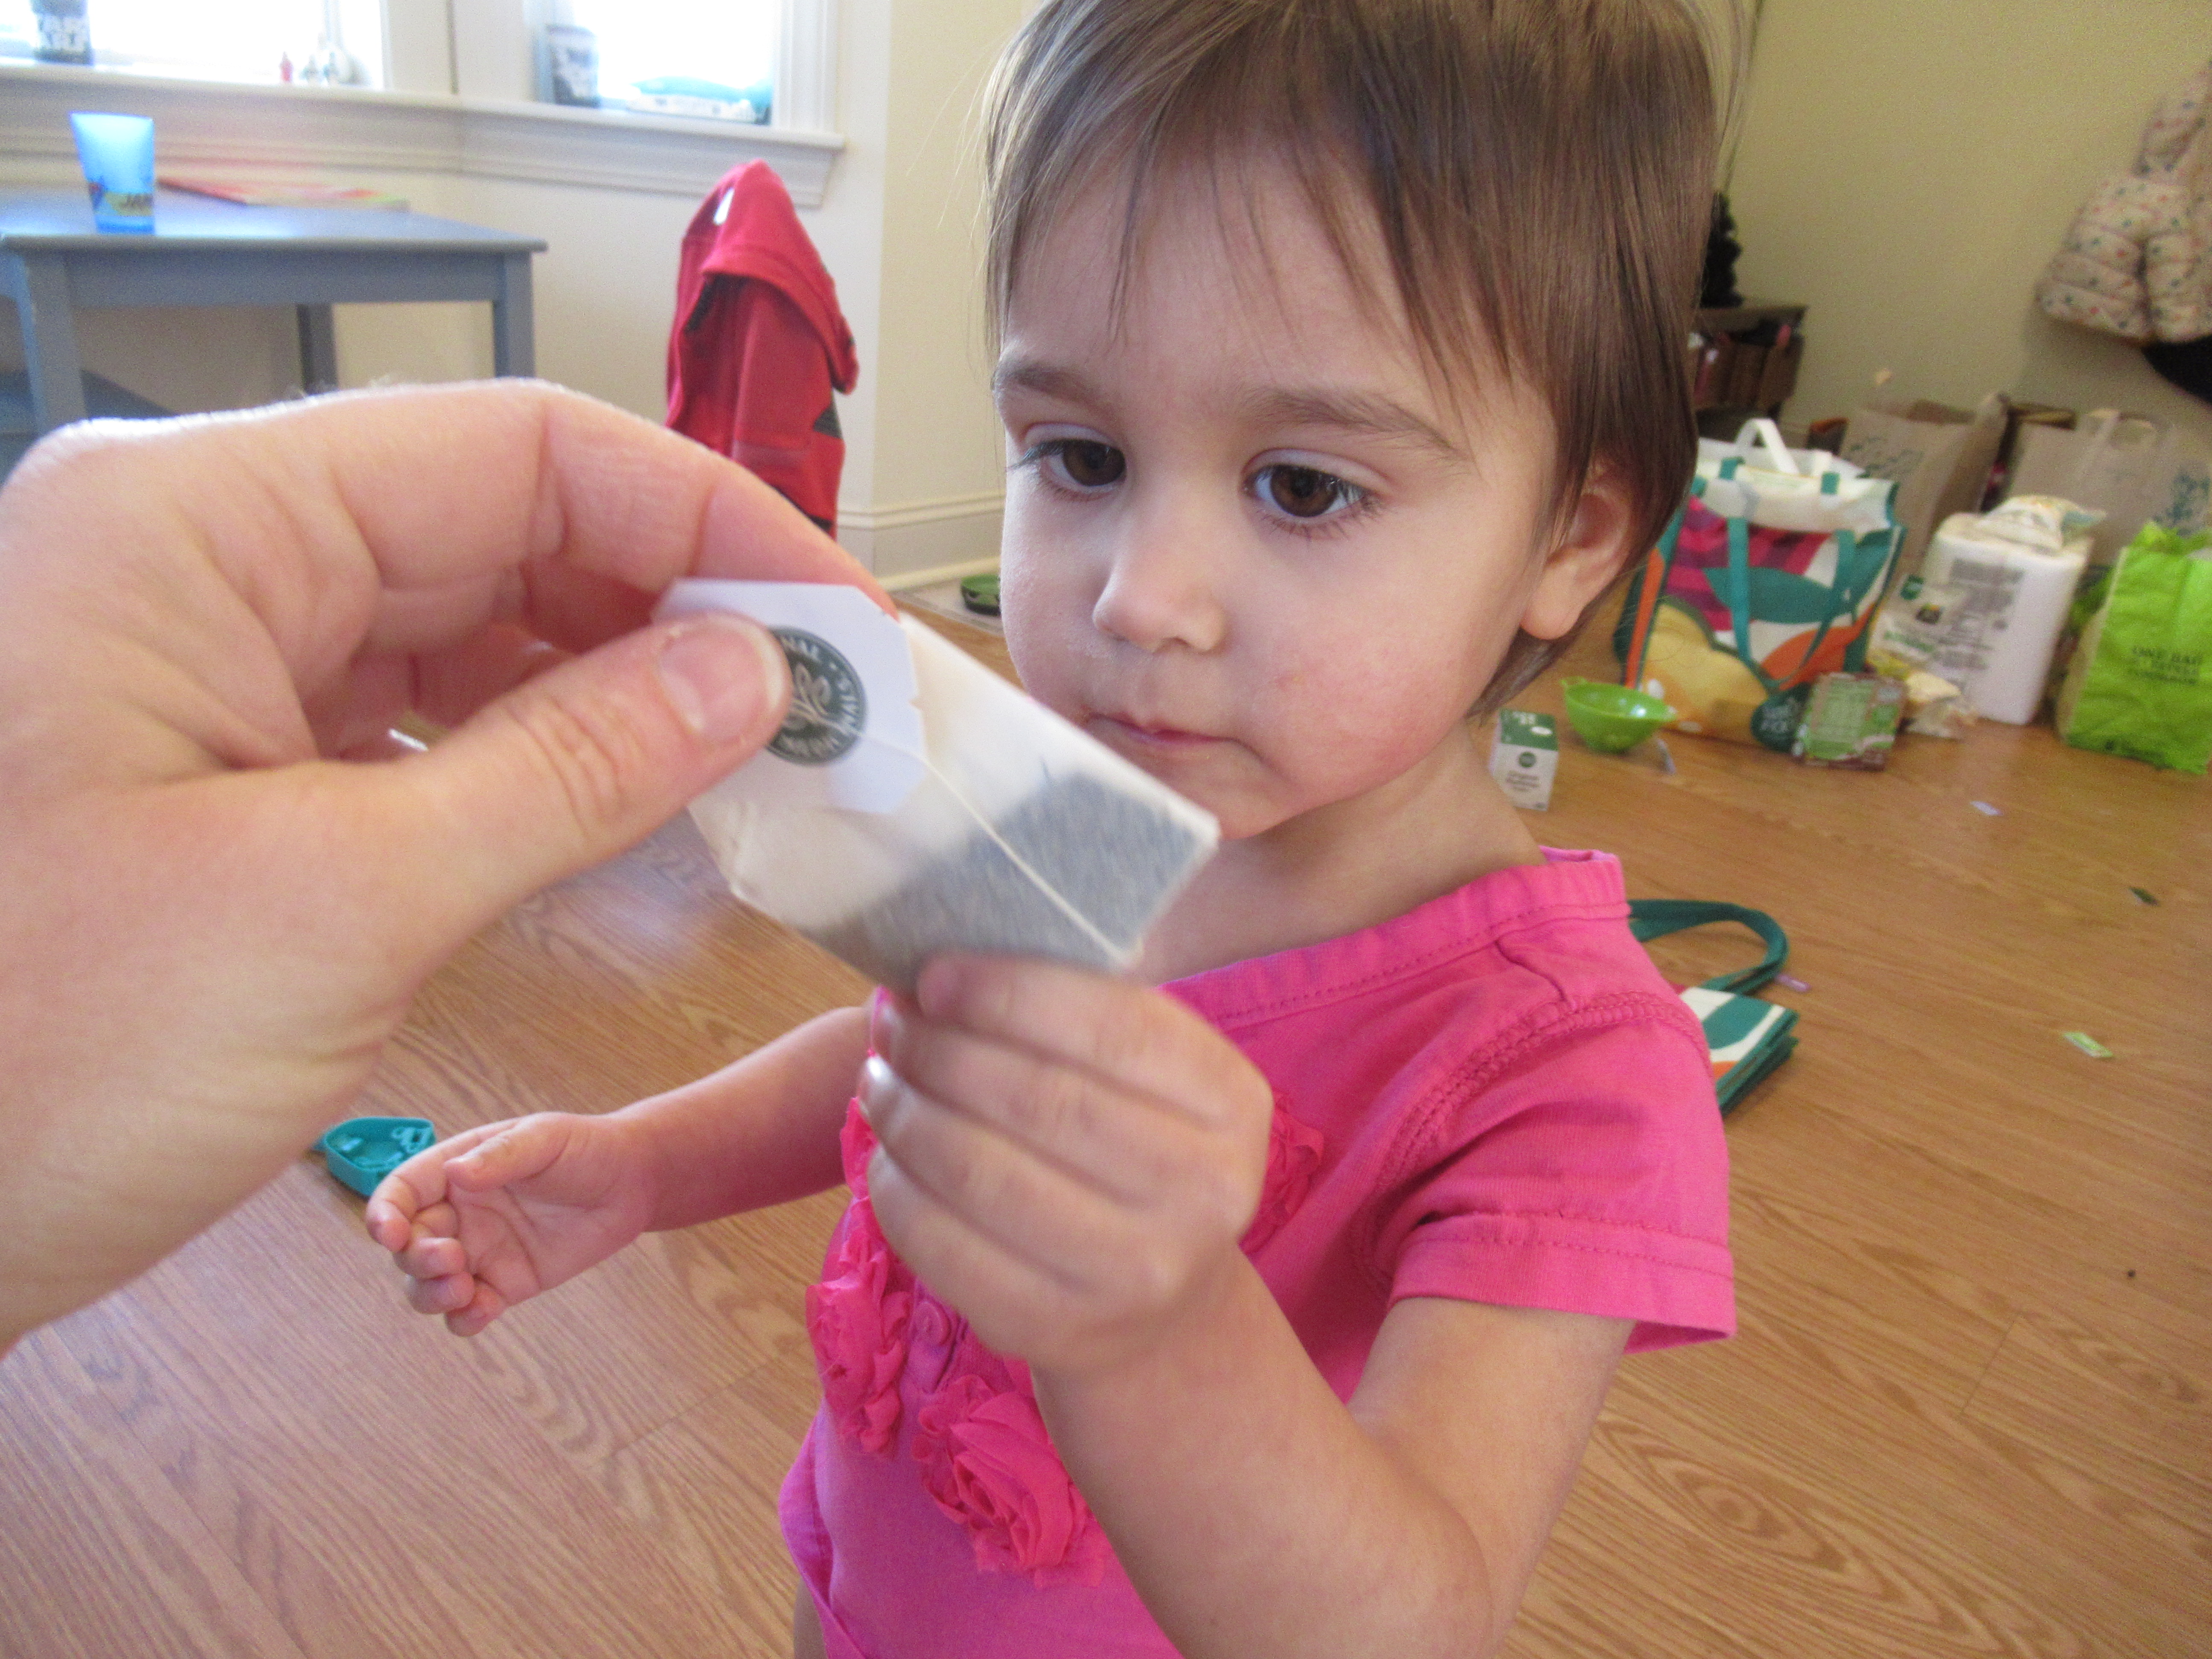
Veronika quickly proved adept at ripping up the tape and even at getting the sticky tape off her fingers when it momentarily got stuck.

Free the Toys (5)

She delighted in discovering who was in each compartment, calling out the names she has for them like Pajama Bunny and Crawler Bunny.

Free the Toys (6)

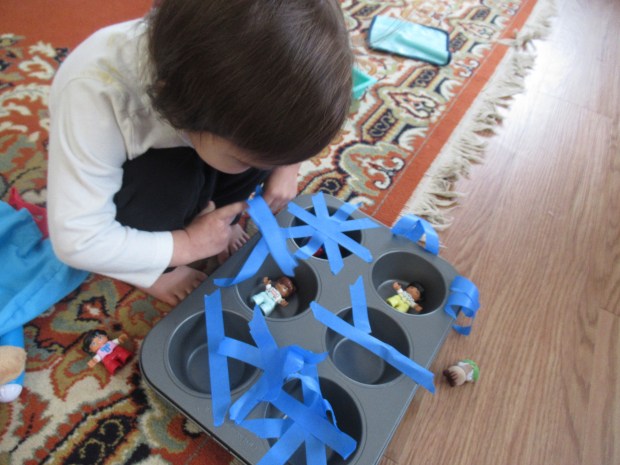
When she was done, she immediately asked for a repeat: “Let’s trap them again!” I repeated the process, and this time she was able to replace some of the tape herself after, soon inventing a game that involved the bunnies taking a “bath” in the little compartments.

Free the Toys (9)

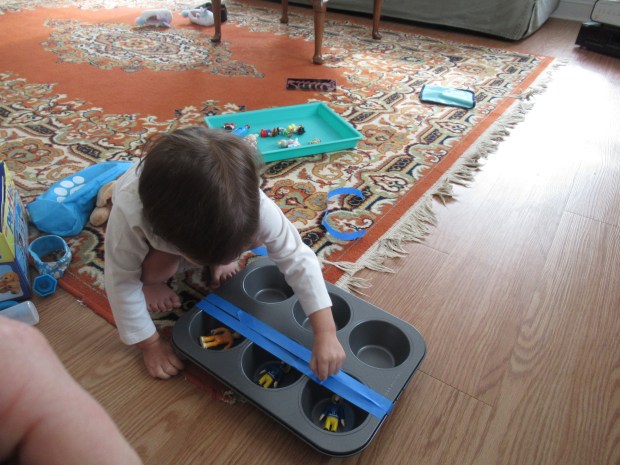
It wasn’t long before she wanted a third round! This time she wanted to trap her fireman toys and I switched it up by making long lines of tape instead of trapping each toy individually.

IMG_1590

She wasn’t as pleased with this version, but she did puzzle out how to pull up the long strands, after a little deliberation.

IMG_1591

I can unequivocally say that this is a fantastic way to keep a child busy, occupying Veronika’s attention far longer than most games.

Movie Dinner Night

Movie Dinner Night (5)

Last week the kids loved a picnic dinner-and-movie night so much that today we took it a step further. We repeated the picnic, but specifically designed a meal to fit the movie we were going to watch! This would work for any movie your kids love, and in our house that means Star Wars.

Movie Dinner Night (1)

That meant we were soon dining on TIE fighters made from crackers and vegan cheese (original idea on the Star Wars website here), blue Bantha milk (recipe care of Baking Mischief), and Jabba the Hummus (a quirky idea from ASDA Good Living).

Movie Dinner Night (6)

Combine that with a pan of nachos (tortilla chips topped with vegan shredded cheddar, black beans, corn, tomatoes, cilantro, avocado, and non-dairy sour cream), and we had all the fixings for a galactic banquet.

Sheet Pan Nachos (2)

All of this literally came together in under half an hour.

Movie Dinner Night (2)

The kids couldn’t get enough of the Bantha milk!

Movie Dinner Night (3)

Again, it doesn’t matter what the movie theme is. Pick the one your family loves most, find a few easy recipes, and you have a dinner they’ll never forget.

Movie Dinner Night (4)

The kids loved it so much we might just make this a tradition, revisiting the idea once a month with a new movie each time!

Movie Dinner Night (7)

Pasta Artist

Pasta Art (3)

Travis read about pasta artist Linda Miller Nicholson in his latest Highlights magazine, and we were so intrigued with the article that we went on to check out her Instagram. Talk about wow! We knew we couldn’t recreate anything close to her masterpieces, but thought it would be fun to try some pasta art of our own.

Nicholson uses plant-based dyes right in her pasta dough, but in a pinch, I placed a little bit of dry pasta in small zip-top bags, then added all-natural food coloring (think yellow from turmeric and red from beets) and a tablespoon of white vinegar to each bag. Seal and shake the bags to coat the pasta, then let dry on paper plates.

Pasta Art (1)

From here, you could color or paint directly on the pasta, or glue the various pieces down into pictures of other things. Travis predictably wanted to make Star Wars creations, so we tried our hand at pasta x-wing fighters and Darth Vader wielding a red ziti lightsaber.

Pasta Art (4)

If your kids try pasta art, we’d love to hear what they create in the comments!

Pasta Art (2)

Play with Peppermint

Play with Peppermint (5)

I came home from the market with fresh mint, and Veronika was immediately intrigued with the smell. So we turned the morning into a little chance to explore peppermint with all our senses! It’s fun to pick one ingredient like this on occasion, and focus on it closely.

First up I asked her to use her eyes/sight, and notice that the plant was green and leafy. But more importantly, she wanted to explore with her nose/smell. First we smelled a peppermint teabag and then the fresh leaves.

Play with Peppermint (1)

Next came taste! I brewed a pot of peppermint tea and cooled down cups for the kids with ice cubes. They both loved it, and also sampled the fresh leaves, which big brother Travis loved dropping right into his tea.

Play with Peppermint (2)

Now it was time for hands/touch. Mint has that great slightly fuzzy texture and Veronika loved holding the leaves or ripping it into smaller pieces with her fingers. We decided to glue some of this confetti down to make mint art!

Play with Peppermint (3)

I suppose we didn’t really “hear” the peppermint, unless you count the sound of it crumbling between our fingertips.

Play with Peppermint (4)

Finally, I tied together a few sprigs for Veronika as a whimsical bouquet. She loved this “tiny tree” and played with it for a while. I thought it looked a bit like a magic wand, too! So perhaps the sixth sense we used today was our imaginations.

Play with Peppermint (6)

This was a nice way to pause and focus on just one food, as opposed to making a recipe together. I loved seeing her wonder as she explored the peppermint with every sense.

Play with Peppermint (7)

Teach Your Child To…Wash the Dishes

How to Wash Dishes (3)

I love Parents magazine’s new feature with a “Teach your Child to…” each month. Last month, my big kid tackled tying his shoes. This month, it was Veronika’s turn, teaching my 2 year old (yes!) to wash the dishes, or at least the rudiments behind the task.

Don’t expect sparky plates to come out of this activity; the idea is simply to introduce your toddler to this daily chore, and have some family fun in the kitchen while you’re at it. To start, I cut a regular sponge into a smaller piece; this was much easier for her little toddler hands to hold! Veronika seemed mesmerized the moment she spotted a mini sponge waiting for her right next to mommy’s bigger sponge!

How to Wash Dishes (1)

I filled the sink with a few dishes (think rubber spatulas or small metal pans for this first foray into the task, not breakable items), and then stood Veronika up on a chair so she could reach. She felt like such a big girl!

How to Wash Dishes (2)

Together, we started washing the dishes. I showed her how to add soap to her sponge and scrubby-scrub-scrub on the dishes.

How to Wash Dishes (5)

After each one was sudsy, we gave it a good rinse, which she loved!

How to Wash Dishes (4)

She also loved squeezing the sponge to make more dish soap bubbles, and then rubbing those bubbles all over her hand. “I need a rinse!” she would tell me each time she got soapy.

How to Wash Dishes (6)

When the dishes were clean, I showed her how to set them aside in the drying rack, and her lesson was done. But Veronika wasn’t finished! She loved her little sponge so much that she wanted to scrub down the chair, too.

How to Wash Dishes (7)

Winter Water Table

Dishwasher Water Table (1)

When it’s obviously too cold outside for water table play, here’s a fantastic hack to create a water table right in the warmth of your kitchen. Simply tilt open the door of an (empty) dishwasher, and you have a shelf at the perfect height for a toddler. All that’s left to do is to arrange a few items on the shelf like a bucket of warm water, cups for pouring, scoops, and other water toys.

Dishwasher Water Table (3)

To heighten the summer feel of the activity, I dressed Veronika in her favorite bathing suit and laid a fluffy beach towel underneath the open dishwasher. This towel was perfect not just for catching any spills, but also keeping her bare feet warm! She immediately began playing, needing no instruction for this activity. There was lots of happy scooping, pouring, and dumping.

Dishwasher Water Table (4)

She loves cups with holes that make water “rain” down a little at a time. Then she was busy for a while pouring water from one small cup to another.

Dishwasher Water Table (5)

Such concentration!

Dishwasher Water Table (6)

And of course sometimes she got impish, lifting the cups up high for a big waterfall that splashed down!

Dishwasher Water Table (7)

After about 20 minutes she was ready for warm dry clothes, but this was a great way to fit in water play in the middle of winter.

Pipe Cleaner Shapes

Pipe Cleaner Shapes (4)

This easy project is a great way to help little ones develop the hand-eye coordination to color within the lines. In this case literally, thanks to bumpy raised lines made from pipe cleaners.

As Veronika played with a few extra pipe cleaners, I arranged others in simple shapes like triangles, squares, and circles on sheets of construction paper, and then taped them down.

Pipe Cleaner Shapes (2)

Then I simply showed her how to use crayon to color within the shapes. She loved choosing which color to use in which shape.

Pipe Cleaner Shapes (3)

It was neat to watch her reaction when her crayon came up against the pipe cleaner “bumper”, forcing her to stay within the lines. I could see her brain working as she realized she had to stop her crayon before it ran over he edges.

Pipe Cleaner Shapes (5)

In sum, this is a great early lesson on pen control, which is the first step towards drawing all those shapes…down the line.

Tube Fun

Tube Fun (5)

The last time I was at the hardware store, I stocked up on a few items that could make a quick activity for a toddler once put together. A snowy day at home was the perfect moment to pull out those items, and this “toy” came together in moments!

First up was a length of clear plastic tubing, which is usually available in bulk at the store and you can ask to have it cut to size. I asked for two feet, although next time I might make it closer to three feet. Make sure your tubing is wide enough for marbles to roll through; that’s about 1 inch for regular marbles, but I have small decorative marbles at home that fit in 1/2-inch tubing.

Tube Fun (2)

Next, I used hot glue to attach a rubber cork (also available at hardware stores) into one end of the tube. Fill the tube with the previously-mentioned marbles or beads, then glue a second rubber cork in the other end. The toy is ready!

Tube Fun (1)

Veronika actually managed to pull the second cork off, but luckily the hot glue had created enough of a seal that the tube still worked without the marbles rolling out. From here, she loved holding it up to watch the items slide around.

Tube Fun (6)

She also turned it into a belt.

Tube Fun (8)

Or kitty ears, or a necklace!

Tube Fun (4)

If you prefer, you can add a little vegetable oil into the tube before gluing on the second cork; just make sure your corks are very secure if you choose to go this liquid route.

Tube Fun (7)

Snack Switcheroo

Snack Switcheroo (7)

Veronika had to work for her snack today! Kids seem to universally love that old magician’s trick of hiding an item under a cup and then making it “disappear”. This variation involves hiding a snack under a cup before shuffling cups around, but the point is for your toddler to find it at the end. Doing so actually helps hone your toddler’s visual tracking skills, and the bonus to this version is the yummy reward to eat!

Any small snack will work fine for the game; I used crackers, but raisins or pieces of cereal are other good options.

Snack Switcheroo (1)

I first hid a cracker under one cup in a cluster of four, making sure she saw where it was, then said to Veronika, “Where’s your snack?”

Snack Switcheroo (2)

I slowly shuffled the cups (you don’t want to make this too hard for a 2 year old), then took my hands away and repeated the question.

Snack Switcheroo (3)

She was instantly a little ham and loved the theatrics involved in the game! “Is it under this cup?” she would ask, lifting up for a reveal.

Snack Switcheroo (5)

She giggled when the cracker wasn’t there…

Snack Switcheroo (4)

…and was consistently surprised and delighted when it was. Her surprise showed me that she still hasn’t learned to visually track the correct cup, but clearly today the game was about her enjoyment and theatrics. All in all, it turned snack time into an activity that fed both bellies and brains!

Snack Switcheroo (6)

Magic Inflating Balloons

Magic Inflating Balloon (5)

It turns out that helium isn’t the only gas that can inflate balloons. You’ll wow your kids with a bubbly explosion of baking soda and vinegar for this “magically” inflating version.

To set up, I first added white vinegar to an empty water bottle, using a funnel to avoid spills. Set aside over a tray.

Magic Inflating Balloon (1)

Slip the end of an uninflated balloon onto the funnel and add baking soda (I didn’t measure, but we probably poured in about 1/4 cup. Now carefully fold the lip of the balloon over the top of the bottle, but make sure you don’t upend the baking soda just yet.

Magic Inflating Balloon (3)

Stand the balloon upright so the baking soda pours down into the vinegar, then be ready for the reaction. As the baking soda and vinegar react to create gas, the balloon inflates.

Magic Inflating Balloon (4)

This made for such a bubbly, fizzy, dazzling reaction! I worried that the balloon might pop off the bottle if there was too much pressure that built up, but luckily this didn’t happen. Still, I was glad we had a tray underneath the experiment, just in case.

Magic Inflating Balloon (6)

Travis was thrilled when he put his arms around the inflated balloon at the end, almost disbelieving that we’d blown it up so big. Just be aware that this isn’t the best balloon to knot off and play with after, as some liquid will remain inside.