Sandpaper Line Designs

Sandpaper Lines (3)

This classic toddler activity can be a lifesaver whether you need to keep little hands busy at home or if you’re on the go. To make it portable, simply cut the sandpaper square smaller and tuck the strands of yarn into a zip-top bag.

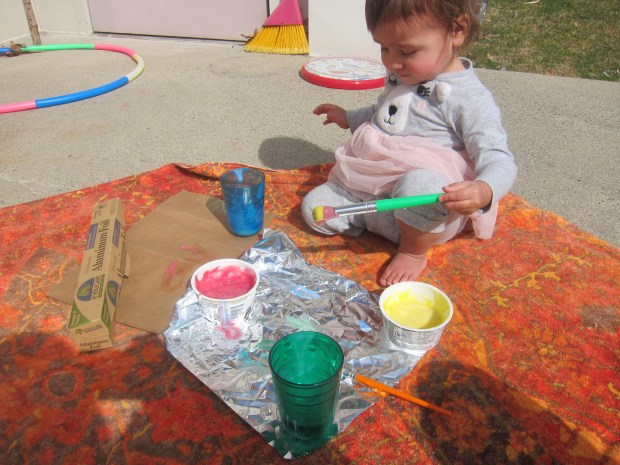
For an at-home version, I just sat Veronika down in front of a few squares of rough sandpaper and added strands of yarn in various colors and lengths.

Sandpaper Lines (1)

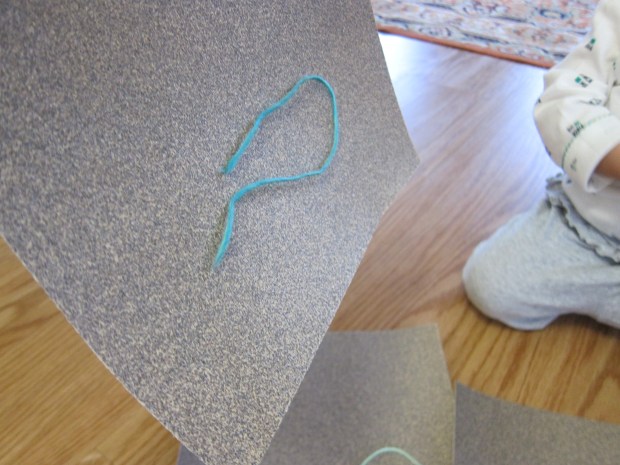
I showed her how to make a few depictions of real things, like a little “fish” swimming in water. Older toddlers can have lots of fun trying to fashion real pictures!

Sandpaper Lines (5)

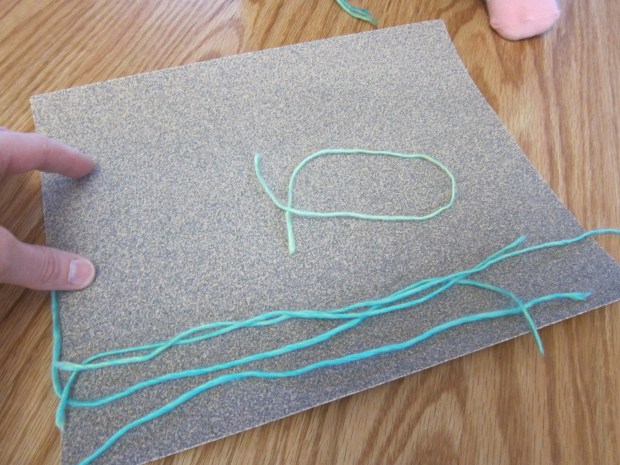
But the enjoyment here for a young toddler like Veronika was the way the yarn sticks to the sandpaper. I demonstrated by holding it up for her so she could marvel at how the yarn seems to “stick”.

Sandpaper Lines (2)

She also loved scratching her fingers against the rough surface.

Sandpaper Lines (4)

Or just picking up handfuls of yarn and dropping them down again.

Sandpaper Lines (6)

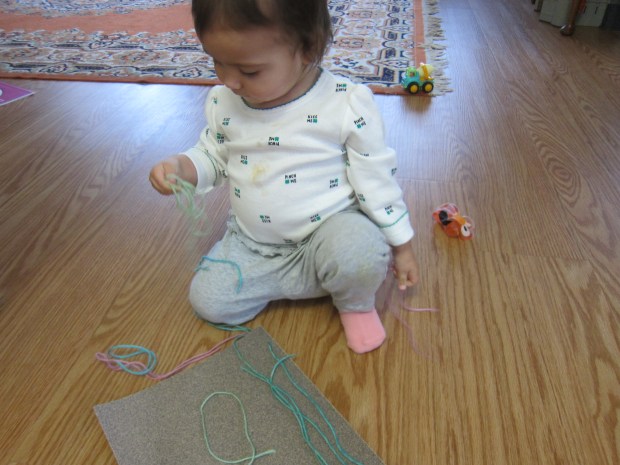
Truth be told, her favorite version seemed to be draping strands of yarn around herself like a scarf!

Sandpaper Lines (7)

One way or another, this is a great activity when you need to entertain your toddler in a pinch.


Magic Carpet Ride

Magic Carpet (5)

Veronika is at the age where imaginative play starts to take off, so today I took her on a magic carpet ride!

Clearly your child will have no context for such a game, so you may want to take a quick peek at the magic carpet scene of a movie like ‘Aladdin’. Veronika was entranced by the soaring carpet!

Magic Carpet (1)

Then I sat her down on a big beach towel (with a rather magic carpet-esque print). A few doll friends came along for the ride.

Magic Carpet (3)

Humming and singing songs, we went for a magic carpet ride around the apartment, waving to the things we passed.

Magic Carpet (4)

I then transferred her dolls to a smaller towel to see if she wanted to be the one to give a ride, but this was met with confusion.

Magic Carpet (6)

So it was back to her big carpet for another ride! Does your child prefer to pull toys on the magic carpet, or sit for a ride? Please share in the comments!

Peppermint Sugar Crystal Sticks

Peppermint Crystals (4)

If your kids love rock candy, they’ll be intrigued by this method to make it at home. Unfortunately, our spate of bad luck with crystallization projects continues, but here’s a step-by-step guide. I’d love to hear if your kids are successful with this one!

First, bring 1 cup water to a boil in a saucepan. Stir in 2 cups sugar and continue to cook at a boil until the sugar dissolves.

Peppermint Crystals (1)

Carefully pour the mixture into two small mason jars. Add a few drops of peppermint extract to each. Travis loved the way this smelled! Next he added a couple drops of red food coloring to one and green to the other.

Peppermint Crystals (2)

Ideally, use lollipop sticks to grow your crystal candy. We had to improvise and used toothpicks instead, which may explain our poor results. Dip these in the peppermint sugar solution, then roll in regular sugar. Use a clothespin to suspend them in the red and green liquid, making sure they don’t touch the sides or bottoms of the jars.

Peppermint Crystals (3)

Now wait!

Peppermint Crystals (6)

We did see a little bit of crystallized liquid form near the surface of the jars after about three days, which we could skim up with a spoon, but nothing crystallized on the toothpicks.

Peppermint Crystals (5)

Well, that didn’t deter Travis from spooning up some sugary liquid for a quick snack!

Shoe Box Train

Shoe Box Train (8)

We had a few leftover boxes around the house, so it felt like the perfect day to make Veronika a cardboard train. Okay, technically none of these were shoe boxes, but I use the term in the title because they were all about that size. Use any similarly-sized packages for this terrific tot train.

To put it together, simply puncture holes in the sides of each box, and attach them together with yarn or string.

Shoe Box Train (1)

To make even this part fun, I made lots of drilling and clanging construction sounds as I worked.

Shoe Box Train (3)

Veronika wanted to hold a pair of safety scissors to get in on the action! Once our train was complete, it was time to load up passengers. Some stuffed animal friends happily climbed aboard at the station.

Shoe Box Train (5)

I showed Veronika how to hold the yarn so she could pull the train along with her as she walked forwards. I realized this was the first time she’s used a toy that pulls, rather than pushes, so it was great for her motor development.

Shoe Box Train (6)

After a while, she did prefer to push the train cars along, which was just fine too.

Shoe Box Train (7)

Station change! Next it was all aboard the dinosaur train.

Shoe Box Train (9)

There were so many elements to this game that I loved, whether watching her busily load the passengers in and out, the way she said “roar!” to the dinosaurs, or how determined she was to make the train move. She even decided to test out a seat for herself!

Shoe Box Train (10)

Motor skills, imaginative play, and so much more, all thanks to a few upcycled boxes.

How To… Throw a Boomerang

Boomerang (4)

The latest “how to” from Highlights magazine was more of a feature article about a professional boomerang thrower. Travis was so inspired that we picked up a cheap one online and headed outside to try our hand at it!

Carefully, we read the tips. Hold the boomerang vertically with the decorated side facing you, then pinch it between thumb and index finger.

Boomerang (2)

We even took a moment to check that the wind was on our right cheek, not left, since we both throw lefty. Now throw overhand!

Boomerang (3)

Well, it turns out that it’s very hard to throw a boomerang and have it return to you. But we sure had a lot of laughs together, got some mother-son exercise which felt novel and playful (baby sister was painting on the patio, FYI), and had a blast. He loved chasing after it and was so proud when he could catch it, even when we did so more Frisbee-style.

Boomerang (5)

Finish off the fun with some videos from the pros!

Salty Cave Crystals

Salty Cave Crystals (3)

Travis has seen stalactites and stalagmites in cartoons and real life, so he was intrigued when we set out to make our own. You’ll need about a week for this project from start to finish, so it’s also a good lesson in patience!

For set up, add 1/4 cup Epsom salts to each of two paper or plastic cups. Fill with water and stir for 1 minute. There should still be some Epsom salts undissolved in the bottom, making this a supersaturated solution.

Salty Cave Crystals (1)

Add food coloring in your child’s colors of choice. Travis stirred in blue and green.

Salty Cave Crystals (2)

Tie a piece of yarn around two paper clips (or safety pins), and dangle the ends in the cups. Now set the whole contraption some place where it can sit undisturbed with the yarn dangling over an old jar lid between the two cups.

Alas, we didn’t have great results with this. Either something is wrong with Epsom salts in our apartment these days, or we’re making a mistake! But we could see crystals growing lightly along the string.

Salty Cave Crystals (6)

Interestingly, there was a leak in one cup and the best crystals formed around the base. So Travis declared these our stalagmites.

Salty Cave Crystals (8)

As a side note, we could also see the blue food coloring creeping up the yarn: capillary action in action!

Salty Cave Crystals (7)

What’s That Smell?

What's That Smell (2)

For some olfactory fun today, I presented Veronika with smells from around the house and we had fun naming each item as we smelled it. Unlike when she was little, now she can parrot these words back to me, hold the items herself, make yummy noises of delight, and more.

I wanted to clearly differentiate between edible and non-edible items in the game, so we started with the latter. I laid out a flower, tea bags, spice jars, and three different scents of soap.

What's That Smell (1)

One by one, I held them to my nose, then showed her how to do the same. For breakable items, like the spice jars, I waved the item under her nose. But she got the hang of it solo with the soap!

What's That Smell (4)

The tea bags were a big hit, so much so that I got out a bag of coffee and let her inhale that one deeply, too.

What's That Smell (5)

She looked so pleased when she smelled the cinnamon sticks, but she pulled back quickly from curry and a few other spices.

What's That Smell (3)

Next we moved on to items she could smell and eat. I set out a few pungent foods, like cooked vegan sausage and yogurt. Berries would be good, too. Or berry yogurt!

What's That Smell (6)

Veronika then found other fun ways to play with the items, and I was more than happy to watch her toddler brain explore. The cinnamon sticks were fun to take in and out of the jar, and the yogurt was fun to spoon through.

What's That Smell (7)

Finally, I made her a chart with a smiley face for the scents she had liked and a sad frown for ones she did not. Older toddlers will get a kick out of this part of the lesson, and may want to add to it on occasion.

What's That Smell (8)

Have fun continuing this kind of play no matter what room of the house you’re in, whether the bathroom or even outside.

Edible Finger Paint Activity on Foil

Baby Foil Painting (6)

Between an edible yogurt-based paint, pretty colors, an outdoor setting, and a shiny piece of foil as the canvas, what’s not to love about this project? The edible paint means it’s safe to play with toddlers or even younger babies.

It was warm enough that we took the activity outside to the patio, where a big beach towel could contain any mess. If it’s summer, you might consider stripping baby down to a bathing suit or diaper, in fact!

To make the paint, spoon non-dairy vanilla yogurt into containers or cups and add a few drops of food coloring to each. The pretty pastel colors felt just right for spring.

Baby Foil Painting (1)

For her “canvas”, I lightly crumpled up a piece of aluminum foil, then opened it back up again. This added lots of fun texture and shine to capture her attention. Note: I did also set down a brown paper bag in case she wanted to paint on that, too, but the foil was the definite favorite.

Baby Foil Painting (3)

She was eager to paint right away, and especially intrigued with using a brush instead of her fingers. Then she started painting her pants! Luckily it was warm enough to take them off and continue the activity.

Baby Foil Painting (5)

Next she loved pouring the paint cups right onto the canvas. After that we swished the yogurt around to even out the big blobs.

Baby Foil Painting (7)

Here is her final masterpiece:

Baby Foil Painting (8)

This activity was good yummy colorful fun.


Erupting Chocolate Ooblek

Chocolate Ooblek (3)

Today I made Veronika a new version of ooblek. Wanting to make this one stand out from the crowd, not only did this version feature chocolate, but it could explode! And yes this activity is toddler safe.

As a reminder ooblek is about 2 parts cornstarch to 1 part water. From there, there are so many ways to fancy it up. Unfortunately I messed up the texture of our ooblek from the get-go because I thought I had a full box of cornstarch in the pantry. It turned out I only had less than 1 cup left, and I’d already poured in over 1 cup of water to a plastic tub. So our mixture was on the watery side, not true ooblek.

But that’s okay, because there was more for Veronika to play with here! First, we sprinkled on cocoa powder in addition to the cornstarch. This was purely for the heavenly smell. Yum!

Chocolate Ooblek (1)

We also added 2 tablespoons baking soda because we wanted our ooblek to erupt. (Note: Be careful, because the baking soda will offset the now-solid-now-liquid property of ooblek, as it will dissolve in the water).

To make the explosions, add white vinegar to squeeze bottles and squirt in a bit at a time. This is great for exercising those little fingers.

Chocolate Ooblek (4)

Veronika almost couldn’t believe it when the first bubbles appeared. I had to help out with lots of the squeezing, but she was transfixed watching the eruptions every time the vinegar hit the baking soda.

Chocolate Ooblek (6)

The resulting bubbles are really neat ones, too, almost like honeycomb, but with a quasi-solid texture. They won’t pop until you pop them!

Chocolate Ooblek (7)

This made for lots of fun poking and prodding. Veronika was a little hesitant to get her hands messy, but adding a spoon helped her get in there.

Chocolate Ooblek (9)

There also was also an added auditory component to the fun, thanks to the hissing sound whenever baking soda mixed with the vinegar.

Chocolate Ooblek (11)

In sum, this project made for one happy girl!

Chocolate Ooblek (10)


Corn Muffins

Corn Muffins (1)

These not-too-sweet muffins make a great breakfast with a pat of vegan butter, or can be served alongside a bowl of soup for dinner.

Ingredients:

  • 1 cup yellow cornmeal
  • 1 cup flour
  • 1 teaspoon baking soda
  • 2 teaspoons + 1/4 teaspoon baking powder, divided
  • 1/2 cup applesauce
  • 1/4 cup agave nectar
  • 1 cup unsweetened soy milk
  • 3 tablespoons canola oil
  1. In a bowl, combine the cornmeal, flour, baking soda, and 2 teaspoons baking powder. Set aside.
  2. In a large bowl, whisk together the remaining 1/4 teaspoon baking powder and the applesauce. Add the agave, soy milk, and canola oil.
  3. Add the dry ingredients to the wet ingredients, stirring just until combined.
  4. Bake at 400 degrees F for 25 minutes.

We particularly like these next to a bowl of lentil soup!

Corn Muffin alt

Note: The muffins turned out quite browned on the outside, following these baking instructions. You may want to reduce the cook time by a few minutes, or reduce the oven temperature to 375 degrees F for a lighter cornbread.

Corn Muffins (2)