Five Activities with Bottles and Lids

Five with Bottles and Lids (2)

I’ve been saving a collection of empty bottles and lids for a while now (think smoothie bottles, sparkling water, peanut jars etc.). Basically anything with a lid that a toddler can twist off. Today, I finally pulled out the collection and there were so many ways that Veronika and I could play with them!

We started with the obvious: placing all the bottles in front of her with the lids off, so she could mix and match and figure out which lid belonged where.

Five with Bottles and Lids (6)

She was remarkably adept at this, I think because she knows some of these bottles by sight (like her favorite smoothie!). Sometimes she picked up a lid that was too big or too small, and I loved watching her puzzle through why it wouldn’t twist onto the bottle she’d chosen.

Five with Bottles and Lids (3)

Next, we did a little learning. I lined up the bottles from big to small, pointing out the size differences to Veronika.

Five with Bottles and Lids (14)

Older toddlers can solve this challenge all by themselves, but for Veronika at 19 months old, it was enough to introduce vocabulary about size.

Five with Bottles and Lids (15)

We then filled the bottles with items from around the house that would range in volume from quiet to loud. Our items included: pipe cleaners (the quietest), a pen, craft sticks, and buttons (the loudest!)

Five with Bottles and Lids (10)

She loved shaking these…

Five with Bottles and Lids (12)

…so of course we had to put on some music and have a jam session. Then she wanted to get at the items inside the bottles, so the lids were twisted off once more.

Five with Bottles and Lids (13)

Once the lids were off, we had fun rolling them on the floor! You could even have bottle cap races if your kids are a bit older.

Five with Bottles and Lids (8)

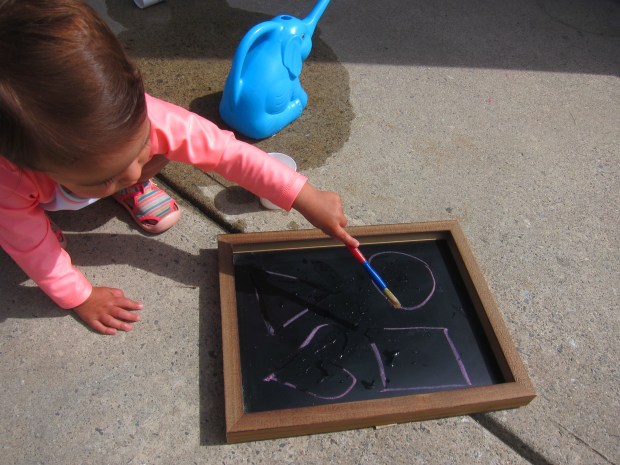
Finally, we did an art activity, tracing all of the lids on a piece of heavy watercolor paper. (Older toddlers can practice their own tracing).

Five with Bottles and Lids (17)

I asked Veronika what shape she saw. “Circle!” she said proudly.

Five with Bottles and Lids (16)

We used watercolor paint to fill in the circles. I mostly was the one painting, filling each circle with a different color, while Veronika was more into the cups of water!

Five with Bottles and Lids (19)

But the resulting artwork looked quite neat.

Five with Bottles and Lids (20)

Just a girl busy with her bottle and lid collection!

Five with Bottles and Lids (11)

How do you play with bottles and lids? Please share in the comments.

Color Cards

Color Cards (5)

These easy DIY color flashcards are similar to a set I made for Veronika last week, that time featuring shapes. This time, I likewise covered construction paper with sticky contact paper for durability, and then cut two squares from each color. I wanted all the shapes to be uniform, because the test now was on colors!

I laid all the squares in front of Veronika and held up one green. If I had a green, could she find the match?

Color Cards (2)

It was interesting to watch her go through this game, as it made clear which colors she knows and which she still guesses. She mixes up blue and green, for example, as well as red and orange, but she has a solid grasp on yellow, pink, and white!

Color Cards (4)

Honestly the game didn’t interest her nearly as long as the shape version. But since the squares fit neatly into a zip-top bag, and I can pull these out again and again, the older she gets and the better she knows her colors!

Color Cards (1)

Walking on Pillows

Walking on Pillows (4)

We had a rainy and overcast day today, and the kids were sad to learn they couldn’t head to the playground, especially since it is only newly reopened in our state. Thinking quickly, I devised this gross motor game for them inside: walking on couch pillows!

We stripped the couch of every single pillow, from the big seat cushions to the little side pillows, and arranged them all in a big line. This alone was a thrill – pillows all over the floor!

Walking on Pillows (1)

“Walk?” I asked Veronika, who loves to test her balance. She immediately took my hand and walked the pillow course from start to finish.

Walking on Pillows (3)

Of course then she wanted to do it “all by self”. She was wobbly on the smaller pillows, but so proud.

Walking on Pillows (6)

On the times she wobbled to her knees, she simply turned it into a crawling course instead, which was equally great for gross motor skills.

Walking on Pillows (7)

Big brother Travis could even do it backwards.

Walking on Pillows (8)

She kept trotting over to walk the line over and over again, a sure sign that we had a hit.

Walking on Pillows (5)

And then of course the couch pillows were perfect for a rest after. “Cozy lie down,” she told me.

Walking on Pillows (10)

A quick rest, and then she was up to do it again!

Walking on Pillows (2)

Aside from being great fun, this activity was excellent for building balance. So we had the perfect playground for our rainy day.

Walking on Pillows (9)

Tracing on a Wet Chalkboard

Tracing on Chalkboard (4)

Toddlers love to paint with water, and parents love this activity, too; kids think they are making a masterpiece, but there’s zero mess to clean up. Today, I added a slight twist to the activity. Veronika has painted directly on pavement and sidewalks, but this time I pulled out our chalkboard for a new canvas.

I started out with a shape learning twist, and drew four shapes for her in chalk: a triangle, circle, square, and heart.

Tracing on Chalkboard (1)

I showed her how to dip the paintbrush in a cup of water and follow along the lines of the shapes, a precursor to tracing!

Tracing on Chalkboard (3)

The mechanics of this (and the importance of it) were beyond her of course, but she loved seeing how the wet lines she made with the paintbrush could make chalk lines disappear. It was like a magical eraser!

Tracing on Chalkboard (5)

After that there was just the fun of painting on the chalkboard, watching the water swirl and make patterns, and turn the surface of the chalkboard darker.

Tracing on Chalkboard (7)

Eventually she upended one of the water cups over the chalkboard surface, and then there was lots of water to swish about with her brush.

Tracing on Chalkboard (9)

Or splash her hands! So the activity was a joy from start to finish.

Tracing on Chalkboard (10)

Rolling Down Hills

Rolling Down Hills (2)

What’s childhood without the pure joy of rolling down a hill? Today I introduced Veronika to precisely that!

There’s a small hill just behind our apartment building, just right for the kids to run up and down without being intimidating.

Rolling Down Hills (4)

But today, we lay down on the grass instead! Big brother Travis paved the way, showing Veronika how to roll like a log down.

Rolling Down Hills (3)

She was a bit nervous, and I think the grass prickled her, too, so at first she just lay there without turning. So I got down with her on my belly and we log-rolled together from top to bottom. This produced squeals of delight.

Rolling Down Hills (6)

Pretty soon she was running back up to the top to start again. This activity is so simple, but captures the care-free joy of a childhood summer!

Rolling Down Hills (1)

Shape Mail Carrier

Mail Carrier (8)

Today I made a shape matching activity for Veronika, and it turned into a game of playing a mailman who was making deliveries! She was the mail carrier and had to deliver the right shape to the corresponding “mailbox”. I loved that this game was equal parts learning and introduction to imaginative play.

To start, I covered construction paper with sticky contact paper on both sides for durability, and cut out shapes: rectangles, hearts, circles, triangles, and squares.

Shape Match (1)

So first up was a simple game of shape matchup. If I had one of the pair, could she find the other?

Shape Match (3)

She quickly proved to be an ace at this test, not just picking up the right shape…

Shape Match (4)

…but naming them, too.

Shape Match (2)

I wanted to make the game more exciting, so turned it into the mail carrier game. We have a set of toy boxes, each one a different shape with items of the same shape nested inside (i.e. a pizza wedge and watermelon wedge inside the triangle box). We scattered all the shapes on the ground, along with the construction paper set I’d just made, and I placed the empty boxes in front of her.

Mail Carrier (1)

“Special delivery!” I called. “Which mailbox should the triangle go in?”

Mail Carrier (3)

She was so proud making these deliveries!

Mail Carrier (2)

Note: If you don’t have a toy like this, simple cut out and laminate each shape from paper, then tape or glue onto an empty shoe box. These can be your mailboxes!

Mail Carrier (7)

After we’d filled the mailboxes, she decided to get a little impish. I could see the wheels in her brain turning as she deliberately placed the shapes in the wrong box, and then looked at me for a laugh.

Mail Carrier (6)

But if you think about it, this was showing her understanding of shapes on a whole new level.

Mail Carrier (5)

She thought this was hilarious and kept it up for quite some time.

Mail Carrier (9)


Measuring Cups & Pots

Measuring Cup Play (4)

With only two weeks of home school left to go, I still need quick fixes to keep Veronika busy while big brother does his lessons! Today I was reminded that sometimes simpler is better. This activity required zero preparation to set up, and zero mess to clean up!

Measuring Cup Play (1)

I just pulled out measuring cups (both the liquid kind and the dry kind) and a pot. That was it. And then I asked her to make imagination soup! My little chef soon went to town. She poured ingredients into the pot…

Measuring Cup Play (3)

…took the lid off and on and enjoyed the clang this made each time…

Measuring Cup Play( (6)

…and of course tasted!

Measuring Cup Play (5)

I loved watching her lift the measuring cups to her lips and make a slurping noise. “Is it yummy?” I asked her. “Yummy!” she replied. Those dry measuring cups are also great because they double as a nesting and stacking toy.

Measuring Cup Play (2)

She kept very busy in her kitchen while Travis did his morning school work. I wonder what she put in her imagination soup?

Tape Shapes

Tape Shapes (6)

Veronika loves shapes and she literally squealed with delight when I set up this easy learning activity on the floor this morning.

Using colored masking tape, I made four giant shapes on the floor: a triangle, square, star (her favorite!), and circle. Note that the circle is a little tough to make with tape, and shapes with straight sides will be easier.

Tape Shapes (1)

Not only was this great for shape recognition, but also counted as our gross motor play for the morning. First she hopped to the triangle!

Tape Shapes (2)

Then she ran to the square.

Tape Shapes (3)

Then she twirled in the star.

Tape Shapes (7)

You get the idea! For each shape, give your toddler a new action to perform, simultaneously testing their shape recognition and their listening skills.

Tape Shapes (5)

She’s off to the circle, folks! This was so easy, but she absolutely loved it. Definitely a game we’ll repeat soon.

Tape Shapes (4)

Play Dough Construction Site

Play Dough Construction Site (4)

Veronika loves to play with her set of construction trucks, and I am all for any sort of gender-neutral play like this! Today I supplemented the fun by adding in a play dough “construction site”.

This really couldn’t have been easier to set up. I mashed some play dough flat on the bottom of a shallow tray to the be the dirt, then rolled some into balls to fill the dump truck like large ‘rocks’. Finally, I rolled some into ‘logs’ for the bulldozer to push.

Play Dough Construction Site (1)

The rest was up to her! She loved saying “full” and “empty” as she took the ‘rocks’ in and out of her dump truck.

Play Dough Construction Site (2)

She might not have understood that she was now the foreman at an important construction lot, but she sure loved squishing the play dough and driving the vehicles around!

Play Dough Construction Site (5)

We also put the empty play dough containers upside down like construction cones, which she could then drive around – or bump into!

Play Dough Construction Site (6)

This was an easy sensory tray that kept her busy for quite a while.

Play Dough Construction Site (3)

Cars and Colors

Cars and Colors (7)

Veronika loves to drive around her little cars, so today I turned it into a color game. Each car had a corresponding “garage” of the same color to drive into.

Okay, so these weren’t really garages, just flat pieces of construction paper. But Veronika immediately took to vrooming the cars onto them.

Cars and Colors (1)

I started out making things very easy for her, just two different color cars and their corresponding paper. “Can you drive the orange car onto the orange paper?” I asked her.

Cars and Colors (2)

Success! So we made it harder. I added a third color, and then a fourth, and so on.

Cars and Colors (6)

Each time she vroomed the right car. Some of this might have been coincidence of course, since I laid down the correct piece of paper directly in front of her. But it’s all about reinforcement and repetition at this age!

Cars and Colors (4)

Throughout the day, I kept up the line of “Can you…?” questioning with regards to color. “Can you hand me the green car?” I asked her.

Cars and Colors (5)

“Can you pull on the red ribbon?”

Color Game (1)

“Can you point to the yellow sticker?”

Color Game (3)

This is such an easy way to reinforce colors throughout the day. You can even make it more of a Simon Says game: “If you’re wearing pink, clap your hands!”

Color Cards (3)

Want more color learning ideas? Try picking a color of the day the next time you take a trip out of the house.