Bird-Nest Salad

Bird-Nest Salad (1)

Tweet your way into spring with this cute little salad!

Ingredients:

  • 4 lettuce leaves
  • 1/4 cup shredded carrots
  • 2 tablespoons bean sprouts
  • 3 yellow tomatoes
  • Salad dressing of choice
  1. Arrange the lettuce leaves on a plate.
  2. Arrange the carrots and sprouts in the middle of the plate, so they look like a nest shape.
  3. Nest the tomatoes in the carrot bed as little eggs, and drizzle with your favorite dressing. We like this with a simple balsamic vinaigrette!

Happy spring!

Bird-Nest Salad (2)

Whole Wheat Goldfish Crackers

Goldfish Crackers (7).JPG

As a mom of vegan kids, my biggest goal is to make sure they never feel left out. This means I come prepared with vegan pizza slices and cupcakes to every birthday party we attend, stock my son’s preschool cabinet with vegan cheddar squares and rice cereal bars, and happily go out of my way to try a new recipe or test a new vegan meat on the market.

But one item we haven’t been able to replicate was goldfish crackers. Until now! These snacks are ubiquitous, and Travis has been asking about them, so I special ordered a little goldfish cookie cutter. Turns out the crackers are a cinch to make, and now he can have them at snack with his school buddies!

Ingredients:

  • 1 and 3/4 cups shredded Daiya cheddar
  • 1/2 cup all-purpose flour
  • 1/4 cup whole wheat flour
  • 4 tablespoons Earth Balance butter
  • 1/8 teaspoon onion powder
  • 1/8 teaspoon salt
  1. Combine all the ingredients in a food processor, using the dough blade attachment. Process for about 2 minutes, until a dough forms, scraping the sides of the bowl as needed.Goldfish Crackers (1)
  2. Turn the dough out onto a work surface and gather into a ball. Note: the dough is a bit crumbly, but will stick together as you work it with your hands.
  3. Roll the dough out.Goldfish Crackers (2)
  4. Use a mini fish cookie cutter to cut out the shapes.Goldfish Crackers (3)
  5. Transfer the fish to a baking sheet – we had quite the little school of fishies!Goldfish Crackers (5)
  6. Use a toothpick to make a small eye in each fishGoldfish Crackers (6)
  7. Bake at 350 degrees F for 15 minutes.

Note: The original recipe said to roll the dough 1/8-inch thick, but ours was closer to 1/4-inch. Honestly, we preferred the results, with crackers that were a little chewier and a little less cracker-crispy than actual Goldfish.

Maple-Sesame Mashed Sweet Potatoes

Maple Sweet Potatoes (3).JPG

It’s the tail end of maple sugaring season, something Travis and I got to check out in person last year, helping to collect sap from a spile! So we decided to feature maple syrup in tonight’s dinner, to celebrate the tail-end of winter.

Maple Sweet Potatoes alt.JPG

Ingredients:

  • 2 medium sweet potatoes
  • 1/4 cup vanilla almond milk
  • 1/4 cup maple syrup
  • 1/2 teaspoon tahini
  • 1/4 teaspoon salt
  1. Peel and cube the sweet potatoes, and cook in boiling water until very tender – about 15 minutes.
  2. Mash the potatoes with a potato masher until smooth – Travis loved this step!Maple Sweet Potatoes (1)
  3. Stir in the maple syrup, almond milk, and tahini, then sprinkle with the salt.Maple Sweet Potatoes (2)

A Whale of a Roll


Whale Roll (8).JPG

When you’ve been having a whale of a good time with your Baleen Whale crate from Kiwi Co., you continue the fun with these adorable whale bread rolls. These would be fantastic in a bento box, if you’re into lunchtime art!

To start, Travis made ovals about the size of his fist from store-bought bread dough, which we arranged on a baking sheet.

Whale Roll (1)

Shape smaller portions of dough into the fins and tails. (Note: he had trouble shaping the tails, so I made a rough V-shape for each, which he stuck to the whale bodies).

Whale Roll (2)

Next we pressed a raisin into each “whale” for an eye; make sure to press these in quite deep, or they will pop out during baking.

Whale Roll (3)

Use kitchen scissors to snip a small slice into the front of each whale, and pull open slightly to make a mouth.

Whale Roll (4)

Bake at 425 degrees for 12 minutes.

Whale Roll (5)

Let cool, then poke a hole in the top for each blowhole – a straw worked nicely.

Whale Roll (7).JPG

As the finishing touch, I cut Daiya cheese sticks into small slices, and divided these into thirds to be the spouting water; carefully insert one water spout into each blowhole.

Whale Roll (6)

Thar she blows!


Make a Paper Chef’s Hat

Chef's Hat (6).JPG

Of all the Raddish Kids lessons we’ve enjoyed thus far, the suggested “Kitchen Brigade” unit to go with our Croque Monsieur Sandwiches was the hardest to adapt for a preschooler. It involves learning and identifying the different jobs within the classic French kitchen hierarchy, and was a stretch to make this material accessible to my four year old.

Instead, I turned the focus onto him being a chef… with his own chef’s hat (toque) of course!

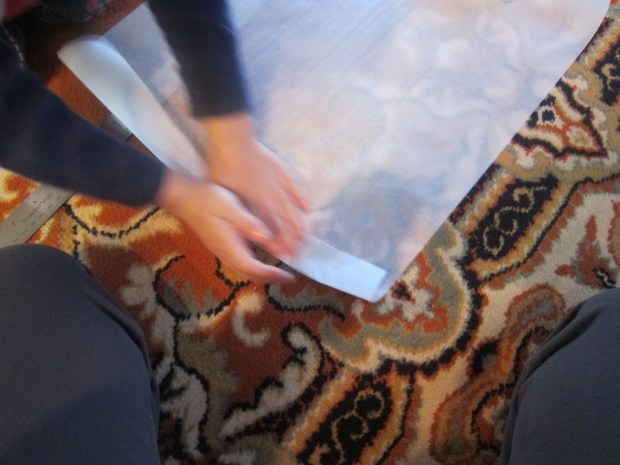
First, cut about 3 feet of parchment paper. Travis was really into the feel of the paper, since we don’t use it very often. “What’s this?” he asked, delighted.

Chef's Hat (1)

Fold up accordion-style, then unfold; your paper now has a pleated look.

Chef's Hat (2)

Tape two sheets of regular white paper together for the base of the hat.

Chef's Hat (3)

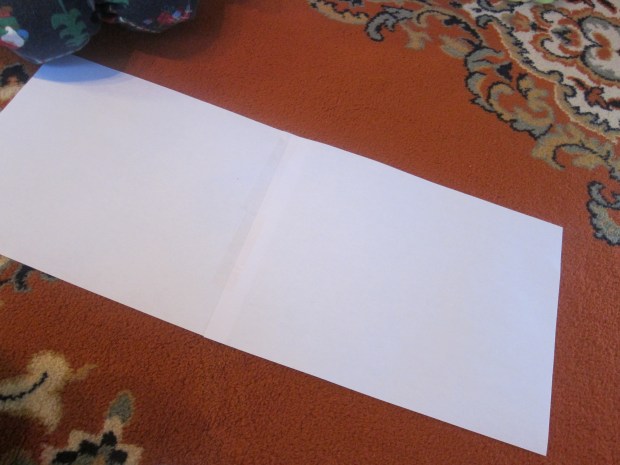
Fold in half, then in half again, and open back up. Fit the parchment paper into this base, and staple closed at the ends and middle.

Chef's Hat (4)

Gather together the top of the parchment paper, and tape to secure.

Chef's Hat (5)

Now fold the whole hat inside out, tucking the tapered point inside. Staple together (make sure the hat will fit your child’s head before stapling), and voila!

Note: If the directions are hard to follow, you can get a visual of the project here.

Next my little chef de cuisine and I did sit down briefly to discuss kitchen roles. I simplified greatly, selecting 6 jobs for him: chef de cuisine, sous chef, patissier, aboyeur, line cook, and plongeur (dish washer).

There are multiple games that big kids can play by making flash cards for each of these jobs (plus many other roles): memory games; charades; role playing; or “who’s the boss,” (i.e. knowing the order of the kitchen hierarchy. Rather than play a true memory game, I simply had Travis name each job while looking at the flash cards we made, and tell me which job it was.

Chef's Hat (7)

In this way, at least he knew 6 kitchen roles, and roughly their hierarchy, since we numbered them 1 through 6.

Overall, I doubt he took much from the lesson… But he did like his toque!

Heart-y Sandwiches

Hearty Sandwich (5)

Start your Valentine’s Day on this sweet note with hearts for breakfast! Or, serve these adorable sandwiches for a Valentine’s Day tea time.

Hearty Sandwich (2)

To start, use a cookie cutter to cut heart shapes from slices of white bread.

Hearty Sandwich (3)

In a bowl, Travis mixed a few drops of red food coloring into Daiya cream cheese; stir until you have a pretty pink.

Hearty Sandwich (1)

We spread half of our hearts with the pink cream cheese (which Travis thought was frosting, so much the better!), and the other half with strawberry jam.

Hearty Sandwich (4)

Serve to someone you love! A great little recipe suggestion from Ranger Rick Jr.

Squeeze Your Own Juice

Squeeze Juice (6).JPG

In the February issue, Travis’s High Five magazine gave us pretend hot chocolate … But real orange juice! Travis had an absolute blast with this easy squeeze-your-own project.

First, he helped me peel two big oranges. He was very interested in the peel, and what it felt like, since normally I present him with oranges already cut up.

squeezejuice28129

Next he proudly put all the orange wedges into a large zip-top bag.

squeezejuice28229

Seal the bag tightly, making sure the air is out, and then squeeze! Travis went wild with the squishing and mushing.

squeezejuice28329

Once it looks like you have enough juice in the bag, place a strainer over a cup. Let the juice trickle into the cup, reserving the solids in the sieve. Travis was very pleased about this step, since he always tells people he doesn’t like orange juice with pulp.

squeezejuice28429

(Note: we found that it was easier to get the last of the juice out of the orange segments squeezing them directly in the strainer, rather than still in the bag).

squeezejuice28529

Time for a taste test!

squeezejuice28729

Travis loved it, deciding it was kind of sweet, and the freshest orange juice he’d ever tasted.

squeezejuice28829

Next we got a little scientific with the project, wondering what would happen if we squeezed a grapefruit instead. Travis surmised that since the grapefruit was bigger, we’d have more juice.

squeezejuice28929

Ding ding ding! He was correct.

squeezejuice281029

Thanks for the great burst of citrus on a cold winter’s day, High Five. This was such a neat way to show kids where their boxed juices come from.

Grocery Store Scavenger Hunt

grocery hunt (1)

As an expansion to our French-themed Raddish Kit, Travis and I headed off with a scavenger hunt card to discover some of the most common ingredients in French cooking.

On the way there, I gave Travis a quick lesson on French food shopping. Having spent time in the country, I eagerly told Travis how different types of ingredients were sold in different markets. So although we were headed to a big grocery store, we still shopped department by department!

grocery hunt (3)

First up was the produce, or what might be found in a village marche (farmers’ market). Travis was very proud finding mushrooms, the first item on our list.

grocery hunt (2)

We also picked up a number of spices, including fresh tarragon, rosemary, and thyme. Take the time to savor the smell of these!

Bread would have been purchased at the boulangerie of course, and Travis loved pulling a long baguette from the bread counter. And although we didn’t buy it, he had fun stopping by the cheese counter (fromagerie), since we’ve never paused to look at such a display together.

grocery hunt (5)

He was so proud holding up our list once everything had been checked off!

grocery hunt (6)

No-Cook Overnight Oatmeal

no-cook oats (5)

Let’s face it – mornings are crazy, amiright? High Five magazine must know it, because Travis’s January issue featured a great recipe that kids can help make the night before. Shake up these no-cook oats, and they’re ready to go for breakfast!

Ingredients:

  • 1/4 cup rolled oats
  • 1/4 cup plain non-dairy yogurt
  • 1/4 cup non-dairy milk (we used coconut)
  • 1 teaspoon agave nectar
  • 1/4 teaspoon ground cinnamon
  • Handful of dried apricots or raisins
  1. Combine all of the ingredients in a jar with a tightly-fitting lid.no-cook oats (2)
  2. Seal the jar and shake – kids will love this step!no-cook oats (3)
  3. Refrigerate for at least 8 hours, or overnight.

no-cook oats (4)

In the morning, simply uncap the jar and voila – breakfast is served. You can serve cold like muesli, or warm it briefly in the microwave.


Host a Cookie Swap

Cookie Swap (7)

Travis doesn’t know it yet, but he’s about to receive a subscription to Raddish Kids as a gift this holiday season. Having gotten a sneak peak, I’m already impressed with the company. A suggested further activity from his upcoming December package was a holiday cookie swap. I instantly knew I wanted to make this happen, but it had to be quickly, even before he opens up his first box on Christmas morning. Could we pull off a cookie swap in just a few days? Yes!

First, we decided on a date for the party, then downloaded the invitation template and sent off to a few buddies. Come to Travis’s cookie party!

Cookie Swap (16).JPG

The day of the party, we set our computer to play holiday tunes…

Cookie Swap (2)

…and added festive decorations around a cookie table, including garlands, pinecones, and various crafts we’ve made this holiday season.

Cookie Swap (5)

We offered 4 kinds of cookies to our guests:

Classic Thumbprints

Peppermint Chocolate Brownie Cookies

Caramel Cracker Bark

and Snowball Cookies

Cookie Swap (10)

Now it was time for guests to arrive, each bearing their own plate of cookies!

Cookie Swap (6)

I recommend keeping things manageable – 3 to 8 friends, depending on your child’s age and the size of your home. Older kids may want to do an organized tasting, sitting down and rating each cookie. Little kids just loved running around and occasionally stopping to chomp a cookie! Meanwhile grown ups got to sit around, enjoy sweet treats, and chat.

As a couple of extras, we also added gingerbread men ice cubes to fruit punch for the kids, and I provided gift bags for everyone to take home the cookies they wanted.

Cookie Swap (14)

This was an absolutely perfect afternoon – I’m so thankful to Raddish for a suggestion I’d never have come up with otherwise, and can’t wait to see what Travis receives in his official first December kit. You can be sure there will be a blog post about it!