Cityscapes Crate

Koala City (16)

Our latest from Koala Crate was a kit all about “cityscapes,” which introduced great city landmarks (i.e. the Eiffel Tower), as well as the various buildings, modes of transportation, or shapes you might find in a city. The crate used buildings as a leaping off point to talk about colors, patterns, and geometric shapes, making this one of the more STEM-related kits we’ve received to date.

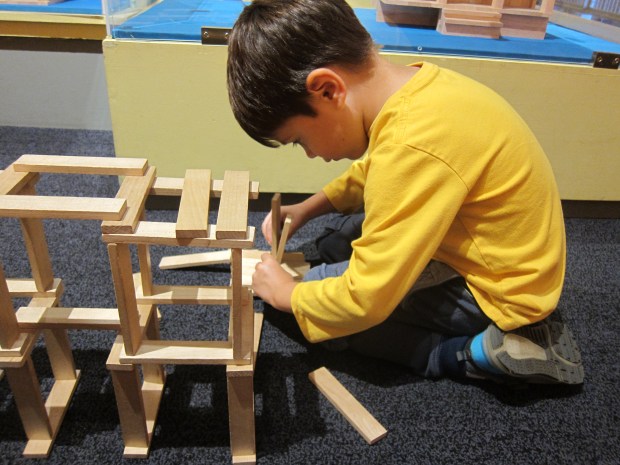
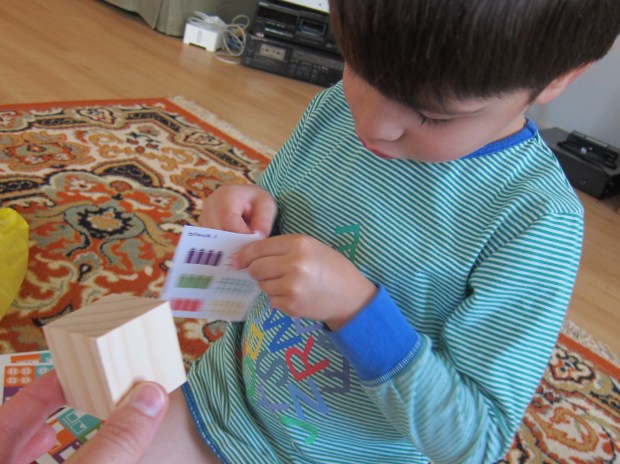
To wit, first up were City Building Blocks. This project is clever, of course – for what is a city if not built up of blocks? Cement, stone, brick, you name it. There are 9 blank wooden blocks in the crate and 9 sheets of stickers with which to cover them.

Koala City (2)

I was proud of Travis for latching onto the idea that each cube had six faces, and making sure to turn to an empty face before he added each new sticker.

Koala CIty (1)

Soon we had trees, walls, doors, windows, rooftops, and more. Your child can simply use the blocks to free-build a city…

Koala City (3)

…or use them in a more educational way. Can you construct an all red building? All purple? An alternating pattern? (We tested out: door, window, door, window etc.). You can also talk about the shapes within the blocks, although we didn’t do much of that.

Koala City (17).JPG

One note of caution: the stickers are a bit tricky to peel off, which may lead to a moment of four-year-old frustration… Hopefully easily diverted!

When Travis spotted the glitter paint in the crate, he couldn’t wait for the next two projects. Because glitter makes everything better of course.

Koala City (7)

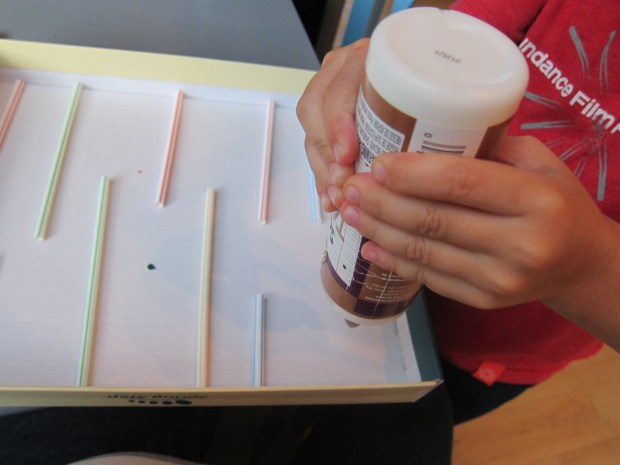
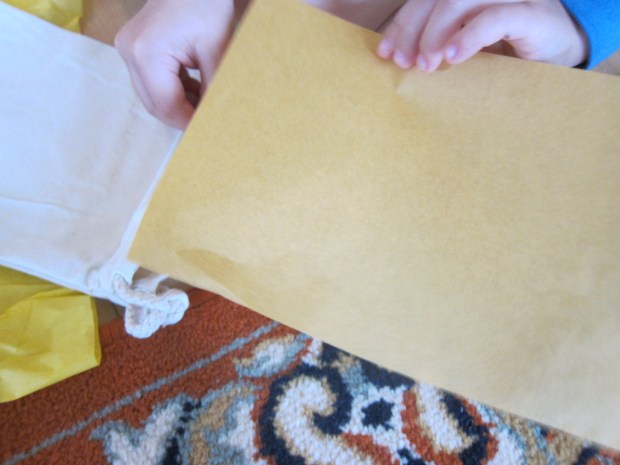
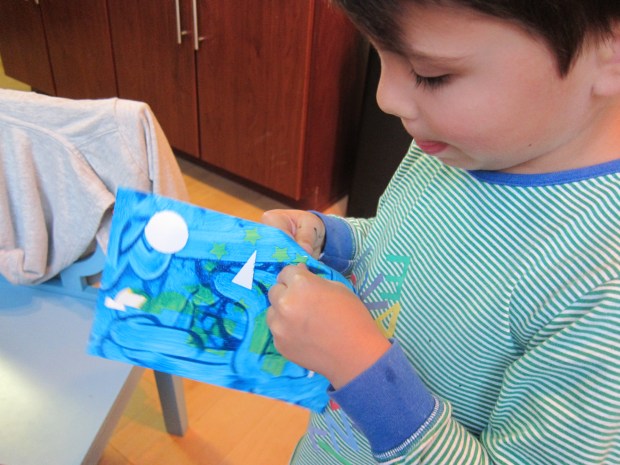
First, we decorated the Stencil Drawstring Pouch, which is fun as a project and then handy later to store the blocks in. Slip the provided wax paper into the provided drawstring bag to prevent the paint from bleeding through.

Koala City (4)

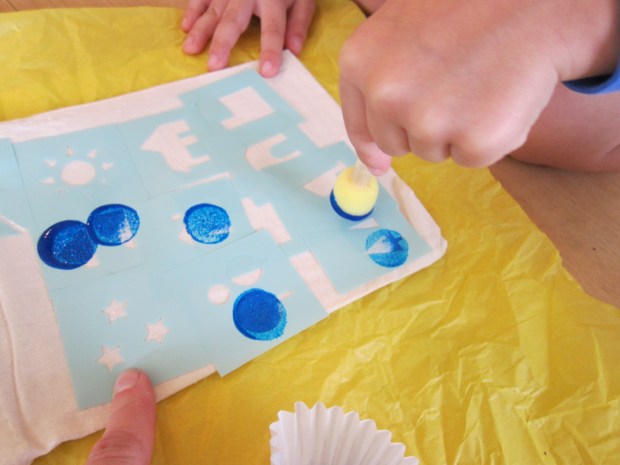
This project relies on stencil stickers. I paused to explain to Travis that the paint would go inside the blue lines, once I realized he was overlapping his shapes a little. He seemed fascinated by this, and most of our buildings turned out just fine. We talked about what went where in the layers of a city – buildings and trees on the bottom, rooftops in the middle, stars and clouds up top.

Koala City (5)

To paint, dip the provided sponge brush into the provided paint cup, and dab inside the blue lines.

Koala City (6)

Let dry for about one hour before peeling off the stencils and revealing your city.

Koala CIty (10)

The final project, Skyline Paintings, employed the opposite method from stenciling (i.e. resist painting). I loved watching my engineer at work, talking about all the geometric shapes and what we could make from them: a house from a square and triangle, for example, or a bridge from a semi-circle and rectangles.

Koala City (8)

Then he grew creative and started inventing his own. And of course then there was the fun of paint dabbing.

Koala City (9)

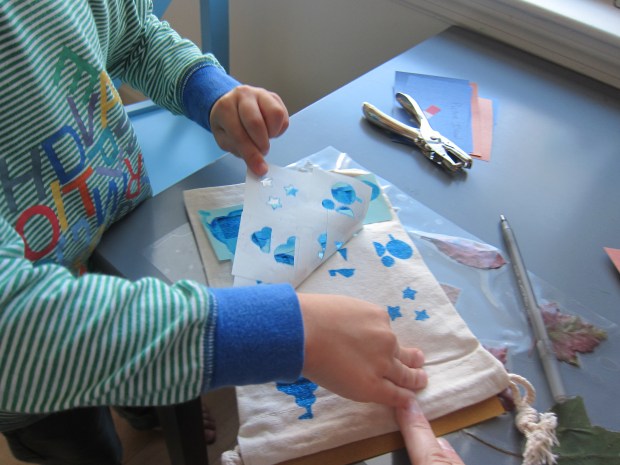
Let the paint dry, then peel off the stickers. “How did it make the shapes?” Travis wondered, marveling at how his houses and towers looked once the stickers had lifted away.

Koala City (11)

We’d used up all the stickers, but took some extra time to make our own neighborhood, talking about what shapes we see near our home. Soon we had a cute collage – rectangle buildings, semi-circle driveways, oval ponds, square windows etc.

Koala City (15)

As you can see, this kit was heavy on the geometry, and on seeing and finding patterns. Happy kid, happy mama. Thanks Koala!

Koala City (13)

Slow-Cooker Curried Chickpeas and Quinoa

Curried Chickpea.JPG

Set the slow-cooker going in the early afternoon for this recipe, and it’s ready by dinner time. We love walking in the door to the smell of curry!

Ingredients:

  • 1 tablespoon olive oil
  • 1 cup chopped onion
  • 3 minced garlic cloves
  • 2 cups cauliflower florets
  • 1 (15-ounce) can fire-roasted tomatoes
  • 1 (15-ounce) can chickpeas, rinsed and drained
  • 1/2 tablespoon curry powder
  • 1 teaspoon ground ginger
  • 3/4 teaspoon salt
  • 1 (13.5-ounce) can coconut milk
  • 1 and 1/2 cups vegetable broth
  • 1 cup quinoa
  • 3 cups chopped kale
  1. Heat a slow-cooker to high and add the onion and garlic; cook for about 5 minutes.
  2. Add the cauliflower, tomatoes, chickpeas, curry powder, ground ginger, salt, coconut milk, and broth. Cover and cook on high for 3 to 4 hours.
  3. Stir in the quinoa, and cook for 15 minutes. Add the kale and cook for a final 15 minutes – the liquid should be mostly absorbed.

Pineapple Pumpkin (and More Pumpkin Fun)

Pineapple Pumpkin (8)

We had so much fun at the pumpkin patch this year; Travis needed to come home and carve one right away. We even sorted and saved the seeds for roasting (full recipe below). With our final three pumpkins, we got a little craftsier, putting together these three painting projects.

First up was Mr. Pineapple Pumpkin. Paint your pumpkin with a layer of yellow acrylic paint and let dry overnight.

Pineapple Pumpkin (1)

Once dry, I added upside-down V marks with a sharpie to mimic the exterior of a pineapple.

Pineapple Pumpkin (4)

Travis helped glue on two eyes, and we used dot stickers (cut in half and slightly overlapped on the top) for the mouth.

For the pineapple stem, attach two pieces of green sticky-back craft foam together, leaving a sticky overhang on either side. Cut leaf-like shapes into the foam. Attach one sticky portion to the stem, then wrap tightly and use the remaining sticky edge to hold the “stem” in place.

Deck out your pineapple fellow with a blingy pair of shades for the final touch!

Pineapple Pumpkin (5)

Needless to say, this particular pumpkin craft required significant adult help for a four-year old. For something he could do entirely on his own, I set Travis up with puffy paints and a whole pumpkin.

Pineapple Pumpkin (2)

He loved squeezing out all the colors, which almost looked like goopy spider webs.

Pineapple Pumpkin (7)

Kids who are too young to carve might also love attaching feathers to a pumpkin, or sticking on pre-cut foam shapes for a funny face. Many sets of facial features come available in craft kits, and Travis enjoyed selecting this goofy look.

Pineapple Pumpkin (6)

What pumpkins are adorning your stoop this year? Please share in the comments!

I’ll leave you with this easy pumpkin seed recipe:

Scoop seeds from 1 pumpkin (about 1 cup). Rinse well and pat dry. 

On a baking sheet, drizzle with 1 and 1/2 tablespoons melted butter and sprinkle with 1 teaspoon salt.

Roast at 200 degrees F for 40 minutes. Increase the heat to 325 degrees F and roast a final 5 minutes.


Leaves + Contact Paper = Fall Placemat

Fall Placemat (5).JPG

It’s been a rather disappointing autumn for leaf color in our neck of the woods, with oddly warm temperatures keeping the leaves stubbornly green. Happily, we returned home from a recent nature walk with enough leaves that had managed to turn shades of red, orange, and yellow, and knew we needed a quick project for them. Here we are on the hunt – it’s finally cold!

Nature alph (4)

If you want to make this a science project as well as an art one, talk about how the leaves stop producing chlorophyll this time of year, which reveals the hidden autumn shades under the green. I touched on the matter briefly, but really we were just happy to come home with pretty finds.

Fall Placemat (2)

To easily preserve your leaves, make this placemat:

Place a piece of contact paper, sticky side up, on a work surface. Travis got impish at first, and wanted to stick his hands to the paper a few times!

Fall Placemat (1)

Encourage your child to arrange the leaves in whatever manner they see fit, varying the shapes, size, and colors until they are happy with their arrangement.

Fall Placemat (3)

Seal the leaves by placing a second sheet of contact paper, sticky side down, on top. Trim to size and voila – you have the perfect fall placemat.

Fall Placemat (4)

If you have the inclination and enough leaves, go ahead and make several; these would make wonderful holiday placemats. For Thanksgiving decor, perhaps?

Fall Placemat (6)


Nature’s Alphabet

Nature alph v

How do you keep the alphabet fresh and fun for a preschooler who knows all his or her letters? Search for the letters outside, of course! This nature activity will challenge your child’s brain to see letters in whole new ways, all while getting some fresh air.

Take about a crisp fall day – we needed to pull out our winter coats, but the sunshine was gorgeous.

Nature alph (3)

First we made a list of the alphabet so we could keep track as we hunted. This is a good chance to review all the letters, or sing the ABC song if your child is learning alphabetical order.

Nature alph (1)

If your child has a camera or nature notebook, this hunt is also a great opportunity to use both! Travis is so proud whenever he takes pictures, although I had my camera, too, to catch closeups of the letters we spotted.

Nature alph (2)

Don’t try and find the letters in order – you’ll drive yourselves crazy. Instead, we stretched our eyes and imaginations, and saw what came to us.

Nature alph x

A few are easy, like x’s and A’s.

Nature alph a

Don’t forget to look up! There was a D in the curve of the branches when we looked up at this tree.

Nature alph d

Travis thought the three holes in this leaf looked like an M


Nature alph m

If we squinted, this funny shape in a tree’s trunk became a Q.

Nature alph q

Y’s are relatively easy to spot (think of Y-shaped sticks), but we liked finding them in shadows, too.

Nature alph y

We loved this spiderweb sparkling in the sunshine. No letter was immediately evident, but perhaps you can make out E’s or F’s marching along the side.

Nature alph f

In sum, this hunt was a great way to spend the afternoon outside together, and sneak in some learning! We didn’t find every letter, but we had fun trying.

Nature alph o

Puffin Costume

Puffin (10)

Our October issue of Ranger Rick Jr. featured a cover story on puffins, with information inside about these bright-beaked birds. If your child is still looking for a Halloween costume, consider putting together this DIY puffin outfit. It’s perfect for trick-or-treating… or just everyday dress up!

Because we were making the costume simply for play at home, I skirted a few corners. But you can be more exact if this will actually be the Halloween garb of choice for your child.

First, make the puffin’s head. Fold a 20 inch x 12 inch piece of white felt in half. Draw the head shape (available from the online template) onto one side of the fold and cut out.

Puffin (1)

Add two “head top” shapes cut from black felt with fabric glue or a hot glue gun. Next cut the beak shape from orange construction paper and glue on as well. Let dry.

Puffin (2)

We added details like eyes and feathers with a marker. Here is my very serious puffin testing out the headpiece.

Puffin (7)

The piece of black felt I had at home was big, but not quite large enough for the suggested wings – a full 34 inch x 18 inch rectangle! So working with what I had, I traced on the wing shape from the template in chalk, and cut out. I added a ribbon to tie around Travis’s shoulders; if you are using truly large enough felt, part of the felt itself will become the tie.

Puffin (5)

Finally, we needed puffin feet. Trace the foot shape onto orange craft foam and cut out; add details with marker.

Puffin (6)

Poke a pipe cleaner (ideally orange) through the middle of each foot shape, and wrap around the thong of a flip flop. If you’re going all out for Halloween, make sure your pipe cleaners and flip flops are orange too! Yellow pipe cleaners and some old summer flip flops worked for us in a pinch.

Puffin (9)

Finish a true puffin costume with a white shirt and white pants.

My little bird was happy just to fly around the apartment.

Puffin (8)

What a cute idea this was!

Creamy Squash Pasta Bake

Squash Pasta (2).JPG

This homey casserole is perfect for chilly autumn nights! This time of year, consider using 1 and 1/2 cups pureed fresh butternut squash, but the canned version will do in a pinch.

Ingredients:

  • 1 pound penne pasta
  • 4 tablespoons Earth Balance butter
  • 6 tablespoons all-purpose flour
  • 3 and 1/2 cups unsweetened non-dairy milk
  • 2 teaspoons Dijon mustard
  • 1 tablespoon salt
  • 1/4 teaspoon black pepper
  • 1/4 teaspoon nutmeg
  • 2 cups shredded Daiya cheddar
  • 1 (15-ounce) can butternut squash
  • 1/2 cup panko breadcrumbs
  1. Cook the pasta according to package directions; drain and return to the pan.
  2. Meanwhile, melt the butter in a large saucepan over medium heat. Whisk in the flour and cook for 30 seconds.
  3. Whisk in the milk. Bring to a boil over medium heat, whisking frequently.
  4. Once at a boil, remove from heat and stir in the mustard, salt, black pepper, and nutmeg. Add the cheese, stirring until melty. Stir in the squash.
  5. Toss together the squash mixture and cooked pasta, then transfer to a 13×9-inch baking dish. Sprinkle evenly with the panko.
  6. Bake at 350 degrees F for 30 minutes, until bubbly.

Squash Pasta (1)


Early Explorers Toys & Games

LP Toys (29)

This month’s offering from Travis’s Early Explorers subscription was literally a package devoted to fun – toys and games that is! One look and we knew we were sure to have a good time with this one. We received all the recurring elements, such as an activity booklet, flash cards, postcard, and stickers for Travis’s wall map and suitcase.

LP Toys (1)

Even adults can learn a lot from this one – I sure had never heard of games like turumpo, galimoto, and daruma otoshi from around the world. Then it was time to get busy with the booklet’s additional suggestions.

LP Toys (10)

Toys Craft:

We loved the craft for a homemade marble maze. To construct it, you only need a shoe-box lid and straws. Travis marked a circle in one edge for Start, and a “smiley face” in red at the bottom for Finish. I do love his slightly-glowering smiley faces these days!

LP Toys (5)

Next we cut straws to various lengths, and he helped me decide where each should go. I glued them down and we let it set overnight.

LP Toys (4)

In the morning, it was time to test our toy! Travis loved tilting and learning how to maneuver a marble among the straws.

LP Toys (8)

We had fun with suggestions in the booklet such as: timing ourselves; going backwards from Finish to Start; and testing out ways we could make the maze even harder. When the opening between two straws was narrow, this was the biggest challenge.

LP Toys (9)

You can also try making multiple mazes, or roll something through it other than a marble!

Toys Science:

The booklet challenged us to make a new toy – a STEM endeavor if ever I’ve seen one! I pulled out our craft bin and a few other odds and ends from around the house, and encouraged Travis to come up with anything he wanted.

First up was this toy wheelbarrow – a matter of attaching an empty ribbon spool between two dowels.

LP Toys (18)

Next he wanted to build with craft sticks, much as you would with building blocks. Lots of tape helped make a sturdy frame.

LP Toys (19)

The construction soon turned into a game with a goal post that we could shoot wooden craft beads through for points.

LP Toys (20)

I loved watching his creativity through this whole process, involving at various points: black dot stickers; floral wire; Velcro stickers; and more. Some “toys” worked and some didn’t, but he had a blast and it filled a morning. I’d love to hear what your child makes in the comments! What will you name your new game?

Toys Keepsake:

Travis loved the keepsake in this package, a felt tic-tac-toe pouch with x’s and o’s that handily store inside the pouch when not in use. He needed a few games right away.

LP Toys (3)

Toys Field Trip:

If you’re lucky enough to live near a toy factory of some sort – the Crayola Experience in Easton, PA perhaps, or the Vermont Teddy Bear factory in Shelburne, VT – then there’s your ideal field trip to accompany this theme! Failing that, seek out local exhibits that feature a specific toy. We were lucky enough to find two such exhibits near us.

lego (4)

First up, a Lego building competition at a local cultural center, where we got to see fantastic creations, vote on our favorite, and try our hand at building our own.

lego (7)

Then, our local children’s museum hosted a Tinkertoy exposition, which was a fun chance to check out this classic.

LP Toys (26)

While we were there, we got to see other traditional toys too, like this decorated doll house.

LP Toys (15)

What do you find in your area?

Toys Further Activities:

We used the booklet as a jumping off point for further, well, games! I have a set of tangrams (from Melissa and Doug) so it was fun to try and recreate the patterns in the booklet (although our shapes differed from the classic Chinese version).

LP Toys (16)

But Travis loved the activity so much he spent a whole evening busy at work!

LP Toys (17)

Then we headed outside to play the French version of hopscotch, called escaragot (snail), in which the board is curved, not the traditional American line.

LP Toys (28)

We had fun experimenting with other animal forms, including a turtle and a crab!

LP Toys (27)

Then we had a tabletop board game “tournament.” Pull out all your board or card games, and make it family game night!

LP Toys (21)

The extent to which this is actually a “tournament” may depend on your kids’ ages. For Travis, we’re still just getting used to learning rules and turn-taking, but he had fun with Guess Who? Go Fish, Charades, Yeti in my Spaghetti, and more.

LP Toys (22)

Bigger kids or larger families can actually keep a scoresheet and turn it into a true tournament.

Then of course there’s good old block building. Make it special by trying to recreate buildings you’ve visited, or famous landmarks.

LP Toys (14)

Since we’d had a recent trip into the city, we tried to build skyscrapers. Keva blocks are great for this purpose, but any wooden block set (or plastic) would also work well.

LP Toys (13)

Finally, we chose to purchase the kit’s optional add-on this month, which was a Superhero game – not just dressing up like one, but training to be one. Needless to say, Travis was in heaven.

LP Toys (24)

Soon we were jumping hard enough to shake the Earth, flying around the room, leaping over targets, and more.

LP Toys (25)

Apple-Butter Bars

Apple Butter Bar (2)

It finally feels like fall, after a strange spike back into 80 degree weather, and today simply called for this apple dessert. The flavors and smells practically scream out autumn.

Ingredients:

  • Cooking spray
  • 2 (6-oz) Gala apples
  • 1 and 1/2 teaspoons cinnamon, divided
  • 1 cup plus 2 tablespoons apple butter, divided
  • 1 and 1/2 cups all-purpose flour
  • 1 cup sugar
  • 3/4 teaspoon baking soda
  • 1/2 teaspoon salt
  • 12 tablespoons Earth Balance butter
  • 1 and 1/2 cups old-fashioned rolled oats
  1. Coat a 9×13-inch baking dish with cooking spray; set aside.
  2. Core and finely dice the apples, then combine in a bowl with 1/2 teaspoon cinnamon and 2 tablespoons apple butter. Set aside.
  3. In a large bowl, combine the flour, sugar, remaining teaspoon cinnamon, baking soda, and salt. Add the butter and mix with your fingers until the mixture starts to clump. Stir in the oats.
  4. Press 1 and 1/2 cups of the flour mixture into the bottom of the prepared pan. Spread with the remaining 1 cup apple butter, then top with the Gala apple mixture. Sprinkle with the remaining flour mixture.
  5. Bake at 350 degrees F for 40 minutes. Transfer to a wire rack and cool completely in the pan for 2 hours before cutting into 20 squares.

Apple Butter Bar (3)

Toasty Fall Treats

Toasty Fall (4)

These adorable little toasts, the recipe in our October High Five magazine, make a great snack – simply vary the shape to make them appropriate throughout the entire fall!

For our first toasts, Travis chose pumpkin- and leaf-shaped cookie cutters. Adults: toast 1 slice of bread per each shape.

Toasty Fall (1)

Travis loved helping press the cookie cutters into the bread, and seeing the shapes pop out.

Toasty Fall (2)

Next came spreading them with red-pepper hummus, giving a nice autumnal hue to our snacks.

Toasty Fall (3)

I cut up small strips of red and yellow peppers for him to arrange on the toasts as decoration, including red color for our pumpkin’s stem.

Okay, the leaf veins were care of mama.

Toasty Fall (5)

Closer to Halloween, make a ghost toast! Use a ghost-shaped cookie cutter and spread with non-dairy cream cheese. Add eyes and a mouth from cut black olives.

Toasty Fall (6)

Once we’re into November, consider a turkey version. We spread with red-pepper hummus again, and used bell pepper pieces for tail feathers and a beak.

Toasty Turkey (2)

Happy snacking!

Toasty Turkey (1)