Measuring Cups & Pots

Measuring Cup Play (4)

With only two weeks of home school left to go, I still need quick fixes to keep Veronika busy while big brother does his lessons! Today I was reminded that sometimes simpler is better. This activity required zero preparation to set up, and zero mess to clean up!

Measuring Cup Play (1)

I just pulled out measuring cups (both the liquid kind and the dry kind) and a pot. That was it. And then I asked her to make imagination soup! My little chef soon went to town. She poured ingredients into the pot…

Measuring Cup Play (3)

…took the lid off and on and enjoyed the clang this made each time…

Measuring Cup Play( (6)

…and of course tasted!

Measuring Cup Play (5)

I loved watching her lift the measuring cups to her lips and make a slurping noise. “Is it yummy?” I asked her. “Yummy!” she replied. Those dry measuring cups are also great because they double as a nesting and stacking toy.

Measuring Cup Play (2)

She kept very busy in her kitchen while Travis did his morning school work. I wonder what she put in her imagination soup?

Kindergarten Home School Week 13: Monday

Home School 66 d

We hit the ground running for Travis’s second-to-last Monday of kindergarten, and what a fantastic day we had. Here’s a recap:

9-9.30: Travis did three pages in his summer workbook: a page about safety rules, a page on the letter V, and a geometry page identifying shapes. That last featured images of circus performers, so we watched Cirque du Soleil clips online to kick things off on a fun note.

Home School 66 b

9.30-10: Author spotlight. After watching a read-aloud of Don’t Let the Pigeon Drive the Bus, by Mo Willems, Travis wrote a sentence about the pigeon: Don’t let the pigeon watch Star Wars! He then colored in the pigeon with a thumbs up for a class vote on whether or not the pigeon can drive.

Home School 66 e

He finished with a STEM extension, designing alternate vehicles for the pigeon and building one from Legos. (Where was little sister during all this? At a play dough construction site!).

Home School 66 f

10-10.30: Snack/recess.

10.30-11: Art. We made monster straw paintings!

11-11.30: ELA. Travis did a protest-free stint on Lexia. His sight reading has come so far!

11.30-12: P.E. He chose to do about 20 minutes of Minecraft-themed yoga for some exercise.

12-1.30 – Lunch/free play.

1.30-2: Class Zoom. I was very proud of Travis sharing during show-and-tell.

2-2.30: Math: After one page in his Star Wars workbook, we played Uno. (Little sister got in her toddler math with tape shapes).

2.30-3.30: Outside. The state’s playgrounds have reopened! This meant Travis got to safely have a play date with a classmate. It made my heart do cartwheels to see children playing again. I hope you are finding a similar return to normalcy in your own hometown.

playground (2)

Chocolate Beet Bundt Cake

Beet Bundt Cake (4)

You’ll sneak a full two cups of vegetables into this cake but your kids will never notice – unless they help bake it of course! This cake is a dream: it requires only two mixing bowls, bakes up perfectly light and airy, and comes out in a fun circle shape that kids will love. (“How did you make a hole in the center?” my son asked).

For ease of preparation, I recommend making your beet puree the night before. Place 6 beets in a pot and cover with water. Bring to a boil, then continue to cook for 30 minutes, until very tender. Drain and let cool until cool enough to handle. Rub off the skins and transfer to a blender; process until very smooth. Refrigerate until ready to use.

Beet Bundt Cake (5)

Ingredients:

  • 3 cups flour
  • 3/4 cup cocoa powder
  • 1 cup sugar
  • 2 teaspoons baking soda
  • 1 and 1/2 teaspoons baking powder
  • 1 teaspoon salt
  • 2 cups beet puree
  • 1 cup warm water
  • 3/4 cup applesauce
  • 1/3 cup canola oil
  • 1 teaspoon vanilla extract
  1. In a large bowl, combine the flour, cocoa powder, sugar, baking soda, baking powder, and salt. Set aside.
  2. In a second bowl, whisk together the beet puree, water, applesauce, canola oil, and vanilla. Add the wet ingredients to the dry ingredients, stirring just until combined.
  3. Spoon the batter into a 10-inch Bundt pan coated with cooking spray. Bake at 350 degrees F for 50 minutes. Let cool in the pan for at least 20 minutes, then turn out onto a wire rack to cool completely.

Beet Bundt Cake (1)

Monster and Creature Straw Paintings

Monster Straw Art (10)

Travis recently learned to make blobs of watercolor paints turn into art with nothing more than a straw, thanks to Kiwi Crate! He loved the activity so much that today we did a repeat, this time creating a set of silly monsters.

Travis chose three colors of liquid watercolor for the first piece of paper, and we dripped on a nice blob of each. Then he proudly blew through a straw.

Monster Straw Art (1)

He loves that he can do this now, scattering the paint with no fear of inhaling it, which wasn’t the case at first.

Monster Straw Art (4)

We soon had crazy wobbly waving shapes.

Monster Straw Art (2)

We examined them carefully to see what monsters we could identify! Travis loved pointing out antennae, six-legged fiends, holes for their eyes and more.

Monster Straw Art (3)

Of course we needed to repeat with a new set of colors. “I want to make lots!” Travis declared.

Monster Straw Art (7)

For the final piece of paper, he combined two colors (blue and black) in one big blob in the center and huffed out a giant monster with his straw.

Monster Straw Art (8)

Let the paint dry completely.

Monster Straw Art (9)

Once dry, we could add details. I suggested gluing down wiggle eyes, but Travis preferred to add embellishments with a marker, including giant cyclops eyes.

Monster Straw Art (11)

And fire for this one, that reminded us of a dragon!

Monster Straw Art (12)

All in all, this was frightfully good fun.

Monster Straw Art (13)

Tape Shapes

Tape Shapes (6)

Veronika loves shapes and she literally squealed with delight when I set up this easy learning activity on the floor this morning.

Using colored masking tape, I made four giant shapes on the floor: a triangle, square, star (her favorite!), and circle. Note that the circle is a little tough to make with tape, and shapes with straight sides will be easier.

Tape Shapes (1)

Not only was this great for shape recognition, but also counted as our gross motor play for the morning. First she hopped to the triangle!

Tape Shapes (2)

Then she ran to the square.

Tape Shapes (3)

Then she twirled in the star.

Tape Shapes (7)

You get the idea! For each shape, give your toddler a new action to perform, simultaneously testing their shape recognition and their listening skills.

Tape Shapes (5)

She’s off to the circle, folks! This was so easy, but she absolutely loved it. Definitely a game we’ll repeat soon.

Tape Shapes (4)

Play Dough Construction Site

Play Dough Construction Site (4)

Veronika loves to play with her set of construction trucks, and I am all for any sort of gender-neutral play like this! Today I supplemented the fun by adding in a play dough “construction site”.

This really couldn’t have been easier to set up. I mashed some play dough flat on the bottom of a shallow tray to the be the dirt, then rolled some into balls to fill the dump truck like large ‘rocks’. Finally, I rolled some into ‘logs’ for the bulldozer to push.

Play Dough Construction Site (1)

The rest was up to her! She loved saying “full” and “empty” as she took the ‘rocks’ in and out of her dump truck.

Play Dough Construction Site (2)

She might not have understood that she was now the foreman at an important construction lot, but she sure loved squishing the play dough and driving the vehicles around!

Play Dough Construction Site (5)

We also put the empty play dough containers upside down like construction cones, which she could then drive around – or bump into!

Play Dough Construction Site (6)

This was an easy sensory tray that kept her busy for quite a while.

Play Dough Construction Site (3)

Cars and Colors

Cars and Colors (7)

Veronika loves to drive around her little cars, so today I turned it into a color game. Each car had a corresponding “garage” of the same color to drive into.

Okay, so these weren’t really garages, just flat pieces of construction paper. But Veronika immediately took to vrooming the cars onto them.

Cars and Colors (1)

I started out making things very easy for her, just two different color cars and their corresponding paper. “Can you drive the orange car onto the orange paper?” I asked her.

Cars and Colors (2)

Success! So we made it harder. I added a third color, and then a fourth, and so on.

Cars and Colors (6)

Each time she vroomed the right car. Some of this might have been coincidence of course, since I laid down the correct piece of paper directly in front of her. But it’s all about reinforcement and repetition at this age!

Cars and Colors (4)

Throughout the day, I kept up the line of “Can you…?” questioning with regards to color. “Can you hand me the green car?” I asked her.

Cars and Colors (5)

“Can you pull on the red ribbon?”

Color Game (1)

“Can you point to the yellow sticker?”

Color Game (3)

This is such an easy way to reinforce colors throughout the day. You can even make it more of a Simon Says game: “If you’re wearing pink, clap your hands!”

Color Cards (3)

Want more color learning ideas? Try picking a color of the day the next time you take a trip out of the house.

Moroccan Spices

Moroccan Spices (1)

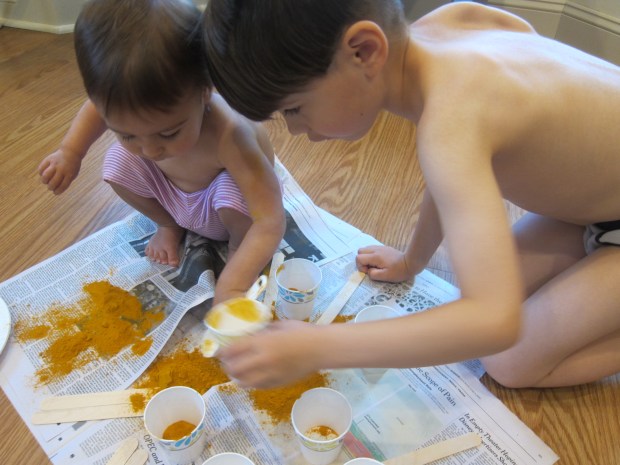
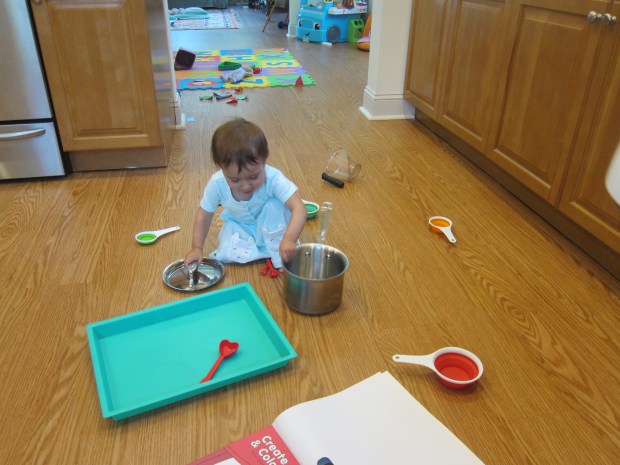
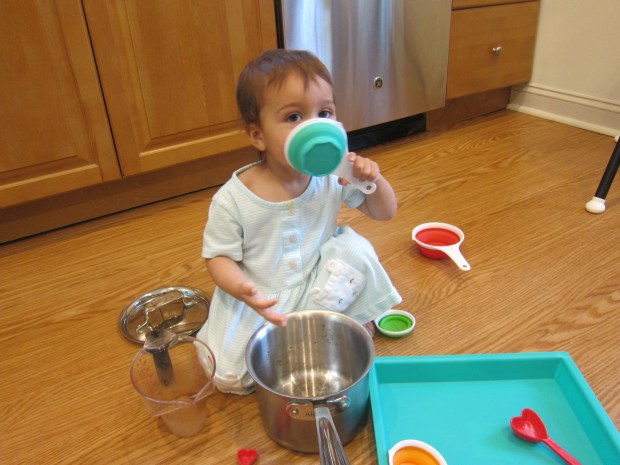
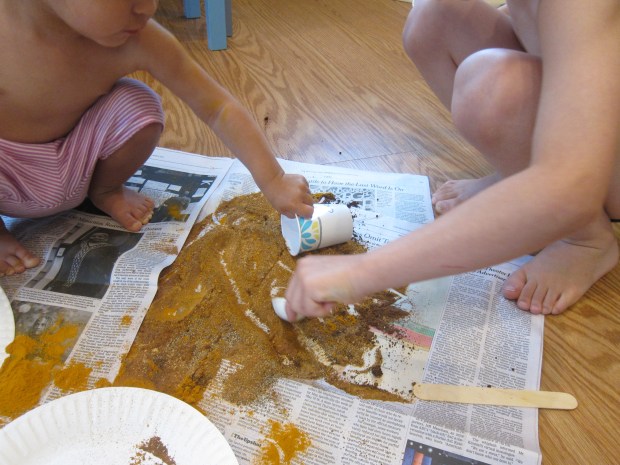
This lesson was a culinary extension to the recipes in the Morocco kit from Raddish Kids. Travis got to pretend to be a spice seller at his very own bazaar! For a kindergartner, the lesson was a mix between learning and sensory play (you’ll notice my toddler was eager to leap in, too). Older kids can take the lesson more seriously, researching spice blends from around the world, grinding their own spices, and using exact proportions to create their own blend.

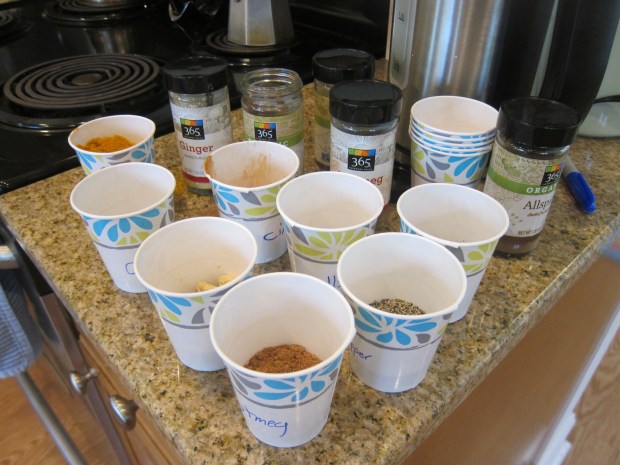
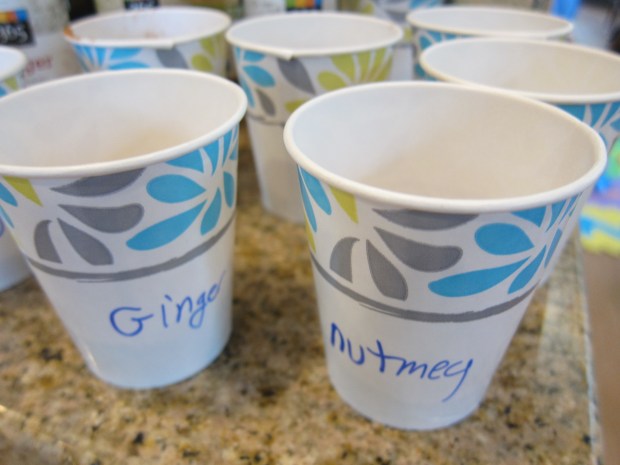
First up was being a scent detective! I poured eight common Moroccan spices into small cups and gave them to Travis one at a time. I labeled each cup just so I wouldn’t forget what was what!

Moroccan Spices (2)

He loved smelling each, summoning up the vocabulary to describe it, and adding tasting notes and color to the provided chart.

Moroccan Spices (8)

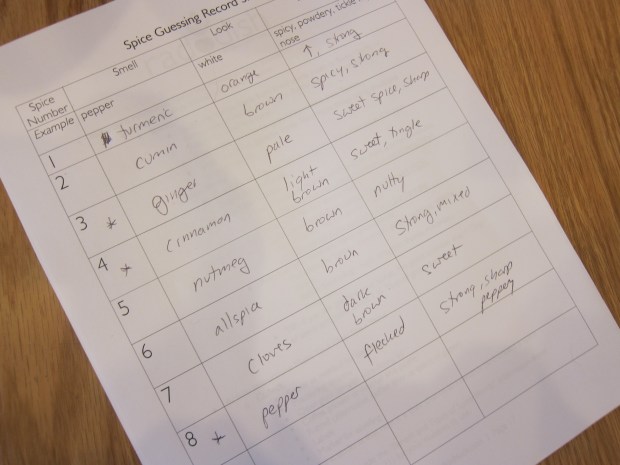
He knew three of them without needing to be told (cinnamon, ginger, and black pepper), and I challenged him to think of why he knew these three. He correctly realized it’s because we cook with them often, whereas the other spices were less familiar!


Moroccan Spices (3)

The lesson plan then included facts about spices, where they come from, the health benefits of spices, and information on common blends like Italian seasoning or ras el hanout.

Moroccan Spices (7)

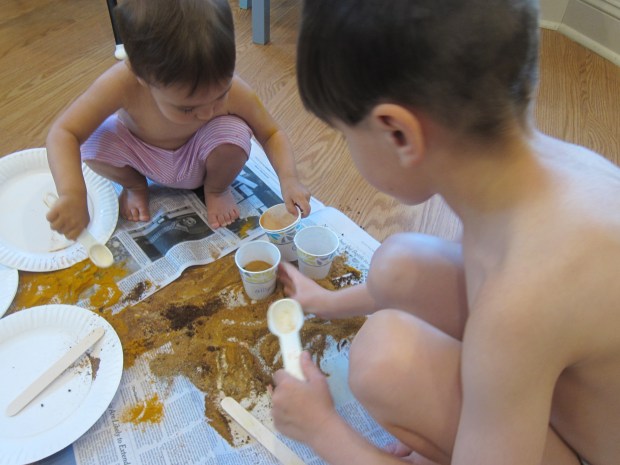
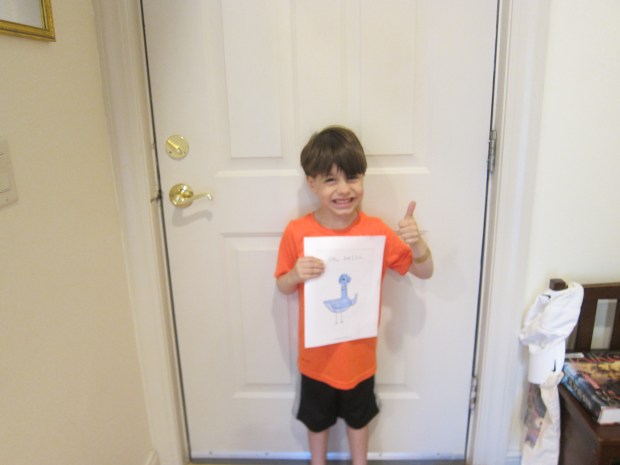
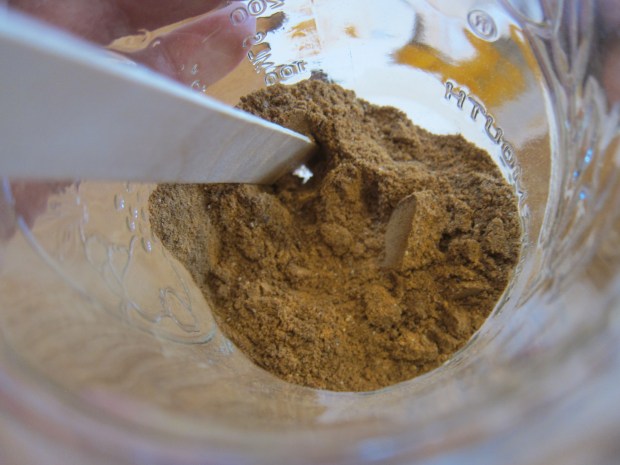
That was all a bit over Travis’s head; instiead, it was time to create his own blend! Mostly he pretended to be a spice merchant, and there was lots of spooning onto paper plates, or pouring in and out of cups. If he gave a spice a thumbs up, we added 3 teaspoons to a glass jar. If he didn’t like it, we added only 1 teaspoon, and if he rated it a medium, we added 2 teaspoons.

In this way we ended up with:

  • 1 tablespoon ground cumin
  • 1 tablespoon ground cinnamon
  • 2 teaspoons ground cloves
  • 1 teaspoon ground turmeric
  • 1 teaspoon ground ginger
  • 1 teaspoon ground nutmeg
  • 1 teaspoon ground allspice
  • 1 teaspoon black pepper

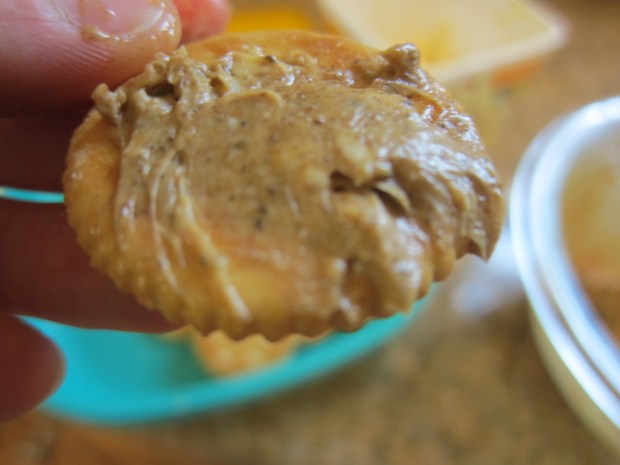
Well, wouldn’t you know, he liked it!

Moroccan Spices (5)

We creamed 1 tablespoon spice mix into 4 tablespoons Earth Balance butter for a spread that worked nicely on homemade bread or crackers. We might try it as a dry rub on tofu, next!

Moroccan Spices (9)

A fun book to read together was My Five Senses, by Aliki. We finished with a virtual trip to a Moroccan bazaar.

Moroccan Spices (6)

Older kids can extend the lesson plan by gifting their spice blend along with a recipe, or researching how spices are grown and harvested.

Moroccan Spices (4)


Spaghetti Squash with Italian Herbs

Spaghetti Squash with Herbs

There’s something magical about spaghetti squash for kids (and grown-ups, too!), about the way the strands instantly shred to look like spaghetti noodles. It always felt a bit to me like Strega Nona’s bubbling pasta pot! This recipe gets a kid-friendly hit of flavor from garlic and herbs.

Ingredients:

  • 1 large spaghetti squash
  • 2 tablespoons olive oil
  • 1 minced garlic clove
  • 1 teaspoon dried basil
  • 1 teaspoon dried oregano
  • 1/4 cup vegan Parmesan shreds
  1. Place the spaghetti squash on a baking dish and pierce several times with a fork. Bake at 350 degrees F for 90 minutes. Let cool slightly, then cut in half. Scoop out the seeds and use a fork to rake the rest of it into strands. Transfer to a large bowl.
  2. Once the squash has cooled slightly, heat the olive oil in a small saucepan over medium-high heat. Add the garlic, basil, and oregano; cook for 2 minutes.
  3. Add the garlic mixture and the Parmesan to the spaghetti squash, tossing to coat.

If you prefer, serve the squash topped with marinara sauce to look even more like real spaghetti!

Spaghetti Squash alt

Color of the Day

Color of the Day (4)

For toddlers who are learning all their colors, there are a lot of new words and ideas to take in all at once. One way to break it down is to devote a day to each color in turn. For example, today Veronika had a red day! You can continue this game on successive days of the week for each color of the rainbow, or add in other common colors like pink, black, brown, and white.

To start us off in the morning, I sang this ditty to the tune of BINGO:

There is a color of the day, and that color is red.

Red, red, red. Red, red red. Red red red.

The color is red.

And of course I pointed out red as I sang! So all day long, it was all about red. She had a red straw in her cup of almond milk.

Color of the Day (1)

And she built with red blocks, and played with red fruits from the toy food bin.

Color of the Day (3)

And she sorted red berries only from a coloring sorting pie.

Color of the Day (5)

When she wanted to draw, I gave her red crayons and markers of course!

Color of the Day (6)

If your child has clothing in the corresponding color of the day, then today’s the day to wear it! When we headed out of the house, I pointed out red everywhere we saw it, whether on Stop signs or other people’s clothing or flowers. We were so happy to spot this vibrant red in the sculpture park!

Color of the Day alt

What color shall we focus on tomorrow? Can’t wait to explore more!

Color of the Day (2)