Paint Dancing

Paint Dancing (8)

I love throwing in a sensory project for the feet now and then, such a different experience for toddlers than working with their hands! All you need for this project is an old crib sheet (or similar large piece of fabric), and a willing pair of toddler feet.

I squirted two colors of washable paint onto a baking tray and added a little dish soap to each color, which will make clean up easier in case any paint goes off the fabric.

Paint Dancing (2)

Fill a second shallow tray with warm soapy water, and have a towel handy. Then tape your old sheet down to the floor securely at all four corners. I put on some tunes (Walking on Sunshine felt just right!) and Veronika immediately started bopping and dancing before the paint was even involved.

Paint Dancing (1)

Then I dipped her feet into the paint and set her painted soles down on the fabric. “Let’s dance!” I said.

Paint Dancing (3)

She was initially hesitant when the paint was thickest, but as she began to move around, a big smile formed.

Paint Dancing (5)

We dipped her toes and repeated a few times, and mixed up the tempo for a little music lesson, too!

Paint Dancing (6)

Arguably her favorite part was washing off in the sudsy water at the end. At first she just dipped in her toes, but then I turned around and found her sitting completely in the soapy tray like it was a mini bathtub. Well, time for an outfit change!

Paint Dancing (7)

Barley with Bananas & Blueberries

Barley with Blueberries (1)

This warm breakfast cereal is a nice alternative if your kids are tired of oatmeal.

Ingredients:

  • 2/3 cup cooked barley
  • 2 tablespoons blueberries
  • 2 tablespoons sliced banana
  • 1/3 cup vanilla almond milk
  1. Spoon the barley into a bowl, and top with the remaining ingredients.

Note: If the barley was cooked the night before, rewarm each portion briefly in the microwave.

Barley with Blueberries (2)

You can also try this recipe with strawberries…

barley strawberry var

peaches…

barley peach

…apricots, or any other fruit, instead!

Barley Blueberry Banana alt

Earth Science Pudding

Earth Puddings (11)

Is this project a healthy snack for your kids? Absolutely not. But when Travis declared mid-way through the activity that he was in paradise, I knew I’d brought some magic into a summer morning.

The idea was to show all the layers of the earth, using just about the most amount of sugar imaginable.

Earth Puddings (1)

I laid out a tray with all of the supplies, and we talked about each layer of the earth as we worked, filling clear plastic cups with each step. First up, we needed bedrock, which I explained was the solid rock deep underground. We used a mix of mini chocolate chips and crushed ginger cookies. The crushing is half the fun; place the cookies in a zip-top bag and smash with a rolling pin until you have big crumbs.

Earth Puddings (2)

On top of this, we spooned the “subsoil” (a dense layer of clay and and iron). Chocolate pudding was perfect of course.

Earth Puddings (4)

You’ll notice my taste testers had wasted no time and were busily crunching into cookies and spooning into pudding. They couldn’t believe I was letting them have this free-for-all!

Earth Puddings (3)

Next we needed topsoil. I explained that this is the dirt we see as we play: dirt, bugs, and minerals. Now we needed oreo cookies, but not the creme filling. I showed the kids how to scrape out the creme with a craft stick so we could crush the chocolate cookies.

Earth Puddings (7)

“Can I eat the frosting?” Travis asked. I nodded. “Plain??” This is when he declared the activity paradise.

Earth Puddings (5)

We sprinkled on our crushed “topsoil” and then added a few “worms”. It’s easy to find gummy worms at the store but most contain gelatin. Instead, we sliced pieces of licorice in half to be our worms.

Earth Puddings (9)

Finally, top with green sprinkles for grass, twigs, and leaves. I wasn’t able to find green sprinkles at the store, but a few drops of food coloring on white sprinkles was a quick fix.

Earth Puddings (10)

Now it was time to dig into the Earth.

Earth Puddings (12)

Veronika plunged her spoon right in and began snacking. It made her so happy she began to do a sugar-fueled dance around the kitchen.

Earth Puddings (13)

Travis loved working his way carefully down the layers, almost like he was excavating. He wanted to stop and talk about which strata we were in, and carefully selected which bite should come next. He was ecstatic when he’d gone deep enough to reveal the pudding under the topsoil!

Earth Puddings (14)

Welcome to paradise on Earth, and thanks to Raddish Kids for this great lesson.


Craft-Stick Cars

Race Cars (5)

These little race cars the perfect old-school camp activity for a summer morning at home!

For the base of each car, line up 3 jumbo craft sticks. Trim two paper straws by about one-third, and line up perpendicular to the craft sticks an inch from each end. Use hot glue to attach.

Race Cars (1)

Hot glue the cap of a food pouch to a wooden skewer; let dry. Thread the skewer through one of the straws, trim the end, and hot glue another food cap.

Race Cars (2)

All of this hot glue work meant the set up was largely a grown-up project, but then Travis was in charge of designing the top of the car, adding a nice STEM element to the craft. Once he’d arranged the sticks as he wanted them, I hot glued them on.

Race Cars (4)

Time for a test drive!

Race Cars (6)

After the designing was done, it turned out that little sister Veronika enjoyed zooming the car around even more. So the whole family got to enjoy this one.

Five, Six, Pick-Up Sticks

Five Six Pick Up Sticks (6)

Nature is the perfect playground for children to learn in, which is a no-brainer because, of course, we evolved and learned to learn in… Nature! I was reminded again today that it’s all right there: sensory concepts, numbers, shapes, and so much more.

The first step of our project today, then, was simply to head out with a little bucket and collect anything that caught Veronika’s eye.

Five Six Pick Up Sticks (9)

We paused at intervals to discuss her collection or to organize it in various ways. She loved lining up sticks on this log, for example!

Five Six Pick Up Sticks (11)

Or playing with various sizes of pine cones.

Five Six Pick Up Sticks (12)

Don’t worry about curating your child’s collection. Simply add anything that he or she wants to the bucket, whether that means little pebbles (one of Veronika’s favorites), seed pods, sticks, leaves, grass, or anything else.

Five Six Pick Up Sticks (10)

Once home, we didn’t even have our shoes off before she dumped the collection on the floor.

Five Six Pick Up Sticks (7)

But that was just fine with me! I sat down with her to talk about everything we’d brought home. First we concentrated on size as I lined up the sticks. Could she find me the longest one? Yes!

Five Six Pick Up Sticks (2)

The shortest stick? Yes! I was really happy to see her mastery of this concept.

Five Six Pick Up Sticks (3)

We played around by subdividing her findings in different ways, whether by item, by color, by texture, and more.

Five Six Pick Up Sticks (1)

You can also use the opportunity to count. How many pebbles did we bring home? “One, two!” she told me.

Five Six Pick Up Sticks (4)

How many acorns? “Just one!” Then of course your toddler is simply going to want to play with all the treasures that have come home.

Five Six Pick Up Sticks (5)

Take Summer Outside


Take It Outside (4)

Here’s a round-up of a few ways we played in the summer sun today, all with one common factor: the activity had to get us outside!

First up was a round of animal charades. The idea was to spot an animal and then move like it. Everyone else guesses what you are! Travis spotted a bee and loved buzzing like one.

Take It Outside (2)

In fact he was so enamored with the bees that it was hard to get him to spot a second animal, but he could also crouch and hop like a squirrel.

Take It Outside (4)

Little sister, meanwhile, loved pretending to fly like the birds she saw. Or getting down low to crawl like an ant bug.

Take It Outside (5)

I loved that this simple activity really got them paying attention to how animals move.

Then it was time for a nature walk. As we strolled on a nearby path, we pulled out an oldie-but-goodie, searching out animal homes and guessing who lived inside each.

Take It Outside alt

This time, Travis snapped pictures with the instant camera, too!

Take It Outside (3)

We also embarked on a leaf hunt! I challenged him to find 5 different leaves and then we used a nature guide to try to identify each one.

Take It Outside (6)

There was such a thrill every time we found a corresponding picture. It was a great activity for talking about similarities and differences.

Take It Outside (7)

Travis glued the leaves to poster board once home and we labeled them, making this a great approximation of an elementary school science project.

Take It Outside (5)

He then drew the leaves, a pretty picture we decided to mail on to a friend!

Take It Outside (9)

To end the outdoor fun, we repeated a classic activity: tracing an item’s shadow to see how it changed over the course of the day.

Take It Outside (1)

Our intent wasn’t to make a full sundial, but just to watch how the shadow changed at intervals. We color-coded our markings for a pretty result!

Take It Outside (2)

Shark Awareness Day

Shark Awareness (13)

Were you aware that July 14 is Shark Awareness Day? Neither were we until Highlights magazine clued us in. I was glad of it, knowing how misunderstood sharks are, plus I knew it was tailor-made for lots of fun activities.

Shark Awareness (2)

First up was some learning. I read Travis ten facts about sharks, and then he loved doing a few coloring pages and shark counting activities. He decided his favorite was the hammerhead shark and filled out a worksheet about them. Now he wanted to know more!

Shark Awareness (1)

We did a deep dive (and I mean deep!) into videos about sharks. By the end of the day, Travis was a graduate of this ‘Shark Academy’.

Shark Awareness (6)

We didn’t forget about little sister Veronika! She was in heaven watching Baby Shark cartoons, and happily shouting out, “Shark shark!”

Shark Awareness (5)

Now it was time for shark crafts! First up was a newspaper shark. Cut a piece from a magazine or newspaper in the shape of a shark nose coming out of the water, and glue to blue construction paper. Add eyes from stickers or wiggle eyes, then a black construction paper mouth. Travis liked snipping all the white triangles for the teeth!

Shark Awareness (3)

We added a strip of blue craft foam at the bottom for the ocean. I swear it is a complete coincidence that the text in the middle said “Brush up on table manners”. This was so perfect I have nothing else to say.

Shark Awareness (4)

Next we made shark puppets. If you have blue craft sticks, simply use those. I painted a few blue in a pinch, and let dry. Attach two sticks together in an X using a rubber band.

Shark Awareness (10)

We traced a shark puppet template onto blue craft foam and then cut out and hot glued onto the craft sticks. Push down on the stick with the lower jaw piece to make your shark chomp chomp chomp.

Shark Awareness (12)

Travis was mad for sharks all day as a result. He pulled out an old shark toy and staged a shark versus Lego battle.

Shark Awareness (9)

This prompted us to add one more STEM activity, constructing a shark from random Lego pieces!

Shark Awareness (15)

We hope you have fun celebrating Shark Awareness Day, too!

Summer Boredom Bucket List: Day 5

Boredom 21 b

Here we are on the fifth day of a week-long journey to bust summer boredom. Feel free to add your own ideas in the comments!

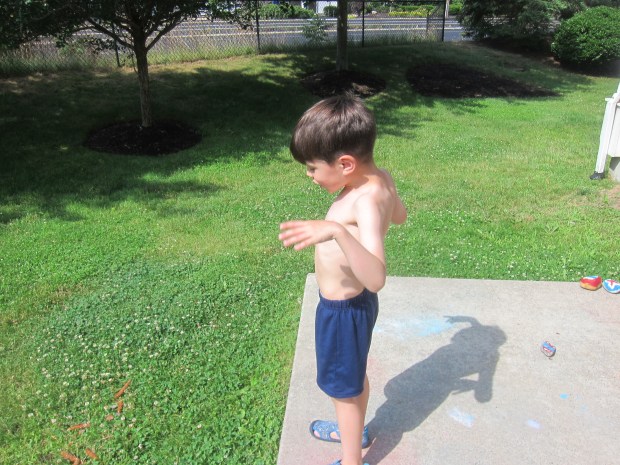
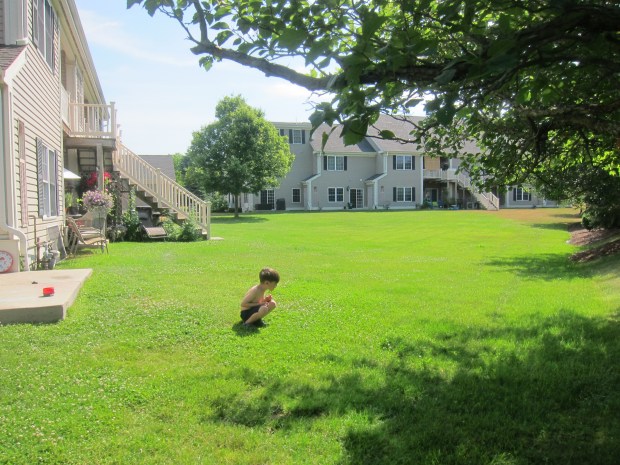
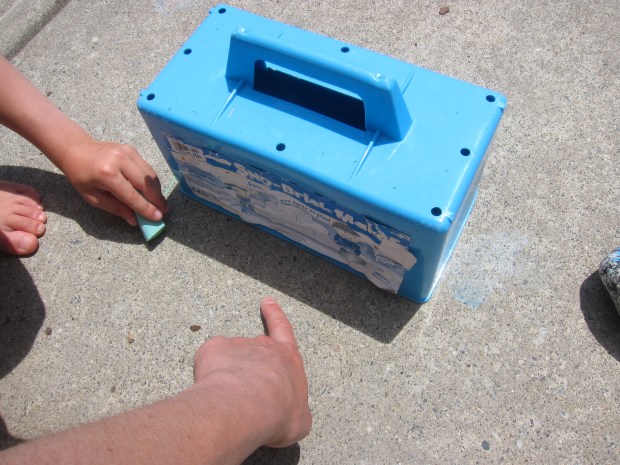
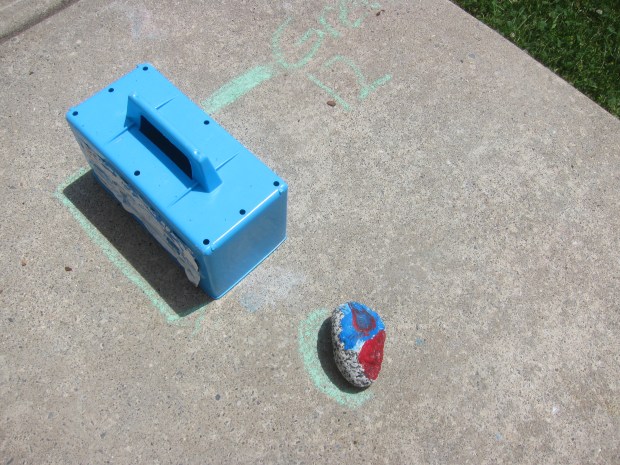
Idea 17: How Far Can You Jump? The “I’m bored” whines were beginning moments after breakfast and I could tell the kids needed to get outside, so I immediately declared it a mini Field Day. I laid a yardstick down on the ground and notched off the starting point with chalk. Mommy jumped first, the full 3 feet!

Boredom 20 b

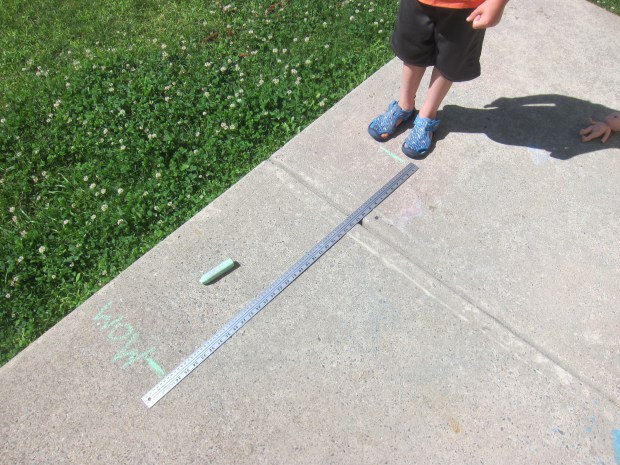
Seeing this made Travis want to take a turn. He landed at 26 inches the first time. But could he beat it? Wow, 32 inches!

Boredom 20 d

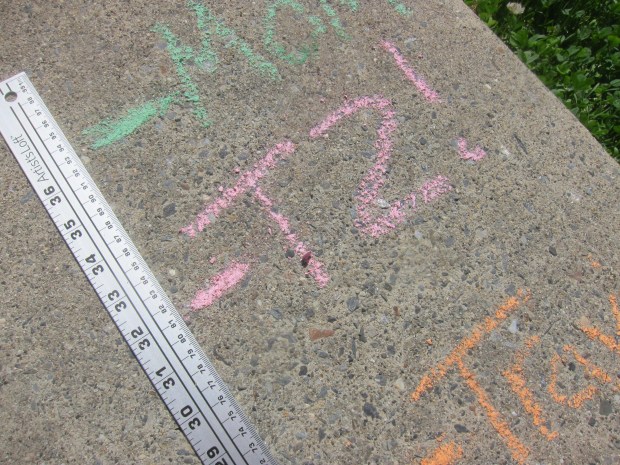
He was so proud. Meanwhile it was not even 9 a.m. and I was pleased the kids had already had some sunshine.

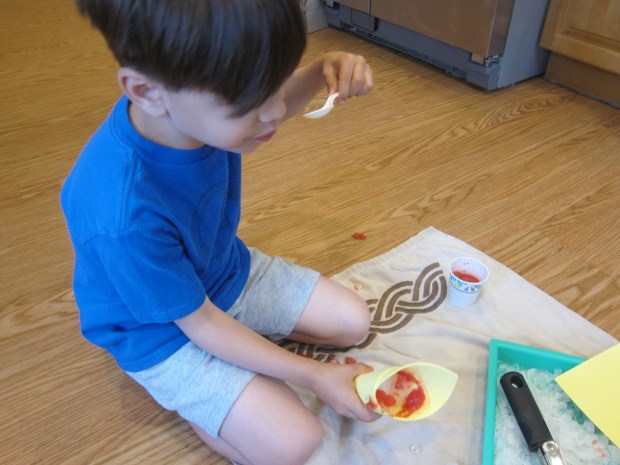
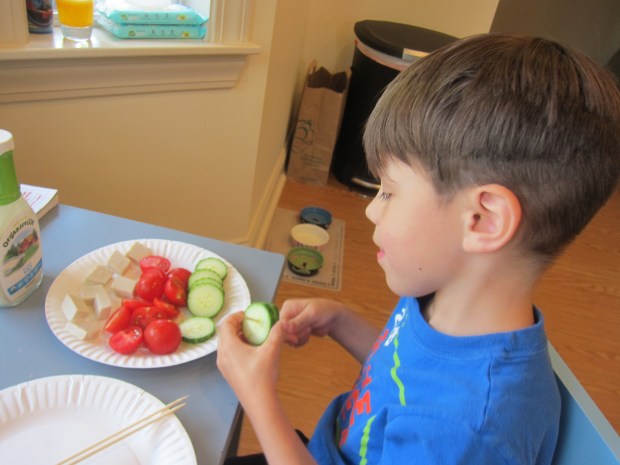
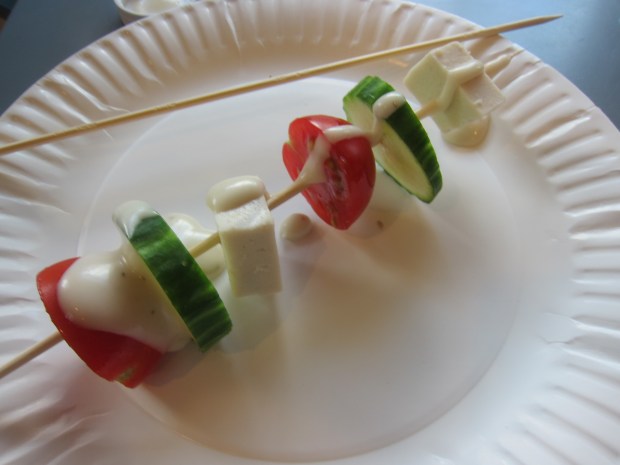
Idea 18: Make a Salad Kabob. Travis loved threading food onto a skewer for a recent project so now I challenged him to make his lunch salad in kabob-form. I suggested a pattern of: tomato, cucumber, cheese (we recommend chunks of mozzarella from Miyoko’s kitchen!). But he declared, “I have my own pattern.” Many slices of cucumber and mozzarella followed.

Boredom 21 a

We drizzled with non-dairy ranch dressing for the perfect salad on a stick!

Boredom 21 c

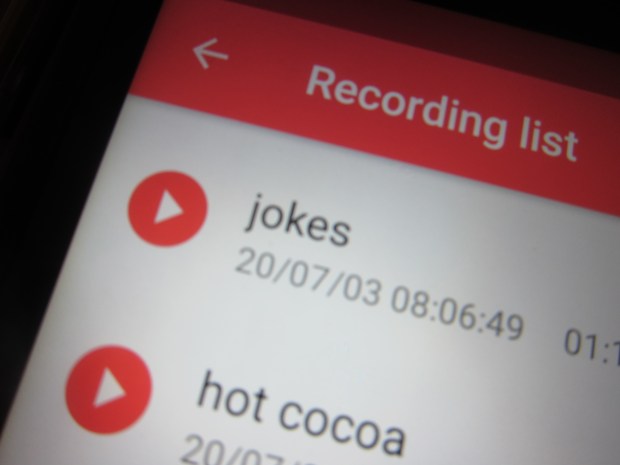
Idea 19: Memorize Five Things. The concept of this one was tricky for Travis (i.e. memorizing five X of any category, be it words in a new language, poems, etc.). I helped him narrow it down to memorizing 5 jokes. Four were Knock Knock jokes, but we threw in one of my corniest favorites from childhood:

Q: What’s gray, and has a trunk?

A: A mouse going on vacation!

Rim shot. We even recorded these onto my phone for little sister Veronika to listen to in the car. 

Boredom 23 a

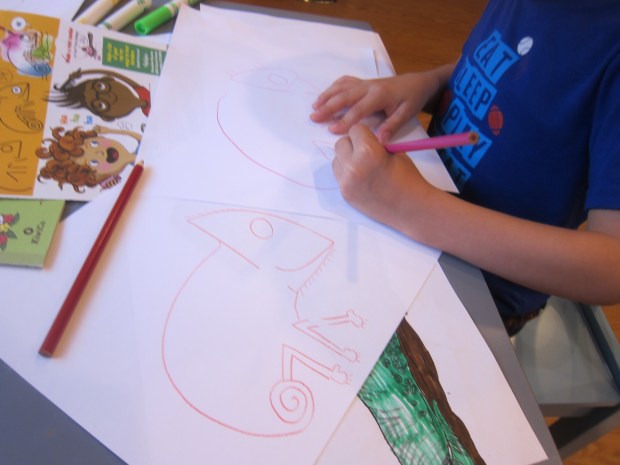
Idea 20: Learn to Draw a Chameleon. What a strangely specific suggestion this was from Highlights, but I took advantage of Travis’s recent interest in learning to draw Star Wars characters in order to pique his interest in a step-by-step chameleon tutorial.

Boredom 24 c

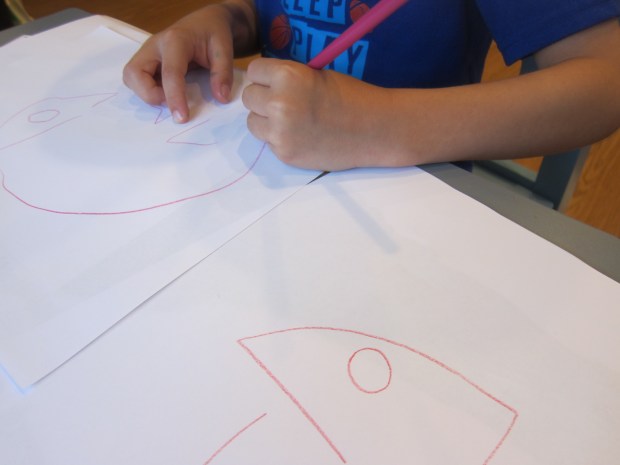
It was tough for him to understand at first how we were following along line by line. Then he began to grasp how each step made it look more like a chameleon than the step before.

Boredom 24 b

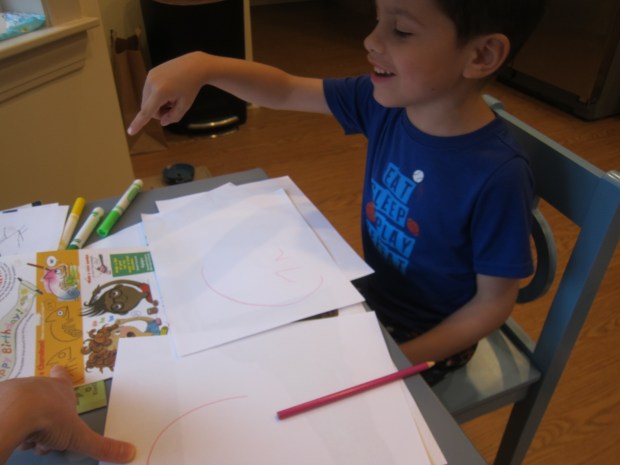
Here’s how mama’s attempt turned out:

Boredom 24 d

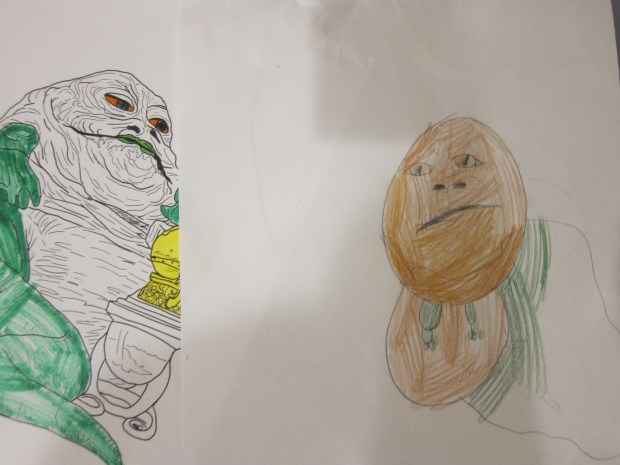
After he had mastered the chameleon, he even tried his hand at drawing Jabba the Hutt.

Boredom 24 e

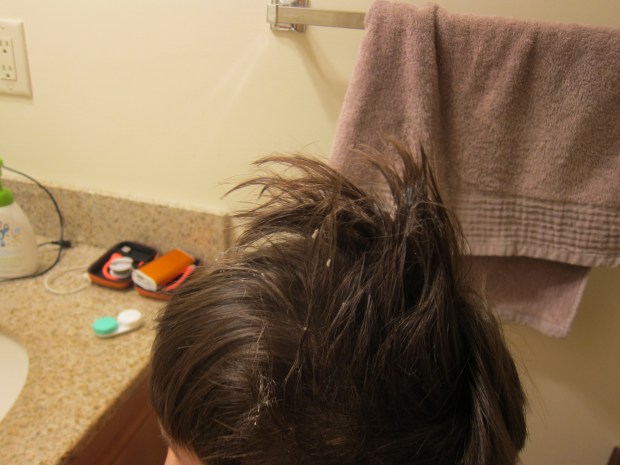
Idea 21: Do a New Hairdo. Travis is hesitant about gels in his hair, so I wondered how this suggestion would pan out. So at first I asked if the kids wanted to set up a doll hair salon. That got a big yes!

Boredom 25 a

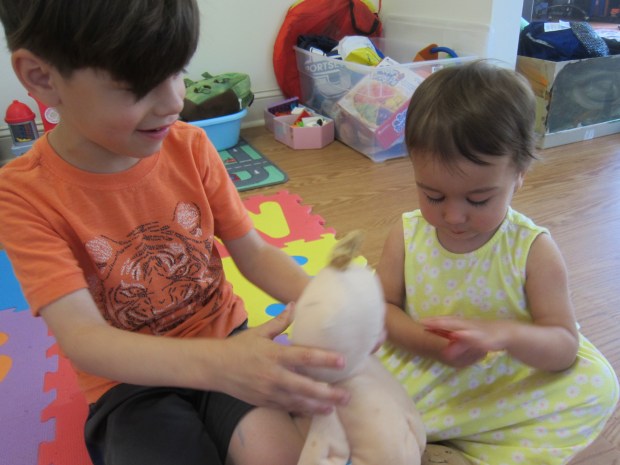
We pulled out safety scissors for pretend snipping, along with jars of pretend cream. Then Travis asked for a real hair product. Heck, why not? I let him work all the baby dolls’ hair into big spiky mohawks.

Boredom 25 b

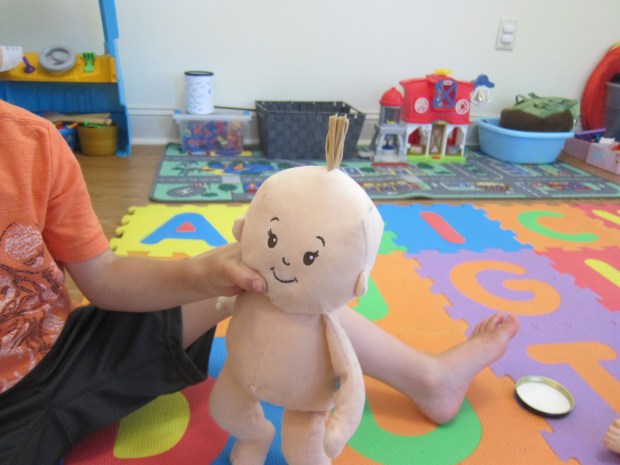
He decided it was so much fun that he was willing to let me run cream through his hair and attempt a mohawk of his own. And of course needed to see in the mirror!

Boredom 25 c

Climbing Practice

Climbing Practice (4)

We couldn’t get to the real playground this morning because of rain, so turned the living room into an indoor playground instead! If you’re helping your toddler learn to climb and navigate playground structures (which can be tricky for toddlers!), pillows are an excellent learning opportunity.

Climbing Practice (1)

I set up all the couch pillows in such a way that Veronika could crawl from pillow to pillow and make her way up to the top of the actual couch. She was so excited she threw herself into the mix!

Climbing Practice (2)

Her favorite was the squishiest pillow from the back of the couch, which could be crawled up…

Climbing Practice (6)

…slid down like a slide…

Climbing Practice (11)

…and more. Then she said, “Let’s walk!” “Good idea,” I complimented her, and she was so proud.

Climbing Practice (7)

“Good idea!” she parroted, and danced and pranced from pillow to pillow.

Climbing Practice (3)

Amazingly, we had no bumps or bruises! I was really happy when she used the pillows as I’d intended, like stairs to reach the top of the couch.

Climbing Practice (8)

We did a big round of “hip hip hooray” to celebrate.

Climbing Practice (9)

You’ll notice big brother Travis wanted in on the action, too.

Climbing Practice (10)

A big heap of pillows is fun no matter how old they get.

Climbing Practice (12)


Edible Sno Cone Creation Station

Sno Cone Creation Station (10)

Here’s an activity that will a) cool the kids off; b) provide sensory play; c) fire up the imagination; and d) give them a yummy snack! I told the kids they were going to open up their own sno cone stand, and the excitement began.

I set out a tray of crushed ice (an easy task thanks to our fridge filtration system, but a blender can do this for you, too), then added ice cream scoops.

Sno Cone Creation Station (1)

For “cones”, we folded conic shapes from craft foam. These turned out to be very easy to break, so next time I would probably stick to little plastic bowls.

Sno Cone Creation Station (3)

All they needed now were fruit syrups to flavor the ice! For these, I simply pureed fruits in the blender. We had pink from strawberries and deep purple from a mix of blueberries and blackberries.

Sno Cone Creation Station (9)

If you have condiment squirt bottles, those would be perfect to use here! I gave the kids paper cups filled with each syrup instead, along with plastic spoons.

Sno Cone Creation Station (5)

As with a recent nature soup activity, I loved that this game could engage both my toddler and 1st grader in different ways. For Veronika, it was all about the sensory aspects. First she just loved spooning through the ice.

Sno Cone Creation Station (2)

When she tasted plain ice, she copied big brother and said, “It’s yummy!” but I don’t think she really thought so.

Sno Cone Creation Station (7)

“It’s cold!” she added instead, looking confused. So we showed her how to spoon the berry syrup on top of her ice. Well now she couldn’t be stopped!

Sno Cone Creation Station (11)

In retrospect I would have done this activity in just a diaper to avoid berry stains, but it was worth a few purple splotches. She was having such delicious fun I let it be.

Sno Cone Creation Station (12)

Travis, meanwhile, enjoyed the role-play aspect of the game. He loved using the ice cream scoop to properly fill a “cone,” and then asking me for my order, adding strawberry or purple berries on top accordingly.

Sno Cone Creation Station (8)

And of course he did lots of tasting, too!