I Spy

I Spy (4)

“I spy” is such a classic children’s game that it’s easy to overlook it. But don’t! And yes, you can play it even with children who are just beginning to speak.

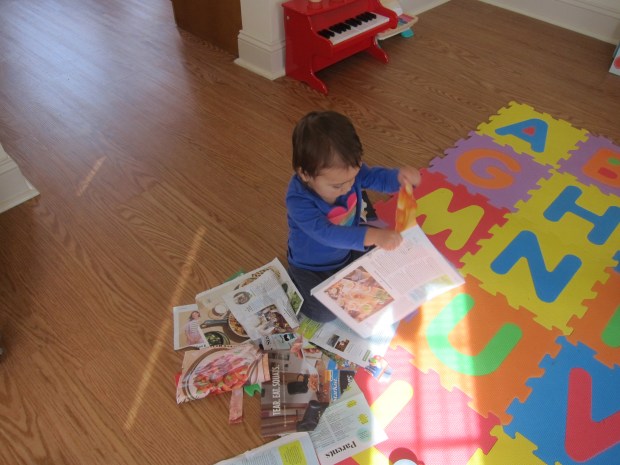
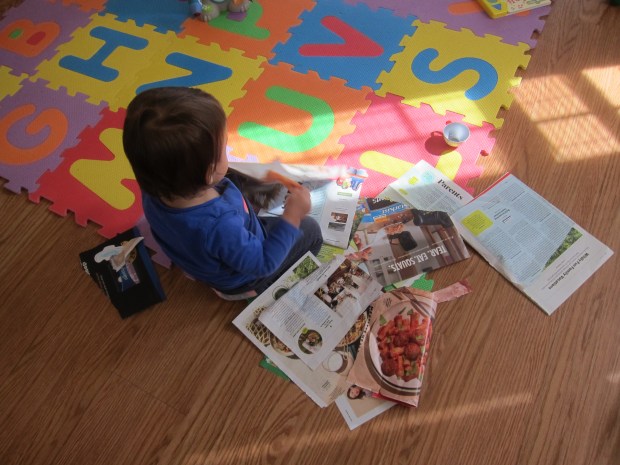
Here are a few ways Veronika and I already play the game, at sixteen months old. First, I use pages of her Hello magazines as “I spy” prompts. “I spy a duck,” I might say simply, and ask her to point to the duck on the page. The magazine’s “Find It” page is particularly great for this activity.

I Spy (3)

It’s a nice way to reiterate vocabulary she already possesses. She sometimes signs the word proudly, or sometimes says it orally back. “I spy a fish!”

I Spy (5)

It’s also a great way to build on existing vocabulary, so I might instead say, “I spy something fast and red. The red car!” This is closer to the classic version you can play with older children (“I spy something red…”) and helps add colors, adjectives, and nouns into her repertoire.

I Spy (1)

Then we take the game along in the car. If she has an issue of Hello open on her lap, I’ll make a mental note of what’s on the page. As we drive, I can say, “I spy a tree.” She’ll look up with a smile when she spots it.

I spy (7)

We also talk about what’s out the windows, though this can be harder for a toddler to grasp with so many items whizzing by. But big siblings will love jumping in on the game. Travis gave Veronika helpful clues like, “I spy an animal that’s furry and says woof,” just as we drove by a dog. What will she spy next? So many possibilities!

I Spy (6)

Junk Mailman

Junk Mailman (1)

If you ever feel like you can’t open the bills or get through the mail with a toddler in the house, this game is for you!

For a few days running, I set aside the junk mail that arrived and kept a collection in a paper bag. When I needed to sit down and peruse the items that mattered, I presented Veronika with this bag.

Junk Mailman (2)

She thought she’d hit the jackpot! There was paper to rip…

Junk Mail (2)

…and envelopes to open. This last part is still tricky for her, but if I start a corner, she proudly pulls the document the rest of the way out.

Junk Mailman (3)

Inevitably there are lots of pictures and pages to flip through, especially if you save up catalogs.

Junk Mail (1)

At one point, she needed a pen just like mommy and I could tell she felt very important!

Junk Mailman (4)

The game was such a hit that I’m going to make it a regular occurrence around here.

Do Nothing Day

Do Nothing (1)

Like many of you, we now find ourselves in a period of “social distancing”; school is closed for 3 weeks and we’re limiting our exposure to the rest of the world. Places that are familiar to the kids like libraries, museums, and local classes are shut down. So I pondered how to approach this period without scaring the kids. One idea? Turn the ability to do nothing into a game, at least for one day. As in: have a do nothing day!

The idea of no chores and no appointments and no assignments is sure to appeal to kids, turning what might otherwise feel like a strange break into a fun adventure. We almost always have at least one outing or activity daily, so today when the kids woke up I declared it a “Do Nothing Day”. We even could stay in our pajamas as long as we wanted!

Do Nothing (3)

Beds could go unmade.

Do Nothing (9)

Chores could be skipped and playtime was a must. The kids could lounge together on the couch eating snacks and watching a Disney movie.

Do Nothing (2)

Other perfect ways to pass the day? Building with Legos…

Do Nothing (4)

….coloring pages…

Do Nothing (8)

…and getting silly while cooking a recipe all fit the bill.

Do Nothing (6)

Obviously we won’t keep this up every day (home school for Travis starts tomorrow!) but it set things off on a playful, joyful note instead of a scary one.

A few other helpful tips to “social distance” without alarming the kids.

  • Get outside every day. Even a small patio or lawn will give your kids fresh air and a daily dose of nature, even when you avoid playgrounds and group areas.
  • Use Facetime and Skype. Stay in touch with older relatives or others you might not be able to see in person now.
  • Order groceries online. Though this is something I’ve skipped in the past, you’ll have peace of mind if you check out an online service instead of bringing kids to a crowded store.
  • Build your mom community: Set up a group text list, and you’ll keep each other sane virtually, answer one another’s questions, and get through this time “together apart”.
  • Have a routine every day. Kids thrive on routine. Now that our Do Nothing Day is done, each day will have scheduled time for reading, math work, quiet coloring or puzzles, crafts, and more.
  • But finally, a little extra screen time can’t hurt. And will help you keep your sanity.

Do Nothing (10)

Please stay tuned. I’ll have lots of activities and crafts in the days and weeks ahead. Wishing health to all.

Puffy Shamrock

Puffy Shamrock (6)

This easy shamrock makes the perfect good luck charm for your front door this St. Patrick’s Day!

Older kids can trace a shamrock shape themselves on green cardstock, but I took care of that part for Travis and helped him cut out along any tricky curves.

Puffy Shamrock (1)

Originally the plan was just to cover it with green pom poms and we had quite an assortment: small ones, medium ones, and sparkly ones!

Puffy Shamrock (2)

As soon as Travis saw some wiggle eyes in our craft bin, though, he knew our shamroock needed them, so those got glued on first.

Puffy Shamrock (3)

He began adding drops of glue and filled in all the remaining space of the shamrock with pom poms, sometimes having fun with a pattern (“3 sparkly, 1 plain!”), and sometimes just in random order.

Puffy Shamrock (4)

He was very precise about filling in any tiny gaps with the small pom poms near the end.

Puffy Shamrock (5)

Once the glue dried, I added a loop of green ribbon on the back so we could hang it from the doorway. Here’s hoping for the luck of the Irish!

Puffy Shamrock (7)

Ice Sun Catchers

Ice Suncatcher (5)

We’re in the very last days of winter here, so Travis and I wanted to try one last icy project! To start, he ventured outside to collect a few late winter/early spring nature finds, including old pine boughs, pine cones, and the first of the tulip petals!

Inside, we arranged these in the lids of Tupperware containers, along with a loop of ribbon for each. Travis was very deliberate about placing the items.

Ice Suncatcher (2)

If it’s still icy winter where you live, set them outside to freeze. We cheated a bit and used the freezer!

Ice Suncatcher (4)

Once completely frozen, run a little warm water around the edges of the lids and the sun catchers should release easily. Now hang them to sparkle in the sun!

Ice Suncatcher (6)

As a bonus, the nature items will simply fall back to earth once these melt, and all you have to do is collect the ribbons.

Ice Suncatcher (7)

Centerpiece

Centerpiece (4)

Veronika has only been walking for a couple of weeks, but she already has a few nature forays under her (tiny) belt. Today when we headed outside, I brought along a small bag so she could collect treasures along the way.

Centerpiece (6)

She loved dropping sticks and other finds into it!

Centerpiece (7)

Of course, she didn’t know that I had plans for these items once home. I set out the items she’d found, along with a bright red beach bucket to be a “vase”.

Centerpiece (2)

Note: You can use anything for the container, but I liked that the bucket wouldn’t break, unlike a glass or pottery vase. You could also try upcycling a milk carton for this project.

She’s at the helpful age where she likes to put things “in”, so one by one, she arranged the items.

Centerpiece (3)

I cheated a bit with a few tulips we already had at home, since these added a nice pop of color. But look at the centerpiece she was able to create!

Centerpiece (5)

I put this on the table as the family dined, and made sure she knew that it was her masterpiece. In sum, this was a really sweet way to engage a young toddler with nature.

Pipe Cleaner Sculpture

Pipe Cleaner Sculpture (6)

Pipe cleaners are a fantastic way to introduce your toddler to the idea of 3-D and sculptural art. Because the ends of pipe cleaners can be pointy, this is definitely an activity that you want to supervise the entire time, not something for a toddler busy box. I loved taking time today with Veronika to show her how to manipulate them.

To start, I dumped out a package of multi-colored pipe cleaners in front of her. So needless to say, the game was already a hit!

Pipe Cleaner Sculpture (1)

I started by making a few fun shapes. Using our imaginations, this one looked like a dog.

Pipe Cleaner Sculpture (4)

She got quite a kick out of mommy’s art skills as we made the pipe cleaner say “woof”!

Pipe Cleaner Sculpture (var)

Her next request was for a sheep, so I wound together white pipe cleaners into a semblance of a woolly lamb..

Pipe Cleaner Sculpture (3)

She then loved pulling off the curly “wool” pieces.

Pipe Cleaner Sculpture (5)

I tried to think of the safest way to make her a “sculpture” without resulting in any poking and pricking, and circles seemed ideal. Loop these together in a pattern or in rainbow order, or any other way that strikes your fancy!

Pipe Cleaner Sculpture (alt)

Veronika loved holding long chains of the loops, and also decided that individual circles made great bangles and anklets!

Pipe Cleaner Sculpture (8)

In sum, you’ll have a great time together discovering all the ways you can manipulate the pipe cleaners, whether tight curly-cues, or interesting shapes, or more.

Pipe Cleaner Sculpture (7)

Rainbow Craft Challenge

Rainbow Challenge (5)

Just in time for St. Patrick’s Day, Travis’s art challenge from Highlights magazine was to make a rainbow using tissue paper, glue, and… anything from the recycling bin!

So of course first we had to dump everything from the bin onto the floor. Travis loved going through the pile, including boxes and tubes and cans that we didn’t ultimately use for the project (some of which became props for his games all afternoon).

Rainbow Challenge (1)

A pizza box was the largest piece of cardboard available so that became our base. We glued down blue tissue paper for a quick background.

Rainbow Challenge (2)

I had bought tissue paper in every color of the rainbow, and assumed we would tear these into tiny pieces. But Travis had other ideas, and I loved watching him twist a sheet of each color into a rope, then glue these in rainbow order.

Rainbow Challenge (3)

A black bottle cap made a pot of gold and white tissue paper glued on to a container lid became a puffy cloud. Clever!

Rainbow Challenge (4)

Here’s hoping we have some extra luck whenSt. Patrick’s Day rolls around next week.

Peanutty Overnight Oats

Peanutty Oats (2)

These individual servings of overnight oats are perfect for hectic mornings since most of the prep happens the night before.

Ingredients:

  • 1/2 cup rolled oats
  • 1/4 cup chia seeds
  • 2 cups plain soy milk
  • 1 and 1/2 cups raspberries
  • 2 tablespoons sugar
  • 1/4 cup creamy peanut butter
  • 1/2 cup sliced banana
  • 4 teaspoons agave nectar
  1. Divide the oats and chia evenly among 4 small mason jars. Pour 1/2 cup milk over each serving and stir. Cover and refrigerate at least 3 hours, or overnight.
  2. Meanwhile, mash the raspberries and sugar together in a small bowl with a fork. Refrigerate until ready to serve.
  3. In the morning, spoon 2 tablespoons raspberry mixture over each jar of oatmeal, along with 1 tablespoon peanut butter, and 2 tablespoons banana slices. Drizzle with the agave nectar.

Peanutty Oats (3)


Chick’n Pot Pie Muffins

Chicken Muffins (2)

Croutons are the secret for the “crust” in these individual-sized pot pies. As a result, they make fantastic toddler finger food!

Ingredients:

  • 2 cups vegetable broth
  • 1/4 cup Earth Balance butter, melted
  • 4 cups croutons
  • 1 and 1/2 cups Gardein chick’n strips, cooked and chopped
  • 2 cups frozen mixed vegetables
  • 1 tablespoon wheat germ
  • 1/4 cup vegan ranch dressing
  • 1 tablespoon ground flaxseed
  • 3 tablespoons water
  • 3/4 cup shredded vegan cheddar cheese
  1. In a saucepan, whisk together the broth and melted butter. Heat over medium heat until warm. Set aside.
  2. Meanwhile, combine the croutons, chick’n, mixed vegetables, wheat germ, and ranch dressing in a large bowl. Mix well.
  3. In a small bowl, whisk together the flaxseed and water. Pour over the crouton mixture, along with the broth mixture.
  4. Divide evenly among 12 muffin cups and top each serving with 1 tablespoon shredded cheddar.
  5. Bake at 375 degrees F for 20 minutes.

Note: These may fall apart slightly for serving, but you’ll still have a tot-sized portion ready to go, even if they aren’t perfect “muffins”.

Chicken Muffins (3)