Cream of Wheat Imagination Bowl

Cream of Wheat (2)

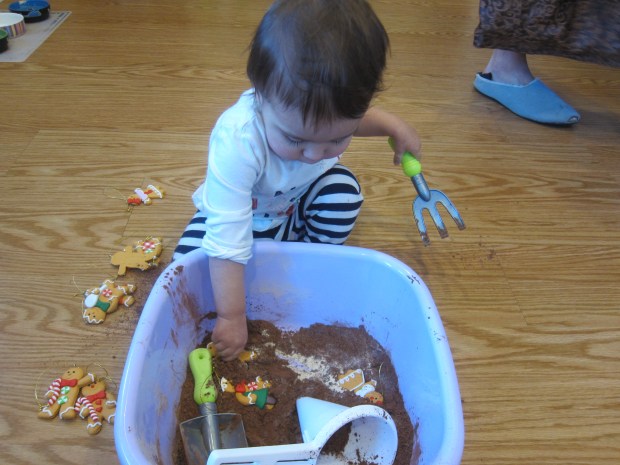
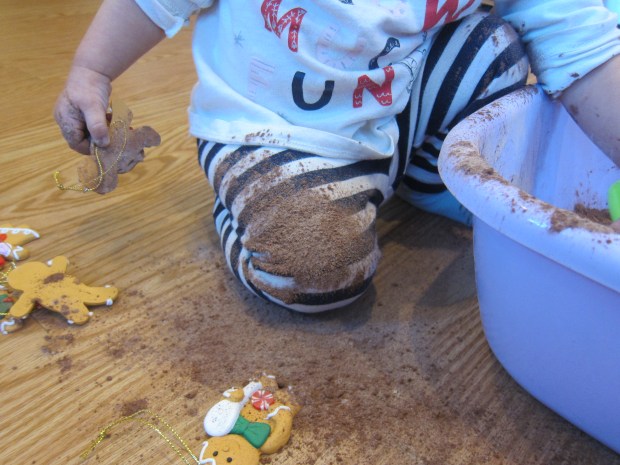
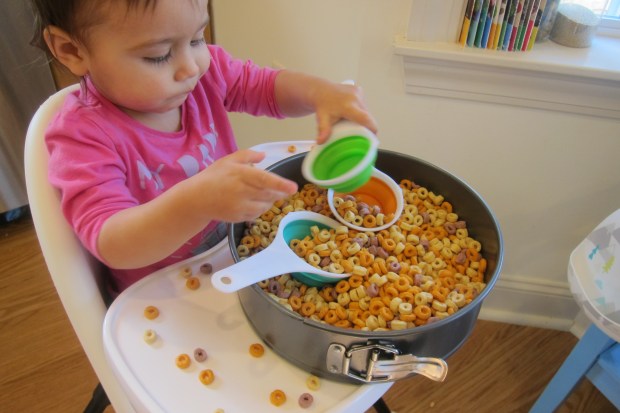
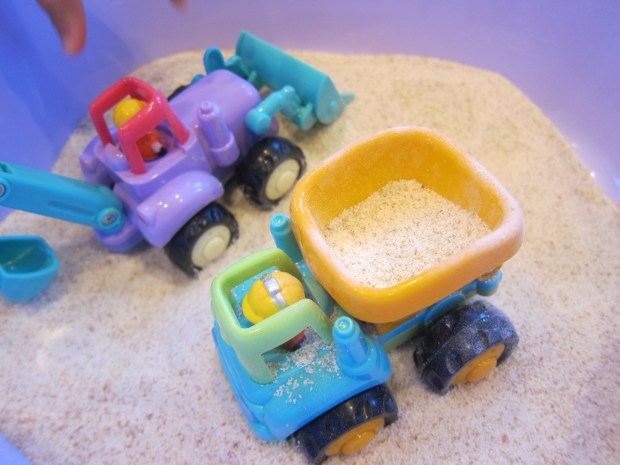
One of Veronika’s latest words is “truck” and she has a set of construction trucks that she loves to play with, just right for toddler-sized hands. Today, I engaged her imagination by making an indoor “construction site”. Cream of wheat made the perfect base for this easy sensory play; it’s simple to clean up from floors or wipe off of clothing, and it also makes it okay if a toddler decides to taste the “sand”, resulting in a much more pleasant experience than an outdoor sandbox!

Once I demonstrated how she could drive her trucks through the pretend construction zone, she jumped right to it. I showed her how she could use the bulldozer blade to push through the cream of wheat, which was a big hit.

Cream of Wheat (3)

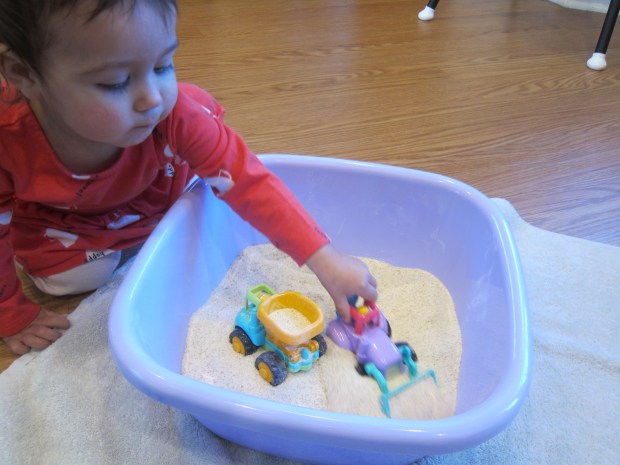
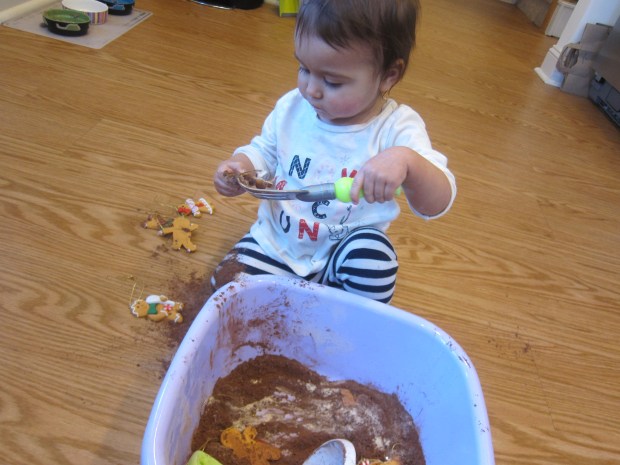
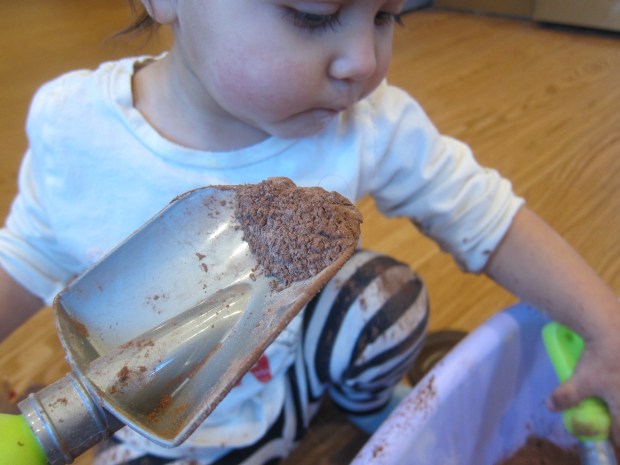
I loved watching her concentration as she carefully sprinkled “sand” into the dump truck.

Cream of Wheat (5)

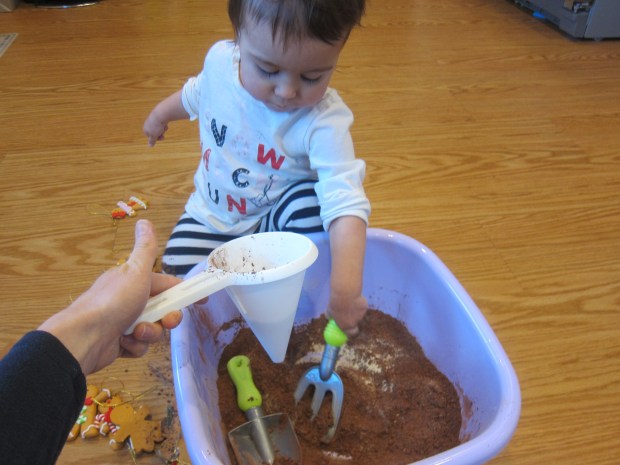
She also loved just vrooming the various trucks, which made fun tracks in the “sand”.

Cream of Wheat (4)

Trucks lend themselves naturally to lots of onomatopoeia as you play. Be sure to make  beeps and vrooms and other car noises, and your toddler is sure to join in!

Cream of Wheat (6)

What a great way to get the imagination going and have hands-on sensory play.

Cream of Wheat (7)

Hot Cocoa Sensory Tub

Hot Cocoa Sensory (4)

Disclaimer: This is by far the messiest sensory play I’ve undertaken with either of my children, and that’s saying a lot. But it’s worth it!

In retrospect, I would have done this activity around Christmas. Something about it felt very seasonal, perfect for the holidays, although technically it is still winter which means hot cocoa season. The original version of this game called for a container of hot cocoa mix, but it’s very hard to find a brand with no milk powder. Instead, I mixed together a tub of cocoa powder but added about 1/2 cup vanilla-flavored protein powder. This meant the mix wouldn’t be too bitter if Veronika happened to lick her fingers (which she did!). Straight cocoa powder probably won’t appeal to your little one.

To complete the set-up, I added a few gingerbread people ornaments. in keeping with the cocoa theme. If you want to keep the bin fully edible, use mini Dandies marshmallows instead. Or try gingerbread men cookies, if in stock around the holidays.

I added a funnel and a few scoops and rakes, and Veronika went to town!

Hot Cocoa Sensory (5)

This was like indoor dirt, except it smelled divine. I held the scoop up to her nose a few times to fully enjoy that chocolate-y scent, which prompted little “mmm’s” of delight.

Hot Cocoa Sensory (8)

Mostly she loved scooping through it.

Hot Cocoa Sensory (2)

Once I showed he how to fill up the funnel, she became an expert at that.

Hot Cocoa Sensory (9)

The gingerbread men were fun to put in the cocoa and bury, then dig up again. Again, I wish I’d thought to use edible marshmallows, though!

Hot Cocoa Sensory (3)

By now she had completely spooned cocoa powder all over her pants and socks. Another mea culpa: wear only a diaper next time!

Hot Cocoa Sensory (7)

Well, since we were already this messy, I figured why not take our sensory bowl from indoor “dirt” to “mud”. I poured in a little oat milk, which made the whole thing smell even better. She loved stirring and watching the powder dissolve in big bubbles.

Hot Cocoa Sensory (10)

Okay, playtime complete; now it was immediately upstairs for a wash and a change!

Sticky String

Sticky String (4)

Here’s a simple ice project, but one that has a bit of  a “wow” factor to it!

For set up, fill a bowl with water and add ice cubes on top.

Place a piece of yarn over the ice, making sure it is fully saturated. Travis pretended this was spider silk, and we were testing how strong it was. What an imagination!

Sticky String (1)

Sprinkle the yarn generously with salt. How much do you need to use? Unfortunately, I can’t give you an exact answer, as Travis just dumped in a lot of the container, but I would imagine a tablespoon or two is plenty.

Sticky String (2)

Now wait for 1 minute. He proudly helped count to 60 seconds!

Sticky String (3)

Lift gently on the yarn and watch as the ice cubes rise. I thought the yarn might be strong enough to pick up one cube, but it could even pick up a whole clump. So even mom said “wow!”.

Sticky String (5)


Fruity Tortilla Pizza

Fruity Pizza (2)

Pizza for breakfast? Yes please, when it’s this peanut butter-and-fruit-topped version! Or have the kids help you put it together for an afternoon snack.

Ingredients:

  • 1 (8-inch) flour tortilla
  • 2 tablespoons creamy peanut butter
  • 2 tablespoons blueberries
  • 2 tablespoons sliced strawberries
  • 1 baby banana, sliced
  • 2 tablespoons coconut chips
  • 1 tablespoon non-dairy mini chocolate chips
  1. Toast the tortilla for 2 minutes on each side in a skillet over medium heat.
  2. Transfer to a cutting board and spread with the peanut butter.
  3. Top evenly with the blueberries, strawberries, coconut chips, and chocolate chips, then slice into quarters.

Repeat with additional ingredients to make as many of these as you need!

Fruity Pizza (1)

Show Love Around the World

Love World (9)

Raddish Kids had a heart-warming lesson this month about different ways that cultures celebrate love, specifically on Valentine’s Day, but also throughout the year. As a kindergartner, Travis is working on learning and showing empathy, so it was a nice lesson to make things concrete. First, we spent a few nights devoting story time to books about love, including:

  • Snuggle Puppy by Sandra Boynton
  • Best Friends (Owen and Mzee) by Isabella and Craig Hatkoff
  • Mama, Do You Love Me? by Barbara M. Joose

Love World (1)

After each one, we discussed the type of love relationship it entailed. Sometimes it was two friends, sometimes a parent and child, and sometimes members of different species! This was a great jumping-off point for talking about what love means, and how we might express love differently towards different people (or animals).

Travis said he shows love to a parent by hugging, but love to a friend by playing.

Love World (2)

Raddish provided lots of links to learn more about other cultures’ love traditions, including silly bits like how to say “love” in Klingon. Some made Travis giggle, like walking barefoot in Slovenia. Overall, though, this section of the lesson was geared towards older children and Travis was too antsy to sit and go through all of the customs.

Instead, we jumped ahead to the project: making up his own love celebration. The provided worksheet helped direct Travis’s thinking, but he gave a lot of silly answers before honing in on a real idea.

Love World (3)

He wanted to celebrate sibling love (aww!) so we ended up combining this with a winter picnic for Veronika.

Love World (5)

I loved watching them play and share the moment together!

Finally, we put together a Love Jar. Decorate any container you like, whether a shoe box or a mason jar or anything in between. Travis drew designs on a mason jar with permanent markers, including hearts and arrows.

Love World (8)

I left out post-it notes by the jar with the idea that he can write down a moment he appreciated or loved each day.

Love World (10)

Reading these out can become a special moment each week! We finished off all the heart-shaped fun with a quick compound word game from Raddish, filling in the blanks on “broken hearts” to complete each word.

Love World (4)

Winter Picnic

Winter Picnic (4)

We’re in the final stretch of winter, and if you’re equally sick of being indoors and dying to get your toddler outside, here’s the perfect idea: Don’t wait! Throw a winter indoor picnic instead.

While Veronika was napping, I set the whole stage including big blankets on the floor, soft balls to throw and play with, and a picnic basket full of little lunch items.

Winter Picnic (1)

When she woke up, she immediately needed to check everything out. The balls were a blast to play with, and soon she and big brother were happily devouring their meal.

Winter Picnic (2)

We invited a few “babies” along, and Veronika loved putting them in and out of the picnic basket!

Winter Picnic (5)

Older kids might have fun talking about favorite warm weather memories as they eat. My two were just thrilled with the change of location from the kitchen table! Did they eat as much as usual? No, but we sure had fun.

Winter Picnic (3)

Nature Collage

Nature Collage (9)

This was Travis and Veronika’s first art project together, a really wonderful milestone for siblings.

It started with a nature walk! On a gorgeous spring-like day, we took Veronika out to stretch her legs, and although she has come along on nature hikes, this was the first time she walked on her own two feet.

Nature Collage (1)

Travis was a great help along the trail, pointing out the names of objects. “Log!” he told her proudly, and also pointed out grass, acorns, pine cones, sticks, pebbles, and dirt.

Nature Collage (4)

Of course dirt had to be explored.

Nature Collage (3)

When Veronika saw that big brother had a walking stick, she needed one too!

Nature Collage (2)

As we hiked, the kids added treasures to a brown paper bag. Because it is late winter, there wasn’t a whole lot of color, but there was beauty to be found in dried brown leaves, curiously-shaped sticks, and bristly pine needles.

Nature Collage (5)

Once home, I asked Travis what shape we should draw on construction paper. He chose a butterfly, but anything else from nature – a flower, a favorite animal – would be fun.

Working together, we dripped on glue and applied bits of our nature finds into a collage. Travis loved using an acorn for a big eye and pine needles for antennae. Veronika loved pressing down pieces of leaf on the wings. Something for everyone!

Nature Collage (6)

She even loved squeezing the glue bottle.

Nature Collage (8)

This project helped shape an absolutely beautiful afternoon, and I hope you find the project equally magical.

Nature Collage (7)

Fruity Cereal Activities

Rainbow Cereal Sensory (5)

A favorite snack around here is the Rainbow O’s cereal from Cascadian Farm. So today Veronika played with the cereal in three different activities! You could also do any of these activities with Fruit Loops or Fruity Cheerios, but I like the all natural ingredients in the Rainbow O’s.

First up was a simple sensory tub. I filled a round cake pan with some of the cereal and added brightly colored measuring cups for scooping.

Rainbow Cereal Sensory (1)

Veronika was a lot more interested in tasting and snacking at first…

Rainbow Cereal Sensory (2)

…but eventually scooping was fun, too.

Rainbow Cereal Sensory (4)

Next up, we made some art! I had her scribble on a yellow plate with crayon to make the center of a flower.

Rainbow Cereal Sensory (6)

I glued the plate onto blue cardstock and outlined petal shapes around it. Drip glue over the petal lines, and then cover the glue with the cereal. If your child is in preschool, he or she can definitely help with this step, which will be great for exercising little fingers. Veronika, on the other hand, was quite alarmed to learn she was not allowed to eat the cereal that had glue on it, so much so she burst into tears! So this might have been a little ambitious with a toddler.

Rainbow Cereal Sensory (7)

Finally, it was time to take some cereal on the go! With visions of spring dancing in our heads, I turned her snack bag into a butterfly: Fill a zip-top bag with some of the cereal, then seal and divide in two with a finger.

Rainbow Cereal Sensory (8)

Secure with a craft lace.

Rainbow Cereal Sensory (9)

When you reach your destination, make a necklace! Undo the craft lace and thread some of the cereal onto it, then secure about your child’s neck loosely.

Fruity Necklace (1)

Now a bite is literally at hand the moment the urge to snack hits.

Fruity Necklace (2)

Cupid’s Coasters

Salt Coasters (5)

These salt dough coasters are a fun project and they make a pretty gift. In other words, a fantastic way for kids to say ‘I love you’ to any relatives or friends.

To start, Travis needed to make sure our dough ended up pink, which meant he counted out 8 drops of red food coloring into 3/4 cup water.

Salt Coasters (1)

In a bowl, combine 2 cups flour, 1 cup salt, and the red water; stir to form a dough, and then knead until smooth.

Salt Coasters (2)

I would use a touch less flour next time, as the dough was quite dry and a little crumbly.  Roll it out until a 1/4-inch thick and use a 4-inch circle cookie cutter to cut out shapes.

Salt Coasters (3)

I showed Travis how to drag a toothpick through the dough to make designs. It was a bit tough for him, but after some frustration, we had circles marker with hearts and arrows (to represent Cupid’s arrow).

Salt Coasters (4)

Bake at 250 degrees F for 2 hours. Let cool completely, then use at home or wrap up for a gift!

Squeeze Bottle Bath


Squirt Bottle (2)

Learning to squirt water is great for strengthening little hands and fists, all in preparation for bigger skills down the line like holding a pen or scissors. And there’s no better place to practice squirting water than in the bathtub!

So tonight, Veronika and I simply brought an empty squeeze bottle into the tub (leftover from a tie-dye project, in fact).

Squirt Bottle (1)

I showed her how to fill up the bottle, which was fun because it made big bubbles blub blub to the surface.

Squirt Bottle (4)

Then I demonstrated how squeezing it made a stream of water jet out. At first she simply held the bottle upside down, waiting for the water to appear. Then she realized she needed to squeeze hard before seeing results. A great lesson in both cause-and-effect and motor skills!

Squirt Bottle (3)