Textured Sensory Wall

Texture Wall (6)

This sensory wall is so easy to throw together, but your baby or toddler will love it! Adjust the height accordingly; for Veronika, I placed the wall low to the ground so she could manipulate items while sitting. For older toddlers, make it chest height so they can cruise along as they practice walking!

I taped four pieces of colored construction paper in a square on the wall to begin: visual stimulation!

Texture Wall (1)

Cover the construction paper with contact paper, sticky side out, and secure with tape. Now you can cover the sticky surface with whatever you like! Large pom poms, curly ribbons, and jar lids were all items that I had on hand that worked well.

Texture Wall (2)

I showed Veronika how to pull an item off and place it back on again.

Texture Wall (3)

She took to it right away, and surprised me with the objects she gravitated towards. I thought she’d love the pom poms, but jar lids were ab igger hit.

Texture Wall (5)

Talk about all the colors with your little one, or the crinkly sounds the riibbon makes, or the different textures.

Texture Wall (4)

Later, I added a few instant camera pictures for her. She loved peeling these off from the sticky surface.

Texture Wall (8)

And even was able to stick them back on!

Texture Wall (9)

Leave the wall up over the course of a day (or more!) and let your child return to it; you might notice him or her interacting with it different ways.

Texture Wall (12)

Stuck Together

Stuck Together (3).JPG

What’s the most adorable kind of sandwich? A baby sandwich of course! Engage siblings and other family members in this game that is sure to have everyone giggling.

Have two older children or adults sit back-to-back, leaving a slight gap in between their bodies. Daddy and big brother Travis were happy participants!

Stuck Together (2)

We encouraged Veronika to crawl through the gap between them. It took a few tries before we kept her from veering off toward anything that caught her eye; a few crinkly toys as bait didn’t hurt.

Stuck Together (4)

Once she was in the tunnel between them: squeeze! Travis and daddy pushed back to “trap” her between them, for one big snuggly Veronika sandwich.

Stuck Together (5)

As an alternative, have the big kid/grown-up players start with no space between their bodies, and see if baby wants to wedge open the gap.

Stuck Together (1)

Games like this might seem silly, but they’ll encourage bonding. Travis loves that Veronika is finally old enough to truly play!


Little Chef

Little Chef High Chair (12)

Veronika gets so frustrated watching me prepare meals these days, now that she’s on the other side of a baby gate. If you’re in a similar predicament, then it’s time to play little chef!

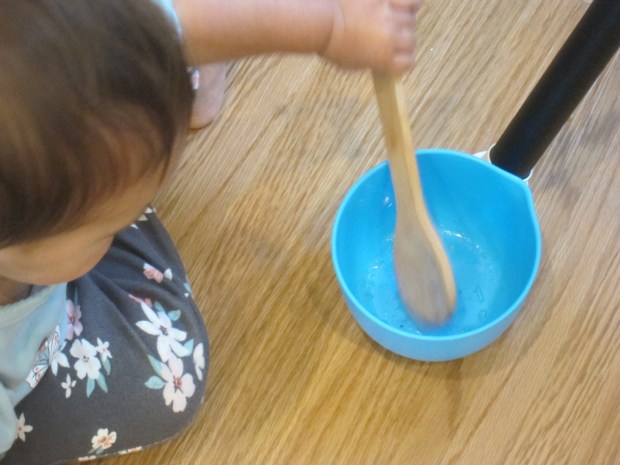
While I prepared dinner today, I set Veronika up with toy bowls and a spoon from a Melissa & Doug food set, but the key is to give your budding chef real food.

Little Chef High Chair (8)

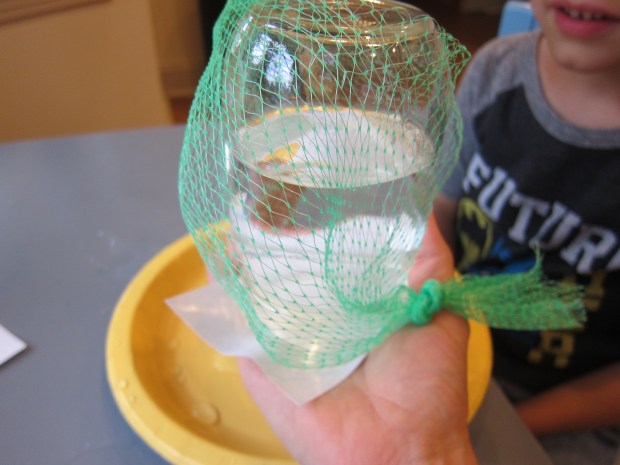
While I prepped a carrot-and-raisin salad, she got extras of each: long grated strips of carrot and raisins that I had plumped up with water. (Note: even softened in water, raisins are a choking hazard for the under-one-year set, so make sure these remain items to stir, not ones your baby is lifting up to the mouth).

Little Chef High Chair (10)

The carrot strands were fun to pull up, and she loved nesting the bowls and dumping them into one another.

Little Chef High Chair (11)

Next we made “pasta sauce” with sliced tomatoes and cucumber. These she just liked upending on the floor!

Little Chef High Chair (13)

Then she decided it was more fun to chase the bowl around the kitchen floor with the wooden spoon, and I was happy to have her underfoot in this controlled, delighted way.

Little Chef High Chair (14)

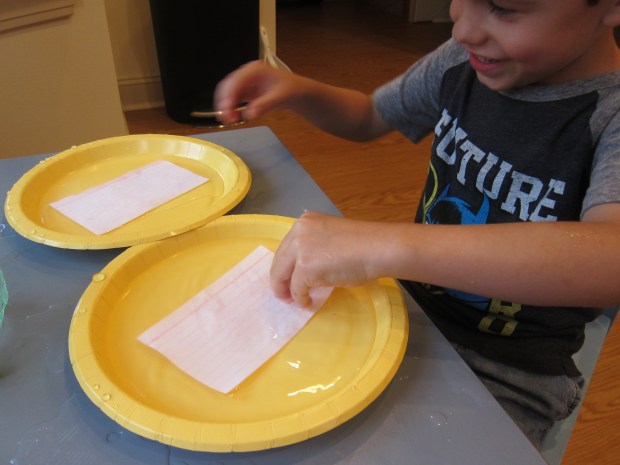
Another combo was couscous and red bell pepper strips, while I prepped a couscous side dish. As you work, tell your baby what you’re doing… great for bonding and language building!

Little Chef High Chair (19)

You can do this activity with just about any meal you prepare, as long as you don’t mind added chaos in the kitchen. My little chef had so much fun and I didn’t have to worry about her banging down the baby gate!

Little Chef High Chair (7)

If you prefer your baby in the high chair while you cook, here are a few other ways that Veronika loves to be entertained.

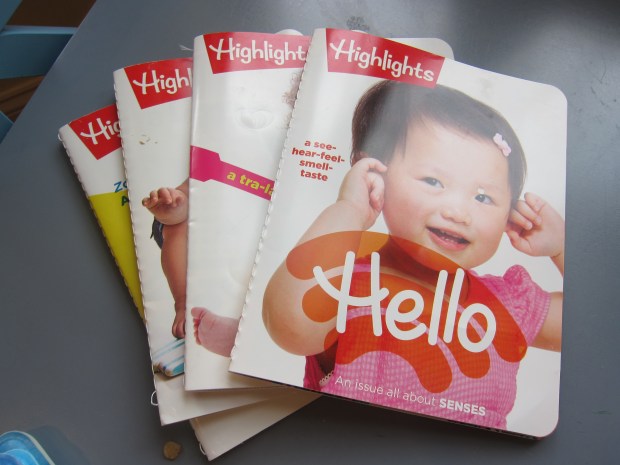
Bath Books: Don’t save waterproof books for the tub; they’re excellent for mealtime. Veronika will flip through plastic-paged copies of Rainbow Fish and other favorites, “reading” them to herself in baby babble.

Little Chef High Chair (3)

I don’t have to worry about clean-up because she can’t tear the pages and they wipe clean with a swipe! Hello magazine (Highlights publication for the littlest tots), is equally easy to clean which is why I keep a stack of Veronika’s subscription in the kitchen.

Little Chef High Chair (18)

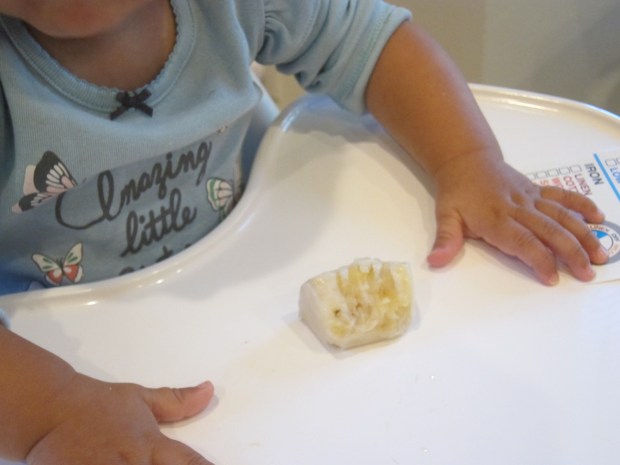
Yogurt Teethers: Make a batch of yogurt “pops” and store them in the freezer so you have them on hand in a pinch. Mash 1 banana with 1 (5-ounce) container plain non-dairy yogurt. Freeze in individual compartments of an ice cube tray.

Little Chef High Chair (1)

I give one to Veronika, who will spin it around on her tray and otherwise delight at the cold texture and the challenge of picking it up. This keeps her quite busy, and by the time it’s thawed enough for her to get a taste, dinner’s ready for everyone!

Little Chef High Chair (6)

Spoons and Language: This game is great once it’s actually meal time. Instead of one spoon, use two! With these, Veronika and I play a game of opposites. “My spoon,” I say to her. Then point at hers: “Your spoon!”

Little Chef High Chair (15)

Double spoons equal double the fun mushing food around!

Little Chef High Chair (16)

You can also highlights opposites like “open” and “close”, or  “in” and “out”.

Little Chef High Chair (17)

What’s your favorite thing to cook with your little chef? Please share in the comments!

Magic Marker Color Experiment

Magic Marker Color (6).JPG

This quick illustration of water’s movement might have seemed ho-hum to Travis after a few of the more complicated activities we’ve done recently, but he loved it!

Magic Marker Color (1)

To set up, I cut a paper towel into strips, each about one inch wide and four inches long. I let Travis tear them apart along my slits, which he enjoyed.

Magic Marker Color (2)

We made a line with magic marker near the bottom of each strip.

Magic Marker Color (3)

Dangle these strips into a clear plastic cup filled with water so that the paper towel is touching the water, but not the part you’ve colored in.

Magic Marker Color (5)

The water will begin seeping up your paper towel (here’s that capillary action in action again!), and Travis loved watching it.

Magic Marker Color (4)

He wanted to experiment further in so many ways. First, we continued dipping the paper towel further into the cup. This made the marker color continue to bleed upwards, until the ink was so faint you couldn’t tell anymore.

Magic Marker Color (8)

Then we colored a wider piece of paper towel with multiple markers, and draped this all around a plastic cup. Which color would creep up the fastest? He was thrilled watching the purple and green in the middle, which outperformed the others.

Magic Marker Color alt

Plus it was fun to play with leftover soggy paper towels and cups. So this quick experiment was well worth it!

Magic Marker Color (7)

Surface Tension Experiment

Surface Tension (8)

This is one of those experiments that Travis and I couldn’t get quite right, whoops! But we tried and had fun in the process, which is sometimes all that counts.

The science behind the activity is that water molecules hold with strong bonds, so much so that they’ll fill the holes of a mesh bag even when tipped upside-down.

First, Travis checked out our mesh bag. It sure didn’t look like it would hold water!

Surface Tension (1)

We put it over a mason jar and secured with an elastic. Fill the jar about 3/4 full with water.

Surface Tension (2)

Place an index card on top and flip over. No water leaking yet.

Surface Tension (3)

Now the idea is to remove the index card – slooowly. According to the internet, sometimes it can just fall off, which works even better. Either way, the water should hold!

However, I think because every time we slid the index card out it wiggled the mesh bag, our experiment didn’t work.

Surface Tension (4)

We tried altering several variables. Securing the elastic tighter around the mesh didn’t make things work any better, nor did using a second, smaller-mouthed glass jar.

Surface Tension (6)

But you’ll notice from the giggles hat Travis wasn’t disappointed in the slightest. In fact, I think he liked the experiment better with the mess!

Surface Tension (7)

Did you get your water to hold? Please share in the comments!

Spoons and Cups in the Tub

Spoon Cup Tub (1)

I used to avoid giving Veronika anything resembling a cup at bathtime, because she lifted everything to her mouth and that meant a mouthful of soapy bath water (yuck!).

Now that she’s not mouthing everything automatically, these simple items make for fantastic tub time. I recently wanted her to have an extra long bath (to help soothe a slight sniffle; hello back-to-school season), and these kept her occupied for so long.

After she played for a while in her own way, I showed her how to stir. She really did try to imitate the motion!

Spoon Cup Tub (3)

Likewise, you can show your baby the idea of water transfer, whether from cup to cup, or from the measuring spoons into a cup.

Spoon Cup Tub (4)

She also tried stacking them, tapping them together, and swishing them around in the water. And she came out from the bath a little less sniffly!

Spoon Cup Tub (2)

It’s a Goal!

Its a Goal (5)

For some fun sport today, Veronika and I played her first round of soccer!

Lie a box on its side and present your baby with a selection of balls. Veronika was excited when she saw a growing pile of mini soccer balls, baby sensory balls, and other favorite toys.

Its a Goal (1)

rolled one toward the box, and as it rolled in I said a very excited, “It’s a goal!” Channel your inner futbol announcer for this!

Its a Goal (2)

She picked up on the excitement immediately. Her expression demanded a repeat.

Its a Goal (6)

Then I encouraged her to make the goal.

Its a Goal (4)

Even if her ball was close but not quite in, I repeated the excited, “It’s a goal!”

Its a Goal (7)

She looked so proud of herself.

Its a Goal (8)

This led to lots of further ball play in her own way, tapping them together, holding several at once, or following them around the room.

Its a Goal (9)

A great morning of sport, in sum.

Its a Goal (3)

Telephone Talk

Telephone Talk (5)

If one telephone is fun, then two telephones are twice as fun!

Smartphones are like catnip for babies, Veronika included, which is why I deliberately avoid my phone except for necessary calls. A far safer alternative is to buy baby a toy cell phone. We happen to have two versions of the same phone, which makes for perfect games of “phone call”.

Today I sat down with her and pretended to dial.

Telephone Talk (3)

I handed her the other phone and began a conversation. “What should we do today?”

Telephone Talk (2)

Wait for your baby to babble back, which will help encourage the idea of a two-way conversation. Oh my goodness, she looks too much like a teenager already!

Telephone Talk (4)

Then it was her turn to dial me!

Telephone Talk (6)

This kind of make-believe play might seem advanced for a 10 month old, but it’s exactly through such modeling that Veronika is learning about the world. Nice chatting with you!


Beat to the Rhythm

Beat to Rhythm (4)

No doubt you’ve pulled out pots and pans and Tupperware for your baby already, and discovered that it’s a fantastic way to keep little ones occupied in the kitchen. And while a free-for-all jam session is fun, don’t discount introducing real rhythms at this young an age; kids pick up on it much earlier than you think.

So today, I sat down with Veronika and first we simply banged on our saucepan “drum.” But then I showed her one beat with my hand.

Beat to Rhythm (2)

She banged her hand a few times, but I repeated until she, too, was doing one solitary beat.

Beat to Rhythm (3)

It may have been coincidence, but this worked when I moved up to two beats as well. If I tried for three, it became a free for all of tapping and banging.

Beat to Rhythm (6)

We also tried the game with a spoon, first one beat, then working up to two and three.

Beat to Rhythm (1)

Again, don’t expect your baby to be a maestro, but you’re introducing the idea of beats and rhythms, and your little one gets to have a blast! Big brother wanted to be a demonstrator, too, and loved making one beat with his hand and watching her copy.

Beat to Rhythm (5)

Needless to say, the spoon and pot entertained her so thoroughly that I was able to clean the kitchen undisturbed!

Fee Fi Fo Fum

Uh Oh GIant (4).JPG

Grown-ups are likely all familiar with the common syllables “fee fi fo fum” from the giant in Jack in the Beanstalk. But there’s no need to include the scary giant as you introduce this word play to your baby! The syllables echo a baby’s babble at about 10 months old, so today, I recited this classic for Veronika… with a twist.

Uh Oh GIant (1)

Sitting in front of her, I said:

Fee fi fo fum,

Here’s my fingers, here’s my thumb (open your fingers and then your thumb).

Fee fi fo fum,

Fingers gone, so is thumb (tuck fingers and then thumb away).

Uh Oh GIant (2)

To add a little learning in, I then repeated the rhyme with a different first consonant. For each letter, I handed her the accompanying foam letter to play with – a little extra learning to absorb! So she played with a big foam B for “bee bi bo bum” and giggled over T for “tee ti to tum”,

Uh Oh GIant (4)

We also did the rhyme on “dee di do dum” and then finally on “mee mi mo mum.”

Uh Oh GIant (5)

A big hit, for little effort!

Uh Oh GIant (6)