Straw Rockets

Straw Rocket (8)
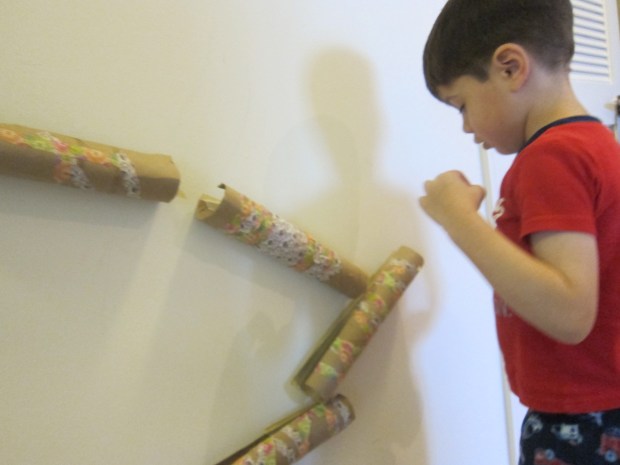
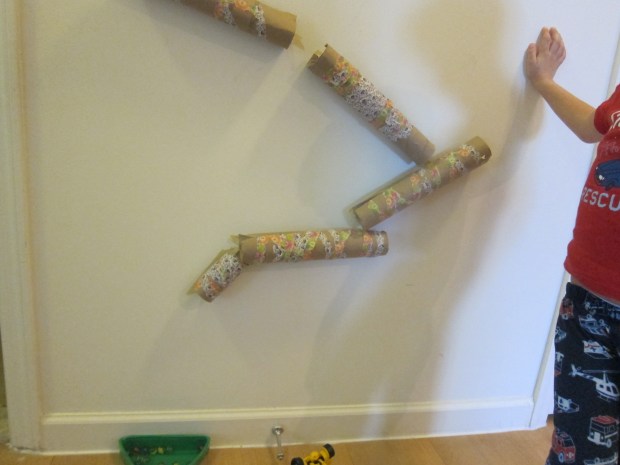
Travis and I have been launching all kinds of things lately, from marshmallows to disks. Today, we made little rockets that could have races!

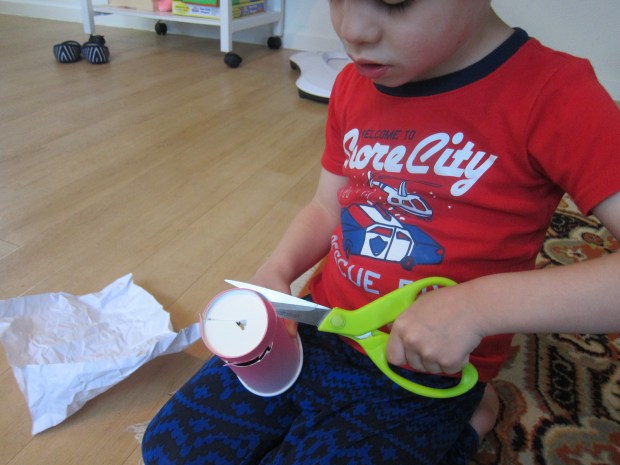
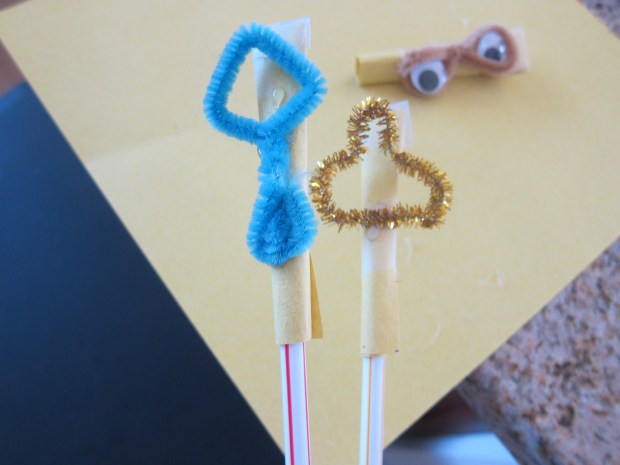
Cut squares of construction paper that are 3 inches x 3 inches. Make as many of these as you’ll want rockets.

Straw Rocket (1)

Wrap each piece of paper around a straw, making sure it is loose enough to fly off the straw when needed. We secured these with tape.

Straw Rocket (2)

Although there’s no need to, it was fun to add decorations. Travis soon was swirling pipe cleaners into all kinds of creations!

Straw Rocket (3)

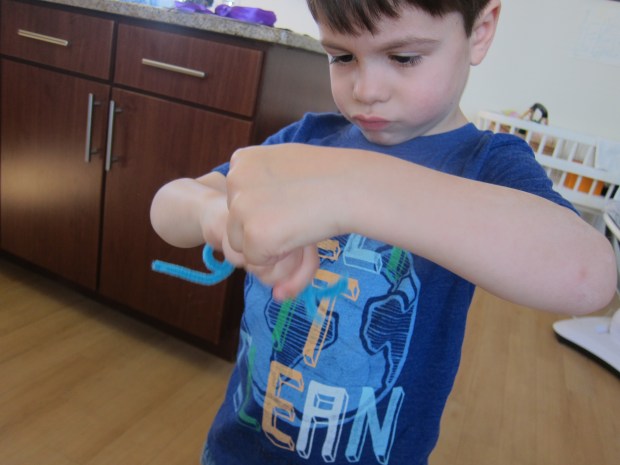
I helped with one that was recognizably a “rocket,” as well as a few silly ones. Definitely have fun with these; we even had a little alien with googly eyes.

Straw Rocket (5)

We used hot glue to affix our pipe cleaner creations to our paper pieces. Now our rockets were ready to launch!

Lift the straw to your lips and blow, and see how far it flies.

Straw Rocket (7)

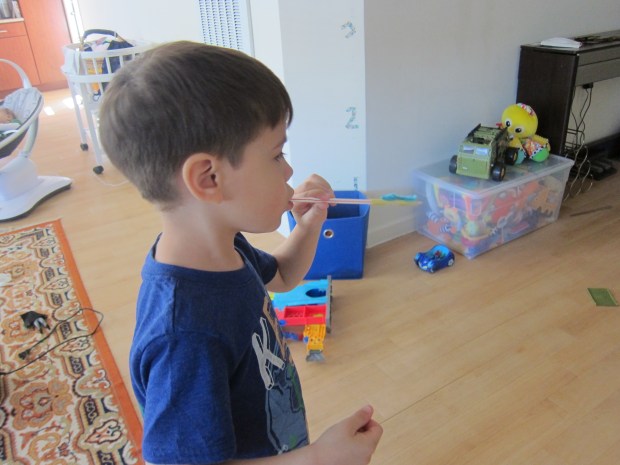
You can even turn it into a race, and see whose rocket flies furthest.

Straw Rocket (6)

Felt Board Story Time

Felt Board (5).JPG

Felt boards are a fantastic visual… and slightly magical to kids, too, since the pieces stick together but then peel right off. Today, I wanted to tell Veronika some familiar stories and rhymes using a felt board as a visual.

If you want, this could be a DIY craft: cover a board with felt and staple the edges in place. Then you’ll need to cut additional shapes from other colors of felt to act out the stories. I confess, though, that I used a pre-made felt story board. This made it a lot easier to focus on the storytelling for Veronika, and not on my negligible crafting skills!

She was intrigued the moment I pulled out the board, no doubt from the bright colors of the felt.

Felt Board (2)

And the texture!

Felt Board (1)

After letting her have some time for exploration, I set up a story. Goldilocks and the Three Bears was fun, with a little house shape, and a semi-circle for a bowl of porridge.

Felt Board (6)

Then I set up a little “boat” and sang “Row Row Row Your Boat.”

Felt Board (7)

This one was Jack and Jill going up the hill!

Felt Board (9)

And tumbling down.

Felt Board (10)

Obviously there is a bit of stretching the imagination that needs to happen here, but it was great fun to mix and match the shapes and watch her reaction.

Felt Board (11)

This is definitely a game I hope to continue as she gets older, especially since we can use smaller pieces and more intricate shapes once she doesn’t put everything in her mouth.

Felt Board (8)


Sprout Sculpture

Chia Sponge y.JPG

This little project is sort of a DIY chia pet, but you get to control what it looks like! It’s a neat way to introduce kids to the concept of a greenhouse, too.

To set up our “greenhouse,” Travis and I first spooned about 2 teaspoons chia seeds into a measuring cup, and filled with 1/2 cup water. Let sit while you put together the sponge structure.

Sprout Sponge (2)

We glued two sponges to a paper plate as a base, then built upwards using other colored sponges.

Sprout Sponge (3)

Have fun cutting some of the sponges into smaller pieces or shapes, or perhaps getting architectural with your design!

Sprout Sponge (4)

Note: We found that hot glue worked best for holding the sponges in place; a few of them had a slight tower-of-Pisa lean when we tried to use white glue.

Spoon your chia mixture over the sponges. Travis thought it was so goopy!

Sprout Sponge (5)

We spritzed with a water bottle until the sponges and chia seeds were nicely saturated.

Sprout Sponge (6)

Place inside a clear plastic container (this is your “greenhouse”) and set the container some place with plenty of sunshine.

Chia Sponge x

We made sure to spritz at least twice daily and within about four days, we had some sprouts!

Chia Sprout var

By one week, it was looking quite sculptural! Definitely a neat experiment.

Chia Sponge z

A+ for Teachers

A+ Teachers (5)

May 7 is National Teacher Day, so in appreciation, Travis put together “report cards” for his two preschool teachers!

A+ Teachers (1)

Ahead of time, I bought a few packs of school-themed stickers. These served as helpful prompts as I asked him to think about how his teachers help him. For example, cookies and juice reminded him, “They help me at snack time.” Glue, scissors, and paint jar stickers reminded him, “They help me with crafts.”

A+ Teachers (2)

We also added a few more abstract ideas, like “they are patient with me” or “they encourage me.”

Of course for each sentence, we graded his teachers an A+! Once he’d written in his name, the cards were complete.

A+ Teachers (4)

What will you do for your kids’ teachers in appreciation? Please share in the comments!


Cardboard Tube Marble Run

Marble Run (9).JPG

This DIY marble run is a fantastic way to get your kids engineering and learning about laws of motion – all while they just think they’re playing!

I saved up cardboard tubes (from toilet paper and paper towel rolls) for a few weeks, until we had a good-sized collection.

First we needed to decorate our tubes. Travis loved covering them with washi tape, and insisted on being in charge of snipping off the pieces of tape we would use.

Marble Run (2)

Next, we cut the tubes open, which he also loved doing!

Marble Run (1)

If your child wants to, decorate the inside of the tubes with marker or crayon. But at this point, Travis was so excited to design our marble run that he said let’s skip the markers!

Marble Run (3)

We headed over to a blank portion of wall, and I taped up the first tube with masking tape. Slowly, we decided where each tube needed to go.

Marble Run (4)

This part will involve a bit of trial-and-error, and a few test runs! Check to see where marbles bounce out or fall off tubes, and adjust accordingly.

Marble Run (7)

I recommend placing a small container with sides at the bottom to catch the marbles.

Marble Run (5)

We were so proud once we had a run that perfectly deposited the marbles inside our container.

Marble Run (8)

When Baby Grabs the Spoon

Baby Grabs Spoon (2)

Full disclosure: my 4 and 1/2 year old sometimes still wants me to spoon feed him, especially with anything liquid like soup or cereal. So the concept of Baby Led Weaning was always far from my mind… Until Veronika got her hands on a spoon!

From the moment I spooned up her first puree, this girl wanted control. She had no interest in being spoon-fed, but she was delighted when she was in charge. As a result, I quickly looked into Baby Led Weaning. In the ensuing few weeks, I learned some tricks of the trade. Here are just a few to impart:

  • Always use unbreakable utensils, sized just right for a baby. I love the curve of Munchkin spoons, which also turn white if food is too hot. Veronika’s spoon inevitably is on the ground by the end of every meal, and same goes for bowls, and plates.Baby Grabs Spoon (6)
  • Cut food into pieces that are big enough for your little one to grab, but slender enough that they don’t pose a choking hazard. First foods should be soft and gummable. Baby Grabs Spoon (9)
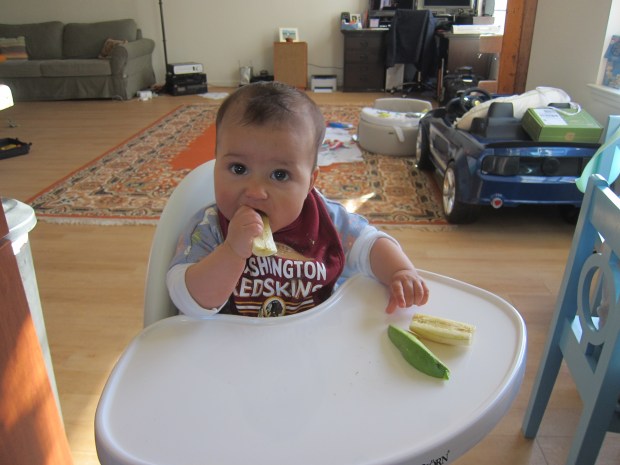
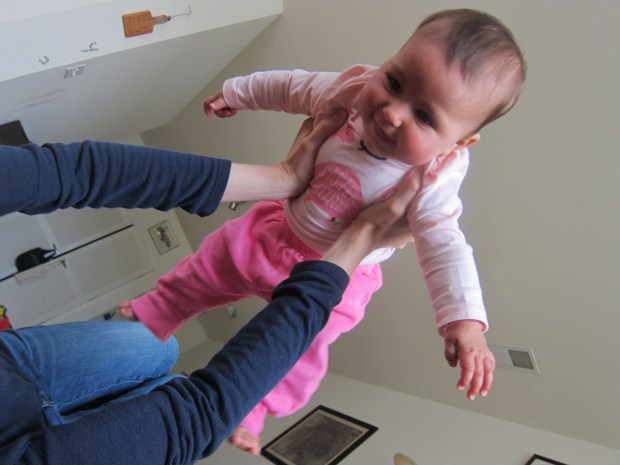
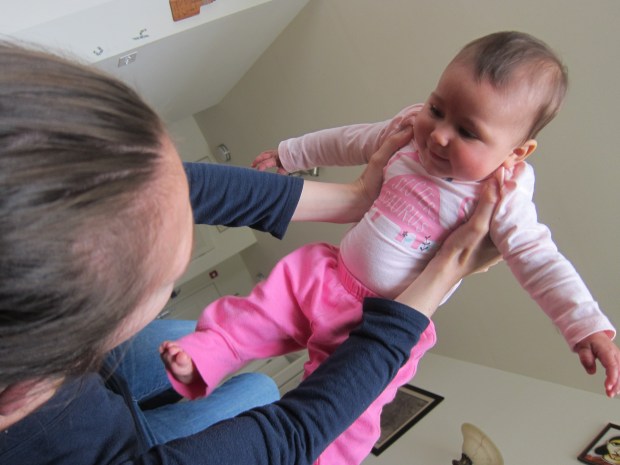
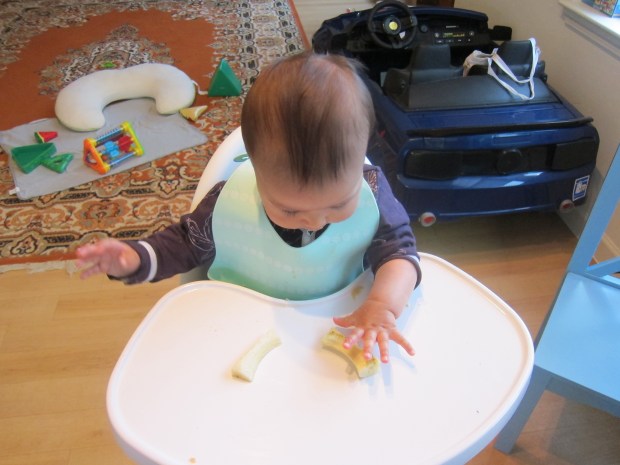
Veronika loves avocado slices, banana slices, roasted sweet potato wedges, rice cakes, teething biscuits, steamed yellow squash strips, and long strips of honeydew or watermelon.BLW (6).jpg
  • Only put a few pieces of food on the tray at a time, or your little one might get overwhelmed. Again, the idea in these early months is practice, not a full meal’s worth of calories.BLW (1).JPG
  • Don’t worry about the mess! Veronika’s chair looks like a war zone when she’s done, but she’s happy, and thus so am I. You can always wipe everything clean and do an outfit change at the end, but resist the urge to wipe fingers and chins after every drippy bite.Baby Grabs Spoon (1)
  • Make your baby part of the family meal! Veronika eats when her big brother does, and she seems so delighted to join in the fun of utensils and self-feeding right alongside a big boy. The first time they ate the same veggie at the same time, I swear my heart exploded.Baby Grabs Spoon (4)

So when your baby makes a move to grab the spoon, pay attention! It may very well be the sign that he or she is ready to self-feed, too.

Baby Grabs Spoon (5)

Marshmallow Launcher Redux

Marshmallow Launcher (3).JPG

Every once in a while, it’s fun to repeat an activity at one- or two-year intervals, and see the differences in the way your children play at different ages. Travis and I first made a marshmallow launcher nearly two years ago, but with some extra Dandie’s marshmallows in the pantry, today we decided to do a repeat!

First, cut the bottom from a few paper cups, one for each launcher you want. At nearly 5 years old, Travis can handle the scissors himself, unlike at age 3!

Marshmallow Launcher (2)

I tied the end of a balloon into a knot, then had Travis help snip off the top of the balloon.

Marshmallow Launcher (7)

Stretch this balloon over the cut end of the cup, and secure with an elastic.

Marshmallow Launcher (4)

Place 1 marshmallow in the cup; pull down on the knot of the balloon and release. Boom!

Needless to say, we soon had marshmallow bombs all over the apartment, and an eager little boy who had to run and grab all the ammo.

Marshmallow Launcher (5)

For some experimentation, we tested what happened when we put multiple marshmallows inside, but unsurprisingly, they didn’t launch as far. Then we tried to hone our aim, using some unwitting Ninja Turtles as target practice. Here’s a quick clip:

All in all, what fun!

Marshmallow Launcher (1)

Airplanes

Airplanes (8).JPG

Veronika’s still a little too young to notice airplanes in the sky (it will be a few more months before those excited fingers point skyward every time a plane flies overhead!), but she’s just the right age to be a plane.

For some cute context, first we played with a small airplane toy.

Airplanes (2)

Veronika loved the propeller on this one!

Airplanes (1)

Then she got to be the plane. There are two ways to do this. If your baby still needs some support, lie on your back and hold him or her against your knees. Three, two, one… Lift off!

Airplanes (5)

She loves flying around up here.

Airplanes (4)

But her muscles are also strong enough now for liftoff right from mommy’s tummy. This time, I lay down with knees bent, but placed Veronika on my stomach and held her around the middle. Three, two, one… She’s flying!

Airplanes (7)

As you fly your baby around, make lots of zooming airplane noises. You can also get silly: Sometimes I make the captain’s voice announce take off, landing, or even getting delayed, and lift her quickly back up and then down again for a false start. That last one always gets giggles.

Airplanes (10)

Add to Your Repertoire

Add to Reperatoire (6).JPG

I’ve been saying and singing nursery rhymes to Veronika since the first week of her life, but if you’re at all like me, you’ve settled on your favorites and tend to say the same ones over and over.

So today, I deliberately mixed it up!

If you need inspiration, read through a book of nursery rhymes to find new faves. It turns out there were some I’d forgotten about, including Hey Diddle Diddle and Wee Willie Winkie. She loved the bright pictures in the book!

Add to Reperatoire (4)

As I read her the rhymes, I pointed out each thing in the illustrations – the cat and his fiddle, the dish and spoon etc.

Add to Reperatoire (7)

Another nice idea is to tap along the rhythm on your baby’s back or leg as you say the rhyme, and they’ll feel it in their whole body.

Add to Reperatoire (11)

If you are unfamiliar the tune for any rhyme, check for a video of it online.

Add to Reperatoire (3)

Although I normally don’t advocate screens at this age, sometimes it’s nice to sit with Veronika for a few animated songs (and if you save this in your quiver of tricks for when baby is especially fussy, and it will work like magic).

Add to Reperatoire (1)

Finally, don’t limit yourself to English rhymes! We recently learned an indigenous Australian song, with a fun sneezing “choo!” sound and hand movement.

Add to Reperatoire (8)

It makes Veronika giggle every tiem.

Add to Reperatoire (10)

If you don’t want to learn a different rhyme, just add new verses to an old favorite. I highly recommend Little Baby Bum’s endless variations on Wheels on the Bus. You never knew there was so much more than wipers swishing and doors opening until you see what they’ve come up with.

What new rhymes have you added to your repertoire? Please share in the comments!

Add to Reperatoire (5)

Oatmeal Energy Balls

Oatmeal Energy (5).JPG

Travis and I have talked a lot lately about energy and inertia and what makes things move. That’s why it was so clever of Kiwi Co to include this recipe in Travis’s inertia crate – a snack designed to power human energy!

Ingredients:

  • 1 cup quick oats
  • 1/4 cup agave nectar
  • 1/2 cup peanut butter (or other nut butter)
  • 1/3 cup chopped almonds
  • 1/3 cup non-dairy mini chocolate chips
  • 1/3 cups dried cranberries
  1. Combine all the ingredients in a large bowl; refrigerate for at least 30 minutes.Oatmeal Energy (3)
  2. Shape the mixture into balls (you’ll have enough for about 10 servings) and enjoy!

Oatmeal Energy (4)