Book Busy Box

Book Busy Box (3)

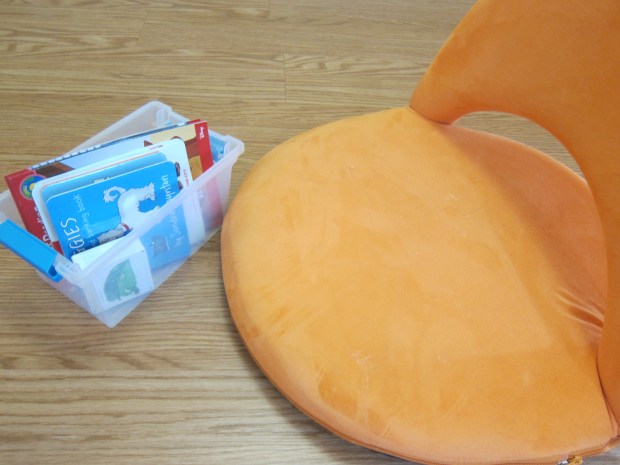
Yes, a book box can keep a toddler busy, even if he or she is not reading yet! To wit, we love taking books for “picture walks” in our household, and today I set up this little bin to keep Veronika occupied while I got a few things done.

I included some of big brother Travis’s early chapter books because she loves the pictures of Star Wars characters (she knows them all by name!) even if she doesn’t understand the story.

Book Busy Box (1)

I also included more age-appropriate favorites, like her Hello magazine and favorite board books. It’s a good idea to use books that you’ve read to your child many times so he or she is familiar with the story, even if you’re too busy to read it.

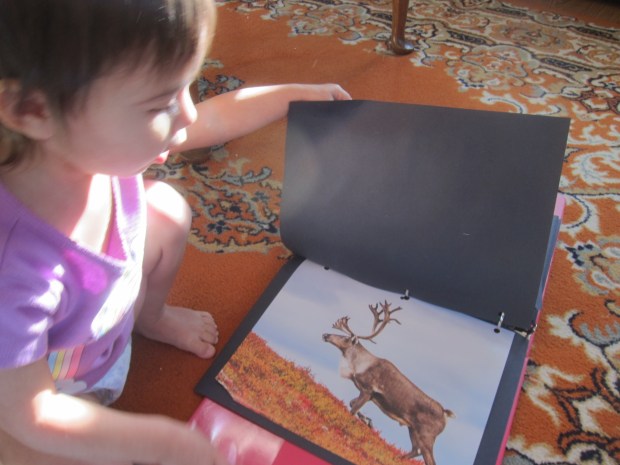
Finally, I included a set of magnet tiles that tell the story of The Very Hungry Caterpillar. This was a nice way to give her something to manipulate with her hands, in addition to just books. Now I set out the bin on a comfy orange chair as a sort of invitation, and she jumped right in!

Book Busy Box (5)

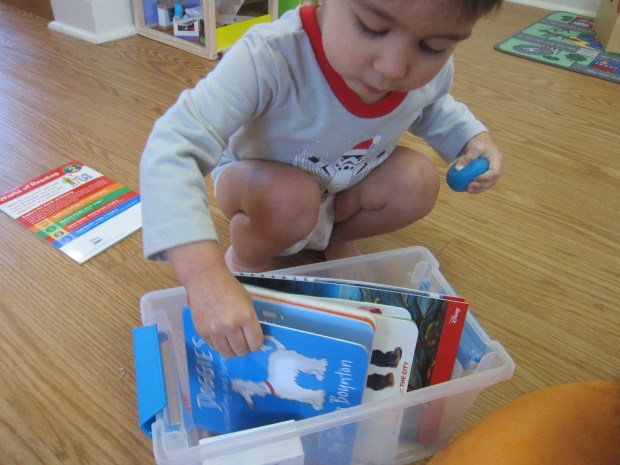
The Star Wars books caught her eye right away.

Book Busy Box (4)

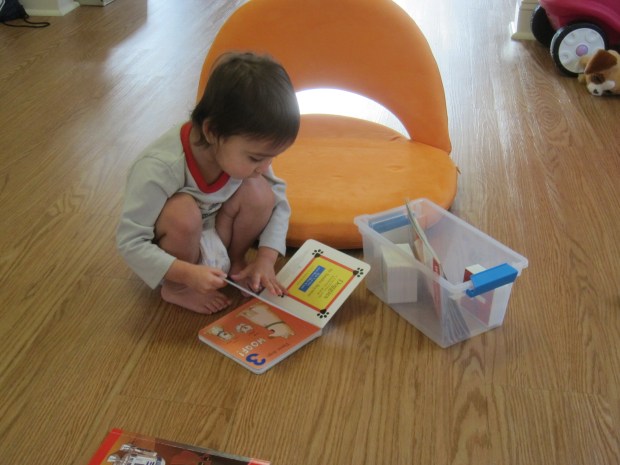
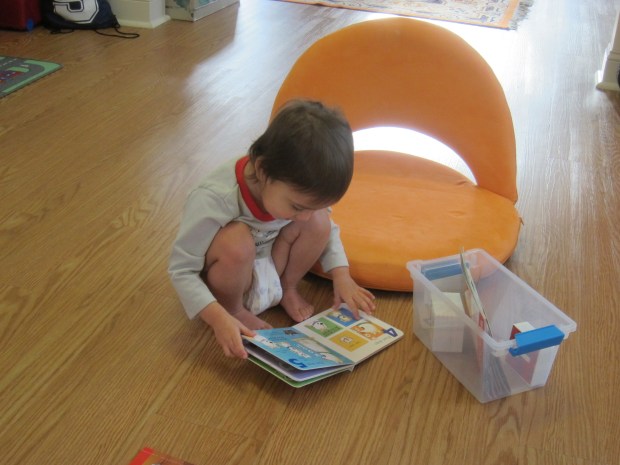
Soon she was leafing through a favorite board book, narrating the pictures and words to herself.

Book Busy Box (6)

This is the kind of bin you can leave out all day for your toddler to return to whenever the mood hits.

Book Busy Box (7)

What would be in your toddler’s book box? Please share in the comments!

Book Busy Box (2)

Winter Star Sensory Ice

Winter Star Sensory Ice (3)

This ice activity is really just good old-fashioned ice exploration, but with a winter twist to give it the guise of something new!

To make our sparkly “winter” ice, ideally use a star or snowflake ice cube mold and freeze overnight. Lacking such a mold, I used winter-themed cookie cutters instead (a pine tree, snowflake, star, and heart). This was a bit trickier because I had to lift the cookie cutters from a larger dish after the water started to freeze, but before the cookie cutters were frozen solid! I also sprinkled star-shaped glitter into the water before freezing for extra winter sparkle.

Winter Star Sensory Ice (1)

When we took the ice out of the freezer the next morning, Veronika was delighted. “It’s a little snowflake!” she said, spotting this shape.

Winter Star Sensory Ice (2)

We used our senses to explore them, and she carefully touched her fingers to the ice. “Ooh, that’s cold!” she said.

Winter Star Sensory Ice (6)

Then we placed them in a little dish of water to see what would happen. The small shapes melted almost instantly. Good thing our larger star shape lasted much longer.

Winter Star Sensory Ice (5)

She loved picking this one up and transferring it in and out of the water, testing how cold it was each time.

Winter Star Sensory Ice (8)

This was a fun winter twist on early STEM exploration of liquids vs. solids. With older toddlers, you can delve more into how water can come in three states (solid, liquid, and gas); test sprinkling salt on the ice cubes to melt them faster; or see if the ice shapes melt faster inside or outside.

Winter Star Sensory Ice (4)

Jump and Match Snowflakes

Jump and Match Snowflakes (6)

Here’s the perfect way to get some indoor exercise on a cold morning, plus sneak in a learning game, too!

I tailored the game so it would be a challenge for both my 6-year-old and my 2 year-old. First, I printed a snowflake template on cardstock showing 6 pairs of snowflakes, each with a match. Attach these to a door frame in your home so they are just high enough for kids to jump and touch the pairs.

Jump and Match Snowflakes (1)

Because I knew matching up snowflake pairs with subtle differences would be beyond Veronika’s ability, I also color-coded the game; each pair of snowflakes dangled from the same color string.

Jump and Match Snowflakes (2)

Travis proved to be an expert at spotting twin snowflakes (quicker than I would have guessed!) and loved jumping up to grab them.

Jump and Match Snowflakes (8)

Veronika was able to jump by color when I asked her to find both yellow strings, for example.

Jump and Match Snowflakes (4)

She’s just learning to get her feet off the ground in a jump, so this was great practice!

Jump and Match Snowflakes (3)

We also later played a quick game down on the floor where I showed her mismatched snowflakes followed by an identical pair, so she could be exposed to this more subtle version of a match.

Jump and Match Snowflakes (9)

Beyond the matching and jumping, simply having all those snowflakes dangling turned out to be lots of fun. Veronika thought it was a hoot to run under the strings so the snowflakes just brushed her head.

Jump and Match Snowflakes (5)

She also loved jumping her dolls up toward the dangling strings! This was a great way to burn some energy on a cold morning.

Icy Winter Scene Salt Paint

Icy Winter Scene Salt (4)

You only need two items to make a toddler happy on a slow morning: white glue and Epsom salts! To wit, Veronika made a winter artwork of “ice and snow” with just these two ingredients.

I set out one cup full of white glue and another with the Epsom salts, along with a sheet of construction paper. We chose blue as a background to evoke the bluish light of winter.

Icy Winter Scene Salt (1)

I thought she might want to paint the glue on with a paintbrush, but she was so interested in the cup of salt that she wanted to dip her brush back and forth between that and the glue. This meant her brush was quickly too gunky to spread the glue around on the paper.

Icy Winter Scene Salt (2)

Instead, I helped her pour the cup of glue right over the paper! Then I showed her how to pour the salt on top. There’s no need to worry about a mess because as you tilt the paper to tap off any excess salt, the rest will stick in the puddles of glue.

Icy Winter Scene Salt (3)

It looked like sparkly snow and ice to us!

Basic Cereal Threading

Basic Cereal Threading (3)

This easy threading game is a great intro to the activity for toddlers. All of the items involved (play dough, cereal, and dry spaghetti) lend themselves to solo toddler play either before or after the activity, too, meaning you’ll get double-duty from one game.

To set up, we first rolled a few balls from different colors of play dough. Veronika loved helping with this step.

Basic Cereal Threading (1)

I then speared a strand of dry spaghetti into each mound of play dough. We were working on a craft tray, so I simply poured out some o-shaped cereal right onto the tray. If you’re doing this activity in a high chair, give your toddler a bowl of the cereal instead.

I showed her how to thread one cereal piece at a time onto the spaghetti. After a few misses, she was quickly a pro at the activity!

Basic Cereal Threading (2)

I loved watching her work with great care, not only looping the cereal over the top, but then holding onto it as she guided it all the way down to the play dough base.

Basic Cereal Threading (5)

Don’t be surprised if there’s some snacking involved, too, with all the cereal around!

Basic Cereal Threading (6)

Bundt Pan Suncatcher

Bundt Pan Suncatcher (10)

We’ve made sparkly winter suncatchers in cookie cutter shapes before, but this year we decided to think big: Bundt pan big that is!

To start this gorgeous project, head off on a treasure gathering hunt. Veronika especially loved finding the bright pop of red berries and collecting small pine cones as we took a walk.

Bundt Pan Suncatcher (1)

Once home, I filled a Bundt pan with water about half full, then we plunked in our treasures.

Bundt Pan Suncatcher (5)

Now simply set it outside to freeze! We actually had to wait a few days for this to work, since first I realized our layer of water was simply too deep and poured some out. Then we needed a night that dipped down to 20 degrees, and finally we woke to a beautifully solid chunk of ice.

Bundt Pan Suncatcher (7)

To unmold, simply run the bottom of the pan under a little hot water and slip out gently. I wrapped a bright ribbon through the hole in the center of this ice “cake” and suspended it from a tree branch.

Bundt Pan Suncatcher (8)

This was absolutely gorgeous in the sunlight!

Bundt Pan Suncatcher (9)

Travis loved that way that tiny icicles began to form near the bottom as the sun warmed the ice through a little.

Bundt Pan Suncatcher (11

We’re hoping for a few icy cold days so this can last before the sun melts it. As a bonus, all the nature treasures can simply fall where they lie as the suncatcher melts. Just be sure to clean up the ribbon!

Primary Colors Squishy Bag and Storytime

Primary Colors Squish Bag (5)

This activity is 50% storytime and 50% art activity, and 100% fun for your toddler.

I set up the color squishy bags first so they would be ready to go. Squirt one primary color into the bottom left corner of a small zip-top plastic bag, and then a second primary color in the top right corner. Seal tightly and tape down to the floor with duct tape. Repeat so that each primary color is paired once with the other two.

Primary Colors Squish Bag (2)

Now I was ready to invite Veronika over for this hands-on storytime! There are so many wonderful color books you can read, but we love Press Here and Mouse Paint, both of which are particularly good for talking about primary colors.

Primary Colors Squish Bag (4)

As we read through Mouse Paint, we copied the mice! As the red one danced in the yellow paint, we squished that bag together and got orange! The middle mouse mixed yellow and blue to make green, and we followed along with our squishy bag.

Primary Colors Squish Bag (6)

And finally the third mouse mixed red into blue, and Veronika did the same. She loved that the storytime was so interactive, not to mention simply loved the squishy feel of the paint bags!

Primary Colors Squish Bag (3)

There were lots of ways for her to continue the play solo, whether continuing to have fun with the sensory bags or leafing through the pages of the books.

Primary Colors Squish Bag (8)

What’s your toddler’s favorite book about primary colors? Please share in the comments!

Primary Colors Squish Bag (9)

Salad Spinner Art

Salad Spinner Art (4)

There’s no need to buy one of those fancy spin art kits at the store; if you have an old salad spinner (or find one cheap at a yard sale), then you’re all set for this art project!

First, Veronika just wanted to play with the spinner when I set it out. She was strong enough to press down the knob on top all by herself, and was rewarded each time she made the basket inside spin.

Next, we placed a small paper plate in the bottom (between the bowl and the basket insert) and squirted a few colors of paint directly onto the plate.

Salad Spinner Art (1)

Replace the lid securely and give that salad spinner a spin!

Salad Spinner Art (3)

She loved watching it in action!

Salad Spinner Art (2)

The big reveal, though, was when we lifted the lid and she saw all the splattered colors. Needless to say, make sure you have several paper plates on hand because your toddler is going to want to repeat this one a few times.

Salad Spinner Art (5)

The result is such pretty art for almost no effort. Just make sure this particular salad spinner lives in your craft bin, not the kitchen cabinet.

Salad Spinner Art (6)

Fun with Calendar Pictures

Fun with Pictures (6)

January is the perfect time of year for this project, whether you’re tossing old calendars from last year or have been gifted a few extras at the start of the new one. Armed with those, you can put together a “picture book” for your toddler!

To wit, we always seem to have extra calendars with nature and animal themes, which are perfect for toddlers because they tend to depict familiar images.

Fun with Pictures (2)

First Veronika and I simply flipped through all the pages together and ripped out any that appealed to her. This was fun as an activity in its own right!

Fun with Pictures (1)

Once we had a pile, Veronika helped smear glue sticks on the back of each picture to attach onto black construction paper. Depending how durable you want the final “book” to be, you can cover with contact paper, too.

Fun with Pictures (3)

Next we played a sorting game. She helped divide the images into piles by category. We ended up with birds, mammals, buildings, and nature scenes. These pictures can serve as great vocab builders, too, for things your toddler might not see often in real life (like stars, waterfalls, or high mountains).

Fun with Pictures (7)

Finally, I punched holes in each page with a three-hole punch and put them all into a three-ring binder. Now it was a “book” that she could flip through whenever she wanted!

Fun with Pictures (5)

Mailbox Pretend Play

Mailbox Pretend Play (6)

Veronika is very into Blue’s Clues right now, and her favorite part of each episode is when Mailbox arrives bearing a letter for “mail time”. So today I set her up with her own post office!

To make each “mailbox”, simply fold a piece of construction paper over itself so the bottom half comes about 3/4 of the way up the top half. Staple shut along the sides, leaving the top open to form a pocket for mail deliveries.

Mailbox Pretend Play (1)

I made one mailbox for each family member (including the cat!) and then taped them up to the wall.

Mailbox Pretend Play (5)

To make our mail, I gave her an assortment of index cards, old envelopes, and leftover holiday cards. She loved scribbling, but was even more excited when I started drawing a few of the Blue’s Clues characters on envelopes so she could receive mail from them.

Mailbox Pretend Play (3)

I would hand her each letter and she proudly decided which “mailbox” to slot it into. “Let’s put this one in the purple!” she might say, and narrated the whole process.

Mailbox Pretend Play (7)

She was so excited pulling letters back out and seeing what she got in the mall!

Mailbox Pretend Play (9)

This was such easy but fantastic pretend play for a two-year-old. Does your toddler like to play mail delivery? Please share in the comments!

Mailbox Pretend Play (8)