Cling Wrap Painting

Cling Wrap Painting (9)

Veronika loves to smoosh her fingers through paint, and today I found a way to make that smooshing a part of the process, minus the mess!

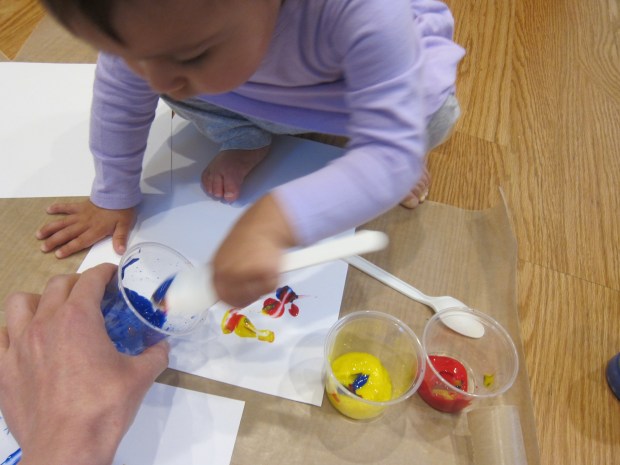
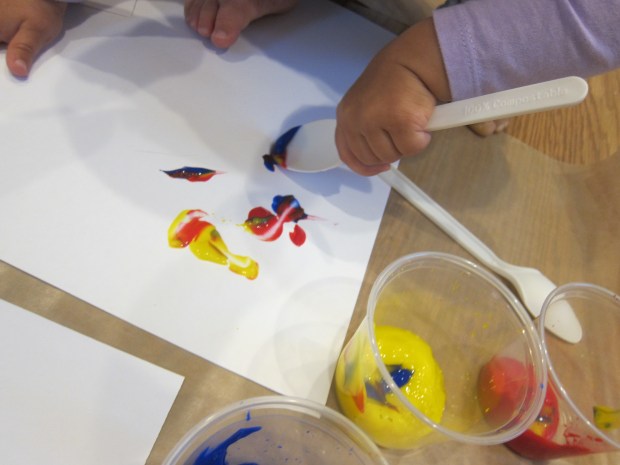
To start, cover your work surface and lay down sheets of white paper. Set out plastic cups filled with paint, and add a plastic spoon in each cup.

Cling Wrap Painting (1)

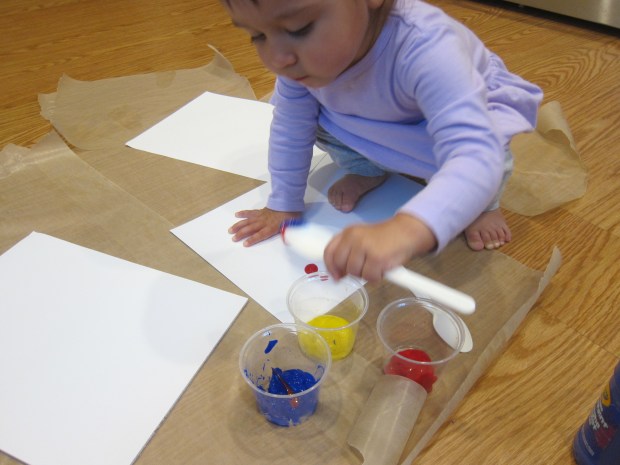
I showed her how to use the spoons to dribble paint onto the paper. Veronika liked making both big blobs and using the edge of the spoon more like a paintbrush.

Cling Wrap Painting (3)

When each page was filled with enough splotches and blobs (and just when her hands were itching to get messy in the paint!) I laid a piece of cling wrap over the paper. Make sure the paper is completely covered.

Cling Wrap Painting (5)

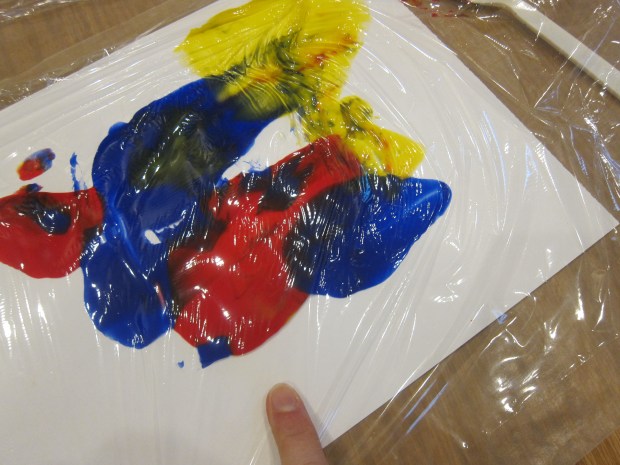
Now use your hands to smooth over the paint.

Cling Wrap Painting (7)

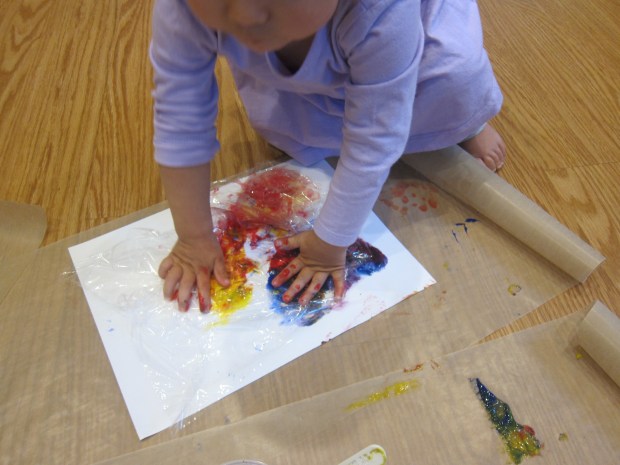
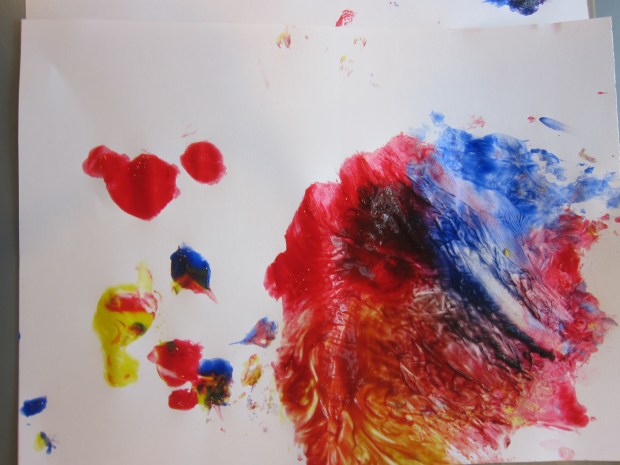
The blobs will squish and flatten in a fun sensory way. You’ll get some color mixing, too! I pointed out to her where our blues and yellows had made green, or where red and blue had mashed together for purple.

Cling Wrap Painting (6)

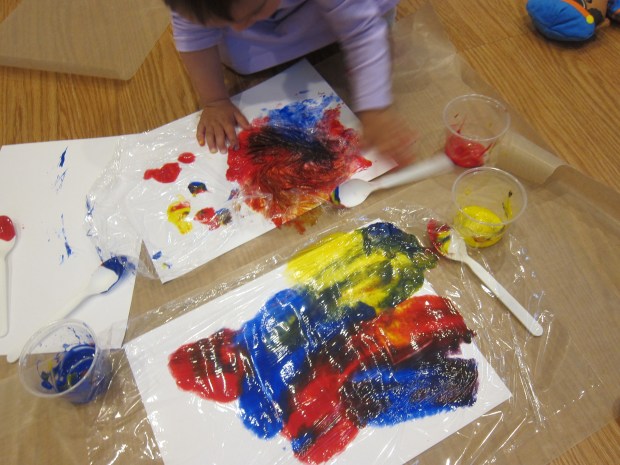
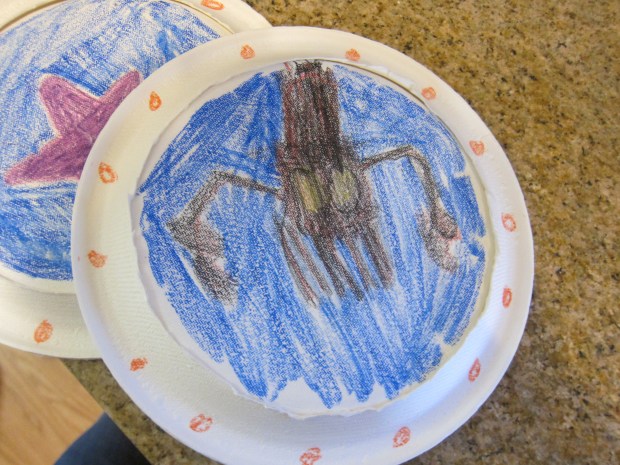
Lift up the cling wrap and set the painting aside to dry completely before displaying your little one’s art.

Cling Wrap Painting (8)

This was a novel painting method, and her hands even stayed (mostly!) clean.

Cling Wrap Painting (2)

Blob Painting

Blob Painting (4)

Veronika is so into painting these days, but all too often she drops the brush and decides to smear with her hands instead. I wondered if using a few novel tools might distract her from doing so!

For this project, you’ll need anything your toddler can squeeze paint out of. We used two versions: an old infant medicine syringe (for pushing) and an empty cosmetic bottle (for squeezing).

I filled each with a little paint, and showed Veronika how to either squeeze or squirt blobs of paint onto the paper. As it turned out, both methods were a little advanced for her muscle development, but she loved seeing the blobs that appeared!

Blob Painting (1)

I folded the paper in half over the blobs we had made, then opened back up to show her a big smeary picture. As an alternative version, place another piece of paper over your blobs, rub firmly, and then lift up.

Blob Painting (3)

She loved the way both versions came out!

Blob Painting (2)

We continued squeezing and blobbing the paint, and she started to use the medicine syringe tip more like a paintbrush.

Blob Painting (8)

For extra fun, we tested out blobbing onto different surfaces, like coffee filters or paper towels.

Blob Painting (6)

Did this project keep her from painting with her hands?

Blob Painting (7)

Not entirely, but it definitely mixed up the art experience around here!

Blob Painting (9)

Spring Flowers Craft

Spring Flowers (7)

These sweet handmade flowers make the perfect bouquet for Mother’s Day, whether to give to a mom or grandma in person, or to share over Zoom!

Ideally, we would have used green straws as flower stems, but because we’re a bit limited on craft supplies (thanks coronavirus), we settled for painting white straws green. I also painted white cupcake liners yellow.

Spring Flowers (1)

Once the paint dried, we were ready to assemble our flowers! Travis helped make four kinds:

Daffodil: Trace a three-pointed petal shape on each of 3 yellow cupcake liners. Align them so they make a 9-pointed circle and glue together. Trim a fourth (white) cupcake liner down, and glue into the center. Glue a small yellow pom pom in the middle, then tape to a green straw as the stem.

Spring Flowers (4)

Calla Lily: Cut blue construction paper into an equilateral triangle. Tape a green straw so that it points up at one of the triangle corners. Wrap the other sides of the triangle tightly around the straw, and tape into place. Fold a yellow pipe cleaner in half, and insert down through the “flower” into the straw.

Spring Flowers (5)

Daisy: Cut three strips out of white construction paper. Glue each in half to form loops, then glue the loops one atop another.

Spring Flowers (3)

Cut a circle from yellow construction paper and glue in the center. Tape to a green straw for a stem.

Poppy: Cut six circles from red tissue paper, then trim around the edges to resemble the petals of a flower. Glue the pieces one atop another.

Spring Flowers (2)

Cut a circle from black construction paper and glue in the center of the tissue paper. Poke the end of a yellow pipe cleaner through the black circle and then all the way through the tissue paper layers; thread the pipe cleaner down into a green straw.

Spring Flowers (6)

Gift your flowers to someone special. Happy Mother’s Day!

Spring Flowers (8)

Glue Play

Glue Play (2)

Your toddler is going to be a using a lot of glue in the next few years, since it’s part of just about every nursery school and preschool project. But how often is glue itself the object of play? The point of this activity was simply for Veronika to explore glue… and yes, you can probably count on it to be messy.

I lined the bottom of a shallow tray with two pieces of construction paper just to contain some of that mess, and then showed her how to squeeze a glue bottle.

Glue Play (1)

Squeezing glue bottles is actually great for muscle development in the hands, and she was so proud when she could do this all by herself. “Dot dot dot!” she said.

Glue Play (3)

Then we opened up the nozzle and really let the glue pour out, which she found fascinating.

Glue Play (4)

From here, she wanted to touch it, and I used the word “sticky” as she played. She was not at all afraid to get hands-on with the stuff.

Glue Play (6)

Thinking to extend the play, I added a few plastic spoons and little pom poms she could sprinkle into the glue.

Glue Play (5)

But really she was mostly interested in the glue itself! Then it was time for a hand wipe and clean up.

Glue Play (7)

Scribble Table

Scribble Table (2)

Veronika wants to scribble anywhere and everywhere these day, so today I made it easy for her – not to mention extra fun! – by setting up a low “scribble table”.

All you need for this activity is a table that’s about waist-high on your child, such as a coffee table or craft table. Cover it with long sheets of craft paper, taping securely and making sure that no tabletop shows through.

Add jumbo crayons and you’re ready to go!

Scribble Table (1)

Veronika was thrilled to learn she could scribble on a normally-taboo surface. She made lots of, well, scribbles of course!

Scribble Table (3)

She even experimented with holding multiple crayons at once.

Scribble Table (5)

I added a few simple drawings and depictions for her, but mostly I just left the craft paper blank as her canvas to fill in throughout the day.

Scribble Table (4)

Big brother did later realize he could use this as a backdrop for Lego games, making scenes of pirate ships and sea monsters. So we got multiple uses out of it!

Scribble Table (7)

One note of caution: You may want to avoid this game with a toddler who is too young to follow directions, otherwise they might start to think any table or piece of furniture is fair game for scribbling.

Flapjack Octopus

Flapjack Octopus (6)

This suggestion from Kiwi Crate was both a way to upcycle Travis’s latest package from the company and an extension on the theme of the deep sea. Winding yarn around a piece of cardboard is also a method you can use for making pom poms, but we found this project to be even easier.

Cut the top off of a Kiwi crate box (or any shoe box), and cut off any flaps, leaving a rectangle. Begin winding yarn around the middle of the rectangle, wrapping about 100 times. This was great practice for counting to 100, something Travis has been working on for home school!

Flapjack Octopus (1)

When we reached 100, we slipped a piece of yarn through the loops at the bottom of the rectangle, and double-knotted securely. Now slip the whole bunch of yarn off the cardboard. Find the middle of the yarn bundle, and tie another piece of yarn there in a double-knot to form the octopus’s waist.

Flapjack Octopus (3)

Snip the loops at the bottom of the octopus. Divide into eight portions (these will be the eight legs) and secure each bundle with a piece of yarn.

Flapjack Octopus (4)

For ears, slip a pipe cleaner through the yarn at the top of the head, and twist down into cute little ear shapes, trimming any extra pipe cleaner.

Flapjack Octopus (5)

As a final touch, glue on wiggle eyes. Once the glue dries, your flapjack octopus is ready to be discovered in the deep sea!

Watercolor Ocean Scene

Watercolor Ocean Scene (3)

Travis had so much fun drawing a squid for a project yesterday that I wanted to expand upon it today. This time, the assignment was to draw a full ocean!

For this project, it’s really up to your child to draw whatever ocean scene he or she envisions. Make sure to use thick watercolor paper for the best results. Travis started out with a big red octopus, but he was dissatisfied with it. He changed it into a crab, but was still displeased. So then he decided he wanted to start over!

Watercolor Ocean Scene (1)

On his second sheet of paper, I could tell he was really thinking about how the world might look under the waves. He drew sand at the bottom, green seaweed growing up, a crab, and a big toothy shark.

Watercolor Ocean Scene (4)

He added blue water all around as background. I worked beside him on a second scene with similar animals.

Watercolor Ocean Scene (2)

When we were done drawing with art pencils, the real watery fun began. Brush over your pencil marks with just a light layer of water. It will smear the colors somewhat, and make it took like you are scuba divers exploring beneath the waves!

Watercolor Ocean Scene (5)

Painting with Trucks

Painting with Trucks (12)

Veronika loves her little set of construction trucks, and she loves paint, so today I thought we’d combine the two. It turns out she was more into finger painting than truck painting, but at least we had good fun.

I started out by taping two pieces of construction paper in a shallow craft bin, and setting out her trucks. Add blobs of paint directly on the paper and show your toddler how to roll cars or trucks through.

Painting with Trucks (1)

Tire tracks!

Painting with Trucks (2)

I thought Veronika would be fascinated, but the paint blobs themselves were just too enticing. Soon we just had two very blue hands (“Hello fingers!” she said).

Painting with Trucks (5)

I did get her to drive the trucks back and forth a few times, but it was always quickly back to smearing her hands right through all those tire tracks.

Painting with Trucks (3)

I thought she might get more into the tire tracks if she had a bigger surface to drive along. So we cleaned up the first version and set up a second. I taped a long piece of craft paper to the floor, and this time I only dabbed down a little black paint, just enough to drive through.

Painting with Trucks (8)

This time she did maneuver the cars for a few passes, and did seem to notice the tracks.

Painting with Trucks (10)

But even the little blobs of paint were irresistible for her fingers.

Painting with Trucks (9)

Soon we had smeary black hands!

Painting with Trucks (11)

Well, she had a blast, and of course half the fun is the “car wash” at the end. We put the trucks in soapy water and I gave her a few rags. This was arguably even more enjoyable than the painting itself!

Painting with Trucks (14)

So start to finish, it made for a great project.

Painting with Trucks (15)

Porthole Scratch Art

Porthole Scratch Art (4)

This ocean-themed art project didn’t quite work as intended, but it still led to great artistic and creative play for Travis today!

The goal with scratch art is to have two layers of color, scratching off the top layer to reveal the shade underneath. To start, cut the center circle from two paper plates and set aside; these will be the rims of your submarine “portholes”.

On a second set of paper plates, I asked Travis to draw his favorite sea creature. He chose a big red squid, and I was so proud of his drawing even though it wasn’t exactly easy to scratch off, as intended.

Porthole Scratch Art (1)

I made a nice fat starfish in the center of another plate as an easier option.

Porthole Scratch Art (2)

We then colored all around the sea creatures with white crayon. Layer a second color of crayon over everything, choosing a dark color to go over the sea animals and then blue crayon over your layer of white.

Using a penny, you now should be able to scratch off the top layer of crayon. If this works, you can make animal details like fins or scales, as well as water details like swirls and seaweed.

Unfortunately, our two colors of crayon just smudged together! Well, we were undeterred. Tape these plates underneath the first set of plates, and add details like bolts with more crayon.

Porthole Scratch Art (3)

Then we got inventive and played deep-sea diver on the couch! Travis loved pretending to be the squid outside my submarine.

Porthole Scratch Art (5)

We might try this again on a different brand of paper plates next time and see if we have more success.

Porthole Scratch Art (6)

Drawing on the Floor

Drawing on the Floor (5)

Usually both my kids love to color in pages that we print from the internet, but with our printer out of ink, I had two kids clamoring for an alternative! This art project saved the day, and can apply to either a toddler or an older child, depending how you tailor it. Either way, half the fun is the novelty of drawing on the floor!

First, I taped a long sheet of craft paper down to the floor. At intervals, I added some fabric prints we have of Van Gogh paintings, like Starry Night.

Drawing on the Floor (1)

For younger kids, these pictures can simply serve as visual stimulation; I had no expectation that Veronika would do anything other than scribble, but hopefully she was inspired by the beautiful artwork around her.

Drawing on the Floor (7)

Certainly she loves to talk about colors these days (“Yellow!” Purple!”) as she draws, and I could point out examples of them in the artwork.

Drawing on the Floor (6)

For older kids, encourage them to try and copy what they see in the famous paintings. Or, simply let the artwork act as a catalyst, and see where it takes them. Travis didn’t exactly copy Starry Night, but he did make big swirls of color in imitation.

Drawing on the Floor (9)

You could even use the project as a jumping-off point for deeper exploration into a certain artist or particular piece of art, as many museums are offering free tours these days. 

Drawing on the Floor (2)

Even if it just turns into messy scribbling on the floor, your kids will have had fun.

Drawing on the Floor (10)