Grasping Objects

Grasping Objects (1)

Has your kid ever wondered why we have thumbs but most animals they see don’t? Or asked what the thumb is for? Travis sure has! This quick STEM lesson illustrates how useful the thumb can be, and how important it is for us as humans.

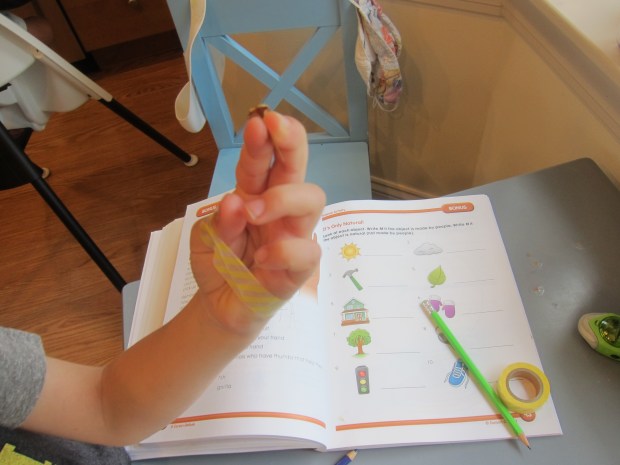
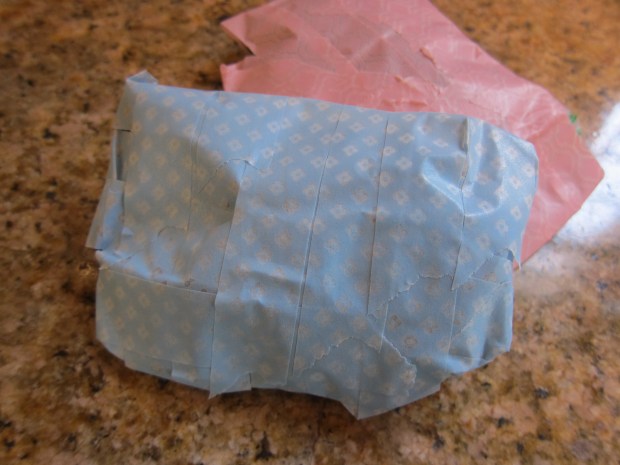
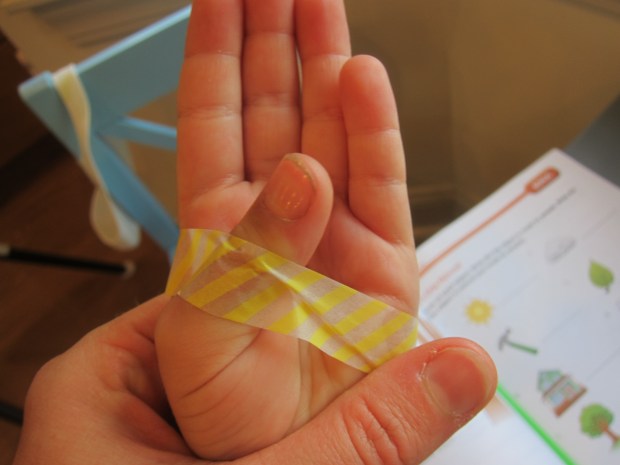
To start, I taped Travis’s thumb down against his palm. Our tape wasn’t that strong, so he also had to promise not to cheat, ha.

Grasping Objects (2)

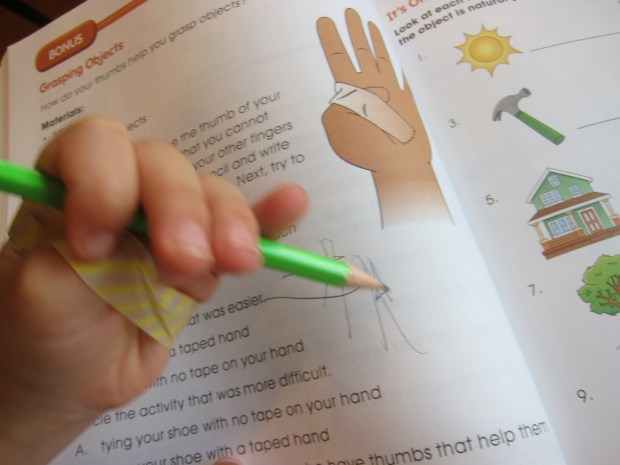
Now I challenged him to write his name using only the free fingers. Wobbly letters followed, which made him giggle.

Grasping Objects (3)

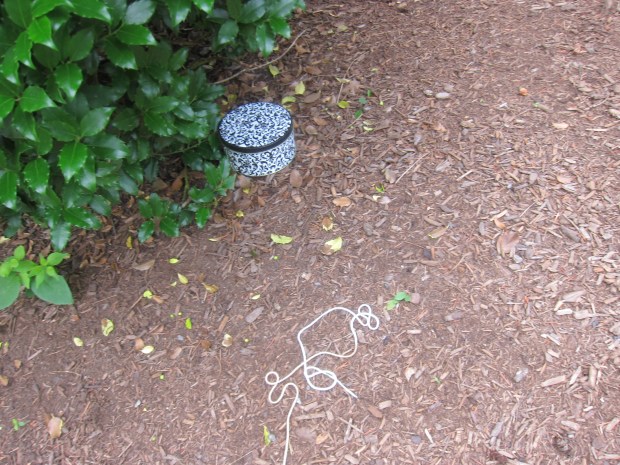
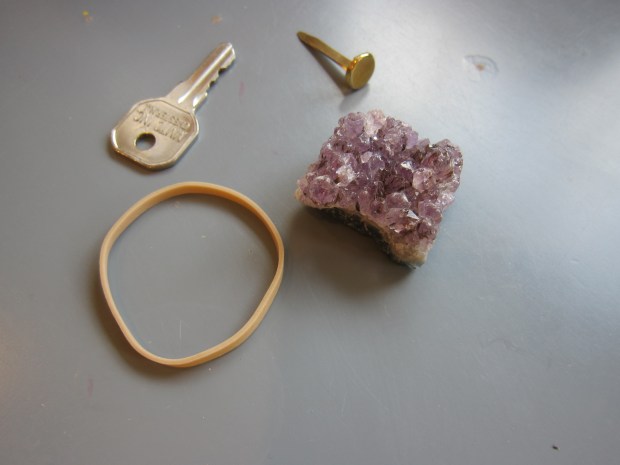
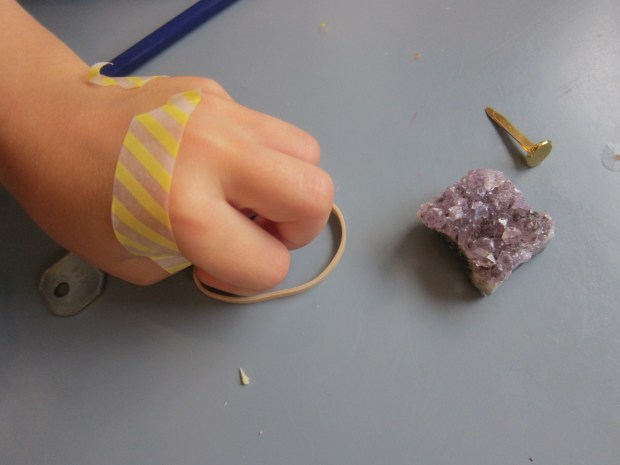
Then we placed several small objects down on the table. Smaller and flatter will be more of a challenge for this activity (think keys or coins). It took some pondering on his part, but then he figured out he could pinch items up using the middle and pointer fingers. He was quite proud!

Grasping Objects (4)

If your child knows how to tie his or her shoes, that would be another fun challenge with the thumb taped down. To finish the lesson, we brainstormed other animals that have opposable thumbs.

Travis’s mind was blown realizing that yes, humans are animals (sometimes we forget what our kids don’t know yet!), and that our closest relatives are apes and gorillas with thumbs, too.

Grasping Objects (5)

Tiny Treasure Hunt

Tiny Treasure Hunt (1)

It seemed only fair to stage a toddler treasure hunt for Veronika today, since big brother Travis has enjoyed big kid versions lately! While she was distracted and busy playing, I placed a few small gems from our dress-up box in a cookie tin, and then hid the tin under a nearby bush.

I stretched a long length of yarn that led from the cookie tin back to our patio. Depending on where you play the game, you can make the yarn twist and turn, looping up and over bushes or playground structures, too.

“Look!” I told her with excitement as I handed her the end of the yarn. “Pirates were here in the night and left treasure!” (Travis immediately wanted to know if this was true).

Tiny Treasure Hunt (2)

I showed Veronika how to hold the yarn and gather it with each step, following the trail.

Tiny Treasure Hunt (3)

The more excited you act, the more your toddler will catch on to the thril of such a quest.

Tiny Treasure Hunt (4)

X marks the spot! She spotted the little box waiting at the end of the trail and loved the jewels inside.

Tiny Treasure Hunt (5)

Teddy Swing

Teddy Swing (2)

Veronika’s favorite activity at the playground is the swings, so I thought for sure she’d enjoy letting her stuffed animals have a turn. It turned out this activity wasn’t nearly as fun as the real thing!

I tied yarn securely around the waist of two favorite stuffed animals, a teddy bear and a monkey, then looped the other end of the yarn over a low tree limb.

The animals were hanging right about chest height on Veronika so she could easily give them a push. But I think she got a little nervous seeing her animals dangling!

Teddy Swing (3)

It turned out big brother Travis liked this activity a whole lot more. He, at least, loved giving the animals big swings!

Teddy Swing (4)

Perhaps your toddler will enjoy it more! Let me know what your kids think in the comments.

Treasure Sandboxes, Two Ways

Pan for Gold Sandbox (5)

After digging for dinos and enjoying a pretend day at the beach, it was time to turn our homemade sandbox into a gold mine! We played around with this idea in two ways, first as a diamond mine and then panning for gold.

For the diamond mine, I gave each of my kids a paper cup with a handle to collect any treasures they unearthed.

Diamond Mine Sandbox (1)

Ideally I would have used pipe cleaner handles, but we’re all out! Floral wire worked in a pinch; just make sure to twist any pointy ends safely away.

Diamond Mine Sandbox (3)

I buried four “gems” from our dress-up box in our container of sand and pebbles. Each kid got a shovel, and the digging began!

Diamond Mine Sandbox (2)

Veronika seemed unsure at first, until big brother Travis joined in. He loved searching for a glint of treasure.

Diamond Mine Sandbox (7)

Veronika preferred rinsing off the glittering finds in a little bowl of water on the side. This was simple but good fun in the sunshine (you’ll notice we’ve moved the sandbox outside).

Diamond Mine Sandbox (4)

For the second version, it was time to pan for gold. This time, I painted a few pebbles with gold metallic paint. Toddlers will love helping with this step!

Pan for Gold Sandbox (1)

Let dry completely.

Pan for Gold Sandbox (2)

In the afternoon, I buried the “gold” in the sandbox and set out sand sifters instead of shovels.

Pan for Gold Sandbox (3)

Ours are in fun animal shapes, though it would be more realistic if you have classic circular ones. Once again, we had a dish of water on the side to rinse off any gold nuggets the kids discovered.

Pan for Gold Sandbox (4)

Surprisingly, this didn’t hold their attention for long, but perhaps they were all mined out!

Diamond Mine Sandbox (5)

Cool Whip Painting

Cool Whip Painting (5)

What’s better than finger paint in the bath tub? Edible finger paint in the bath tub of course!

When I spotted this brilliant (and delicious) idea, I knew it would be worth the mess. For a vegan cool whip, try Whole Foods’ non-dairy whipped topping from the freezer aisle. Let thaw in the refrigerator about 3 hours prior to this activity and it will be the perfect consistency when you’re ready to play.

I divided the whipped topping evenly among the tins of a large muffin tray. Add drops of food coloring to each cup.

Cool Whip Painting (1)

To get the full rainbow, we mixed a few of our colors (red + yellow, blue + red). Older toddlers might enjoy helping with this step!

Cool Whip Painting (2)

Then I simply stripped Veronika down to a diaper, handed her a paint brush and set her loose in the tub. She immediately started painting.

Cool Whip Painting (3)

“A rainbow!” she said, even though she only had one line of color. What a perfect idea, so I started to paint stripes in rainbow order on the side of the tub. Some of the paint dripped onto her leg as a result. “Oh no!” she said, but I assured her it was okay because this paint was edible.

Cool Whip Painting (4)

She looked at me with surprise; usually I chide her not to eat paint, ha! So I dipped a finger in and held it up to her tongue. “Yummy!” she said with absolute delight.

Cool Whip Painting (6)

“Try blue?” So I dipped a finger in blue for her. “Try green?” You get the idea. Well clearly we were going to need plastic spoons!

Cool Whip Painting (8)

After this it became more feast than art project. At this point, big brother Travis needed to join in. He loved both taste-testing and smearing the paint on the tub with a brush.

Cool Whip Painting (9)

He even tried turning it into body paint!

Cool Whip Painting (11)

Meanwhile, I kept using the paintbrushes around my happy diners. This little fish was swimming right on the bottom of the ocean.

Cool Whip Painting (10)

Clean up was surprisingly easy. Strip everyone down and run the water and rinse (humans and tub alike). Travis even loved using a washcloth to scrub the walls until they were sparkly clean.

Cool Whip Painting (12)

Baby’s Adventure

Baby's Adventure (5)

Whether your day involves a simple stroll to the mailbox, a trip to the store, a jaunt to the playground, or something more out of the ordinary, it’s all exciting for a toddler. Everything is new and wondrous at this age, and this fun game will highlight that fact once you return home.

Today’s “adventure” was simple (a trip to a local playground, followed by a quick stop for dinner ingredients on the way home). But when we got in, I opened up two paper grocery bags so they lay flat, and set out markers.

Baby's Adventure (1)

Starting on one side of the paper, I talked excitedly to Veronika about how the journey had begun: leaving home and setting off in our car. “Gray car!” she said with excitement when she looked at my drawing. The journey continued along the road and I talked about the scenery we had passed. “Swings!” she said happily as I drew them.


Baby's Adventure (2)

I then talked her through the jaunt to the grocery store on the way home (don’t forget about the train we spotted!) followed by ending back where we had begun.

Baby's Adventure (4)

As I drew and talked through my version, she happily scribbled on the second paper bag I had laid out. She said she was drawing trucks and motorcycles!

Baby's Adventure (3)

This was such a great way to make Veronika the main character of her own story. Plus we simply had fun making art together!

Baby's Adventure (6)


Sunflower Seed Butter Cookies

Sunflower Seed Butter Cookies (1)

With a leftover jar of sunflower seed butter in the pantry, I threw together these protein-packed cookies.

Ingredients:

  • 1 and 2/3 cups flour
  • 1 teaspoon baking powder, divided
  • 1/2 teaspoon baking soda
  • 1/4 teaspoon salt
  • 1/2 cup applesauce
  • 1 cup sunflower seed butter
  • 1/4 cup canola oil
  • 2/3 cup brown sugar
  • 1/2 cup maple syrup
  1. In a bowl, combine the flour, 1/2 teaspoon baking powder, baking soda, and salt. Set aside.
  2. In a large bowl, whisk together the applesauce and remaining 1/2 teaspoon baking powder. Add the sunflower seed butter, canola oil, brown sugar, and maple syrup.
  3. Add the wet ingredients to the dry ingredients, stirring until combined.
  4. Drop the dough by spoonfuls onto baking sheets, 12 cookies per sheet. Bake at 350 degrees F for 12 minutes.

Sunflower Seed Butter Cookies (2)

Air Science

Air Science (4)

Having recently prepared a recipe reliant on air to cook (a.k.a. a recipe that needs a leavener), today Travis played around with two different kinds of leaveners to see which worked its magic faster.

In one empty water bottle, combine 1 cup warm water, 1 packet active yeast, and 1 teaspoon sugar. Put on the lid and shake, then remove the lid and place an uninflated balloon over the opening. Set a timer for 20 minutes.

Air Science (1)

Meanwhile, fill a second empty water bottle with 1/2 cup water and 1 cup white vinegar. Working quickly, add 1/4 cup baking soda. Add a balloon as fast as you can over the top of the bottle; it will immediately inflate with air.

Air Science (2)

This was fantastic fun for Travis, since the second bottle will be exploding a volcano of vinegar as you attach the balloon.

Air Science (3)

The results were immediately obvious; baking soda acts much faster than yeast. In fact, our yeast balloon took longer than the 20 minutes we had set on the timer, but after about an hour the balloon was beginning to inflate.

IMG_0001

I explained to Travis that this was part of the difference between a slow (yeast) bread and a quick bread (like banana bread), which comes together must faster. Now he understood why!

Air Science (5)

Stayed tuned for more elemental food science soon!

Glowing Bean Bag Toss

Glow Bean Bag Toss (14)

After playing a glow-in-the-dark Frisbee game recently, tonight it was time for glow-in-the-dark bean bags!

This kiddie-version of Cornhole can be played in daylight, too. First, I taped a cardboard box securely with duct tape along the top and bottom, and then used an X-acto knife to cut it in half along a diagonal.

Glow Bean Bag Toss (1)

Cut a hole in the center of each. These will be your target boards. Travis was in charge of decorating them! We used colorful washi tape to make patterns and designs.

Glow Bean Bag Toss (3)

Of course little sister wanted to help, too.

Glow Bean Bag Toss (4)

The bean bags were a bit tricky to make. Cut snack-size zip-top bags into an octagon shape, and then use more decorative tape to cover them and seal the edges. Leave an opening at the top. Fill with dried beans, then add more washi tape along the top. Time to toss!

Glow Bean Bag Toss (6)

We scored 1 point for any bags that landed on the board, 3 points if it went in the hole.

Glow Bean Bag Toss (9)

We upped the ante and kept moving further back from the board with each round. Travis was a natural!

Glow Bean Bag Toss (10)

Once it grew dark, it was time to make it all glow. We cracked glow sticks to activate them and taped them along the sides of the box targets.

Glow Bean Bag Toss (12)

Then we added small glow sticks to a few more bean bags, adding them in with the beans before sealing shut.

Glow Bean Bag Toss (11)

Travis wanted to play so many rounds that bedtime ended up being a little delayed! But that’s exactly what summer nights are for.

Glow Bean Bag Toss (13)

Sandbox Construction Site

Sandbox 1 (2)

I’ve put together small “construction sites” for Veronika before (and for big brother Travis, too, when he was younger), but when a huge bag of play sand arrived today, I knew we had to set up the biggest version yet!

You could do this activity outside in a real sandbox, too, if you have one at home or a neighborhood playground.

We also wanted to collect little rocks for our site and headed outside with a bucket. I poured the sand into a large storage bin and added the rocks along one side. We then added Veronika’s construction vehicles.

Sandbox 1 (1)

The trucks were soon very busy!

Sandbox 1 (3)

Veronika sprinkled sand into the dump truck.

Sandbox 1 (6)

She loved using the front loader to push rocks around.

Sandbox 1 (4)

And then there was just lots of driving trucks around and burying rocks in the sand!

Sandbox 1 (5)

Needless to say, the rocks didn’t stay gathered along one side for long. Older toddlers may want to be more deliberate with their “building”, though, gathering rocks in one place, or building them up into structures.

Sandbox 1 (7)

Travis definitely needed in on this one. His favorite part was burying trucks in the sand, to be unearthed in a big rescue.

Sandbox 1 (9)

The high sides of the storage bin even meant that all the sand stayed in the box!

Sandbox 1 (10)

And the lid meant we didn’t have to clean-up, but could simply cover the box and set it aside for next time. One thing’s for sure: We’ll be pulling this one out again soon.

Sandbox 1 (11)