Footprint Plaque

Footprint Plaque (6).JPG

I’ve already made a beautiful keepsake of Veronika’s footprints with paint, and today we tried a version made with clay! I had leftover air-dry clay from a project with Travis, so it was the perfect opportunity for Veronika to play with this material.

Roll out a large piece of clay with a rolling pin until it is about 1/4-inch thick. Be sure to let your little one watch, even though they are too young to help with the process!

Footprint Plaque (1)

Use a bowl and knife to cut out a circle large enough for both your baby’s footprints.

Footprint Plaque (2)

Here’s the hard part: hold your baby carefully and press one foot into the clay at a time. This might be a bit uncomfortable for them, and indeed poor Veronika let out a little cry! So you’ll notice that her prints are not very deep or pronounced, but at least I was able to capture the size and shape.

Footprint Plaque (3)

Punch two holes in the top using a straw, then lay the plaque flat to dry.

Footprint Plaque (4)

Once dry, thread a pretty ribbon through the holes, and you’ll have a beautiful plaque to display.

Footprint Plaque (5)

Don’t forget the name and date!

Introduce Family Traditions

Family Traditions (7)

It’s never too early to start a family tradition, whether your baby is your first child or a new sibling. Certainly, Veronika’s birth has us thinking about new traditions we can incorporate into our home. Here’s a quick rundown of a few we’ve begun and hope to continue!

Afternoon Walks:

Obviously you won’t be able to do this every afternoon, but I highly recommend finding a pretty spot or route that your family loves, and make it a tradition to head out walking at least once a month (yes, even in the winter)! To wit, we have three walks that now belong to our family: one in a local state park along paved trails; one around the pond at our local park; and one secret trail through the woods. This last we call the “Kerber Walk”, because there is a restaurant of the same name nearby, but it isn’t the actual name of the trail. We love that the moniker is a family secret.

Wherever you go, visit in multiple seasons and your family tradition will be firmly in place.

Family Traditions (11)

Festive Customs:

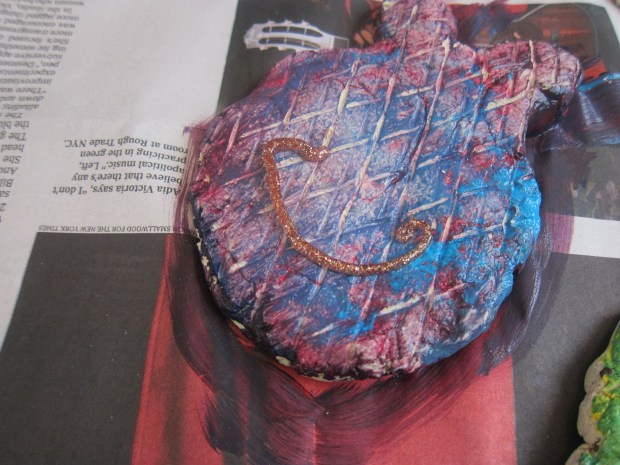
I held off on buying much for the holidays when Travis was my only child, knowing I always wanted a second. Since Veronika’s birth, I can coordinate each holiday as it comes around! Most recently, this has meant brother-and-sister Easter baskets with monogrammed bunny ear liners. I’ll be coordinating the gifts they receive, too: a spring-themed book for each child, as well as a treat (candy for Travis, pureed carrots for little Veronika!).

Family Traditions (14)

Whatever traditions feel unique to your family, introduce them to your baby early; he or she will never remember a time without the custom.

Connecting with Cousins:

If your lucky enough to have cousins in the area, make it a point of playing together. It has been so fun to watch Travis bloom into buddies with the two boy cousins who live close by. Meanwhile the baby girls are only two months apart in age! Our goal is to pencil in a date monthly. These kids can grow up together and forge their own traditions.

Family Traditions (2)

And big teenage cousins have the perfect laps for sitting.

Family Traditions (3).jpg

Saturday Play in the Park:

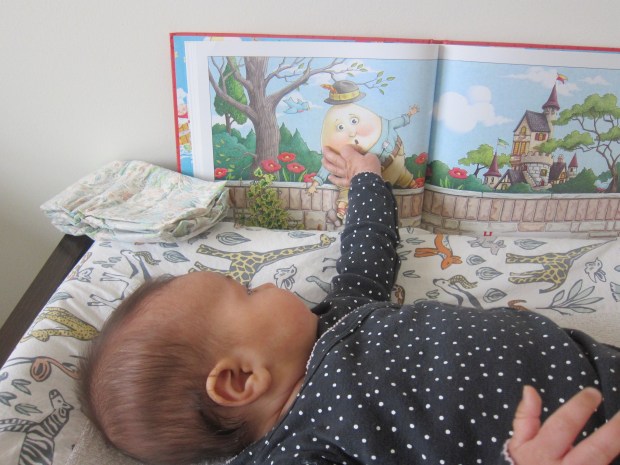
Weekends get busy with kids – sport practice, birthday parties, art classes. But usually are mornings are free, so we try and make it a custom to head to a playground for quality family time. Family obligations might mean you can’t do so every Saturday, but it’s a great goal to aim for. Little Veronika can’t play yet, but she can watch big brother play!

Family Traditions (9)

I like to think she’s soaking up the adventure that awaits, and big siblings will love that they can run and play and not worry about indoor admonitions to avoid waking the baby.
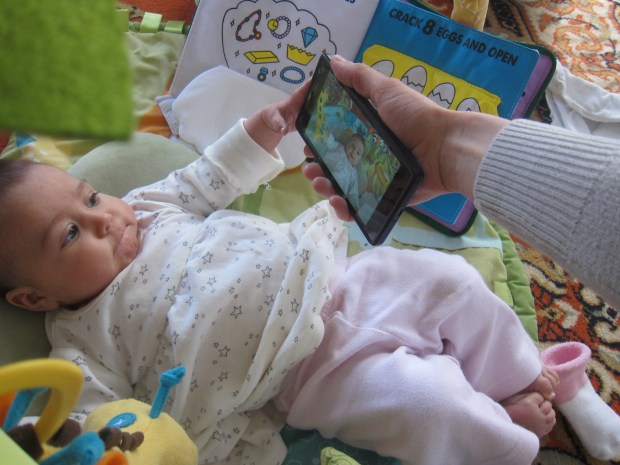
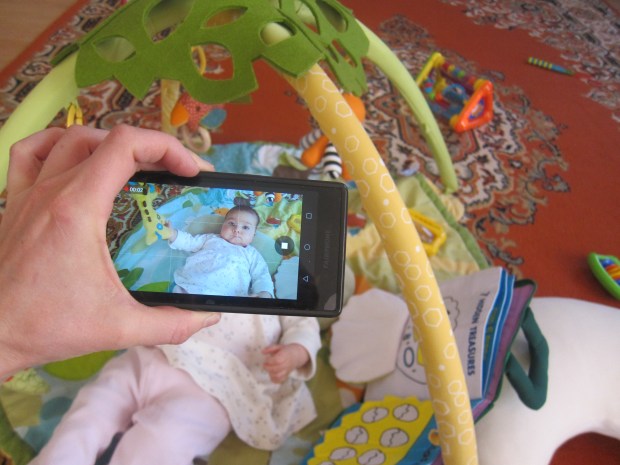
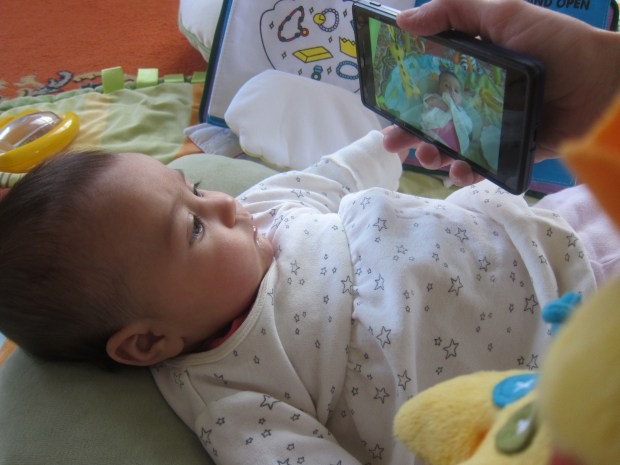
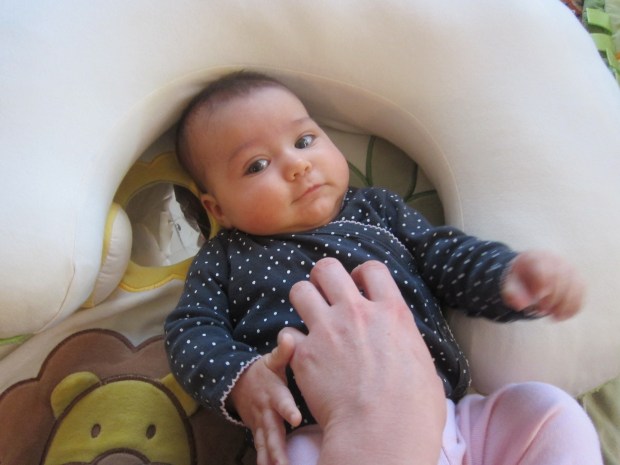
Family Traditions (8)

Sunday Snuggles:

Travis has always been a big one for snuggles (boy do I feel lucky!) and now Veronika is in on the snuggly action. We decided that now when we cuddle up for special Sunday snuggles on the couch, we’ll snap a Sunday Snuggle Selfie. Moving forward, we’ll have a week-by-week record of these cuddly moments!
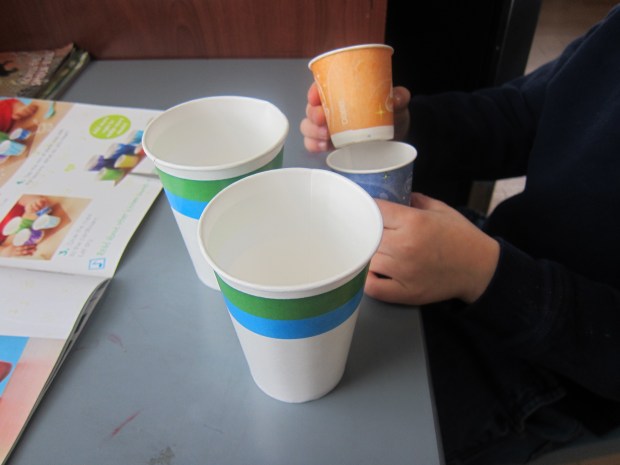
Family Traditions (15)

Family Games:

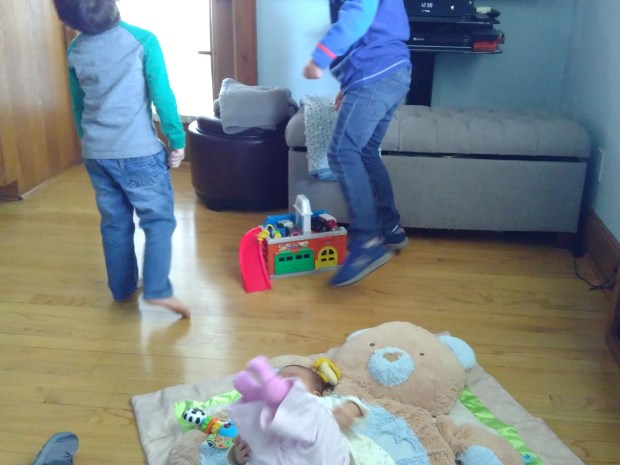
Even though Veronika is too young to play still, it’s great to pull out games and make it a family board game night (or day, if that works better!) and make interactive time a priority. Right now, Travis gets the thrill of playing, while she gets to sit on a grown-up’s lap or lie close by and take in the action.

Family Traditions (1)

What other traditions are you building for your baby? Please share in the comments!


Liquid Hourglass

Liquid Hourglass (9).JPG

Are you passing the hours during a snow day, or the latest winter storm, or just having a day that’s too cold to venture outside? Then this hourglass project is for you! It will make watching the passing hours into a fantastically cool experiment.

To start, you need two identical bottles (we used empty water bottles that were 1 liter).

Liquid Hourglass (1)

Hot glue the caps together, pressing for a tight seal.

Liquid Hourglass (2)

Next add a piece of duct tape, to make a water-tight seal.

Liquid Hourglass (3)

Mark two dots where you will insert straws, then (grown-up step!) drill through the holes.

Liquid Hourglass (4)

Cut straws into pieces that are 2-inches long. Insert one straw 1/3 of the way into one of the holes. Insert the other straw 1/3 of the way in the other direction.

Liquid Hourglass (5)

Fill your first bottle with vegetable oil. Definitely use the cheap stuff here, folks, since the bottle needs to be filled completely. We used a funnel to avoid any mess.

Liquid Hourglass (6)

Fill the second bottle with water. We added blue food coloring for visual effect.

Liquid Hourglass (7)

Now screw one half of the bottle cap onto the bottle with oil. Quickly and carefully, flip over and screw onto the bottle with water. Immediately you’ll get a big bubbling result as the two liquids start to mix.

Liquid Hourglass (8)

After a few minutes, the bubbles will settle down and you can really see what’s happening. Because the oil is less dense than water, it will bubble up, bit by bit through the straw, at the same time that the water bubbles down.

Liquid Hourglass (13)

First, we were simply in awe of how cool this looked.

Liquid Hourglass (10)

Then we decided to get more scientific: Had we really created an hourglass? We timed it and discovered it took 45 minutes on the dot before we had one completely blue bottle, and one completely oil bottle.

Liquid Hourglass (16)

And then there’s the fact that this is simply mesmerizing to watch. Seriously, I could have meditated in front of these bubbles.

Liquid Hourglass (14)

And Travis’s glee made it apparent he felt the same.

Liquid Hourglass (15)

Although not necessary, you can decorate your bottles, too. Since the blue and yellow effect reminded us of sand and water, we added a little octopus and his cave…

Liquid Hourglass (11)

…and these fishy friends.

Liquid Hourglass (12)

What a way to watch the hours pass!


Many Mobiles

Mobiles (12).JPG

Veronika needed some new mobiles to look at, so I had fun making her a few, very easy and (and very inexpert!) versions this morning. The best thing about these mobiles is that I could craft them at her side while she kicked and played on her playmat.

I like using mobiles during diaper time instead of in the crib; Veronika isn’t lying on her back in her crib other than at night, but she sure loves checking out what’s hanging above the diaper table during changes!

For the following four mobiles, I simply suspended the objects from a baby hanger using colorful string. No points for elegance here – but lots of points for delight!

Mobiles (11)

Here are the four variations I made:

The first was easy as pie; simply tie small stuffed animals onto string and loop onto the hanger.

Mobiles (13)

This one had the added bonus of sound, since a few of our animals squeaked or mooed.

Mobiles (4)

The second was equally easy; I threaded large gold jingle bells onto string, and looped onto the hanger. She absolutely loved running her hands across this one, so I placed it over her playmat later, too.

Mobiles (5)

Just be sure to supervise any play baby does with dangling strings.

Mobiles (6)

For the third, I cut cardboard into various small shapes – circles, triangles etc.

Mobiles (1)

Cover the shapes with aluminum foil. Punch a hole into the cardboard, add string, and loop onto the hanger.

Mobiles (2)

These were so sparkly when sunlight hit them!

Mobiles (3)

The final mobile was the least elegant of all, but also got big smiles. I stapled string to a few empty food boxes with bright colors, and then looped the string onto the hanger.

Mobiles (7)

These were fun for her to bat at and hear them knock against each other.

Mobiles (8)

In sum, there’s lots of visual delights here! We’re going to keep all these versions on rotation and change up what’s hanging from her mobile hook so she never gets bored.

Mobiles (10)


Grab and Scrunch

Grab Scrunch (6)

Babies at four months old are all about texture, and this game couldn’t be cuter or easier! All you need are some common household items to introduce new sounds and textures in today’s play session.

I pulled out a brown paper lunch bag and a box of wax paper. For each one, I first showed it to Veronika completely smooth and uncrumpled. Let your baby feel the material at this stage, too.

Grab Scrunch (5)

Next, I crumpled each up. Hold the paper or wax paper close to baby’s ear for this; the sound is nearly as neat as the texture!

Grab Scrunch (2)

Finally, I handed her the wadded up ball. She loved passing the papers from hand to hand.

Grab Scrunch (1)

And of course giving it a test with her mouth, which is okay, but supervise since you don’t want a baby mouthing on wax paper for long.

Grab Scrunch (7)

Alternatively, don’t scrunch up the materials; instead, let your baby take them while smooth, and scrunch them up solo.

Grab Scrunch (3)

What other items does your baby love to hold at this stage? Please share in the comments!

Grab Scrunch (8)

Playback

Playback (4)

I’ve encouraged anyone following along on my baby game journey to record their baby and capture special moments. Today’s homework is not just to capture the audio of your little one, but to let them hear the playback, too!

Veronika is all gurgles and coos these days, and of course any parent would want to capture the moment.

Playback (1)

To encourage some talking, we had quality facetime on her playmat. If you need to get your baby talking, try tickling their little toes!

Playback (2)

As we “chatted”, I set a video recorder going. This will be a sweet memento for me, of course, but now for the real fun part: I let her see the playback!

Playback (5)

She was utterly fascinated by the baby in the video, even though she doesn’t quite yet know she’s watching herself. Babies love watching other babies, and seeing the playback encouraged her to talk up another cooing storm.

Playback (3)

Here’s a quick clip we caught!

The Grand Old Duke of York

Grand Old Duke (6)

On the heels of Humpty Dumpty, I was looking for more fun movement rhymes to play with Veronika. I remember doing this particular one every time Travis and I attended a class at Gymboree when he was little, and realized I hadn’t yet done so with Veronika. Time to amend that!

Lie on your back, with your child facing you, and holding them securely.

Grand Old Duke (2)

Now recite the words:

Oh the Grand Old Duke of York,

He had ten thousand men.

He marched them up to the top of the hill

And he marched them down again.

And when they were up, they were up.

And when they were down, they were down.

And when they were only halfway up,

They were neither up nor down.

On every up, your child goes up…

Grand Old Duke (5)

…and on every down they go down.

Grand Old Duke (2)

And then of course quick up and downs on that last fun line.

Grand Old Duke (1)

It’s a shame that I had to enlist family members to take pictures, because her smile at me was absolutely beatific, but the camera never quite caught it. Either way, it felt great to make her giggle with glee, and we’ll be doing this one often!

Grand Old Duke (7)

Textured Painted Fish


Textured Fish (12)

Travis and I haven’t played with clay in some time, so he was really excited when I pulled out a fresh pack of it this morning. Pretty soon, we came up with great under-the-sea fun, and added texture in two unique ways.

Textured Fish (1)

First, we shaped the clay into little fish. Travis needed some help with this, but sort of got the hang of shaping an oval body and pinching the back to form a tail.

Textured Fish (4)

More so, though, he made his own variations on sea creatures, which was just great to watch; he thought this looked like a perfect seahorse!

Textured Fish (3)

Next we painted the fish, and he loved mixing colors to help them “camouflage.”

Textured Fish (5)

Now for the texture fun. I pulled out a mesh bag, and we placed it on the wet clay. Cover with a rag (to avoid dirty hands!) and press down.

Textured Fish (6)

Now our fish had scales!

Textured Fish (7)

Travis loved it! Some glitter paint was the final shimmery touch for the fish, but Travis wasn’t done yet, so added “coral reefs” (which got lots more glittery glue).

Textured Fish (8)

Finally, our fish needed an ocean to swim in. We painted a piece of poster board blue, and added texture in another fun way – by running a comb over it for ocean waves and currants.

Textured Fish (2)

In sum, this was a great art project, with lots of fun elements, new ways to make texture, and opportunity for creativity.

Textured Fish (10)

Humpty Dumpty

Humpty Dumpty (5).JPG

Veronika and I are moving beyond fingerplays, since she’s old enough now to get her whole body in on the fun for action rhymes. “Humpty Dumpty” is a great one to play with your little one, because the more you do it, the more he or she will anticipate the moment of the “fall.”

First, I simply recited the rhyme to her, to familiarize her with the rhythm and words. As a reminder, here’s how it goes:

Humpty Dumpty sat on a wall.

Humpty Dumpty had a great fall.

All the king’s horses and all the king’s men

Couldn’t put Humpty together again.

A Mother Goose book made for a great visual!

Humpty Dumpty (4)

Later, I sat her on my lap, with a soft mat behind her. Hold your baby securely under the armpits and recite the words.

Humpty Dumpty (1)

On “fall” we went back with a little tickle, then lifted her back up to a sit for a repeat.

Humpty Dumpty (3)

She soon was very into the motions and game! This activity will strengthen muscles, give your baby a good grasp of language, and teach emotional cues, since your smile and happy eyes will confirm that the game is all in good fun.

Humpty Dumpty (2)


Paper Cup Drums

Paper Cup Drums (8).JPG

A kitchen band never gets old; everyone loves clanging on pots, tapping together spoons, and banging on old pans, from toddlers to big kids. But sometimes I don’t want to clean out all the pots after the kids have played with them… and that’s where these clever paper cup drums come in, this month’s craft from High Five magazine. Travis got to use kitchen items for his instruments and I had no pots to wash – a win-win! You’ll also get to teach a little science, thanks to the different tones the drums make.

Paper Cup Drums (1)

First, set out 2 large paper cups and 2 small ones. Cut one large cup and one small cup in half, leaving the others whole – great scissor practice!

Paper Cup Drums (2)

Travis decorated the cups next, using marker on the outside and then coloring inside them, too, which I wouldn’t have thought of!

Paper Cup Drums (4)

We glued down our drums as a “drum set” on a piece of cardboard, then waited for the glue to set.

Paper Cup Drums (3)

Once dry, it was time to play! Use a spoon to tap on the “drums” – first we just enjoyed the sounds.

Paper Cup Drums (5)

But to be more educational about it, I asked Travis what difference he noticed between the big cups and small ones. Tapping first one, then the other, he could hear the difference – a low tone, then a high tone.

Paper Cup Drums (6)

I challenged him to guess how the medium cups would compare. Lower or higher than the big? He initially guessed lower, but then amended his guess once we played the tone. Interestingly, your intact small cup and cut-in-half big cup should now be nearly the same size, and thus sound quite alike.

Paper Cup Drums (7)

Note: We originally tried using a metal spoon, but found that the difference in cup size/tones was much more apparent when tapping with a plastic spoon.

Paper Cup Drums alt.JPG

Thanks for the musical play, High Five!