Rainbow Coloring

Rainbow Crayons (2)

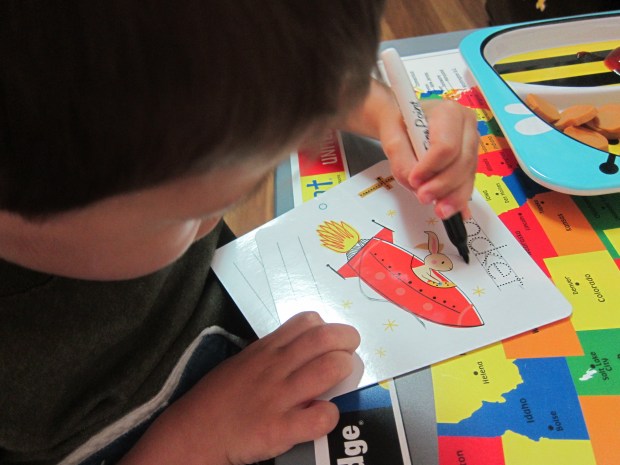
We’ve always loved rainbows around here, but now Travis is really starting to latch on to the idea that there is a rainbow order, instead of a random array of beautiful colors. This easy crayon trick will help your child remember which order the colors are in!

Ready for how easy the set up is? Adults: Use masking tape to make 2 batches of crayons – one red/orange/yellow and the second green/blue/purple.

Rainbow Coloring (1)

That’s all there is to it! Now use the red batch on top and the green batch on the bottom to make a beautiful arced rainbow.

Rainbow Crayons (4)

Travis loved the novelty of the crayons, which are also simply great for drawing pretty pictures and squiggles.

Rainbow Crayons (3)

Balloon Painting

Balloon Paint (5)

When plain old paints and paintbrushes have grown a bit stale, look no further than this novel project! This time around, a balloon itself is your “brush.”

To start, blow up balloons just slightly (you want your little one’s hand to be able to grab on).

I set Travis up with the balloons and several colors of paint on a well-covered surface. You can stick to a color palate (we used various shades of green), or go wild with vibrant primary colors or any shade in between.

Balloon Paint (1)

It was neat to see the different effects we could produce with the balloon as our brush, whether making big blobs by pressing or streaks from rolling.

Balloon Paint (3)

The marks almost looked feathery at times, very neat!

Balloon Paint (6)

In complete honesty, Travis decided he didn’t like the activity much, since the balloon got his hand very messy with paint. His favorite part though was looking at the dried painting afterward, and discussing how we had made it!

Balloon Paint (4)For kids who do love making a mess (and being a mess), this is sure to be a huge hit.

Balloon Paint (7)

Marshmallow Launcher

Marshmallow Launcher (5)

After a full day in the car, I wanted to do something for Travis that was pure joy. This project is sure to earn you cool parent points!

Cut the bottom from a disposable cup – kids can help with this step if you have paper cups on hand, but since ours were plastic, I did the scissor work myself.

Marshmallow Launcher (1)

Next, knot the ends of several uninflated balloons and snip off the tops.

Marshmallow Launcher (2)

Fit a balloon snugly over the cut end of each cup (you can add an elastic band for extra security). Now it’s time to load up your marshmallow ammo!

Marshmallow Launcher (7)

One to two marshmallows at a time will work best (more than that and it’s really too heavy). Travis couldn’t get enough of seeing the marshmallows fly toward the ceiling!

Or of the slightly-verboten ability to eat the marshmallows off the floor after they landed.

Marshmallow Launcher (4)

He wanted to see if his launcher would work with pennies as well. (Hint: Yes, it will – just not as yummy an experiment!) Needless to say, the project involved lots of hearty giggles and tons of fun.

Marshmallow Launcher (8)


Sweet Strawberry Pizza

Strawberry Pizza (5)

Pizza for dessert? Yes please! We absolutely had to try this recipe from High 5 magazine. It can take some searching to find frozen pizza dough that is vegan, but Wholly Wholesome and Gillian’s both fit the bill. Be sure to thaw the dough ahead of time, or you’ll be caught with frozen dough when you promised your little chef that it’s pizza time!

Adults: First line a baking sheet with parchment paper and set aside.

Next, I enlisted Travis’s help to roll our dough into a large oval. The dough was a little finicky, but between rolling, patting, and stretching we got it into a rather free-form oval/rectangle on our baking sheet.

Strawberry Pizza (1)

Travis loved the next step – brushing 2 tablespoons melted Earth Balance butter over the top of the dough – this was like painting with butter!

Strawberry Pizza (3)

I had sliced 12 strawberries for him ahead of time, so all Travis had to do was arrange them over the top of the dough. I stepped in just to make sure they didn’t overlap too much, but otherwise left this step up to him.

Strawberry Pizza (2)

Finally, we combined 2 tablespoons coconut sugar and 1/8 teaspoon ground cinnamon in a small bowl, and sprinkled evenly over the strawberries.

Strawberry Pizza (4)

Adults: Bake the pizza at 375 degrees F for 23 minutes. Dessert is served!

String Roller Print

String Print (9)

You can upcycle your empty toilet paper tubes and enjoy some messy fun with this project.

To create the rollers for our prints, first squeeze glue onto a disposable plate or tray. Add pieces of string and have fun squishing the string through the glue until coated.

String Print (1)

Travis was actually a bit squeamish about this step, so my fingers got good and messy; I finally cajoled him into winding some of the gluey strings around our two empty toilet paper tubes.

String Print (2)

We set the tubes aside to dry – nap-time was the perfect pause.

String Print (3)

To make our prints, I splattered several colors of paint onto parchment paper. First we needed to swirl them together a bit with a paintbrush.

String Print (8)

Then it was time to roll through our rollers. The whole project was neat because it made me think of roll printing on fabric.

String Print (7)

Travis was a little hesitant about getting his fingers covered in paint, but soon the rollers were rolling about on a piece of poster board.

String Print (6)

He decided to add a few brushstrokes with the paintbrush to finish his creation. Overall, very Jackson Pollock-esque!

String Print (10)

Rainbow Slaw

Rainbow Slaw

You’ll bring nearly all the colors of the rainbow to your next barbecue or picnic with this colorful summer slaw! It features unexpected veggies like celery root, which will help it stand out from the rest of the coleslaw crowd.

Ingredients:

  • 1 celery root
  • 1 package baby rainbow carrots
  • 2 cups shredded red cabbage
  • 1/4 cup vegan mayonnaise
  • 2 tablespoons fresh-squeezed lemon juice
  • 1 tablespoon Dijon mustard
  • 1 tablespoon agave nectar
  1. Shred the celery root and carrots using the grater attachment of a food processor. Set aside.
  2. In a large bowl, whisk together the mayonnaise, lemon juice, mustard, and agave nectar. Add the carrot mixture, along with the shredded red cabbage. Toss to combine.

You can serve the slaw right away, or refrigerate up to a day ahead.


How Strong Is Paper?

Strong Paper (5)

This quick lesson on engineering was an absolute delight, for kids and grown ups both. A lot of Travis’s toys are packed up due to an upcoming move to a new home, but we still have items to play with. To wit, all we needed for this experiment was computer paper and books. The question was: just how strong was our paper?

First, I asked Travis simply to fold a couple of sheets of paper into a tent shape – could that hold up a book?

Strong Paper (2)

No way! Immediate collapse.

Strong Paper (3)

Now we needed to try something more structurally sound. Wrap three sheets of paper around cans, and tape to seal. Slide out the cans.

Strong Paper (4)

Set up the three sheets of paper like columns (those ancient Greeks were onto something…). I asked Travis to start piling on the books, and to his absolute delight, the paper remained standing. We couldn’t believe how big our pile grew – 3 books, 4 books, 5 books…

Strong Paper (6)

We had laid on about 15 of slender volumes when we decided to really test things.

Strong Paper (7)

It wasn’t until we added a fat hardcover book that the paper buckled and the whole pile collapsed – to Travis’s delight!

Strong Paper (8)

Needless to say, even I was impressed with how much weight the paper held. This activity is guaranteed fun, whether or not your little engineer grasps all of the concepts involved.

Shaving Cream Prints

Shaving Print (8)

There is definite WOW factor to this project, even for grown ups!

To begin, squirt a healthy dose of shaving cream onto a baking sheet or tray. Ooh, already this project is exciting!

Shaving Print (1)

Now add a few drops of liquid watercolor to the shaving cream. Travis loved seeing the color appear against the white background, after which I instructed him to swirl the colors through the shaving cream with a skewer.

Shaving Print (3)

Next, press heavy card stock or poster board onto the mixture, one piece at a time. Travis loved helping to gently press the paper on, and lift it up for the big reveal.

Shaving Print (5)

Wipe the excess shaving cream from each piece with an old towel, and set aside to dry – what a gorgeous marbled effect!

Shaving Print (7)

The secret is that the soap in the shaving cream pushes the color away, so it is left behind after the cream is wiped off. It also leaves the paper with a velvety texture that feels amazing!

Shaving Print (9)

This paper is so pretty that you’ll definitely want to use it for gifts – perhaps bookmarks:

Shaving Print (10)

Or thank you cards:

Shaving Print (11)

Or simply hang in a prominent place to display your child’s work of art!

Shaving Print (12)

Phoneme Week 7: FR

FR week a

As with the SH phoneme, summer has us moving slow, meaning we spent about a month working our way through fun FR words and activities rather than a week. Travis latched on right away to the rather odd “fruh” sound, telling me that frog has a fruh, but tree doesn’t! I love seeing him grasp the concept of phonemes. We traced our F and R Alphabet Wipe-Clean Cards and then embarked on some learning fun.

FR week (8)

Phonics Book of the Week: Frog on a Log. This silly phonics book actually doesn’t have a single other FR word aside from the frog in the title (it rhymes many -og words instead), but FRog is repeated throughout, making it a quick sight word for Travis. And how could we pick any other book, since frogs were our main theme? Read on!

Guiding Theme: FRog

To jump right in to the frog main theme, I taught Travis how to play leap frog. We also pulled out rubber frog bath toys, who joined in bathtime for nearly 2 weeks before he tired of them!

FR week (3)

We listened:

We Made:

  • A Paper Plate FrogPaper Plate Frog (9)
  • A Feed the Frog. Travis loved first painting a tissue box green, but when this didn’t make it quite great enough, we added green construction paper with glue the next morning. Feed Frog (3)Glued-on googly eyes complete your little frog. Then have fun feeding your frog plastic insects or spiders. Feed Frog (5).JPG
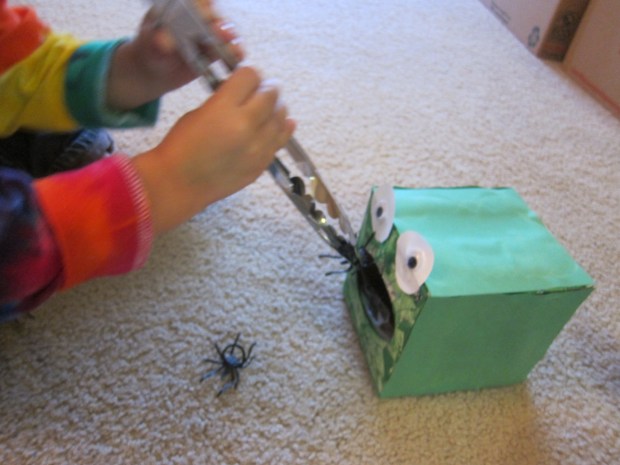
Tongs make the game great for fine motor skills.Feed Frog (2)
  • Also check out old frog games of ours, including a DIY Frog Pond and Frog Rock.

We Learned:

  • Usborne’s Beginner non-fiction book on Tadpoles and Frogs was the perfect reader for our science of the week on a frog’s life cycle. If you’re ambitious, you might consider buying a grow-a-frog kit!
  • For math of the week, we had fun measuring the leaps of frogs! We pulled out a large sheet of butcher paper and took turns leaping (i.e. throwing) the frogs. FR math (2)
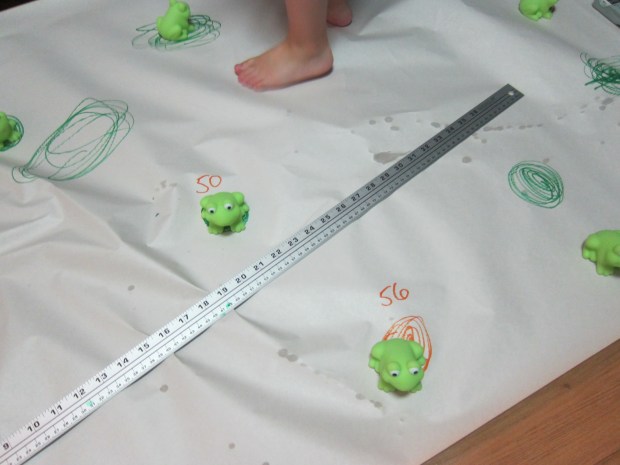
We marked a lily pad wherever one landed, and then used a ruler to see how many inches each frog had jumped. Travis had so much fun that he was busy drawing lily pads and tossing frogs long after the activity was officially “over.”FR math (3)

We Visited:

  • A local nature preserve was the perfect place to look for frogs. We spotted this big fellow outside…Audobon (1).JPG …as well as some in their rehabilitation room. Spotting tadpoles helped reinforce what we’d learn in our science of the week about the frog life cycle. Meanwhile, we soaked up plenty of FResh air while we were there.FR week (7)

We Ate:

Other Words of the Week:

  • Frame: We pulled out the chalkboard paint and had a blast painting a simple wooden frame. This craft would make a fantastic gift. Perhaps for a FRiend?Chalkboard Frame (6)
  • Fraction: Make fraction plates! Keep it simple for a preschooler, but you can also talk about fractions as you divide food all week – pizza slices into eighths, for example, or a sandwich in half.Plate Fractions (5)
  • Free: This was my personal favorite word of the unit, since it led us to come up with ways to have free (or nearly-so) fun. Examples from our summer bucket list of free enjoyment included: a car wash;car wash (1).JPG browsing a farmers market;
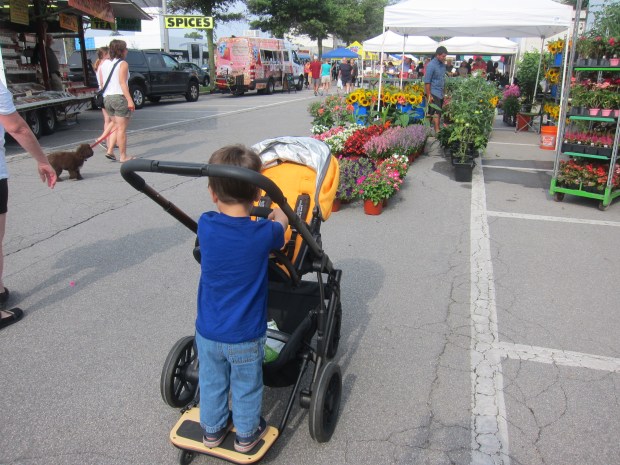
FR week (19).JPG blowing bubbles;FR week (11) taking an inch hike (look for things that are one inch or less, surprisingly harder than you’d think!);FR week (22) having a shaving cream throw-down (free if you steal Daddy’s canister);FR week (26) and a picnic in a park.FR week (28)
  • Freeze: A perfect word for a hot summer month. First we simply FRoze a tray of ice cubes – and then had fun thawing it! FR week (17)You can also play a good old-fashioned game of
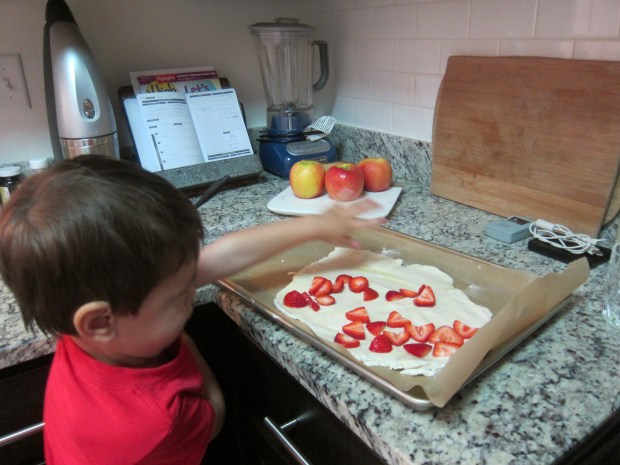
 freeze dance.
  • Fresh: We had fun exploring the properties of fresh vs. salt water. This is also the perfect chance to introduce kids to the wonders of fresh homemade bread – fresh pretzels were the perfect yummy example. Then – perhaps the most magical moment of our FR unit – we picked fresh berries at a local farm!FR week (18)
  • Friend: Here’s the perfect chance to talk about the meaning of the word friend, since preschoolers are beginning to form early bonds and playing together instead of parallel play. One cute book to read is That’s What Friends are For by Florence Parry Heide. So have a playdate this week, and while you’re at it, sing the silly song Be Kind to Your Web-Footed Friends.
  • Frown: We took advantage of homemade playdough to make frowny faces. I added FReckles too! Making faces, whether in playdough, clay, or marker is a great vocab builder for expressions, emotions, and facial features.FR week (31)
  • Frost: Even though it was wildly out of season, Travis loved watching clips of Frosty the Snowman. FR week (24)Then we made homemade frost on our windows!