Fall Bucket List Part I

Fall Bucket (3)

Happy Autumn everyone! It’s my favorite season, and that has my head full of activities I hope to share and enjoy with Travis before the season ends. To make sense of all the ideas, what better way than to put it all on paper? This post is the first of a two-part series; the second will include images and tips from each item on our bucket list that we’ve checked off… But I wanted to make sure to post the Bucket List itself now so you can follow along on this fall journey!

I found a few suggested templates online, but none of them contained all of the items that I was anticipating, and most contained some activities that didn’t interest us. Instead, it was easy to type up the activities we wanted in a Word document, playing around with fun fonts.

Fall Bucket (1)

Since we don’t have a color printer, I printed the template in black and white, but this gave Travis the chance to fill it in with autumnal colors as I read off each item to get him excited about activities to come.

Fall Bucket (2)

“Can we do them all today?” he asked. Not quite!

Fall Bucket (4)

I filled in the final colors and hung the bucket list on our wall, and we can’t wait to check off the first one.

Fall Bucket (5)

Pasta Mosaic

Pasta Mosaic (14)

It’s finally happening… My little boy who used to happily jump at any art project I suggested has his own agenda now. And while I lament that he’s not quite so pliable or amenable to activities I’ve anticipated, I also am celebrating this three-year-old independent spirit and the imagination that accompanies it.

Cue this project as the perfect example. I thought sorting and making art with pasta might nicely fill some time on a Sunday morning since I had several boxes of dry pasta in the pantry. Sorting is a great skill for little fingers and minds, but silly me, every pasta I had was a variation on penne…in different lengths! It turned out we had regular penne, medium-sized pennette, and super-short ditalini.

Pasta Mosaic (1)

This turned the sorting into a neat challenge based more on length than shape, so Travis actually sat happily to help me sort for a while.

Pasta Mosaic (2)

My suggestion to paint the pasta after was met with indifference though! A bit miffed, I pulled out glitter paint. That made things decidedly more sparkly and fun, and we discovered that painting penne is quite silly and tricky since they roll.

Pasta Mosaic (3)

What worked best? Dabbing at them on a piece of wax paper and leaving them to dry? Tossing them into a whole bath of paint and swirling them around?

Pasta Mosaic (6)

Travis decided it was more fun to paint the bowls holding the paint, but eventually we had lots of sparkly painted pasta, and left it to dry.

Pasta Mosaic (5)

The final idea was to turn all that painted pasta into a mosaic, but Travis was completely uninterested…until I suggested that the glue was caulking, and the pasta was “ants” coming through the floor (a game based on a recent, real-life scenario….).

Pasta Mosaic (9)

Well then he couldn’t get enough! We caulked and caulked, and filled puddles of glue with “ants” trying to get into our kitchen.

Pasta Mosaic (10)

When I asked if he thought our paper was full enough, he pointed to the remaining pasta pieces and adamently told me, “No Mom, still more ants.”

Pasta Mosaic (11)

Once we’d used up all the pasta, he needed to “caulk” two more pieces of construction paper before he tired of the game.

Pasta Mosaic (13)

So there you have it, a valuable lesson on my son’s ever-growing independence, but also a reminder that incorporating his latest interests and imaginative play might still just get him to sit and make art with his mama.

Pasta Mosaic (12)

Greek Lettuce Wraps

Greek Wrap (2)

One lettuce wrap makes the perfect size meal for my preschooler – simply increase portion size based on the age and appetite of your little (or not so little) one! I like to use Nate’s classic flavor vegan meatballs.

Ingredients:

  • 1 (10-ounce) package meatless meatballs
  • Bibb lettuce leaves
  • 1/2 cup couscous
  • 1/2 cup water
  • 1 cup halved cherry tomatoes
  • 1 chopped cucumber
  • 1 tablespoon red wine vinegar
  • 2 tablespoons olive oil
  • 4 ounces creamy vegan cheese (such as Miyoko’s Creamery)
  • 1/2 cup plain non-dairy yogurt
  • 1/2 teaspoon grated lemon zest
  • 1 tablespoon fresh-squeezed lemon juice
  • 1/2 teaspoon chopped fresh oregano
  • Kalamata olives
  1. Heat the meatballs according to package directions; set aside. Rinse the lettuce leaves and pat dry; set aside.
  2. Meanwhile, bring the water to a boil in a saucepan. Add the couscous, then cover, remove from heat, and let stand for 5 minutes. Fluff with a fork and transfer to a large bowl.
  3. Add the tomatoes and cucumber to the bowl. Whisk together the vinegar and olive oil, then pour over the couscous mixture, tossing to coat. Set aside.
  4. In a blender, combine the vegan cheese, yogurt, lemon zest, lemon juice, and oregano. Process until smooth.
  5. To assemble the lettuce wraps, top each lettuce leaf with about 1/2 cup couscous salad. Finely chop the meatballs, and divide evenly among the lettuce wraps. Drizzle with the cheese sauce and sprinkle with chopped kalamata olives to taste.

Greek Wrap (1)

Leftover cooked meatballs? We love to simply dice them up and add to bowls of spaghetti, jarred sauce, and a sprinkle of vegan Parmesan for tomorrow’s lunch or dinner.

Spaghetti and Meatballs


Tablecloth Clip Creatures

Tablecloth Clip (6)

A recent dot painting extravaganza reminded me that it’s useful to cover our work space (also Travis’s table for eating), when a craft gets particularly messy; a tablecloth clipped onto a table does the job in a pinch – so why not make the clips to hold it functional and adorable?

Tablecloth Clip (1)

To craft these little creatures, we used small pom poms and clothespins. Travis actually lost interest in forming insects quite quickly when he discovered that he could pick up pom poms with the clothespins – but this was such great practice for his fine motor skills that I was happy to let him continue!

Tablecloth Clip (2)

Meanwhile, we ended up with a variety of bugs, including a butterfly, caterpillar, and bee. Older kids will definitely love mapping out how their creatures look, and selecting which materials work best for which insect. Construction paper made for easy wings, and pipe cleaner pieces were perfect for antennae.

Tablecloth Clip (3)

We’ll be busy and buzzy as bees at our craft table now!

Tablecloth Clip (5)

When not in use, our little creatures love hanging out at the windowsill.

Tablecloth Clip alt.JPG


Peanut-Butter Dip


PB Dip (1)

Veggies and dip are a match made in heaven, and this one gets a nutritious kick from peanut butter and coconut milk. Use full-fat coconut milk for the best results, not the light version.

Ingredients:

  • 1 (13.5-ounce) can coconut milk
  • 1/2 cup creamy peanut butter
  • 2 tablespoons fresh-squeezed lime juice
  • 1 tablespoon low-sodium soy sauce
  • 1 tablespoon brown sugar
  • 1/2 teaspoon grated ginger
  • 1/8 teaspoon salt
  1. Combine all of the ingredients together in a saucepan over medium heat. Cook for about 5 minutes, until smooth and thickened.
  2. Cover and refrigerate until ready to serve – the mixture will continue to thicken as it cools.


PB Dip (3)

We like it best with carrot sticks for dipping, but broccoli florets, bell pepper strips, and cucumber spears would all be great choices.

PB Dip (2)


Q-Tip Painting Indian Corn

Qtip Corn (10)

It’s official, the fall equinox is tomorrow, meaning it’s the start of my favorite season, and that we need some autumnal decorations around our home! What better way to celebrate the harvest and this fall crop than with a cute little craft involving real hay?

I cut half ovals from yellow construction paper to be ears of corn, and shapes from brown construction paper to be the husks.

Qtip Corn (2)

Travis hasn’t been so into painting projects lately, so to keep this one novel, we use q-tips as our paintbrushes! Little dots of red, yellow, and orange gave our corn the speckled appearance of Indian corn.

Qtip Corn (4)

Glue your husks to your corn shapes, and let dry.

Qtip Corn (6)

The biggest hit by far was when I told Travis we’d add real hay to our corn husks. Look for it at any craft store or farmers’ market this time of year.

qtip corn (8)

Definitely the perfect finishing touch.

Qtip Corn (9)

Fire Safety Drill

fire drill (9).JPG

This project feels far and away the most important I’ve ever posted to this blog. Travis has had a fear/fascination with firefighters lately, as so many young children do. He adores their heroics and trucks, but is scared of alarms (especially because our old building had one too many false alerts go off). My tactic on all this has been to hush those fears (“What if the alarm goes off?” “It won’t, sweetie, it will stay quiet all night,”) instead of to address the reality that it very well could, and for a real reason.

A recent article in Parents magazine shamed me straight. Just because our old building had false alarms was no reason to go on thinking every alarm in Travis’s life will just be crying wolf. He didn’t need me to coo sweet reassurances – he needed to be empowered with knowledge!

We followed Parents’ suggestions, and it was a huge hit. First, draw a map of your house, including how to get out of each room – no need to be fancy with your drawing, just make sure your child understands what’s where on the graphic.

fire drill (5)

Now we needed to find two ways out of every room. This was a fun puzzle for Travis, more obvious in some places (a back patio door!)…

fire drill (2)

…and trickier in others – aha, a window!

fire drill (1)

The next step is to decide on a safe place where your family can rendezvous and wait for each other and the firefighters. Our building’s mail kiosk is a great landmark, even for a three year old. We added our “safe zone” to our drawing.

fire drill (4)

Finally, it was time for a drill! Travis loves the timer on my phone, so we set it for two minutes. Could he and I make it to the safe zone before it beeped?

We each started from our bedrooms…

fire drill (6)

…made it to the outside hallway…

fire drill (7)

…and celebrated our success!

fire drill (8)

Travis loved it all that he play-acted the drill in our living room for ages after we were done, and I caught him drawing his own escape “map.”

fire drill (10)

Now when he asks me, “What if the fire alarm goes off?” I still first reassure him that the chances are slim. But if it does go off, he is empowered with the answer to his own question. “If it does,” I asked him, “What would you do?”

“Meet out the doorway at the mail kiosk!”


Ocean Crate

Koala ocean

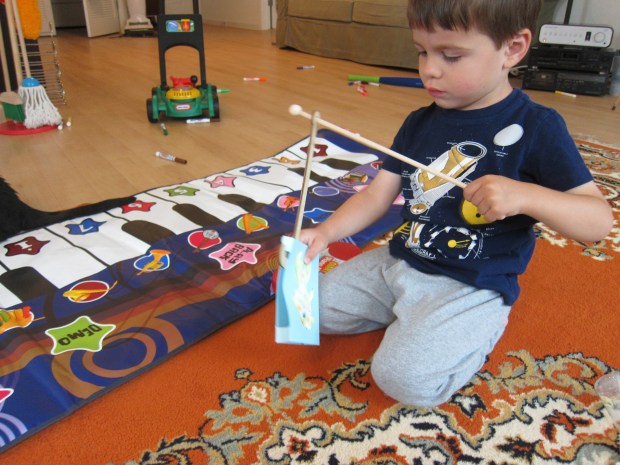
I was a tad dismayed when I saw we’d received the Ocean crate from Koala Crate this month, only because we just finished up an ocean-themed set from Little Passports and I didn’t want Travis to have Ocean fatigue. I needn’t have worried however, because we opened it up and immediately spotted a spray bottle inside. Say no more, Travis was hooked! It was quite clever of Koala to make use of water as a component of two out of three projects, in this crate about a watery world.

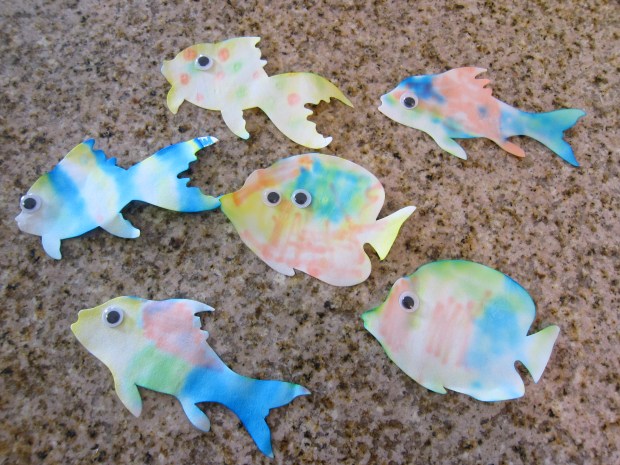
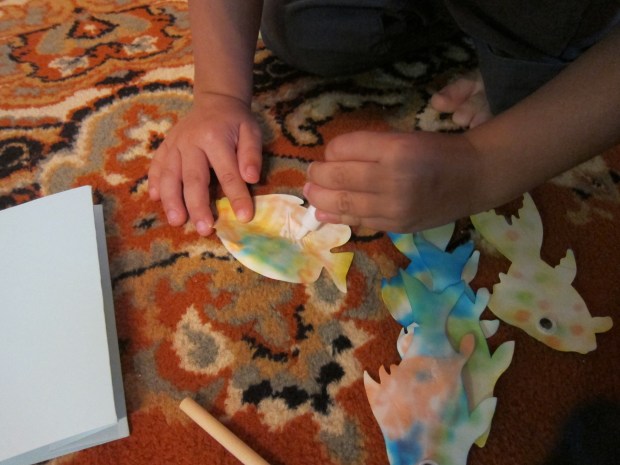
First up was making watercolor fish. The fish shapes were pre-cut on filter paper, but you could also try this at home by tracing a fish shape onto coffee filters and then cutting out. We colored our fish with the provided markers; a little trial and error showed that the more filled in the fish is, the better this craft works.

Koala Ocean (1)

Travis scribbled, and I included a few fish with polka dots and stripes.

Koala Ocean (2)

Then comes the real fun: Place your fish on a paper towel, and spritz away!

Koala Ocean (5)

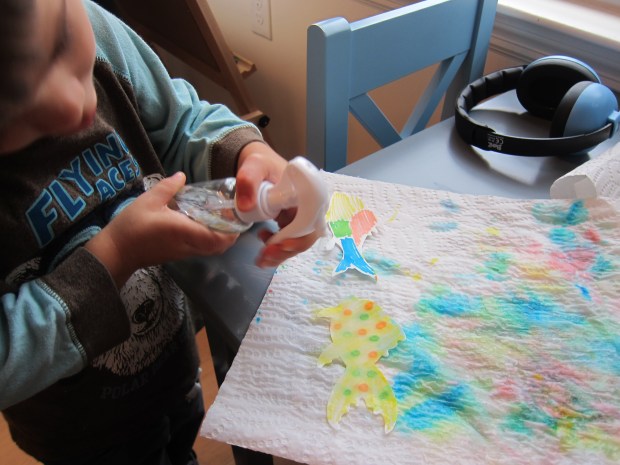
The marker colors will bleed together for a pretty result. Incidentally, we loved the gorgeous marker effect left behind on the paper towels, too:

Koala Ocean (4)

The moment we laid our paper fish on a final piece of paper towel to dry, Travis asked politely, “Can I go spritz the bathroom tile?” Permission granted! I was really pleased with Koala Crate for having included an item that sparked Travis’s joy and entertainment beyond the craft itself. We also appreciated that the markers will last us for quite some time.

Koala Ocean (6)

When I could momentarily capture his attention again, we finished our watercolor fish with googly eyes.

Koala Ocean (13)

He was almost incredulous when I said there was another project in the crate involving the spritz bottle. This was a foam puzzle that featured 6 animal shapes to pop out, which then fit back together in an intricate design.

Koala Ocean (7)

I thought he’d be so excited for the spritzing part that he’d poo-poo the puzzle, but he took pride in following along on the provided diagram and fitting the shapes together.

Koala Ocean (8)

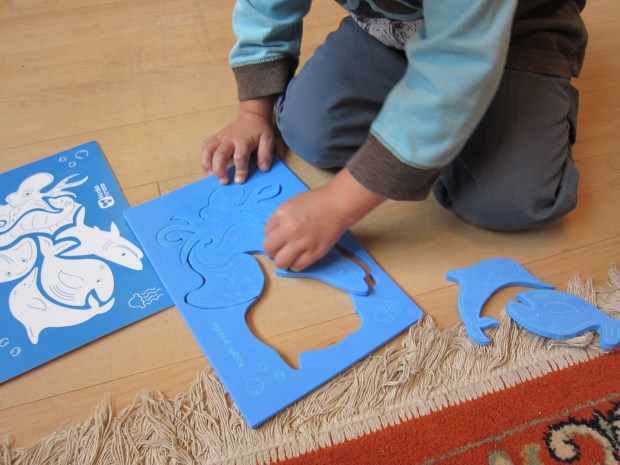
(For older kids, consider not looking at the diagram, for an extra challenge!).

Then we raced to the bathroom for the real fun and spritzed all of the foam pieces. Neat, they stick!

Koala Ocean (12)

He had so much fun spritzing them that I simply placed a towel underneath to catch all the water and let him enjoy. Even the foam frame sticks – target practice!

Koala Ocean (10)

There was neat science behind this, too, as he needed to understand that water droplets were required if he wanted the foam to adhere to the tile. I couldn’t resist catching the moment on video:

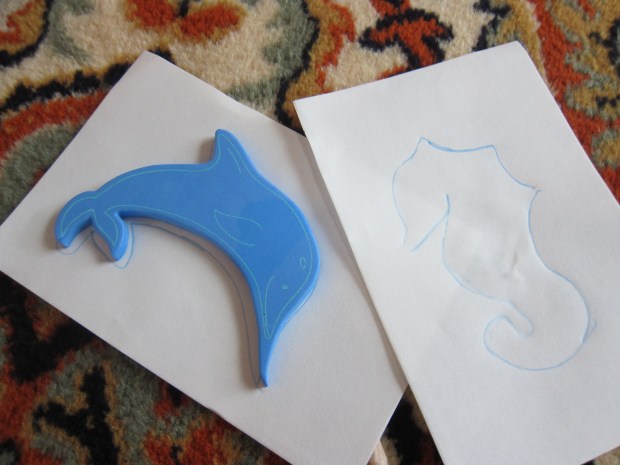
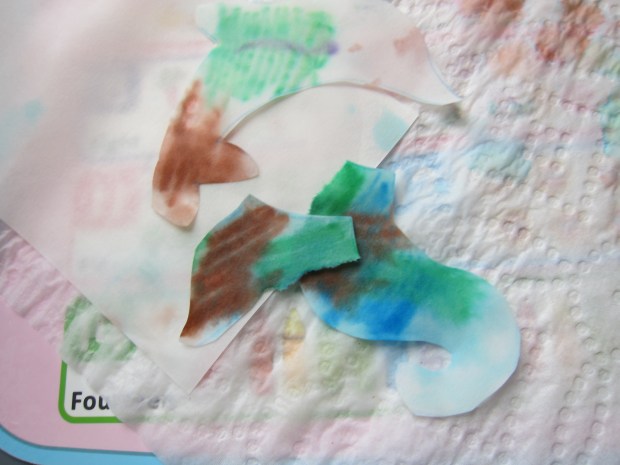
If you can tear your child away from the tub, you can also take those foam pieces and trace them onto additional pieces of filter paper (provided in the crate), to make more watercolor sea creatures.

Koala ocean (19)

At this point Travis was so into the spritzing that our paper got soggy and tore apart in an instant. Ah well!

Koala ocean (20)

The final game was to use our watercolor fish and go “fishing.” I’m still not quite sure yet how I feel about childhood fishing games, but since Travis hasn’t really understood the concept yet, for now we play… The kit came with a glue dropper that was just right for little hands, and blue cardstock to glue the fish onto (I guess intended to depict water). After gluing our fish to both sides of the blue cards and gluing together our fishing rod, we took turns trying to hook the fish cards.

Koala Ocean (14)

Even without the added challenge of a string between rod and hook, Travis found it tough. We really have yet to find a fishing game with a mechanism that’s fun, instead of frustrating.

Koala ocean (18)

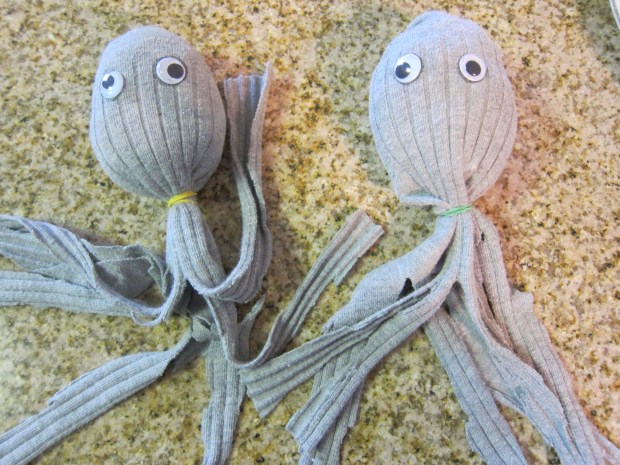
For an additional craft, we tried out the kit’s suggestion of a Sock-topus – a D.I.Y. octopus made from an old sock!

socktopus (4)

I didn’t have any proper roving or stuffing in the house, but we pulled cotton balls apart until they were slightly separated and that worked just fine.

socktopus (1)

Secure the head with an elastic band, then cut the bottom of the sock until you have eight tentacles.

Somehow we ended up with a miscounted sept-opus, which Travis thought was just about the funniest thing ever.

socktopus (3)

Glue on goggly eyes as the final touch.

socktopus (5)

Thanks for the watery fun, Koala Crate!

Indian Cauliflower Sheet-Pan Supper

Indian Cauliflower (2)

Lining a baking sheet with parchment paper makes clean-up a cinch for this one-pan meal.

Ingredients:

  • 1 head cauliflower
  • 3 tablespoons olive oil, divided
  • 1 teaspoon curry powder
  • 1 teaspoon chili powder
  • 1/2 teaspoon salt
  • 1 (15-ounce) drained and rinsed can chickpeas
  • 1/2 cup cashews
  • 1/4 cup raisins
  • 2 shallots, sliced
  • 1/2 cup plain non-dairy yogurt
  • 2 tablespoons mango chutney
  • Pita Bread
  • Fresh cilantro
  1. Cut the cauliflower head into florets. On a parchment lined baking sheet, toss together the cauliflower, 2 tablespoons olive oil, the curry powder, chili powder, and salt. Roast at 400 degrees F for 15 minutes.
  2. Meanwhile, combine the chickpeas, cashews, raisins, remaining tablespoon olive oil, and shallots in a bowl. Add to the baking sheet and roast for an additional 15 minutes.
  3. In a small bowl, whisk together the yogurt and mango chutney.
  4. To serve, warm up store-bought pita bread and cut into halves. Serve the cauliflower dinner alongside the pita bread, topped with the yogurt sauce, and sprinkled with cilantro for garnish if desired.

Indian Cauliflower (1)

Rainy Day Art Picnic

Rainy Picnic (7)Our thoughts have been with those in parts of the world and the country ravaged by hurricanes this month. We’re incredibly thankful that Tropical Storm Jose was only a mild disturbance in our neck of the woods, and highly cognizant of others who were far less fortunate…

The only real inconvenience from our rainy windy day was that we needed to find amusement indoors, and this beautiful “picnic” spread helped make a drizzly afternoon magical.

Rainy Picnic (1)
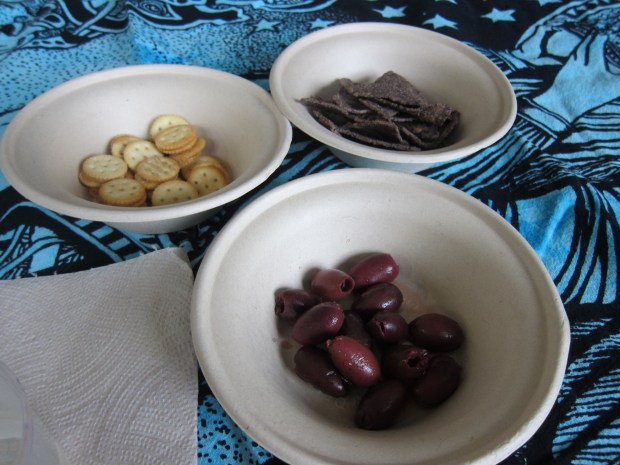
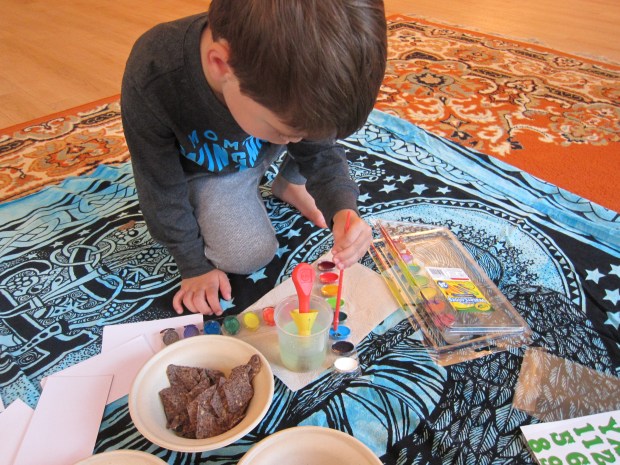
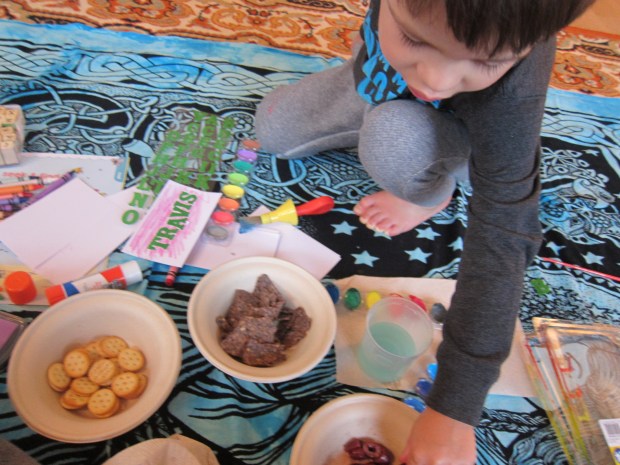
While Travis was napping, I prepared the picnic – a blanket on our living room floor, along with art supplies and index cards on which to produce preschool-sized masterpieces.

Rainy Picnic (3)

Don’t forget the picnic fare! We had chips, peanut butter crackers and olives. Little tea sandwiches would be adorable, too.

Rainy Picnic (2)

When Travis woke up and saw the picnic, he ran right to it. Watercolors were a big hit.

Rainy Picnic (4)

He told me this one was a painting of our cat, with a body, tail, and whiskers – definitely the closest I’ve seen him come to realism.

Rainy Picnic (5)

Don’t forget to snack in between producing your works of art, of course.

Rainy Picnic (6)

We left all our artwork to dry, after which we could stand back and enjoy our neat little art gallery. A vivid display on this gray day!

Rainy Picnic alt.JPG