Have a Family Meal

Family Meal (3)

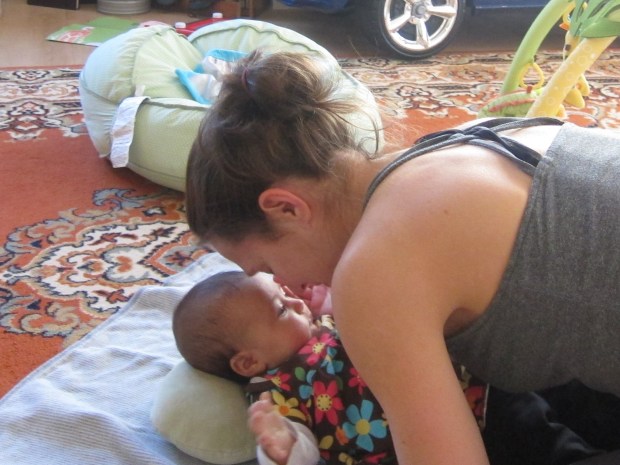
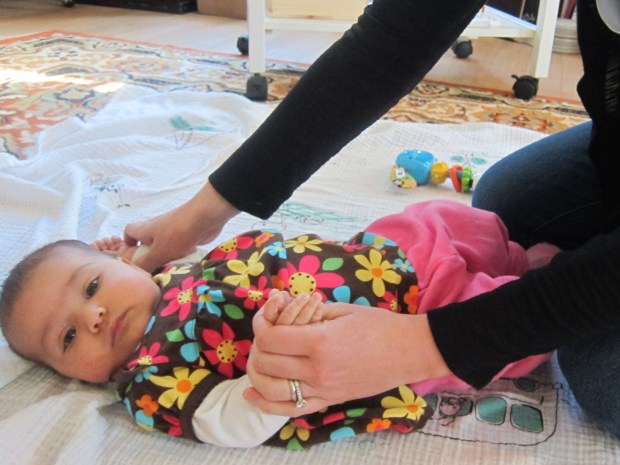
If you’re in step with me on this baby game journey, then your baby is three-months old and still confined to milk alone – whether breast or bottle. So it’s hard to imagine that solid meals are but a few more months away! To introduce Veronika to the idea of family meals, we’re making a point of including her at mealtimes, even though she can’t partake of the food yet.

I will confess, we’re not the model family when it comes to “family dinner.” Travis eats early, and his dad and me eat after he’s asleep. But i always make sure I sit with him at his mealtime, and we read a magazine or do an activity workbook together. I can’t wait until my kids are old enough to have this be their special sibling mealtime together!

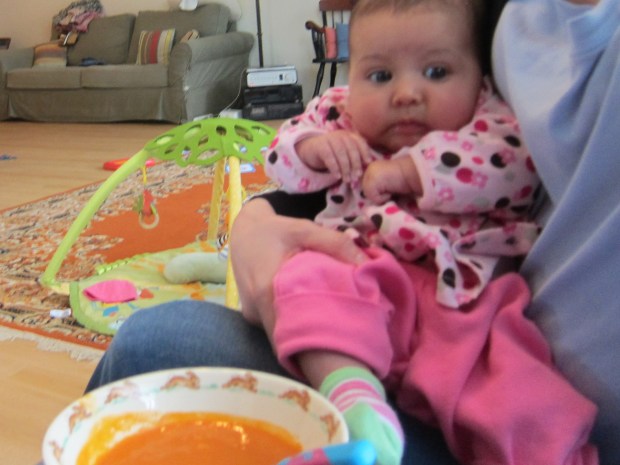
So here comes Veronika. Sit your baby right at the table so he or she is part of the meal, whether on a lap or baby chair.

Veronika gets to practice holding her own spoon!

Family Meal (1)

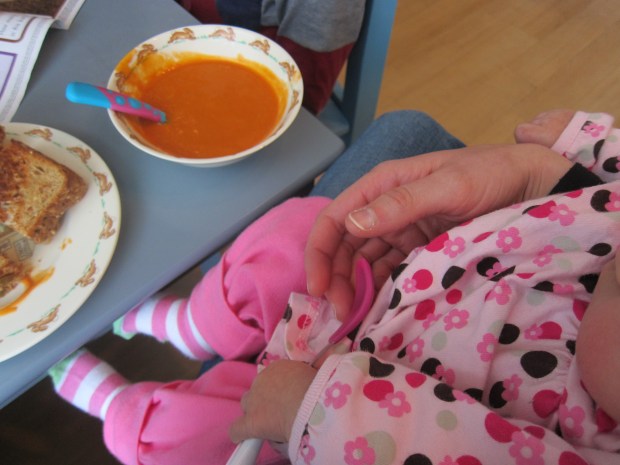
Babies will benefit just from sitting here, taking in the sounds of conversation and the visual cues of eating.

Family Meal (2)

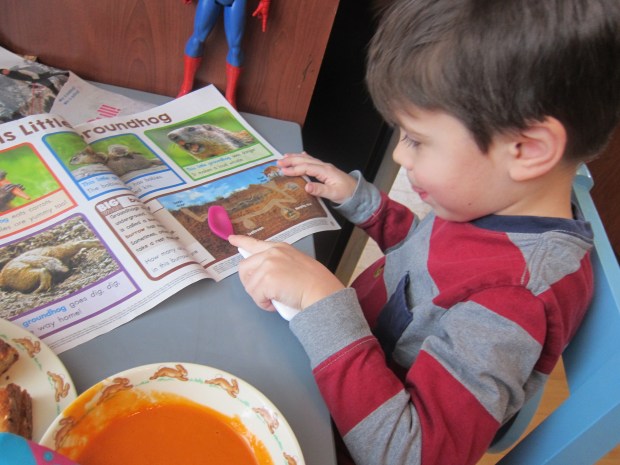
You can also talk about the tastes or textures of what big members of the family are enjoying.

Family Meal (4)

In sum, I love perching Veronika on my knee for mealtime now. She’s part of the family, and we want her to know it!

Exercise Cube

Exercise Cube (4).JPG

Stuck inside on a winter day and need to get moving? Look no further than this game to get those kiddos some exercise, no playground required!

I gave Travis an empty tissue box, and told him we needed to think up an activity for each side of the cube. This was a nice quick math lesson, since we counted to see how many sides our cube had: 6!

Exercise Cube (1)

Travis was really into brainstorming the activities, and actually came up with some I wouldn’t have thought of, including… yoga! Great idea. By the end, our list included:

Yoga

Jump up and down

Run in a zig-zag

Touch your toes

Roll onto your back

and Spin in a Circle

Older kids can have fun drawing a picture to go with each caption. Travis liked my little drawings; no points for artistry here, I stick to stick figures, but these got a giggle.

Exercise Cube (2)

We used a glue stick to attach one activity per side of the box. It dried in no time, and then it was time to play.

Exercise Cube (3)

Travis loved it! We took turns tossing the big dice, and got quite silly, especially when mommy had to spin multiple times in a row, or when he got to run in a zig-zag (his fast favorite).

Here he is spinning:

Exercise Cube (8)

And rolling over:

Exercise Cube (9)

Uh oh, toe touching was tricky for mama…

Exercise Cube (7)

…but a cinch for Travis.

Exercise Cube (6)

The only note of caution here: He wanted to keep playing long after I was winded! Needless to say, we got in our exercise on this gray cold day.

Exercise Cube (10)

Kiss Me Game

Kiss Me Game (1)

Today Veronika and I got silly with our kisses! This is a sweet little activity that builds on the Kisses to Learn game we played when she was younger. It builds vocabulary at the same time that it promotes bonding.

The goal was to see what we could kiss with, other than our lips! First was a nose to nose nuzzle kiss.

Kiss Me Game (3)

Then I rubbed my cheek against hers for cheek kisses! Forehead-to-forehead also produced a big smile.

From there, you can get really silly. Can your eyelashes kiss? Your knees? Your chins? Your ears?

Kiss Me Game (4)

Name each body part as you do the “kiss”, and get ready for smiles of delight. I loved this idea so much that I hope to continue it. As she gets older, maybe we’ll make chin kisses part of our nightly routine before bed.

Kiss Me Game (5)


Healthy Plate

Healthy Plate (4)

Travis has begun asking questions about why we eat vegan, questions which I’m always more than happy to answer, whether from a health standpoint, or how it helps the earth, or how it’s good for the animals.

As far as health goes, it can help kids to have a visual, so today we set up a little game and thought about what a healthy meal looks like. Obviously this works in every household, whether you’re vegan or not, but it drives home the idea that many foods (most, in fact!) are vegan, and everyone benefits from filling their plate with plant-based items like fruits, veggies, legumes, and grains.

As a bonus, there’s some fractions involved. First I asked Travis to draw a line dividing his plate in half. He had to think about this for a moment before making a big blue line. That was exactly right, I told him, since at every meal we want half of our plate to be filled with veggies and fruits.

Healthy Plate (1)

Next he divided one of those halves with a second line, and I told him he’d made quarters. One quarter was for grains and one for protein. We talked about what both of these words meant; sometimes we forget the obvious, like how Travis didn’t realize bread was made from grains.

Next we filled our plates! On the first we used real food. I presented him with different foods, and he had to decide where each went.

Healthy Plate (2)

He was so thrilled with how our plate divided up, and asked if he could eat it all; he almost couldn’t believe it when the answer was yes, why not!

Next, we went through a magazine and cut up pictures to fill each of our categories, and glued these onto a second plate. This gave us a slightly more permanent visual to refer back to.

Healthy Plate (3)

Obviously this is a simplified way to talk about a healthy diet, but it’s a great way to get kids thinking about it.

VIsual Reassurance

Visual Reassure (3)

If your infant has a hard time on car rides, whether that means crying for you, simply fussing, or generally seeming to miss you, then this game is for you!

It can be tough for infants who need to ride backwards, since they can hear your voice, but they can’t see you. I love having a mirror hanging in the backseat so I can see Veronika, but that doesn’t mean she can see me!

Cue this adorable idea: tape up pictures of mom, dad, and other key family members.

Visual Reassure (1)

I had cheap prints made at the drugstore, and first let Veronika take a look at them. She was instantly really clued into them, clearly recognizing faces of her caregivers.

Visual Reassure (2)

A little tape and voila, I had a collage of family members up on the mirror. She seemed to love gazing up!

Visual Reassure (4)

If you want to make the pictures more permanent, laminate them before hanging.

I love that this gives her something interesting to look at, now, as well providing reassurance that I’m there, even when she can’t see me at the wheel. How do you keep your infant happy in the car? Please share in the comments!

Easy Goulash


Goulash.JPG

I’ve been looking for a way to beef up Travis’s pasta dinners, and it turns out that adding vegan, well, beef, did the trick! This is a simplified take on the Hungarian dish of goulash. Parents magazine tells us the stew dates back to the ninth century, and we were more than happy to eat this updated version.

Ingredients:

  • 1 tablespoon olive oil
  • 1 cup chopped onion
  • 1 (14-ounce) package ground meatless beef (such Lightlife Smart Ground)
  • 2 tablespoons tomato paste
  • 1 (15-ounce) can tomato sauce
  • 1 (14.5-ounce) can diced tomatoes
  • 1 cup water
  • 2 teaspoons oregano
  • 1 teaspoon paprika
  • 8 ounces ditalini pasta
  • 1/2 cup shredded Daiya cheddar
  1. Heat the olive oil in a large pot over medium heat. Add the onion and cook for 5 minutes, until softened. Break the beef into crumbles and add to the pan; cook for an additional 5 minutes, until browned.
  2. Stir in the tomato paste, then add the tomato sauce, diced tomatoes, water, oregano, and paprika. Bring to a boil.
  3. Stir in the ditalini; cover, reduce heat, and simmer for 15 minutes, until the pasta is tender.
  4. Ladle onto plates or bowls, and top the servings evenly with the cheese.


Q-Tip Skeleton

Qtip Skeleton (10).JPG

This little craft is great for kids who learning about the body and bones. Big kids can be really exact with it, mapping out locations for the humerus, femur, and more. For my four year old, it was fun just to talk about our bodies and bones, and help him see a skeleton take shape.

To set up the craft, I cut out a skull shape from white construction paper and glued it onto a piece of black paper.

Qtip Skeleton (1)

Next we needed to make bones! To do so, I cut q-tips into varying lengths, including a few that I left whole for bigger bones in the body. This is a fun step because q-tips are quite hard to snip through, which means they go flying when you cut them. Travis became the bone-gathering doctor!

Qtip Skeleton (2)

I asked if he wanted to decide where to place each bone, or preferred to have me lay down lines of glue for him to follow. He asked for the latter, but then it was a great game for him to match the length of my glue stripe to a properly sized “bone.”

Qtip Skeleton (4)

He loved doing the hand. “Look, it’s my pinkie finger!”

Qtip Skeleton (6)

This was a great chance to talk about the differences in the length of our bones. We needed to find a long one for the femur, I explained, which was the biggest bone in the body.

Qtip Skeleton (5)

It was also neat to touch our real, corresponding bones as we worked. He loved feeling his spine.

Qtip Skeleton (7)

When the skeleton looked almost done, I asked him what we still needed. “Hip bones!” he decided, touching his own, so we glued down a few more pieces.

Qtip Skeleton (8)

So proud of my little scientist putting this one together.

Qtip Skeleton (9)

Aquarium Adventure

Aquarium (9).JPG

You don’t need a screen to provide your infant with moving entertainment; just pause in front of a fish tank instead!

Now, a caveat is needed here. I do not advocate for fish swimming around and around in small bowls, or for locations with dirty tanks. But some places do truly have beautiful displays, including our local library and pediatricians office. Should you find yourself in front of a similarly-cared-for tank, simply aim your child’s eyes at the fish, and talk about everything you see.

That’s free entertainment of course, but if you want to take things a step further, bring your baby to the nearest aquarium. Today, Travis and I took Veronika on a field trip to marvel at the colors and motions of the ocean!

Aquarium (1)

Travis loved pointing out the aquatic life to his little sister.

Aquarium (2)

And she in turn stared wide-eyed.

Aquarium (11)

As she gazed, I described everything she was seeing. You can mention colors (especially on vivid tropical fish), as well as patterns like stripes or spots.

Aquarium (8)

We also talked about movement, the various sizes of the different fish, and more.

Aquarium (4)

Whoops, the sharks might have been a little too scary!

Aquarium (6)

But they sure were cool.

Aquarium (7)

In sum, you can’t go wrong with an aquarium adventure. Veronika was able to see so many new things in one day, and to marvel at motion and light and color. Your child might not understand what a fish is yet, but will love the opportunity to learn.

Aquarium (10)

Baby Sit-Ups

Sit Ups (3).JPG

We’ve been working on strengthening Veronika’s little muscles in various cute ways, and I highly encourage you to add this method to the list!

Start with your infant lying on a soft surface in front of you.

Sit Ups (1)

I gave her a little count of three each time – 1, 2, 3…

Sit Ups (2)

….then gently and firmly grasped her hands and pulled upwards. Veronika grinned each time we repeated this motion!

Sit-Ups (4)

We paused at the top for big coos and smiles, then I gently lowered her back down.

Sit-Ups (5)

If your baby doesn’t have great head control yet, be sure to place one hand behind the head and neck on the way back down.

Do a few crunches, then rest! Seven minute abs just got a whole lot cuter.

Bouncing Baby

Bouncing Baby (2)

In busy days with babies, it can sometimes feel like they’re passed from arm to arm or set some place to lie down all day. But this quick little activity is a welcome chance to sit upright, so your little one can feel his or her body in a different way.

Pull out a stability exercise ball or a beach ball. Securely place baby on top, holding them around the middle, and give a few little bounces.

Veronika looked a little uncertain on the first try!

Bouncing Baby (1)

But then she really got into the bouncing. Not only will this help your child understand where they are in space, but it strengthens little tummy muscles.

If your child seems up for it, turn them onto their tummy on top of the ball too; it can encourage babies who haven’t lifted their head during tummy time yet to do so.