Invisible Graffiti

Invisible Graffiti (5).JPG

Let’s face it: Kids are sometimes drawn to things that are taboo, and sometimes it’s good to have an outlet for that naughtiness…but without the consequences!

That’s where this adorable game fits in, allowing kids to have the thrill of painting “graffiti,” but without any visible evidence.

First, I cut an artist’s palette for Travis out of cardboard.

Invisible Graffiti (1)

Paint on circles of color (ideally in as many colors of the rainbow as you can) using nail polish. This will make the “paint” look shiny even once it dries.

Invisible Graffiti (4)

I let Travis have a second piece of cardboard and permission to paint with the nail polish, because this was an added element of fun.

Invisible Graffiti (11)

(Note: I love the shades from the No Miss brand, which are free of all the yucky stuff like formaldehyde and also cruelty-free.

Invisible Graffiti (3)

Now it was time to set my graffiti artist loose! We headed out in the morning sunshine to make trouble. Here he is heading over to paint the fence.

Invisible Graffiti (6)

Travis “painted” all over the bushes, and the patio.

Invisible Graffiti (7)

Can’t you just see the glee?

Invisible Graffiti (8)

He loved finding places to add his graffiti.

Invisible Graffiti (9)

Uh oh, littering!

Invisible Graffiti (10)

In sum, he had a blast getting his naughtiness out with this game. And the best part is that there is no mess left over.


Have a Play Date at Home

Play Date (2)

One thing little babies often see very little of? Other little babies!

This can be true whether your child is your first born, and thus most often in the company of adults, or if he or she is a second child, who gets to see lots of big kids, but probably not so many small ones.

One great way to introduce your baby to another baby is to host a playdate at home – this will be much less overwhelming than a group class, even though there are plenty of organized activities at local libraries or gyms for babies about 6 months and older.

So today, Veronika and I played hostess!

The babies loved checking each other out, reaching out cautious hands and staring at each other with big smiles. Hey, somebody else my size! Veronika seemed to say.

Play Date (1)

We set up a bigger-than-usual tummy time station with some favorite toys where the two babies could look at each other as they got in their exercise and play – built in visual stimulation!

Play Date (3)

It turns out Veronika was fussier than normal during our playdate, perhaps sensing that something was different. But eventually both babies were contentedly playing on mommy’s laps, chewing on toys and vocalizing to each other. Perhaps they even understand each other’s gurgles and coos!

Meanwhile this is a great way for you as a parent to connect one-on-one with a family member or friend whose child is close in age to yours. I guarantee that you will have lots to bond about!

Easy Backyard Spy Fort

Backyard Fort (4).JPG

Travis has been into being either a secret agent or a ninja lately – so we needed a proper screen from which he could spy on the goings-on about the neighborhood, of course!

Plant two lengths of PVC pipe into the ground, spaced wide enough apart for an old pillowcase to drape over both. I bought pre-cut lengths of pipe at Home Depot that were two feet long, but wish I had opted for longer – we really had to crouch behind our fort!

Backyard Fort (1)

Cut an eye hole in the pillow case, then slip over the PVC frame.

Backyard Fort (2)

You can now camouflage your fort with paint. If you want to be sneaky, make sure to paint in shades of brown and green. Mostly though, we just had fun painting on this novel canvas, so our colors were perhaps a bit too bright for any actual hiding.

Backyard Fort (3)

Now see what you can see!

Backyard Fort (6)

As mentioned, our fort was quite low to the ground, which made spying tough. But Travis liked peeking through at all the activity going on down below. This fort would also work great for games of hide and seek, at least with younger kids!

Backyard Fort (5)

Teach Your Cat to High-Five

Cat High Five (4).JPG

Here is an adorable challenge from Travis’s Highlights magazine: Can you teach your cat a trick? Travis was gamely up for trying, and although we didn’t exactly succeed, our cat was an eager participant! It was a great way to engage my son with our companion animal in a new way – cat and boy both enjoyed it!

The goal was to teach our cat, Krishna, to high-five with his paw touching our hand.

Hold a cat treat in your right hand.

Cat High Five (6)

Hold your left hand up just slightly above the cat’s head, as if you’re waiting for a high-five. Now hover the hand with the treat in front of that. The cat will (hopefully) paw for the treat.

Cat High Five (2)

We gave praise, and then tried again, over the course of a few days!

Cat High Five (5)

Okay, so we never got a paw to palm, since Krishna wanted to go in each time with his nose. But it was fun to have his nose nuzzle up to the palm.

Cat High Five (3)

In sum, what great inter-species play! Has your child ever taught the family dog or cat a trick? Please share in the comments.

Dropping Game

Dropping Game (4)

Here’s a game that’s sure to make your baby giggle, but little will he or she realize there are valuable skills being taught, too! The game covers everything from the concepts of in and out to the fine motor skills needed for retrieving an object.

I placed a plastic beach bucket in front of Veronika, and gathered up a few soft toys.

For each one, I dangled it over the bucket, making sure she saw it first.

Dropping Game (3)

Then I dropped it into the bucket with a big grin and an “oopsy!” This got giggles of course!

Dropping Game (2)

Once the bucket was filled, I encouraged her to pull the items out again.

Dropping Game (6)

This proved to be tricky because she was way more interested in the bucket (a novelty!) than the toys she already knows.

Dropping Game (1)

But we did have a few successful pickups. The apple goes in…

Dropping Game (7)

…and comes out!

Dropping Game (5)

This is definitely a game I’d play again; I love simple activities like this that make me pay careful attention to her skills and really zero in on her development, even for a short period, during an otherwise hectic day.


Carbon Footprint Calculator

Carbon Footprint (1)

We have a family tradition of heading out on Earth Day to pick up trash, whether just as a family or by joining a group, as we did today at a local preserve. I’ve posted the details in the past, so here’s just a quick blog today on a quiz we received from Raddish Kids.We loved the way this made us think about how we can do even better for the Earth in the future.

First, Travis learned what a carbon footprint is, and how carbon dioxide contributes to the warming of the planet. We went through the quiz and answered questions like how we get to school (a car – our worst answer, at 4 points!) and what we mostly eat at home (vegetables – yay, we scored a 1).

Carbon Footprint (2)

After tallying your score, you can zero in on areas for improvement as a family. For example, our new goal is to reduce the number of trash bags we take out each week.

What will your family do for the Earth this year? Please share in the comments!

Form an Impromptu Band

Impromptu Band(4)

I love musical play with babies – they take to it so readily! Today, we struck up a band for Veronika as a family, using two types of instruments: real ones that we’ve accumulated over the years, and some improvised ones, too.

Because what is a pot and spoon if not a drum?

Impromptu Band(3)

Or a rolled piece of paper if not a horn? Big brother Travis loved the way this one sounded.

Impromptu Band (1)

We got jamming and handed Veronika instruments to play, too.

Impromptu Band(2)

Travis found a new way to play on this pot – with a kazoo as the mallet!

Impromptu Band(6)

Then we shifted our focus from playing the instruments to dancing to some tunes.

Impromptu Band(9)

Wiggling is such a funny thing for babies both to see and feel. Set your music player to Music Together’s “Wiggle” and, well, wiggle! I wiggled my fingers, my arms, my legs.

Impromptu Band(8)

Travis got into the moves wiggling his whole body.

Impromptu Band(12)

By the time we wiggled Veronika’s own toes and fingers, she was giggling with delight. Wiggle your hands all over baby’s body, too, for more giggles.

Impromptu Band(10)

Don’t forget to just pick up your baby and get your whole bodies into the rhythm. We danced from room to room.

Impromptu Band(13).JPG

Now that she’s older, the dance moves can be more active than those with a newborn; we went up and down, spun around, stepped back and forth, you name it. Dance it up!

Impromptu Band (15)

Eggheads

Eggheads (5)

Got leftover plastic Easter eggs? We’ve got you covered! This cute little gardening project will use up any spares you have lying around.

We borrowed a real egg carton from the festivities at a relative’s house, and took it home to set up the project.

Twist plastic eggs until the top breaks off. Discard the tops and draw faces on the bottom. I gave Travis free reign for this part, and loved seeing the “expressions” he came up with.

Eggheads (1)

Next, we scooped potting soil into each egg. Cover your work surface because this part might get messy!

Eggheads (2)

Sprinkle a little grass seed into each egg.

Eggheads (3)

Now place them somewhere sunny and wait! Be sure to water daily. I’ll update this post when our “eggheads” sprout “hair”!

Eggheads (4)

Update: Our heads have hair! How adorable are these little eggheads?

Eggheads alt.JPG

Inertia Kiwi Crate

Kiwi Inertia (7)

Although Kiwi Co. titled Travis’s crate this month as the “Disk Launchers” crate, really it’s all about inertia, so that’s how I’m styling it here. Nomenclature aside, what fun we had with this one!

First Travis had to Build a Disk Launcher. As always, the step-by-step here is more complicated than in a Koala Crate, so I will simplify. It was great to sit back and let Travis deal with the fine motor skills of attaching sticky-backed foam pieces to the wooden pieces in the right order.

Kiwi Inertia (1)

Elastics help hold it together.

Kiwi Inertia (2)

And then a tube slots into place.

Kiwi Inertia (5)

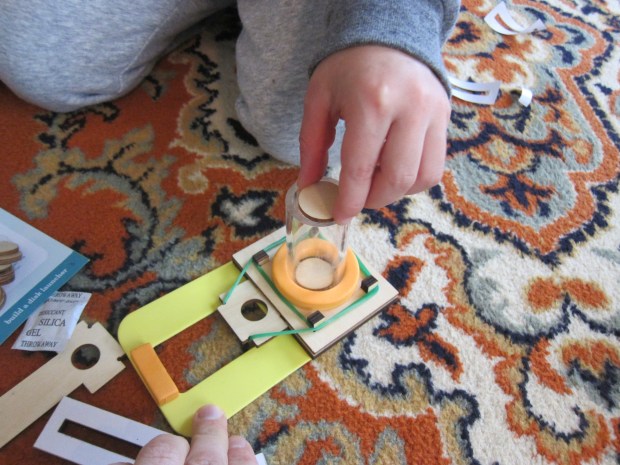
Fill the tube with the provided disks (which look like wooden tiddlywinks). Pull back on the pin and – zing! A disk launches out. Travis was unsure what we had been building up toward, and looked so astonished and delighted when he realized how the launcher worked!

Kiwi Inertia (6)

Needless to say, soon some ninja turtles were lined up to be our targets.

Kiwi Inertia (8)

Next we needed to Create Clay Obstacles from the provided air-dry clay. These will become props in games in a moment, so the instruction manual suggested figures like goal posts or even little goalie people.

Kiwi Inertia (12)

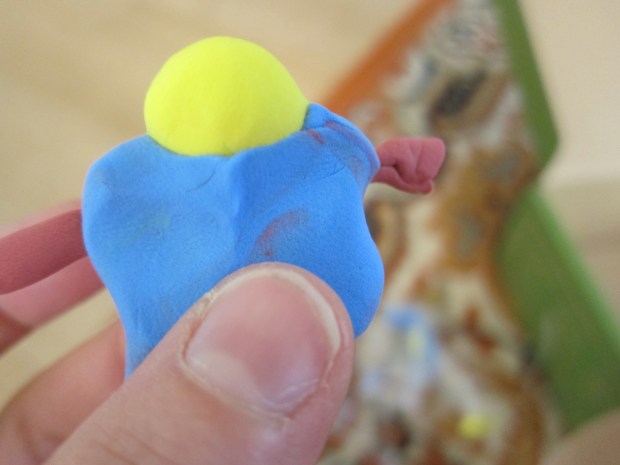
There were also tips on how to make specific artistic touches. We mashed together the blue and yellow clay and made a green clay! Then we tried twisting two colors together for a braided look.

Kiwi Inertia (10)

Three colors rolled together made stripes.

Kiwi Inertia (11)

Travis was mostly content to go his own artistic way with this one, making little blobs. But we especially liked rolling circles that looked like marbles or little planets.

Kiwi Inertia (13)

Leave the clay out to air dry, preferably overnight.

Kiwi Inertia (14)

Now it was time to play Disk Launcher Games.

For the first, we unrolled the provided mat for a spin on “curling.” Secure the mat between your Kiwi Crate box and a book.

Kiwi Inertia (15)

Take turns aiming at the target with your launchers, and see who gets the most points!

Kiwi Inertia (16)

Then we tried bowling.

Kiwi Inertia (17)

Travis was thrilled seeing the provided pins get knocked down.

Kiwi Inertia (18)

Now it was time for the final challenge: create your own game! We just went wild, putting up all our clay figures and the bowling pins and seeing if we could knock everything down.

Kiwi Inertia (19)

Older kids may want to get more sophisticated in their game rules, such as actually scoring through one of the clay goal posts, or knocking over a specific type of target. But Travis loved our mayhem, and we needed to play many rounds.

Kiwi Inertia (20)

To bring it back to the science of inertia for a moment, I showed him a quick Disk Physics Experiment: Set up three disks (touching each other) between a set of books and then launch another disk at them. Have your child guess which disk is going to move forward!

Kiwi Inertia (21)

The answer is the furthest disk, which Travis correctly surmised.

Kiwi Inertia (22)

We talked about how the energy transferred from the launched disk all the way to the furthest one. He thought this idea was neat.

To cap it all off, we explored further with two suggested books: Newton and Me by Lynne Mayer, and Oscar and the Cricket by Geoff Waring.

Bubbles and Squirty Water

Bubble Squirty (4).JPG

With Veronika sitting up in the tub, the fun continues to bubble over in new ways!

I mean that literally tonight; it was time to introduce her to the great joys of bubble baths. Make sure you’re using a baby-safe, tear-free formula, especially because your little one is likely to touch mouth or eyes with a sudsy hand at some point. Luckily Veronika seemed unfazed when this happened.

First I just showed her the bubbles as we ran the water.

Bubble Squirty (1)

Once in the tub, we hid a favorite toy, a bright yellow ducky. She loved digging for it in the bubbles!

Bubble Squirty (2)

I also blew bubbles gently onto her back and tummy, for a giggly sensation.

Bubble Squirty (3)

Then we got squirty! I used an empty dish soap bottle to squirt water, both over the bubbles and onto her skin. She wanted to catch the stream of water!

Bubble Squirty (5)

You can also do this with a funnel.

Bubble Squirty (7)

Or with a sieve (we have a bath cup with little holes that’s perfect, and better-sized for baby hands than an actual sieve). I drizzled a little stream of water over her toes and palms, which she loved!

Bubble Squirty (6)

How do you make bath fun for your baby at this age? Please share in the comments!