Go to the Fair

Fair goats

It’s been a while since I posted a suggested field trip for your baby, but with the season of fall festivals upon us, I remembered: the fair!

Although the under-age-one set will be too young for any rides, there is so much else to see and do at a fair. Veronika loved watching her big brother play all the games to start, under crisp fall sunshine.

Fair (1)

She delighted in the baby goats and other animals to see and feel, and got to take in the sights, sounds, and smells listening to music over a picnic table lunch.

Fall festivals often include family-friendly fare like hay rides, pumpkin patches, and more. So get out there and enjoy before the season is over!

All Kinds of Balls

All Kinds of Balls (9).JPG

Travis and I are about to launch into his Game Day-themed kit from Raddish Kids, featuring a trio of recipes perfect for this time of year. Whether your family loves Sunday football, World Series baseball, or simply watching a local game of youth soccer in the park, there’s no better season for sports and eats!

It seemed fitting, then, to start off with this fun lesson plan on all kinds of balls, and namely: why some bounce and some don’t.

First, we needed to brainstorm a list of balls. I gave Travis a definition of the term: coming up with ideas in a safe space where all ideas are welcome and together we made a quick list. I guided him towards actual sports after his first few ideas were more descriptive (squishy balls, hard balls).

All Kinds of Balls (1)

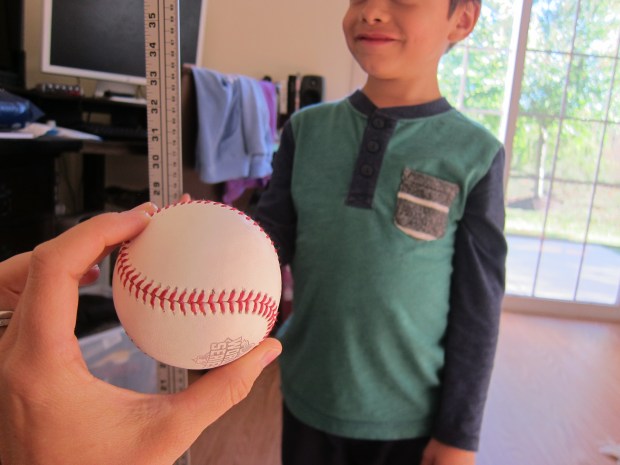
We went through and talked about which was the biggest (basketball!) smallest (ping pong!) and most colorful (tennis!). Now it was time to watch how some of these were made.

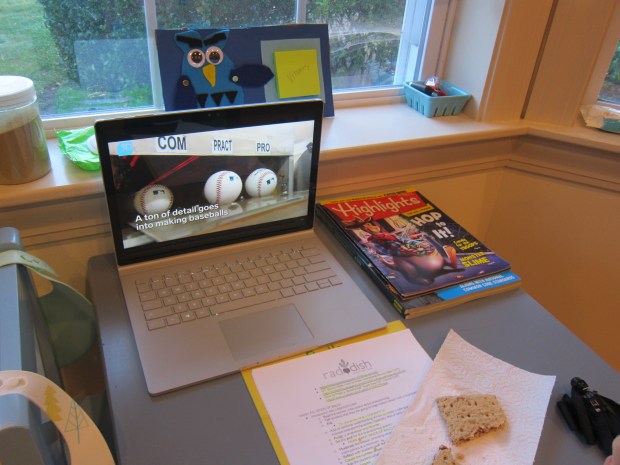
Raddish included links for everything from a soccer ball to a baseball. We added in an old favorite video: check out the bowling ball factory nine minutes in (come for the bowling ball, stay for the jaw-dropping domino demonstration). Travis adores “how-it’s-made” videos like this and was a rapt audience.

All Kinds of Balls (2)

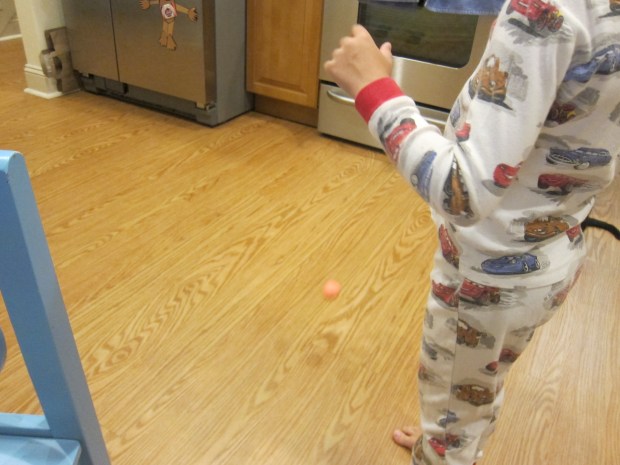
Now it was time to experiment with balls! Relying on what we had around the house, we gathered them into a pile and added a long yardstick.

All Kinds of Balls (3)

Bounce each ball and measure which goes the highest. Our clear winner was a squash ball (36 inches!) while others were duds like the soccer ball and baseball (about 9 or 10 inches).

All Kinds of Balls (4)

This prompted us to talk about why some balls were bouncy, and others not meant to be. (You can guide kids to think about how soccer balls are kicked, baseballs hit, etc., rather than meant to bounce).

For older kids, get into the specifics of kinetic energy here. The lesson was a bit over Travis’s head, but he did like watching a ball bounce in slow motion. We also tried experimenting with which balls bounced best in a certain direction but since all our balls were round (we couldn’t find our football) they all easily went into a target.

All Kinds of Balls (5)

Finally, we bounced them on a wood floor versus carpet, to observe any differences.

All Kinds of Balls (6)

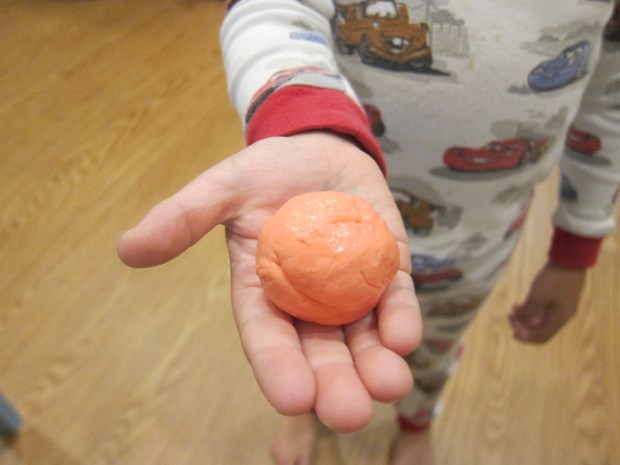
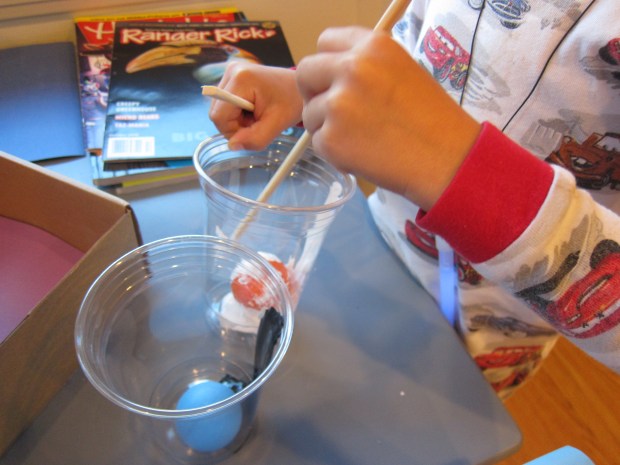
Now for the best part: we made our own ball! Pour 1/2 cup water and 1 tablespoon borax into a clear cup and stir until the borax dissolves.

All Kinds of Balls (7)

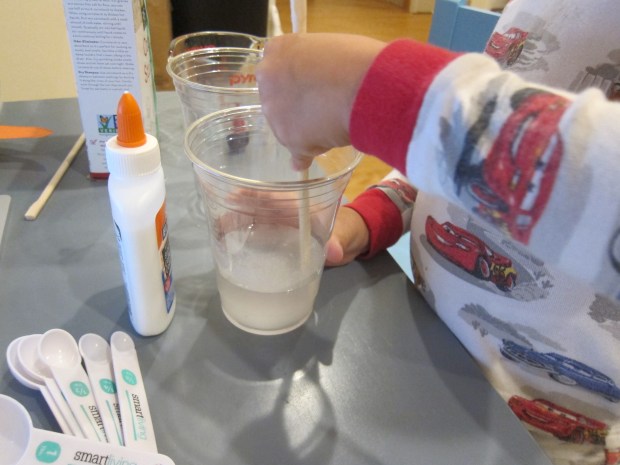
In a second cup, combine 1 tablespoon cornstarch, 2 tablespoons glue, and a few drops of food coloring. Travis chose a red ball.

All Kinds of Balls (8)

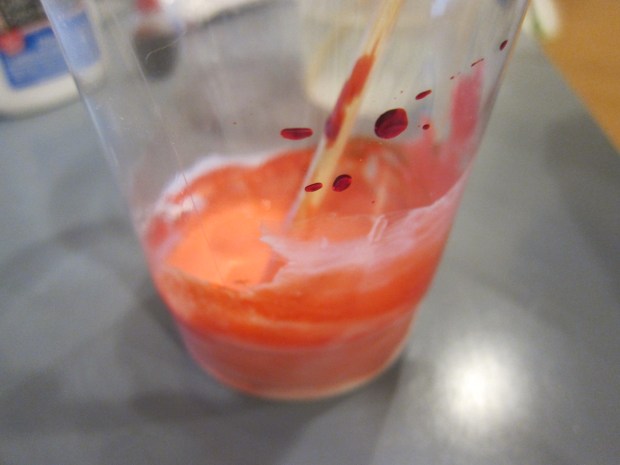
Add the glue mixture to the borax mixture. Your ball will start to firm up immediately. I worked the ball with my hands, dipping back into the borax as needed, until we had a nice round ball. Note: it is safe to touch Borax, but do remind your kids no matter their age that it is inedible.

Travis gave our ball a bounce – it worked!

All Kinds of Balls (10)

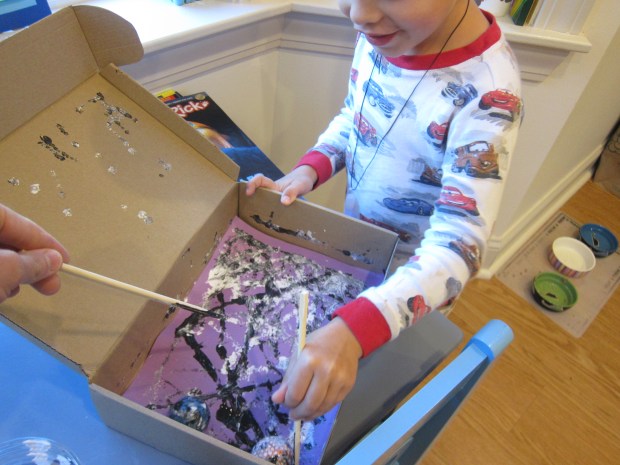
For some final fun, we painted with balls. Roll small balls like golf or ping pong ones in cups of paint.

All Kinds of Balls (11)

Place on a sheet of construction paper in a box. You can close the box and shake it, but Travis preferred to move the ball around with a chopstick.

All Kinds of Balls (16)

We finished with a few fun ball reads including: Round Like a Ball by Lisa Campbell Ernst and Goodnight Football by Michael Dahl.

All Kinds of Balls alt

Board of Curiosities

Board of Curiousity (8).JPG

Although I’d never heard of them before, there is apparently a genre of Montessori busy boards featuring tactile items for toddlers to lift, open, spin, twist, turn, and otherwise manipulate, which are quite popular. These boards are not cheap (some of the more bespoke ones on Etsy run upwards of $150!) but you can purchase a relatively cheap alternative at sites like Amazon.

If you’re feeling truly crafty, make your own from upcycled items around the house – a doorbell, an old latch, a panel to lift – and attach securely to a wooden or fiberboard frame. The key is things your baby can manipulate to hone those fine motor skills.

I wasn’t feeling that crafty, so did opt for a mid-priced version from the store. And Veronika loved it! As she played, I used verb words to talk about her actions. She could spin…

Board of Curiousity (2)

…twist…

Board of Curiousity (1)

….open or unlatch…

Board of Curiousity (3)

And more! Her favorite turned out to be a little button.

Board of Curiousity (4)

Although not actually an old doorbell, every time she switched the button from one position to the other I said, “Ding dong!”

Board of Curiousity (6)

As you can tell from her smile, this was a huge hit.

Board of Curiousity (7)

The “busy” part of these boards is that they can keep your little one occupied while you do other things around the house.

Board of Curiousity (5)

A win-win!

Board of Curiousity (9)

Tangram Toast

Tangram Toast (3)

Travis had a tricky time of it with tangram puzzles recently, so I made things a little more accessible in the best way possible: edible tangrams!

Toast slices of bread first until nice and crispy, making as many as you’d like for the project. Cut into shapes as shown:

Tangram Toast (2)

In a bowl, stir together 1/2 cup softened Earth Balance butter, 1 teaspoon cinnamon, 1/2 teaspoon vanilla extract, and 4 tablespoons sugar. Travis loved mixing all this up!

Tangram Toast (1)

Through trial-and-error, we found it easiest to make the tangrams while the toast was plain, otherwise our fingers got messy (as we learned while designing a slightly-lopsided house).

Tangram Toast (6)

So instead, we spread the cinnamon butter on after, but first Travis helped design a rocket…

Tangram Toast (4)

…and what could this jumble be?

Tangram Toast (7)

Aha a bird!

Tangram Toast (8)

After the puzzling, he was so proud I gave him a real butter knife to spread our cinnamon-sugar mixture over his own toast pieces.

Tangram Toast (11)

He proudly served up triangles, squares, and trapezoids. This was a great way to get kids puzzling while thinking it’s just a messy fun snack!

Tangram Toast (9)

Wooden Puzzles

Wooden Puzzles (3)

We were out and about a lot today, but I did take time to focus on one classic activity with Veronika: wooden puzzles.

For this age (11 months old), find puzzles with knobs that your little one can easily grab and lift.

There are two versions I like. In the first, a colored shape is on top, and an image is revealed underneath. When you play with these, name the image as your baby makes it appear!

Wooden Puzzles alt.jpg

The second kind has the image visible from on top, but the fun comes when the puzzle piece goes back into the frame and makes a sound. Veronika and I played with wild animals first…

Wooden Puzzles (1)

…and then domestic animals.

Wooden Puzzles (4)

Again, point to the picture and name the object or animal while your little one puzzles.

Wooden Puzzles (2)

Veronika was so enamored with the duck piece that she made me do that shape over and over, and I think was trying to say quack!

Wooden Puzzles (6)

This is her, “Mom you better do that duck again,” face.

Wooden Puzzles (7)

Obliged!

Wooden Puzzles (5)

Wooden puzzles like these are great not just for little fingers, but for little minds, too.

Oatmeal with Cinnamon Apples

Oatmeal with Cinnamon Apple

This cinnamon-laced oatmeal will warm up chilly fall mornings. I like to make it for the kids the night before, so they don’t have to wait for it to cool down from a boil first thing in the morning. Simply reheat individual servings just before breakfast!

Ingredients:

  • 1/2 cup water
  • 1/2 cup apple juice
  • 1 golden delicious apple
  • 2/3 cup quick oats
  • 1 teaspoon cinnamon
  • 2 tablespoons agave nectar
  • 1 cup soy milk
  1. Combine the water and apple juice in a saucepan; set aside.
  2. Peel, core, and dice the apple. Add to the saucepan and bring to a boil.
  3. Stir in the oats and cinnamon; continue to cook for 1 minute. Remove from heat and stir in the agave and soy milk; the mixture will continue to thicken as it cools.

Hidden Treasure

Hidden Treasure (5).jpg

Today Veronika learned to dig! Despite somewhat chilly temps, we headed to the sand play area of our local playground armed with a bright ball and a shovel.

Hidden Treasure (1)

I sat Veronika down and – making sure she was watching – showed her that I was digging a hole. I placed the ball in and covered it back up with sand, making sure some of the bright purple was easily visible.

Hidden Treasure (2)

Now I showed her how to uncover it!

Hidden Treasure (3)

She was a quick study. She immediately wanted her own turn with the shovel, whether to dig for the ball, or simply to dig a nice hole in the ground.

You can make the game harder as you move along. On the next round, I left even less of the ball visible, but Verouinka wasn’t fooled!

Hidden Treasure (5)

Work your way up to hiding the ball (or any other bright object) when your baby isn’t looking, and see if he or she will know to dig it up. This is not only great for fine motor skills, but also object permanence!

Hidden Treasure (6)

Make Your Own Soft Play Area

Soft Play Area (7)

Ball pits in children’s playspaces can be intimidating for the littlest tykes; inevitably there are bigger kids splashing and jumping around, not to mention the pits are deep when you’re only 11 months old! To let her join in on the fun, I made Veronika her own “ball pit” today.

Cover a floor space with a soft blanket and line the area with pillows (or you could even recycle the baby tub for this game!).

Soft Play Area (1)

I dumped in a package of soft play balls (look for these on Amazon.com). She was delighted.

Soft Play Area (5)

I showed her how to swish her hands around in the balls…

Soft Play Area (8)

…and we buried her toes, then found them again!

Soft Play Area (4)

We added some crumpled newspaper “balls” for extra texture, but she didn’t like those as much.

Soft Play Area (10)

It turned out that this pit was also great for learning to climb up and over pillows, an inadvertent bonus.

Soft Play Area (3)

She loved crawling in, fetching out a ball, bringing it somewhere, and then heading back in again. It easily filled an afternoon of play!

Soft Play Area (6)

Magic Chocolate Bar

Magic Chocolate (5)

What’s better than one chocolate bar? One you get to eat twice!

Okay, perhaps not really, but this neat puzzle will have your child thinking hard about shapes and how they fit together. We printed out a chocolate bar template, and cut into 5 pieces along the dotted lines.

Magic Chocolate (1)

I told Travis he was going to “eat” the smallest piece, which gets removed from the rectangle. Now the challenge is to fit the remaining 4 pieces back into a whole rectangle. It was a matter of turning the pieces…

Magic Chocolate (3)

…puzzling…

Magic Chocolate (4)

… and tada!

Magic Chocolate (6)

As a fun reward, we cut up a real chocolate bar in the same way for a little after-school treat!

Magic Chocolate (2)

Make Your Own Jigsaw Puzzle

Make Your Own Jigsaw (4).JPG

Travis had so much fun with the puzzles in his latest Kiwi Crate that we decided to make a few of our own!

Download and print out any puzzle template from online. We found ones we liked showing a teddy bear and a butterfly (and if anyone can find the Steve the Kiwi template from kiwico.com/puzzles, let us know!).

Make Your Own Jigsaw (1)

Coloring in was half the fun. I warned Travis that if he made his butterfly all orange, it was going to be very hard to put back together.

Make Your Own Jigsaw (2)

Soon he branched out to other colors, and added blue so that the butterfly was flying over the ocean. Glue your template to an old cereal box and let dry completely.

Make Your Own Jigsaw (3)

Now it was time to cut up the pieces! Word of caution: This task is quite time-consuming for a 16-piece puzzle. For that reason, and because I worried the 16 pieces would be quite a challenge for Travis, I cut his butterfly into fewer, larger pieces.

Make Your Own Jigsaw (5)

Now puzzle! As mentioned, the butterfly came together quickly.

Make Your Own Jigsaw (6)

Between uneven pieces and tricky outlines, the teddy bear nearly stumped us!

Make Your Own Jigsaw (7)

What would your child make a puzzle of? Please share in the comments!

Make Your Own Jigsaw (8)