Ripping Bucket

Ripping Bucket (8)

I’ve given Veronika paper to rip before, a fantastic way to develop strength in little hands, but today we turned it into a slightly more purposeful activity. This game is great because it can keep little ones busy solo for a while, or serve as an activity to do together.

First I filled a toy bucket with various types of paper as a sort of “invitation” for Veronika. I included an old magazine, colored construction paper, a few pieces of junk mail, and bright tissue paper. Newspaper would work great here too!

Ripping Bucket (1)

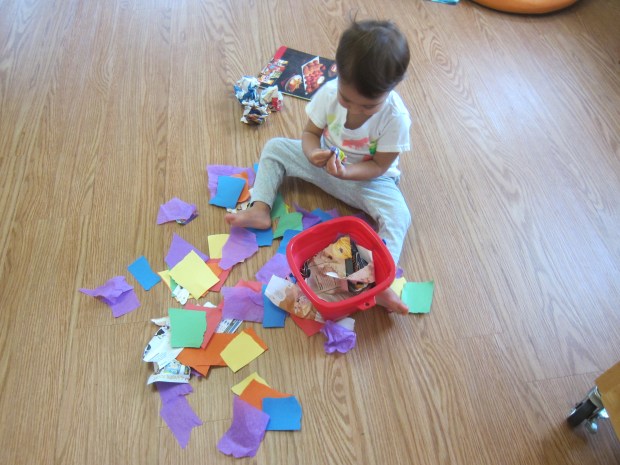
Veronika was immediately curious about the bucket and started tossing out the contents.

Ripping Bucket (2)

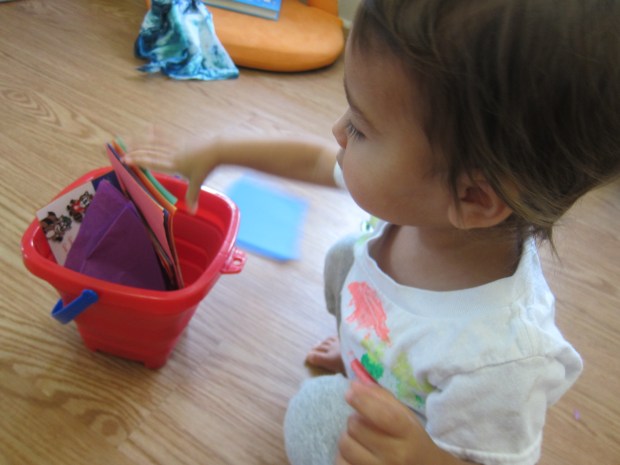
She still needs me to start a rip for her before she can tear a piece of paper in half, but then she loves the riiiiiiip that results.

Ripping Bucket (3)

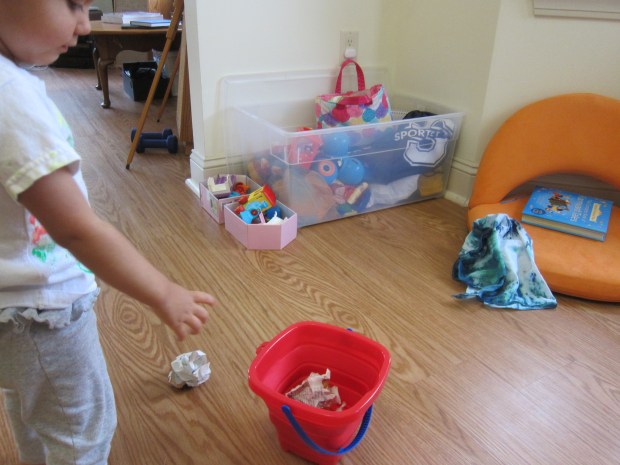
I started tearing pieces alongside her so we could refill the bucket. It was about halfway full when she announced, “Dump!” and this happened:

Ripping Bucket (7)

And then she said, “Let’s fill it up!” We went back and forth like this a few times.

Ripping Bucket (6)

Then I showed her how to rip out full pages from the old magazine. We crumpled these up and now the game turned into target practice.

Ripping Bucket (9)

She got a fit of the giggles when I said, “Trash can!” and tossed a crumpled piece into the bucket. Hint: This was also a subliminal way to teach the idea of cleaning up, even though it wasn’t a real trash can.

Ripping Bucket (10)

Before we ended the fun, we turned it into a craft. I pulled out a glue stick which she smeared all over a piece of construction paper, and we added a few of the torn pieces of paper into a sort of collage.

Ripping Bucket (12)

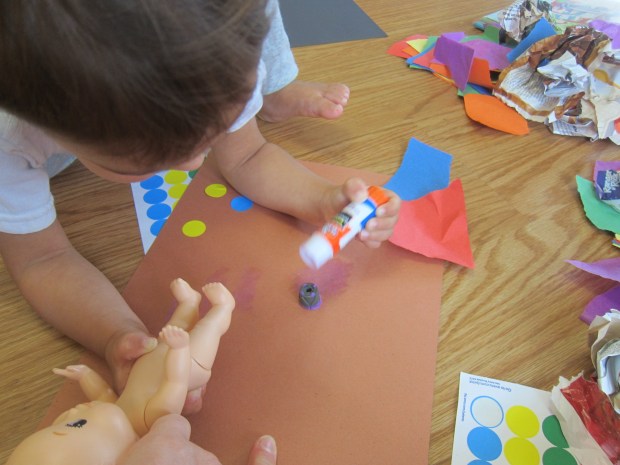
She tired of this particular riff on torn paper play rather quickly, but at least we worked in a little bit of art.

Ripping Bucket (13)

In sum, there’s lots you can do with just paper and a bucket!

Ripping Bucket (11)

Advertisement

Mini Mask

Mini Mask (7)

This cute mask will make your toddler laugh and might lead to lots more dress-up play!

To make the mask, cut a rectangle from paper that is 6×4 inches. Veronika loved helping me draw lines along a ruler!

Mini Mask (3)

Place a quarter in the center and trace around it for a nose, then repeat for the eyes.

Mini Mask (2)

Now add lots of silly features with crayons! While I worked on the “real” version, I gave Veronika extra paper and crayons to draw too. Side-by-side art like this is a great way to involve toddlers in crafts that are beyond their skill level; it makes them feel like big helpers.

Mini Mask (5)

Cut out the mask, as well as the eye and nose holes. I showed her how to hold it up to her face.

Mini Mask (6)

And to my own!

Mini Mask (10)

At the same time, I had dragged over our box of dress up supplies and she immediately latched on to the idea of combining the mask with a costume.

Mini Mask (8)

We added hats, capes, accessories and more as she held up the mask to her face.

Mini Mask (9)

I quickly realized we needed a handle of some sort, so I taped a craft stick to the mask that she could hold on to as she lifted it toward her face. She loved the silly expression I had drawn, and sometimes just wanted to look at it and giggle!

Mini Mask (12)

I love crafts like this that might seem small and quick, but which easily lead to an extension of play. One small mask kept her busy with the dress-up box for nearly half an hour!

Mini Mask (11)

Spongy Pencil Toppers

Spongy Pencil Toppers (7)

These fun pencil toppers were the final craft Travis and I put together to round out his new school supply swag. They’re perfect for any pencils where the eraser is completely worn down to a nub.

I had a bag of makeup sponges that we use for face paint, and the triangle shape made them the perfect candidates to turn into painted miniatures of triangular foods. Think: slices of cake, wedges of cheese, or sandwiches.

Squishy Pencil Toppers (1)

A little puffy paint was all we needed.

Squishy Pencil Toppers (3)

This one was a piece of cake (heh).

Squishy Pencil Toppers (2)

Then we tested out other ideas, like a peanut butter and jelly sandwich (blue and yellow paint). Travis wanted a mint chocolate cake, which we made with black and green paints.

Spongy Pencil Toppers (5)

Let the puffy paint dry completely, then add details like beads on top for cherry garnishes.

Spongy Pencil Toppers (8)

Once the glue dries, poke the sharp end of a pencil into the bottom of the sponge to make a hole. (Note: You can also secure the sponges with hot glue for added security). Insert onto the eraser end of the pencil and write away!