Depth Perception Walk

Distance Walk (4)

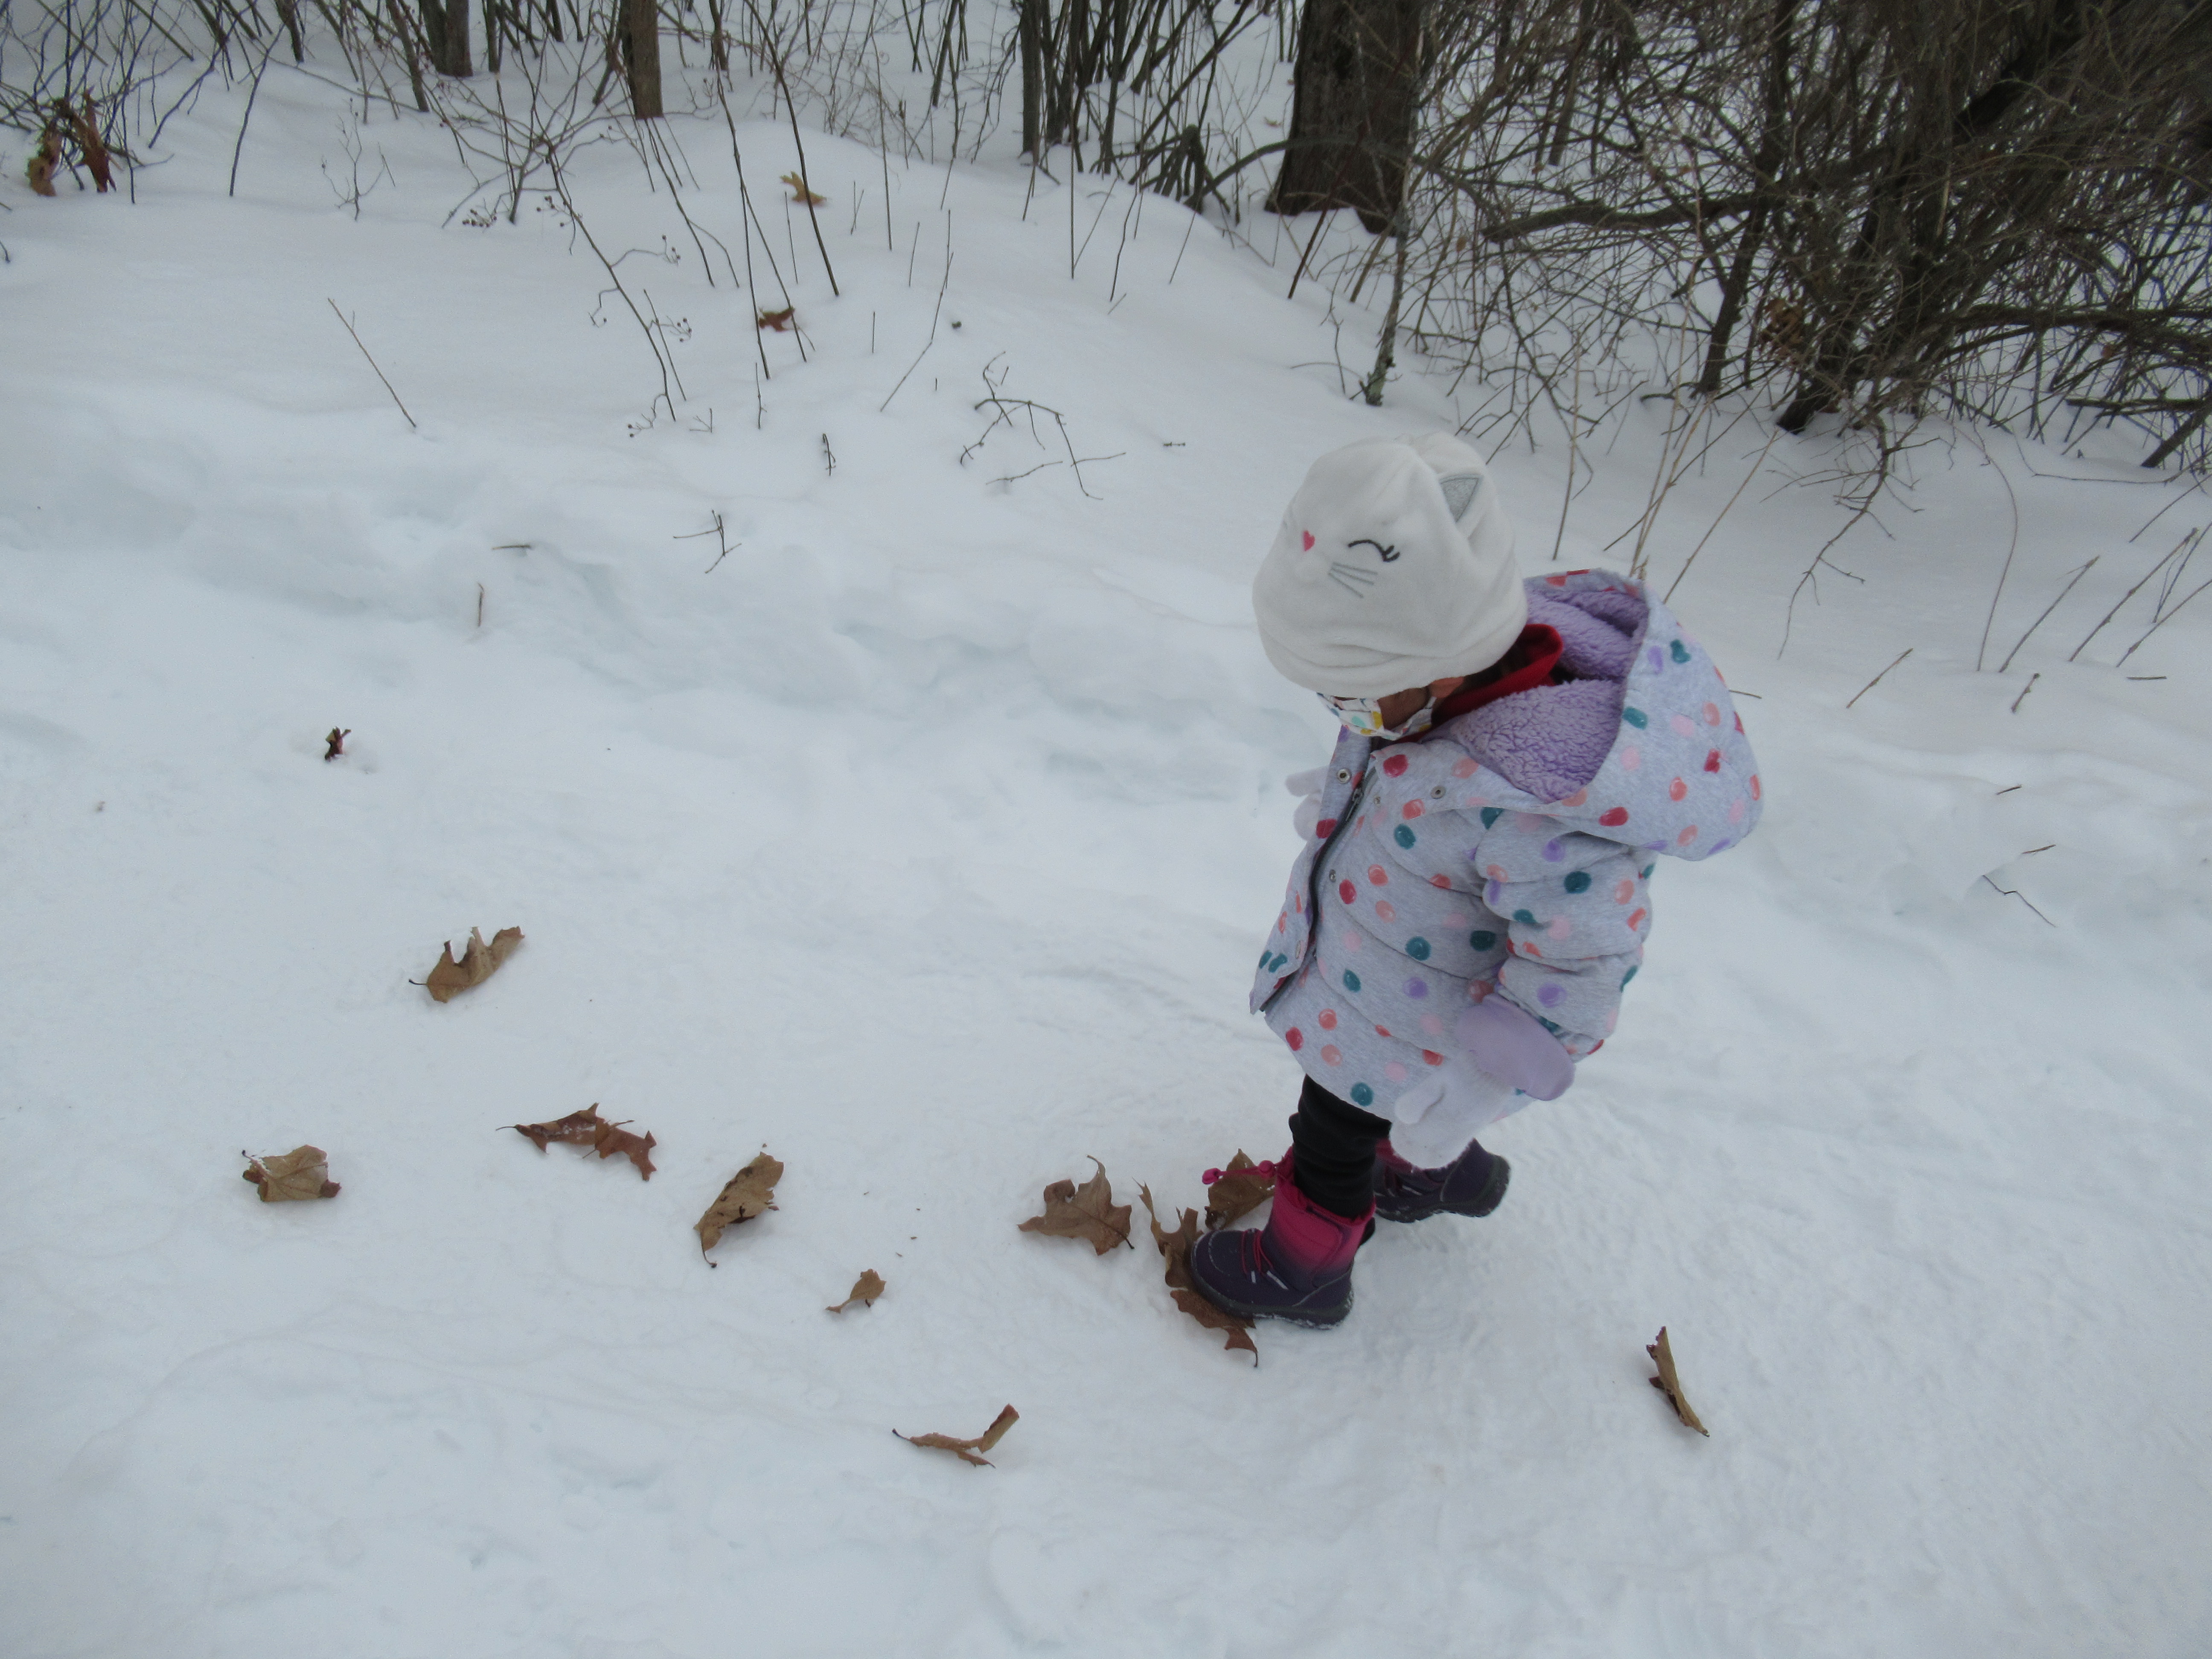
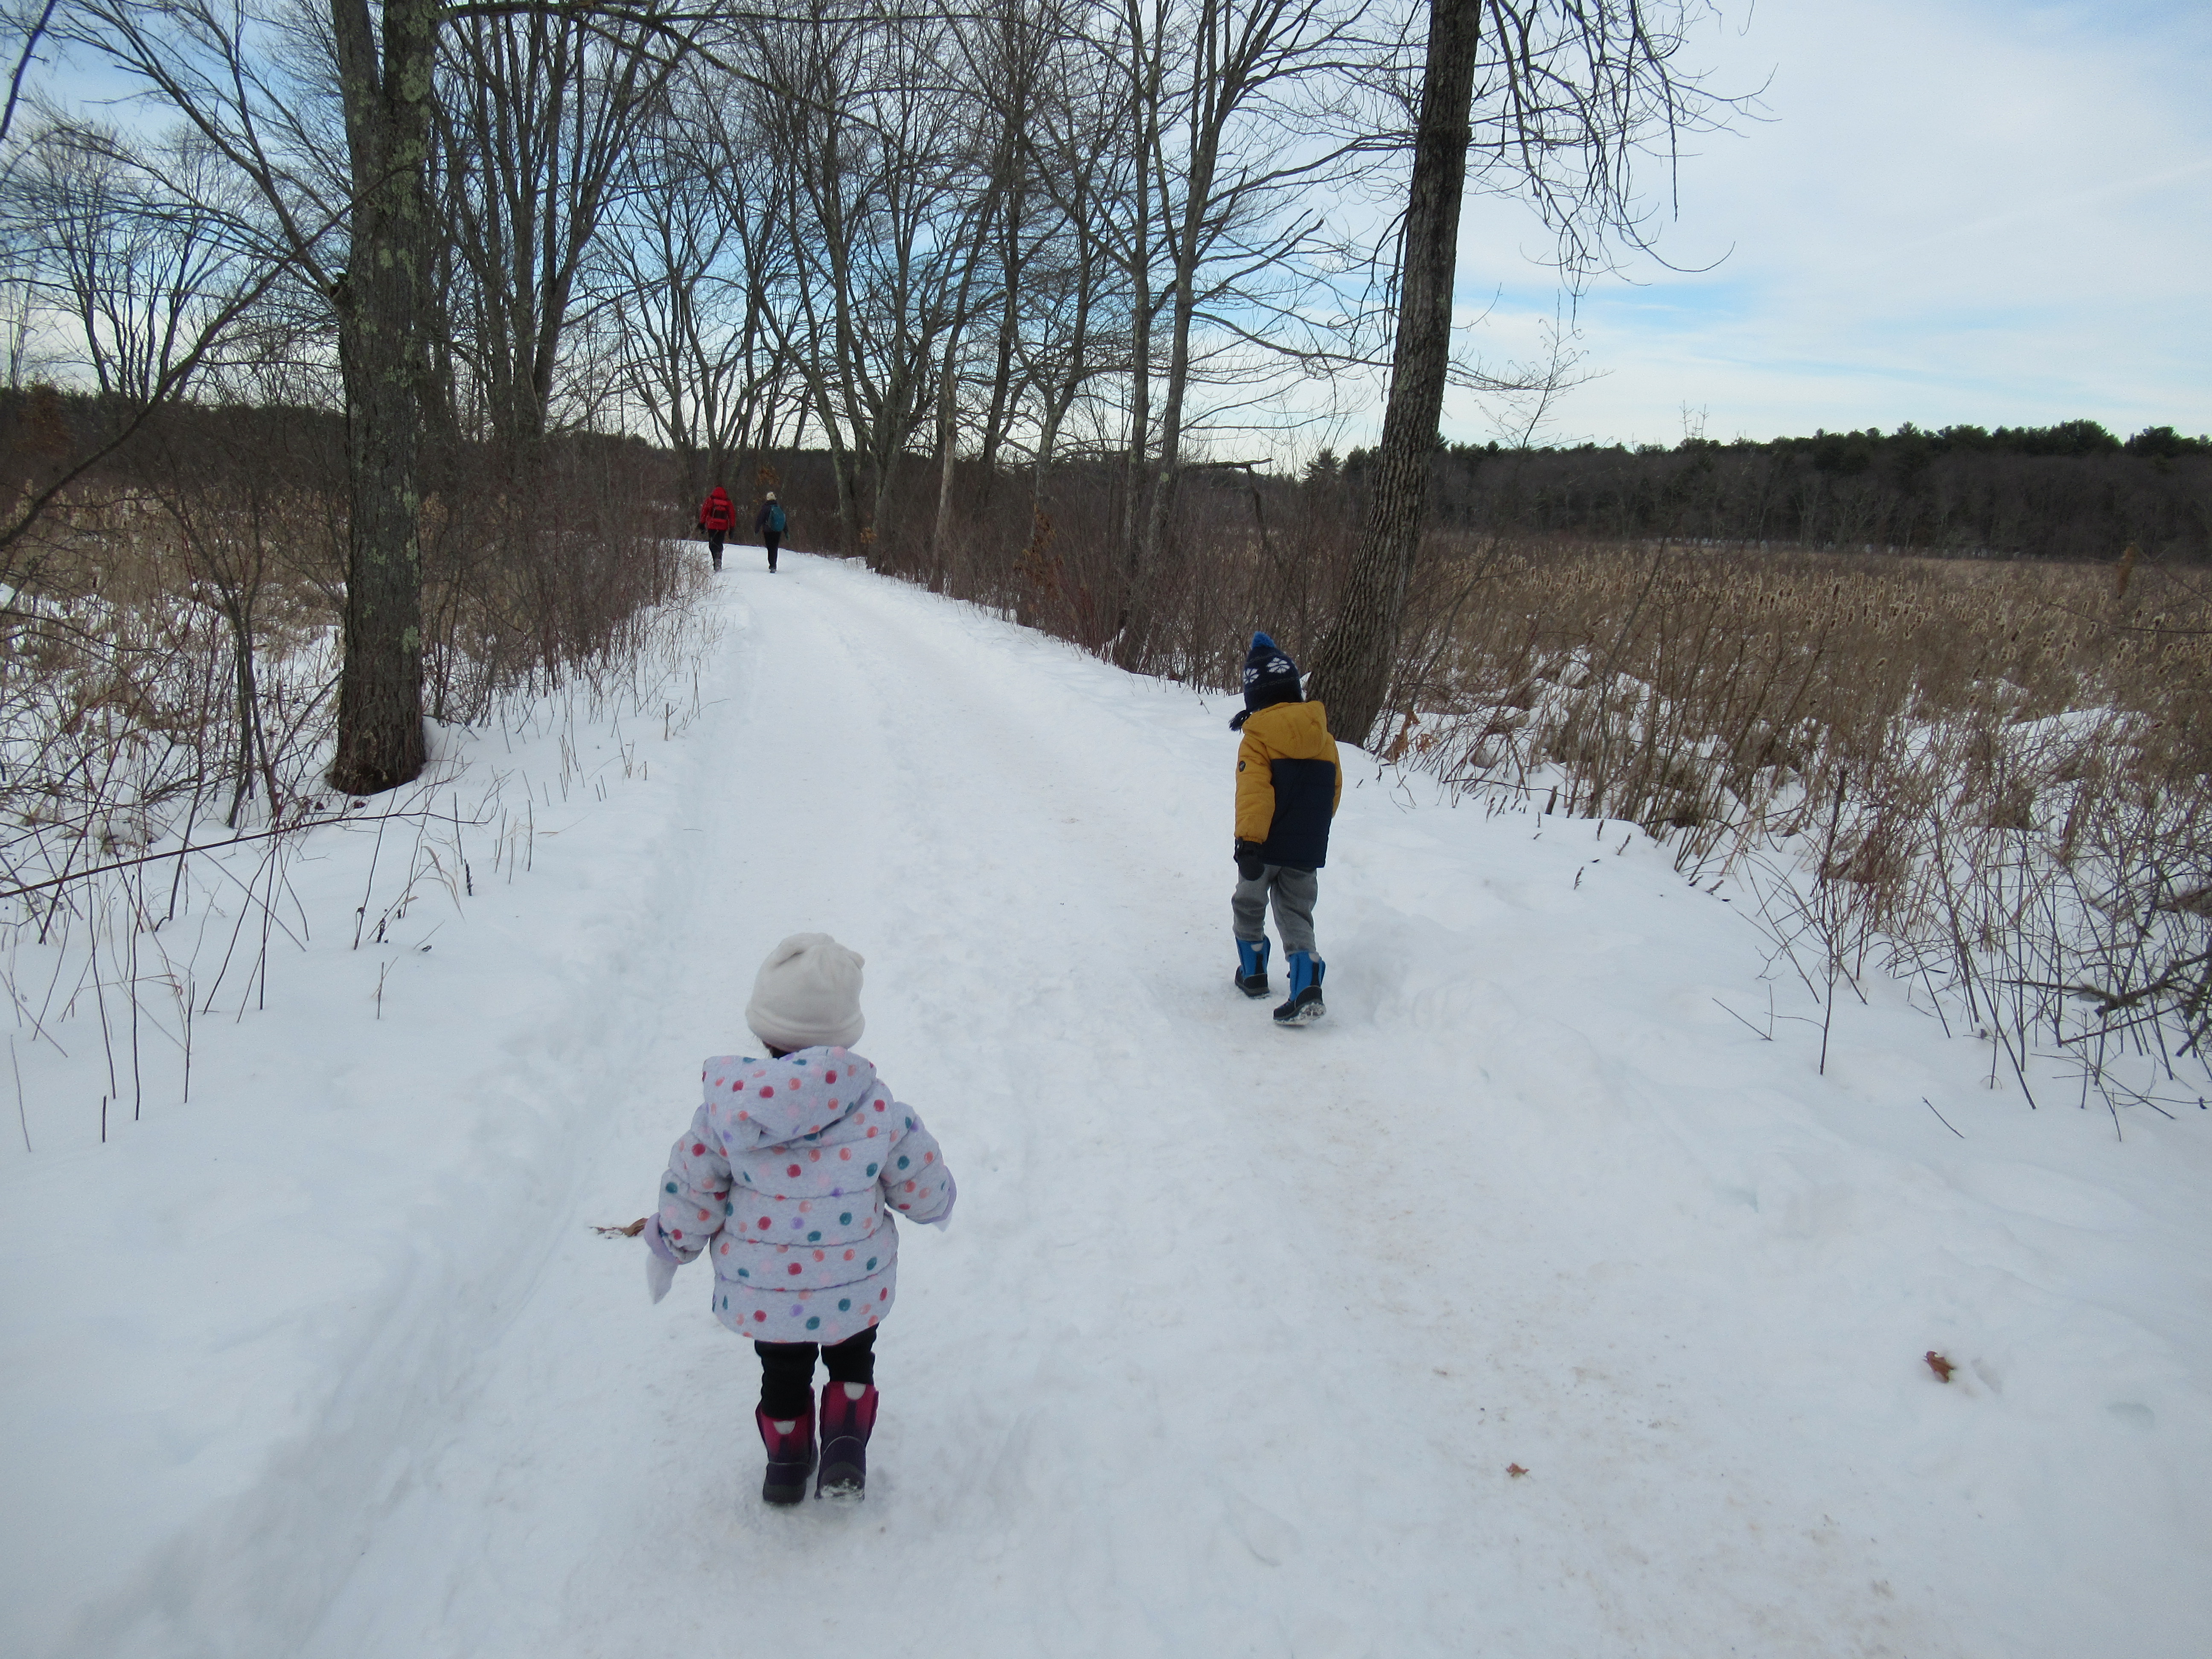
It might seem like there’s less to seek and find on winter nature walks than in other seasons, but the opportunities to leran are still abundant! To wit, we had beautiful cold sunshine today, and used the walk to play with concepts of distance and balance for Veronika!

As we walked, big brother Travis and I took turns pointing out items that were either near (“These branches are so close!”)…

Distance Walk (2)

…or far. “Those leaves are far away!” Travis said. “Let’s race to them!” I was so proud of his teaching, because the racing was his own idea, and helped highlight the difference between items close by and those we needed to get to.

Distance Walk (1)

After that we played around with how fast or slow we could cover the distances. Travis loved leading Veronika with the trail of a stick in the snow, too, sometimes close to her…

Distance Walk (3)

…and sometimes far up ahead. For some final fun on the return walk, we collected a few nature treasures (winter-brown leaves were the most readily available!) and lined them up like a balance beam in the snow.

Distance Walk (5)

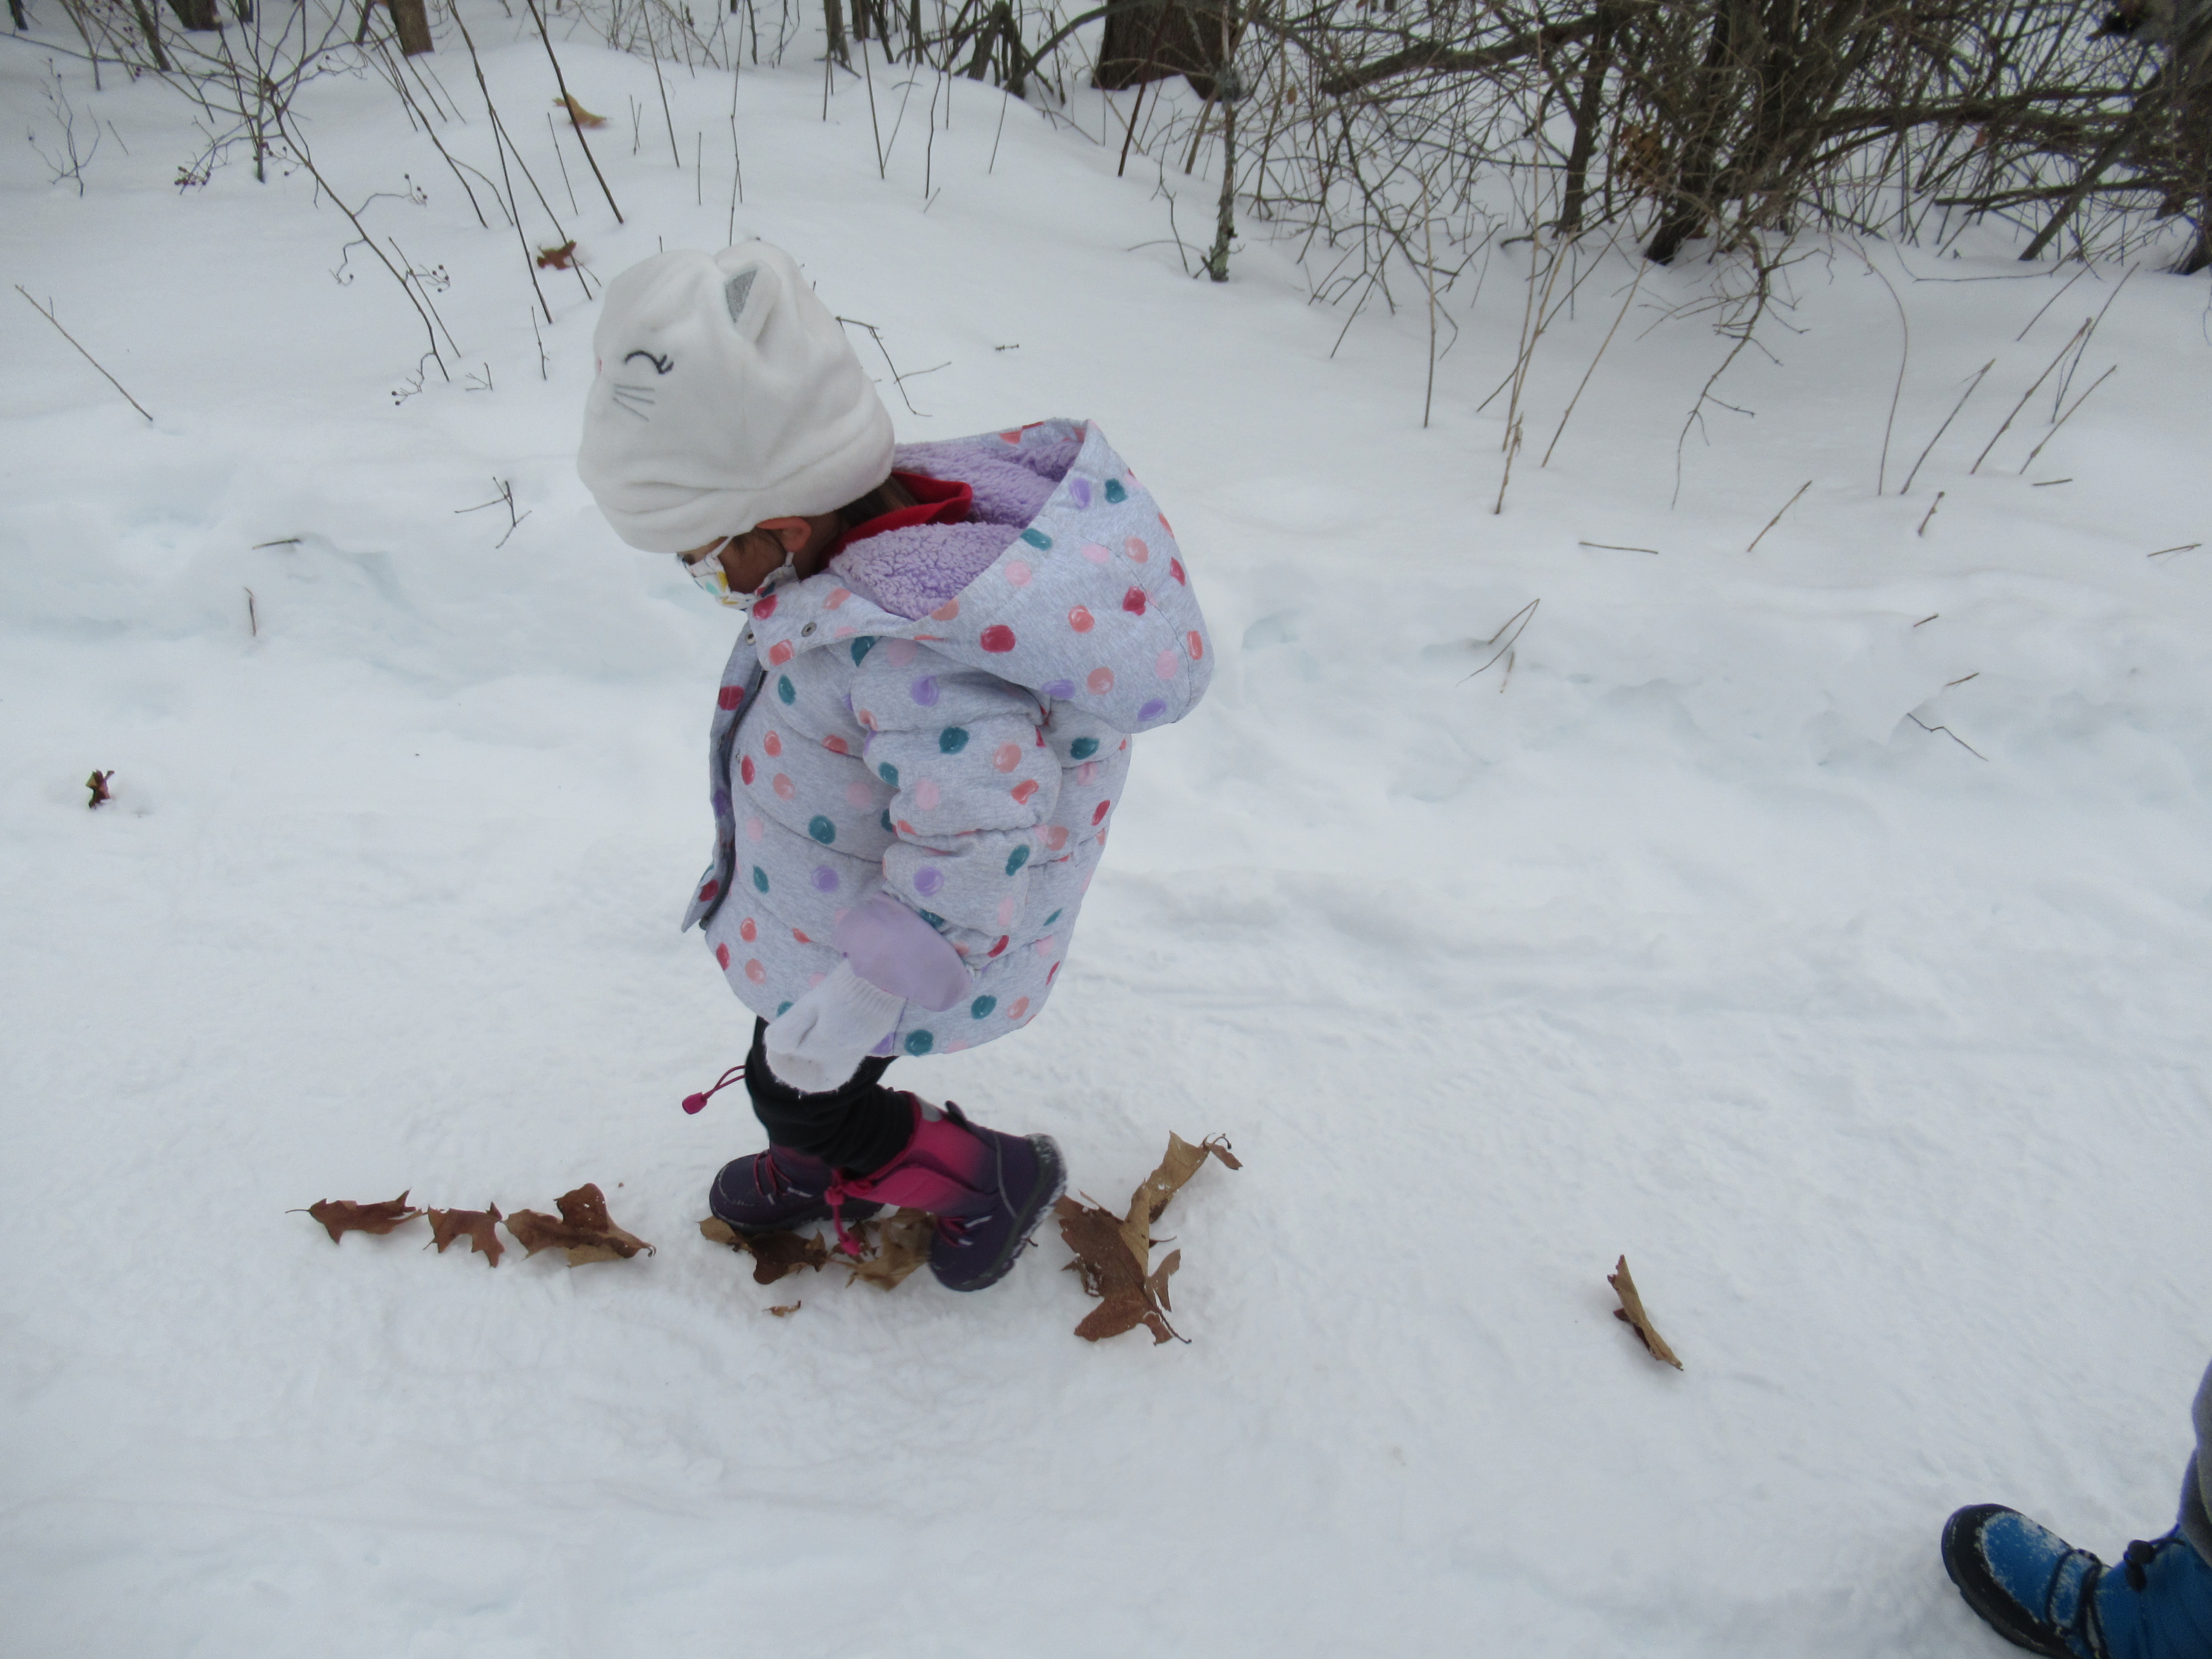
Veronika loved testing her balance as she walked along the line. Once the leaves scattered, she repeated the task but this time her footsteps took her in a zig-zag! All in all, these activities kept us warm and active on what could have been a frigid walk.

Distance Walk (6)

DIY Bath Bombs

DIY Bath Bombs (7)

Both my kids love bubble baths, so today we decided to mix up the bubbly fun with a homemade bath bomb! You can make this concoction entirely from ingredients found in your kitchen; look for citric acid in the baking aisle.

First, Travis helped measure out and stir together 2 and 1/2 teaspoons citric acid, 2 and 1/2 teaspoons baking soda, and 1 teaspoon cornstarch.

DIY Bath Bombs (2)

Add about 2 drops of food coloring (we used green!), followed by 1 and 1/2 teaspoons canola oil; the mixture is still crumbly at this point.

DIY Bath Bombs (3)

Spoon into a small paper cup, then press firmly with the back of a spoon to pack down. Let dry for at least 8 hours.

DIY Bath Bombs (4)

At bath time, tear away the paper cup. Toss in the tub and watch it fizz! Truth be told, the big reveal of the moment was a little less exciting than Travis had hoped for, but it still made for a neat bubbly reaction.

DIY Bath Bombs (6)

Roasted Winter Vegetables

Roasted Winter Veg (1)

This quick roasted veggie recipe is a great way to introduce unfamiliar ones (like parsnips) to the more familiar (such as sweet potatoes or butternut squash). Mix up the recipe simply by varying which root veggies you use next time! Rutabagas, carrots, or beets might be nice, too.

Ingredients:

  • 1 sweet potato
  • 1 small butternut squash
  • 2 parsnips
  • 2 tablespoons olive oil
  • 1/4 teaspoon salt
  1. Peel and cube all of the vegetables and transfer to a 9×13-inch baking dish. Drizzle with the oil an sprinkle with the salt.
  2. Bake at 425 degrees F for 20 minutes, stirring halfway through.

Roasted Winter Veg (2)

Color-Changing Lemonade

Color-Changing Lemonade (5)

This fun STEM snack idea from Kiwi Co has a “wow” factor thanks to the fact that red cabbage acts as a pH indicator. In other words, it will turn acids (like lemon juice) pink. Just like that, a glass of yellow lemonade becomes a glass of pink lemonade!

First, soak about 1 cup torn red cabbage in 1 cup very warm water. Add 1 cup sugar, stirring until dissolved. Let stand for about 30 minutes. Strain the cabbage mixture through a fine-mesh sieve over a cup. Set aside.

Color-Changing Lemonade (1)

In a second cup, whisk together 1/2 cup lemon juice and 1 cup cold water.

Color-Changing Lemonade (2)

Pour a little cabbage mixture into a glass and add ice. Fill with the lemon mixture, then start to stir as you add the remaining cabbage mixture.

Color-Changing Lemonade (3)

Pink lemonade!

Color-Changing Lemonade (4)

Note: The kids declared that the lemonade tasted a little “funny”, which is no doubt the result of a little cabbage flavor. So you may find that this drink works more as a novelty than as the best glass of cold lemonade your kids will ever have.

Valentine’s Day Vase

Valentines Vase (5)

This cute Valentine’s Day gift idea from Hands on As We Grow is a great way to recycle leftover plastic bottles! We used non-dairy smoothie bottles, which were the perfect size and shape.

Clean and dry the bottles thoroughly, then set out a tray filled with Epsom salt. We added red food coloring (naturally!) for Valentine’s Day.

Valentines Vase (1)

Next, I showed Veronika how to smear white glue all over the bottle with a paint brush.

Valentines Vase (2)

Once the bottle is completely covered, simply roll in the salt. It will cling on, and it sparkles so beautifully! Veronika thought it was so pretty that we added blue food coloring and made a second bluish-purple version. Let dry completely.

Valentines Vase (3)

Meanwhile, Veronika was still busy playing with the Epsom salt mixture, stirring it around with a paint brush or dipping her brush into the cup of glue and back again. Just be sure to supervise play closely, as Epsom salt is not edible.

Valentines Vase (6)

When the vases are dry, fill with roses and set out for someone special!

Valentine Window of Hearts

Toddler Hearts for Window (5)

Veronika has made lots of Valentine cards to give away this year, but we realized our house was lacking in decorations that we had kept for ourselves! I had leftover doilies from one of her projects, and these only needed a little toddler-friendly embellishment before we could hang them in the windows.

Toddler Hearts for Window (2)

First, Veronika used dot markers to decorate some of the doilies. We chose red and purple, to keep with a Valentine’s color scheme.

Toddler Hearts for Window (1)

I thought she might also enjoy painting some of the doilies, but she hasn’t wanted to get her hands messy lately. Instead, I placed a few of the doilies in a plastic container and added two balls, one big and one small. Squeeze in a few drops of red paint, then roll the balls around. Your toddler might want to do this with his or her hands and get nice and messy!

Toddler Hearts for Window (3)

Veronika preferred it when I showed her how she could til the container to and fro, making the balls scatter paint across the doilies.

Toddler Hearts for Window (4)

Let these painted ones dry before adding to the other doilies hanging in your window. This made the easiest toddler “garland” ever!

Toddler Hearts for Window (6)

Sponge Towers and Stamps

Sponge Towers (3)

Large kitchen sponges are easy to buy cheaply and in bulk, so consider stocking up the next time you’re at the store. I love keeping a few in the craft bin because they always come in handy, and not just for watery outdoor summer play.

Veronika and I found two fun ways to play with them this winter afternoon! First, I cut several of the sponges into strips so they made almost a soft foam version of Jenga blocks! I showed her to stack these into layers, and she loved helping add to each strata as our tower grew taller.

Sponge Towers (2)

And of course she loved knocking the sponges over.

Sponge Towers (4)

She also came up with her own way to stack them, simply one strip atop another, and I loved watching her concentration!

Sponge Towers (1)

Note: If building up the Jenga-style towers is too tough for your toddler, you can also make simple shape blocks. Aside from the obvious opportunity to talk about shapes or short by shape, toddlers will no doubt find many uses for these soft (danger-free!) blocks.

Sponge Blocks (2)

They were great fun for hauling around in her dump truck…

Sponge Blocks (4)

…or teaching an early intro to simple patterns, like alternating pink and blue.

Sponge Blocks (5)

When the stacking was done, we still had a few sponges left over so I wanted to use them for more of an artsy craft. Sponges make perfect “stamps” for painting and since we’re so near to Valentine’s Day, I cut them into heart shapes.

Sponge Heart Stamping (2)

These made great prints, and Veronika was especially intrigued with the fact that the color that appeared on the paper wasn’t the yellow or blue of the sponge…

Sponge Heart Stamping (3)

…but red paint! So this accidentally turned into a quick lesson on cause and effect.

Sponge Heart Stamping (4)

Want more ways to play with DIY sponge blocks? Check out what big brother Travis was doing with them 4 years ago!

Sponge Heart Stamping (5)

Kids’ Hearts Valentine Gift

Kids Hearts (5)

The kids gave daddy their hearts for Valentine’s Day – literally! This is a great craft for siblings to work on together, and results in a beautiful keepsake for any family member.

First, I wanted the kids to each paint “their” heart, so I cut two heart shapes from sturdy white paper (older kids can do their own cutting), and set out different colors of paint. But neither kid wanted to get messy! So I slipped the hearts into plastic zip-top bags and squirted in their requested colors of paint: peach and green.

Kids Hearts (2)

The kids loved smearing the paint on through the bag. Veronika loved that she made circles of paint as she pressed, and Travis loved that he could cover the heart completely without getting a drop of paint on his fingers, my neat boy.

Kids Hearts (3)

I set the hearts aside to dry.

Kids Hearts (4)

Meanwhile, I removed the mat from inside a frame and traced it onto red construction paper instead. Once the hearts dried, I wrote each child’s name on the one they had painted, then glued to the red mat.

Kids Hearts (1)

Write a sweet message along the top or bottom, replace inside the frame, and then wait for the big smile on your recipient’s face!

Kids Hearts (6)

Valentine Hearts, Two Ways

Valentine Heart (5)

The heart crafts with Veronika continue, a great way to teach toddlers about the connection between Valentine’s Day and love… and messy crafts! Today we used hearts in our painting, but in two very different ways.

For the first, I cut heart shapes from pink construction paper and placed these on a tray. Dribble on a little red and white paint, then fold the heart in half.

Valentine Heart (1)

I encouraged Veronika to flatten out the heart! She could either use her hands or roll over it with a small rolling pin. Because we’d used too much paint, this turned out to be a very smooshy messy process!

Valentine Heart (4)

Open the heart up for the big reveal!

Valentine Heart (3)

Let dry, then write a Valentine message on the back for someone special.

Valentine Heart (7)

The second method is one I did with Travis when he was not much older than Veronika is now (!), making it one of the earliest posts from this blog. It’s fun to repeat activities with my kids and see how they differ across the years. All you need is an empty toilet paper tube; push in one edge slightly to form a heart shape.

Stamped Heart (1)

I showed Veronika how to dip this “stamp” in red paint and print!

Stamped Heart (2)

Make as many heart prints as your child desires. I remember Travis wanted to cover his whole paper, but Veronika tired out about half way through.

Stamped Heart (5)

If you try both of these heart crafts, please share in the comments which one your toddler liked best!

Counting Block Towers

Counting BLock Towers (6)

I recently purchased a new rug for the playroom featuring a hopscotch board. I can envision so many ways we’ll use this in the future, including obviously as an indoor hopscotch mat. But as Veronika was playing with blocks today, I realized the mat will also be great for teaching numbers and counting practice with my toddler!

We’ve used her dump truck to clean up blocks before; now it was time to use the truck to bring them out for play. I ferried the blocks from where she’d been playing with them in the living room and she loved dumping them out atop the hopscotch rug.

Counting BLock Towers (1)

Once we had enough blocks, I sat down with her at the beginning, next to number 1.

Counting BLock Towers (2)

For each number, I named it and pointed to the symbol, and then built a block tower with the corresponding number of blocks. This was fun for her to watch because…

Counting BLock Towers (3)

…the towers kept getting taller!

Counting BLock Towers (4)

At first she helped build. Then she lost interest and wanted to play her own way with the blocks, which was fine. I kept naming the numbers and counting each tower of blocks out loud, knowing she was listening and absorbing.

Counting BLock Towers (5)

As I neared the end with the towering skyscrapers of 8, 9, and 10, she suddenly was mesmerized.

Counting BLock Towers (7)

As soon as 10 was finished, she trotted over and my baby Godzilla knocked down the whole block city!

Counting BLock Towers (8)

This was a great way to introduce the notion that numbers get successively bigger as you count up 1 through 10. We’ll be building on our hopscotch mat again soon!