Suitcase Sandbox

Suitcase Sandbox (4)

If you’re hesitant to bring your baby to the beach during his or her first summer, then bring the beach to your baby! This little activity is one step up from the sand sensory play I did when Veronika when she was only 6 months old.

This time, I found an old craft suitcase and completely filled the bottom with sand. Any old suitcase with hard sides would work fine for this purpose! I briefly considered that bigger might have been better, but the small one had an added bonus: I could do the entire activity in the tub, making for fantastically easy clean-up.

Suitcase Sandbox (1)

I stripped Veronika down to a diaper and sat her in the sand. Beach day!

Suitcase Sandbox (2)

The most fun was burying her hands and feet and then helping her uncover them. She loved just kicking her legs in the sand, although looked confused by the grittiness, too.

Suitcase Sandbox (3)

I sprinkled some over her upturned palms, but found that in general it was best to keep the sensory play to her feet, so she didn’t eat any sand.

Suitcase Sandbox (6)

After a time, she seemed frustrated by the small box so I moved her to the side.

Suitcase Sandbox (5)

I loved watching her reach in and draw patterns in the sand.

To clean up, simply close the suitcase and save it for next time! Any extra sand that had spilled was simply rinsed down the tub drain.

Suitcase Sandbox (7)

Melted Crayon Suncatchers

Crayon Suncatcher (8).JPG

It’s so fun to harness the power of the sun when you make art in the summertime. Travis and I used melted crayons in a project once before, but that one relied on the indoor heat of a hairdryer. This time, we put the sun’s heat to work!

To set up, lay a piece of black construction paper on a baking sheet. The dark surface and the metal will help absorb as much of the sun’s heat as possible. Cut two equal sheets of wax paper, and place one on the black paper.

Crayon Suncatcher (1)

The next step was a bit tricky: remove the paper wrapper from crayons and use the edge of a craft stick to shave off bits of wax. Travis found this to be quite difficult, and in all honesty, I did too.

Crayon Suncatcher (2)

After he’d tried for a bit, I made sure our wax paper was covered with enough shavings. Cover that with the second piece of wax paper.

Crayon Suncatcher (3)

Now place in direct sunlight (just like we did with a solar oven a few days ago)! Depending how hot the day is, your crayons may need anywhere from 1 hour to several in order to melt. You can press down, on occasion, to help the process along.

Crayon Suncatcher (5)

To turn it into a suncatcher, cut the wax paper into rectangles or other shapes, and punch a hole in the top of each piece.

Crayon Suncatcher (6)

Thread them onto a dowel (or attach with string), and hang up in the window to catch the sun.

Crayon Suncatcher (7)

What beautiful sunshine!

Crayon Suncatcher (9)


Sundial

Sundial (12).JPG

Last summer Travis helped make two DIY versions of a sundial, but he was really too young to understand how we were tracking the sun. This year, he was ready, and our model a bit more precise!

First, he traced a circle on a piece of sturdy poster board.

Sundial (1)

Cut out and find the exact center of your poster board by measuring halfway lengthwise and crosswise.

Sundial (2)

We used a dowel as our centerpiece, and used clay to hold it in place; Travis pressed down the clay, and then made sure the dowel was nice and secure.

Sundial (4)

We headed out the next morning as soon as sunlight hit the patio, and I showed Travis how to trace a straight line along a ruler following the dowel’s shadow.

Sundial (6)

I pointed out how looong the shadow was this time of day, too, and challenged him to notice how that would change as the day went on.

Sundial (7)

We missed a few morning hours because we were out and about! But by 1 p.m. we were steadily marking on the hour. As we had guessed, the dowel’s shadow was much shorter in the middle of the afternoon, then began to lengthen again.

Sundial (8)

After 5, we lost our sunlight on the patio!

Sundial (9)

So now it was time to head inside and decorate the sundial. Dot markers were the perfect tool for the job!

Sundial (10)

Travis loved the way it looked and now has a neat visual of the sun’s path across the sky each day.

Sundial (11)


Make a Noise

Make a Noise (3)

Admittedly sometimes parents just want the kids to be quiet (is that even possible?) but likewise sometimes it’s great to encourage loud play. Babies and toddlers love banging things together for a reason; they reap an instant reward for their efforts, and they provide themselves with instant entertainment. You can help them get the loud out of their system with this quick-as-can-be game.

I took two of Veronika’s teacups and banged them together. That’s it! Then I handed them over.

Make a Noise (1)

She didn’t need to see it twice.

Make a Noise (2)

Soon she was tapping with glee…

Make a Noise (5)

…and occasionally eating the cups.

Make a Noise (6)

You could also play this game with two stacking cups, or any other two toys, really, but Veronika seemed to like the teacups best!

Make a Noise (4)


Quick Make & Play Edible Sensory Bottle

Edible Bottle (4)

This fantastically easy sensory bottle is quite possibly my new favorite thing in the world…and Veronika’s, too!

To set up the bottle, save any clear plastic juice bottle with a wide mouth and a lid you can screw on tightly.

I gave Veronika the bottle (which of course is a toy all by itself!) and set out a few easy-to-hold snacks in front of her, including Plum Organics super puffs and Earth’s Best letter of the day cookies (both vegan!).

Edible Bottle (1)

I showed her how to drop some of the snacks into the bottle, making a nice plink sound each time. She soon was following suit, with the added fun that she could nibble as she worked.

Edible Bottle (2)

Once she paused to enjoy the puffs, I filled the bottle a little further and put on the cap.

Edible Bottle (3)

Now it was a sensory bottle to shake!

Edible Bottle (5)

The real beauty of this sensory bottle became apparent as soon as we were on the go. At the grocery store, first Veronika could just enjoy playing with it, shaking it or chewing at the cap.

Edible Bottle (8).jpg

But when she got a little fussy, I unscrewed the cap and surprised her: a snack!

Edible Bottle (9)

She kept handing me the bottle over and over, asking for little puffs with sounds and gestures. I loved watching her enjoy the toy in multiple ways during our shopping trip and I may very well always keep one of these on hand from now on.

Edible Bottle (6)

Exploring Stars Kiwi Crate

Kiwi Stars

The topic of Travis’s Kiwi Crate this month (stars and the solar system), is one of his favorite topics, so I had no doubts he would enjoy the projects. The crafts themselves proved to be a little faulty, but we still had galaxies full of fun. What a perfect coincidence that his recipes from Raddish Kids were star-themed this month, too.

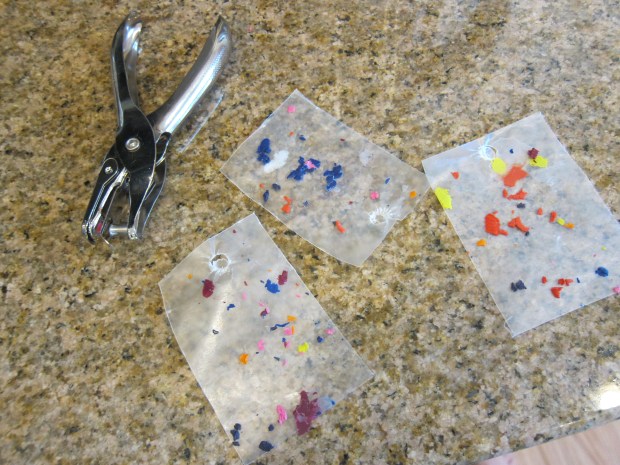
First up: a Constellation Lantern. Travis knows quite a bit about constellations, so happily set about making a few pretend versions with the provided black star stickers on the lantern paper.

Kiwi Stars (10)

I made a few real star patterns for him, including Leo the lion (his astrological sign) and some funny ones (Darth Vader’s helmet!).

Kiwi Stars (11)

He popped open the paper lantern frame.

Kiwi Stars (12)

Insert the slots at the bottom of the frame into the provided paper base; fold and then tape to secure shut. Open the paper lantern insert and put this inside the first frame. The pages he had decorated with stars now fit in between these two.

Kiwi Stars (13)

“I can do it myself!” he said confidently, not wanting any assistance.

Adhere the provided foam circle into the bottom of the lantern. Insert the provided tea light (make sure it is on!) and then add the paper lantern lid. A pipe cleaner threaded through holes in the top makes a handle.

Kiwi Stars (14)

From here, we were off to the darkest room we could find in the house to check it out!

Kiwi Stars (16)

Travis loved being in the dark and seeing the stars “glow”.

Kiwi Stars (15)

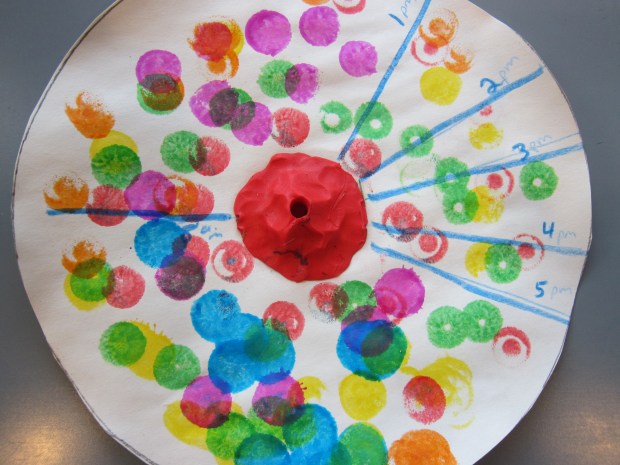
Next up was a Solar Spinner, a kid-friendly version of an orrery.

Two interlocking wooden gears are inserted into the provided base and secured with brads. As with the lantern, Travis loved doing all these fine motor skills by himself.

Kiwi Stars (1)

Once the gears were between the two base plates, Travis screwed them together with kid-friendly plastic nuts and bolts.

Kiwi Stars (3)

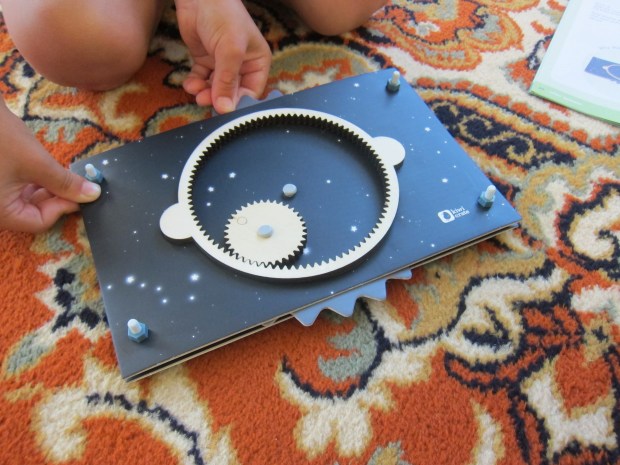
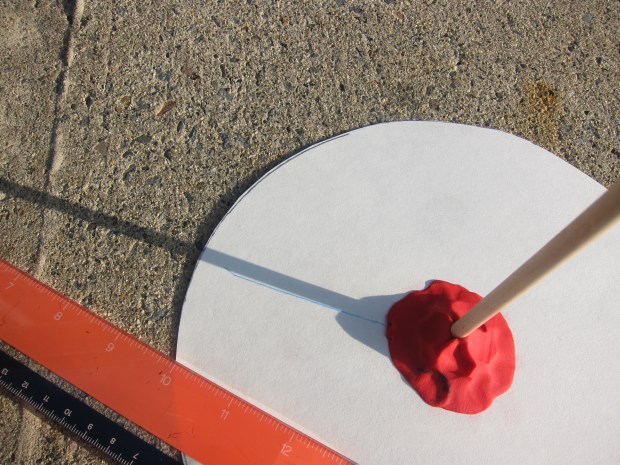
He gave the machine little test, and watched the wooden gears spin around together. Now we just needed to add the provided sun, Earth, and moon. There are teeny tiny green stickers that kids can add to the blue Earth circle.

Kiwi Stars (5)

The “sun” is a light inserted into a plastic case.

Kiwi Stars (4)

All three orbs attach to the orrery with sticky foam dots.

Kiwi Stars (8)

Travis was smitten with the model he’d made! It also fantastically illustrates to children why sometimes it’s day and sometimes night, as well as why sometimes we see a full moon and sometimes no moon (a new moon). Full moon…

Kiwi Stars (7)

New moon!

Kiwi Stars (6)

Finally, we put together a Making Moonlight model. Stick the sharp end of a pencil onto a Styrofoam ball (not provided in the kit); this will be your moon. Turn on a flashlight; this is your sun!

Making Moonlight (1)

Now we headed into a dark room and I had Travis spin while I held the “sun.”

Making Moonlight (2)

When the flashlight hits the ball, it appears to glow; but of course it’s not really glowing, just reflecting the flashlight. The idea is to show that the moon doesn’t make its own light, but looks “full” when the sun shines on it, and looks “new” when sunlight does not hit it.

Making Moonlight (3)

Travis loved adding lots of “craters” to his moon before he was done with it.

Making Moonlight (4)

As mentioned at the top of this post, the projects were a little faulty in this kit. In order to turn off the lights in both, you had to disassemble them a little. This constant take-apart-and-put-back-together-again meant that neither project lasted long. The top of the lantern and pipe cleaner were soon crumpled and broken, and the model sun no longer adhered to our model solar system.

But we at least got to enjoy both for a short while!

Oddly, there were no suggested books this time around, but it was easy to find some fun reads at the library, including Whose Moon is That by Kim Krans and Zoo in the Sky by Jacqueline Mitton.

Kiwi Stars books

Meanwhile, we can’t wait to explore further with Travis’s real telescope on an upcoming vacation. Our plans include making up our own pictures with what we see in the night sky; comparing how the sky is way out in the countryside versus near a city; and looking for craters on the moon!

I Spy Adjectives

Descriptive Words (5).JPG

No doubt you’re teaching your baby a lot of nouns: mommy, daddy, cats and dogs! But don’t forget about adjectives. Here’s a cute way to incorporate them into your baby’s vocabulary.

As Veronika and I went for a walk today, I made sure to mention at least one adjective for each item I named. Although you don’t need to, I find it fun to say, “I spy with my little eye…” before each one.

There were tall trees.

Descriptive Words (3)

Big dogs (and some small ones we passed, too!).

Descriptive Words (4)

Cold bottles.

Descriptive Words (6)

Tiny things like clovers and bugs.

Descriptive Words (7)

And so much more! You can continue the game as you drive or walk around town; fast cars are a great one, or name the colors of cars or buildings.

And certainly keep it up at home. We had mommy’s long skirt.

Descriptive Words (2)

And a big bite of food for my big girl!

Descriptive Words (1)

Consider reading a book together that same evening that focuses on adjectives, like Mouse is Small by Mary Murphy or Big Little by Leslie Patricelli.

Descriptive Words alt.jpg

What does your baby spy with his or her little eye? Please share in the comments!

Snack Math


Snack Math (6)

Summer is winding to a close and I’m sneaking in a few final math games before the start of (!) Kindergarten. Today Travis did a quick math review  at snack time. Ideal foods for this game are small snacks your child eats a lot of: Annie’s bunny grahams, cereal pieces, pretzel sticks, etc. We played with Earth Balance vegan cheddar squares!

Write out the numbers 1 through 10 on post-its or index cards. Before eating, Travis had to place the correct number of cheddar squares on each post-it.

I had him start with 10 knowing that working up to larger numbers would be more daunting. Instead, it got easier as he went along.

Snack Math (2)

Unexpectedly, he loved the game! He tried to make each pile into vertical stacks, and thought it was hilarious when they toppled over.

Snack Math (3)

This was a great way to keep a math lesson light.

Snack Math (4)

He also thought it was hilarious to eat any broken cheddar squares he found, a quick lesson on fractions and halves even if he didn’t know it!

Snack Math (5)

And then at the end, he got to knock down all the towers and gobble them up.

Snack Math (7)


Nature “Size Hunt”

Nature Size (4)

This mini scavenger hunt will inject some math into your next nature walk. We had a  beautiful family afternoon along a local trail, and I challenged Travis to find a few things of various sizes compared to something else along the way. You can vary your list, but here are a few ideas:

First up, he needed to spot something smaller than his fingernail. I thought he might find a bug, but he surprised me with this little pebble.

Nature Size (5)

Longer than his arm? A stick!

Nature Size (3)

A rock was bigger than his hand, and an acorn was smaller than his foot.

Nature Size (2)

For the last one, he needed to spot something larger than a leaf. The leaf we found was cool all by itself, almost mitten-shaped! 

Nature Size (1)What items do you find on your “size hunt”? Please share in the comments!

Young Musician

Young Musician (5)

Toy pianos are a fantastic instrument for babies who have graduated beyond the most basic noisemakers (like maracas and bells). These first instruments (drums, maracas) give baby an immediate connection between their action and the noise that follows. Pianos are one step more sophisticated; the key makes a noise when pressed, but the mechanism (hammer and string) is unseen.

All that aside, what baby doesn’t love just banging on the keys? Certainly Veronika took right to it! I played a few notes and she came crawling over.

Young Musician (2)

Her little fingers were soon pounding along.

Young Musician (4)

For extra fun, this is a good chance to go through a children’s songbook to play simple ditties. You can introduce baby to classics you might have forgotten about, like London Bridge, The Muffin Man, Three Blind Mice and more.

Young Musician (1)

As I played, she grabbed my fingers and wrists to join in.

Young Musician (6)

Toy electric keyboards are fun for babies too. Veronika presses every button and loves the way she can vary the sounds.

Young Musician (9)

Here’s to my little musician!

Young Musician (10)