Sheet Day

Sheet Day (3)

In life with a toddler, it’s easier to do a chore (any chore!) if you turn it into a game. Here’s my hack for making it feel less like drudgery on the day I wash the sheets.

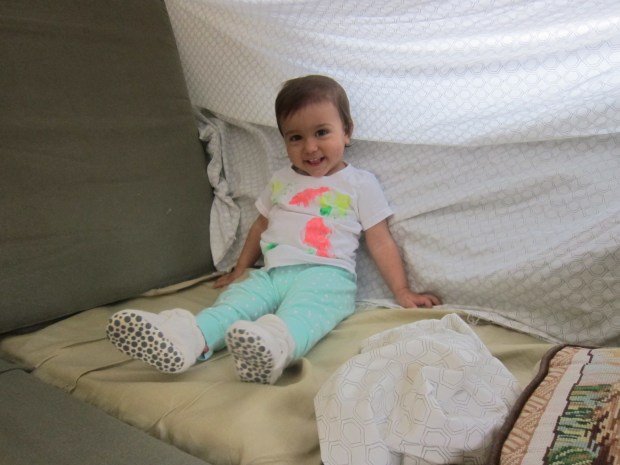
Strip the bed, but don’t toss the sheets into the washing machine right away. First, make a fort! You can mix things up each time, but ours always involves some variation of the couch cushions, cozy pillows and blankets to sit on, and the sheets strung across the top.

Sheet Day (2)

Veronika loves to pretend this is her house. A little pillow makes a handy “door” for coming to visit. “Ding dong!” she says for the doorbell.

Sheet Day (5)

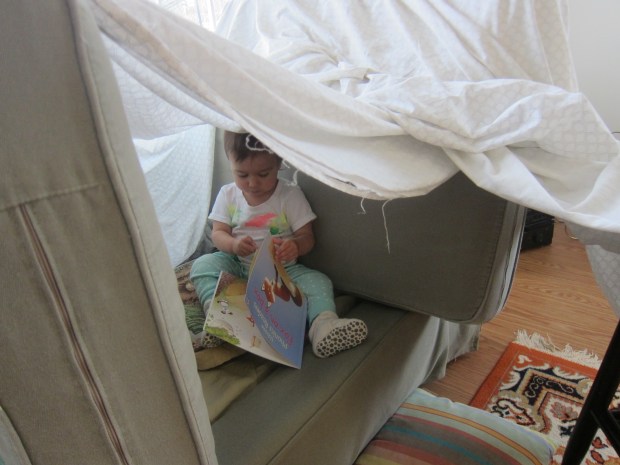
Inevitably, it just becomes a cozy place to crawl in and hide.

Sheet Day (7)

Or relax and read!

Sheet Day (8)

Don’t forget about pillowcases. They are perfect for playing peekaboo.

Sheet Day (10)

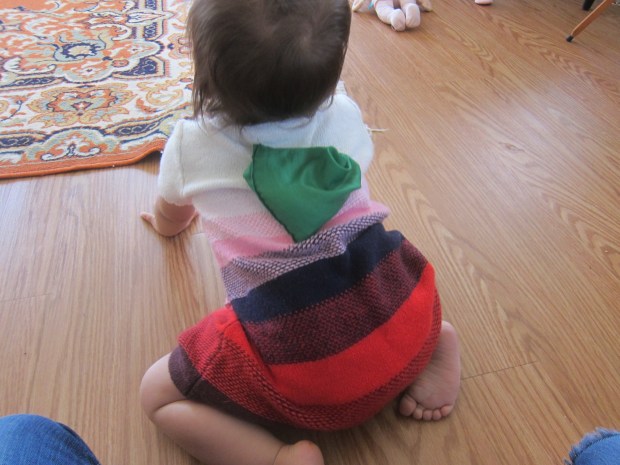
Or for wearing as superhero capes.

Sheet Day (6)

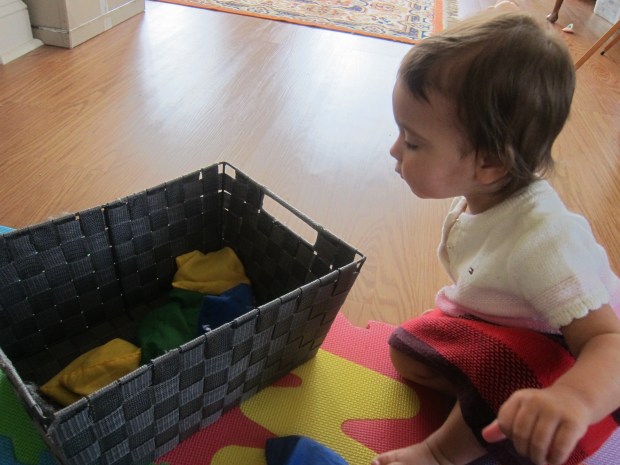
When we’re done, I ask for Veronika’s help to throw all of the sheets into the laundry basket. She loves this part!

Sheet Day (11)

The sheet day fun is complete, and so worth it that I don’t mind making the beds up after.

Sheet Day (9)

Mix a Pancake

Mix a Pancake (4)

A friend once told me her kids ate pancakes for breakfast every morning and my mind nearly exploded. How did she deal with the mixing, and griddles, and clean up and still get the kids to school on time? In my house, pancakes are a weekend project!

Well, one of the benefits of home schooling is that mornings move slower now, and there’s more time for a pancake mess. All I needed was a handy trick to keep my toddler busy until the pancakes were ready! Here’s a fun rhyme you can turn into a game:

Mix a pancake,

Stir a pancake,

Pop it in the pan.

Fry the pancake,

Toss the pancake,

Catch it if you can!

Mime the actions for each line as you say the poem through the first time, and then add props! Veronika has a few spoons and pans that are just hers, for keeping busy in the kitchen.

Mix a Pancake (1)

Beanbags then make perfect “pancakes”!

Mix a Pancake (3)

Tossing and catching the “pancake” was especially fun.

Mix a Pancake (5)

You’ll have breakfast on the table in (almost) no time at all.

Mix a Pancake (2)

Simple Sorter

Simple Sorter (2)

Veronika has started to recognize shapes. Although right now she calls almost all of them “stars”, what she’s exhibiting is an awareness that the world is made of shapes. She’s just starting to say triangle and circle, too! So I grabbed at the chance for some early learning today, by making a shape “sorter” with only one shape.

She has a toy bucket and lid that features a variety of shapes, but this can make it confusing for toddlers who are just learning the vocab. Instead, the sorter I made her only contained circles. I cut holes in the lid of a clean non-dairy yogurt container. Ideally you want your cut-outs to be a perfect circle, although this was tough to achieve with the knife I used.

Simple Sorter (1)

I gave Veronika the can and lid, along with soft yellow golf balls to push through.

Simple Sorter (5)

Since it was all circles, I could help her say “circle, circle, circle” over and over as she pushed each one through.

Simple Sorter (3)

She used a round milk carton cap a few times, too, which roughly fit the circle theme.

Simple Sorter (6)

The golf balls were just the right size though, such that she had to give each one a little push to make it pop in. She seemed to enjoy that sensation!

Simple Sorter (9)

It seems like we’re all about inserting into containers and dumping these days, but whatever keeps her toddler hands busy is fine with me!

Simple Sorter (8)

Clothespins and Containers

Clothespin Drop (6)

Clothespins plus containers are a match made in heaven, perfect for keeping little hands busy. Today, Veronika and I played a few variations on the game.

We started with an empty almond milk jug, which was perfect because it had a lid that Veronika could easily twist on and off, plus the hard plastic sides meant that clothespins inside would make a nice jangling noise.

Clothespin Drop (1)

I simply showed her how to drop clothespins in.

Clothespin Drop (5)

And she took it upon herself to dump them out again!

Clothespin Drop (2)

For variation, seal it up and shake it like a maraca. For further variation, drop something else inside! We decided metallic spoons might be too loud, but give them a try if your kids like things really noisy.

As an alternative clothespin game, I showed Veronika how to pinch spring-type clothespins around the rim of an empty coffee can.

Clothespin Drop (3)

The pinching motion proved to be too advanced still for her at seventeen months, so I’ll probably return to this game down the road.

Clothespin Drop (4)

But when I cut a hole in the center of the coffee can lid, she loved dropping clothespins inside!

Clothespin Drop (8)

She needed help to remove this lid, but then could dump the clothespins out and begin again. The can also makes the perfect place to store clothespins, when we’re ready to put the game away.

Clothespin Drop (7)

As a side note, coffee cans are also great for filling with rocks.

Clothespin Drop (11)

Drop them in, put on the lid, and shake away for a noisy maraca! This was a great way to extend some recent rock play.

Clothespin Drop (12)

Can Towers

Can Towers (6)

A big shipment of cat food arrived today, and before I put the cans away, I had a feeling they would make perfect toddler building blocks! Boy was I right. No sooner did I put the boxes of cans down on the ground than Veronika had her hands on them and started stacking.

Can Towers (2)

These were 3-ounce cans, which I would declare the perfect size for toddlers; I didn’t worry about them being too heavy if they fell. You can play this game with more standard 15-ounce cans, but if so I would recommend making sure your child has shoes on, in case of dropped items. Alternatively, play with larger cans that are empty, but then you’ll need to make sure you’ve duct-taped over any sharp edges.

Can Towers (3)

Meanwhile, these little cat food cans did away with any of that prep work! She loved building high, and seeing how many she could stack. And then of course she loved the kaboom of knocking her towers over.

Can Towers (4)

The game looked like so much fun that big brother Travis came over to join in. The kids had a competition to see who could stack higher of course!

Can Towers (7)

Bigger kids might get fancier with their blocks creations, too.

Can Towers (10)

After a while we even had “bulldozers” to help clean up the debris from our toppling can towers.

Can Towers (9)

In sum, little cans make great “blocks” for small hands.

Can Towers (5)

Bananas, Agave, and Wheat Germ

Bananas Wheat Germ (5)

Here’s a snack that your toddler can actually prepare for him- or herself! This cute project lets even young toddlers practice “knife” skills, proudly prepare their own food, and enjoy a yummy treat at the end.

Bananas Wheat Germ (7)

I sat Veronika down with a plate filled with agave nectar in one compartment, wheat germ in the second, and half of a banana in the third. I asked her to help me peel the banana, which toddlers always love!

Bananas Wheat Germ (1)

She was even more interested in the next step though, when I presented her with Popsicle sticks to “slice” the banana.

Bananas Wheat Germ (3)

More so than the slicing, she loved dipping the sticks into the agave and wheat germ, and then sprinkling over the banana.

Bananas Wheat Germ (4)

She took this so seriously, intent on her work. Scoop and pour. Scoop and pour. When the banana pieces were nicely coated, I showed her how to insert a Popsicle stick to hold up a piece of the snack she had created.

Bananas Wheat Germ (2)

When I cleared the plate, she got a bit more into the slicing element of the project.

Bananas Wheat Germ (8)

Once she felt brave enough, she lifted one of the banana pieces and touched it to her lips.

Bananas Wheat Germ (9)

“Yummy!” she declared.

Bananas Wheat Germ (10)

It was so neat to put her in charge of her snack this way, from start to finish. I could easily see this becoming a favorite food around here.

Rock Play

Rock Play (11)

When Travis was little, there was a fire pit in our apartment complex filled with rocks, and he could literally spend hours standing at the edge and playing with them. Sorting them, taking them out, tossing them back in again, finding favorites, you name it. I lament sometimes that Veronika doesn’t have access to the same great game! So today, we brought some rocks inside to play.

After a walk at a nearby garden, we returned home with a big bounty of rocks. Make sure that you choose ones that are too big to be a choking hazard, but not so heavy that they’ll hurt a little toe if dropped.

Rock Play (1)

First we gave our rocks a bath! Veronika loved swirling them in a little tray filled with soapy water, and helping pat them dry.

Rock Play (2)

I then gave her a few buckets that she could transfer them into. She loved taking them in and out.

Rock Play (4)

Next she started to fill her dress-up purse with the rocks…

Rock Play (5)

…and even headed off for a walk with her rocks tucked inside!

Rock Play (7)

For some artsy fun, we then pulled out paints and I showed her how to dab at the rocks with a paintbrush.

Rock Play (8)

This was good fun…

Rock Play (9)

…until she decided it was more fun to paint her hands, of course.

Rock Play (10)

I let the paint on the rocks dry and set them aside for later use, because I know we’re far from done with them. There will be lots more rock play in Veronika’s future!

Beanbag Games, Two Ways

Beanbag Throw (4)

Beanbags are a classic toddler toy, with almost endless variations on how you can use them. Here are just two fun ways Veronika and I played with them today!

First, I simply placed a basket a little ways away and asked Veronika to put a beanbag into it.

Beanbag Throw (3)

Then I asked her to bring one back to me.

Beanbag Throw (1)

Of course at seventeen months old she didn’t always follow “directions,” but this can lead to endless variations on transferring beanbags in and out of the basket. Your child can throw them, or toss them, or place them gently – whatever they like best!

Beanbag Throw (2)

Then we made things sillier with a beanbag crawl. Encourage your little one to get down on all fours and put a beanbag on his or her back.

Beanbag Crawl (1)

Seeing big brother Travis model this helped her get the idea!

Beanbag Crawl (2)

Then she was off and crawling!

Beanbag Crawl (3)

Obviously it was difficult for her to balance the beanbag, but she got a big laugh out of it every time it slipped off.

Beanbag Crawl (4)

She kept asking for my help to return it to her back: “More more crawl!”

Beanbag Crawl (5)

Maybe we’ll even turn it into a racing game when she gets older. How does your child play with beanbags? Please share in the comments!


Beanbag Throw (5)

Squishy Bag

Squishy Bag (6)

Sometimes you just need a good old-fashioned way to entertain a toddler, and today this squishy bag was it. There is nothing fancy here, just good squishy fun.

The mixture inside is similar to a finger paint recipe I’ve made. Bring 3 cups water to a boil. Meanwhile, whisk together 4 tablespoons cornstarch and about 3 tablespoons water to form a paste. Add the cornstarch mixture to the boiling water and continue to cook for 1 to 2 minutes; the mixture will look like Vaseline.

Remove from heat and stir in food coloring. I divided my batch in half so Veronika could have red and green.

Squishy Bag (1)

Let cool slightly before transferring to zip-top plastic bags. Seal (I recommend duct tape along the top for added security) and then it’s time to play!

Squishy Bag (2)

I gave the bags to Veronika while the mixture inside was still warm, but not hot. Be sure to check the temperature with your own hand, first. This added a tiny temperature lesson to the activity.

Squishy Bag (3)

She really loved the way this one felt!

Squishy Bag (8)

She also was delighted when I showed her how to make shapes, which will linger for a few moments in the goo. A “V” for Veronika was easy.

Squishy Bag (5)

A star (her favorite shape) was a bit harder to make clearly, but she loved that we tried!

Squishy Bag (9)

Then I showed her how to hold the bags tightly at one corner and squeeze, which was a delight.

Squishy Bag (11)

Squeeze!

Squishy Bag (12)

Eventually the mixture inside was completely cold, but she still enjoyed squishing about for a while. Next time I would do this particular sensory bag in snack-size zip-top baggies, as I think it would be easier for her hands.

Squishy Bag (7)

Porcupine Playdough

Porcupine Playdough (8)

Play dough is a great way to keep little hands busy no matter what, but if you want to add an extra element of fun, make it spiky… by designing little “porcupines”!

I cut paper straws into small pieces for this activity. You could also use craft sticks but I liked that I could vary the length of the straws. Some pieces were short and stubby and some were longer.

Porcupine Playdough (1)

Of course Veronika has no actual idea of what a porcupine is, but she sure does know that pushing straws into blobs of play dough was good fun!

Porcupine Playdough (2)

I demonstrated first, and she took right to it.

Porcupine Playdough (3)

Pulling them out was its own challenge, since the straws will stick a little. A good way to work those little muscles!

Porcupine Playdough (4)

She grew momentarily confused at one point when there was no where else to stick a straw in this play dough blob.

Porcupine Playdough (6)

Phew! I presented her with a new ball of play dough just in time!

Porcupine Playdough (5)

The game can easily continue with no more variation than this, but chances are it will turn into more free-form play dough play. Perfect for when big siblings are busy doing school work online!

Porcupine Playdough (9)