As with her past Panda crates, Veronika is a little old for the items that arrived this month from Kiwi Co., but they could also be tailored to fit her age. This month’s topic – making sense of the spatial world around us – included fun toys and innovative game ideas. I would recommend this crate for babies 8 months and up.
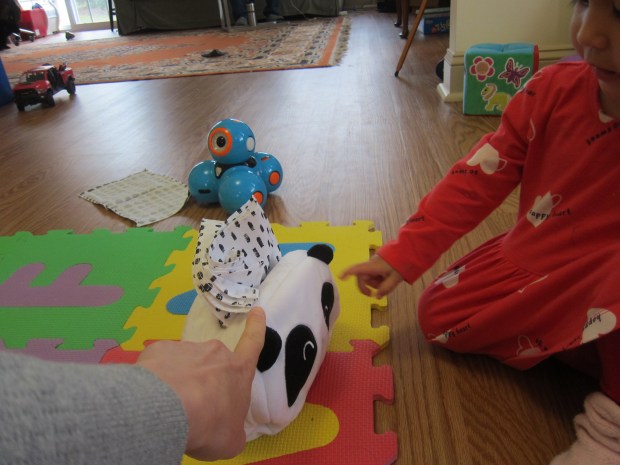
One: Fabric Tissues
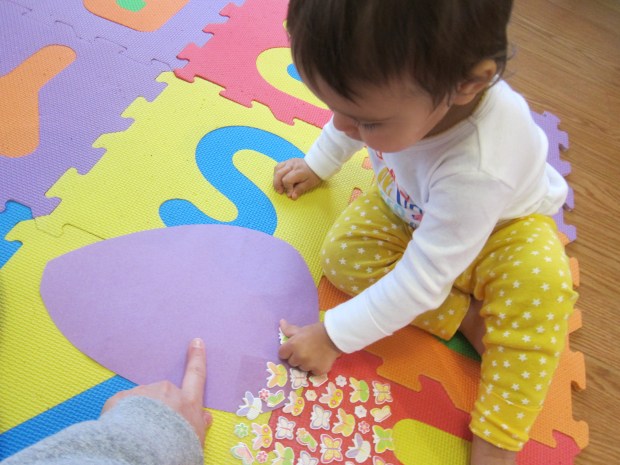
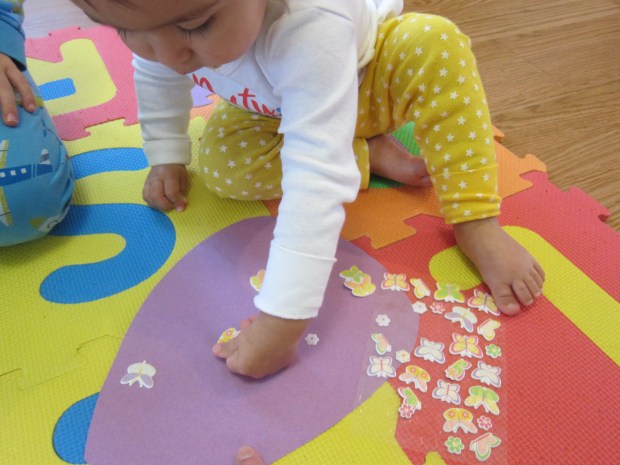
These black and white tissues featured fun patterns, slightly different on each one. They didn’t make any crinkly noise, which I expected, but had a nice thickness that makes them more durable than regular Kleenex.

In addition to just being fun to play with, Panda intends them to help with the idea of object permanence. Although old hat for my seventeen-month-old, the concept never grows stale! We hid her favorite toy and she was so pleased when she uncovered it.

You can also stack the tissues, and encourage your child to lift one and reveal the one beneath.
In this way, they can also be used in conjunction with…
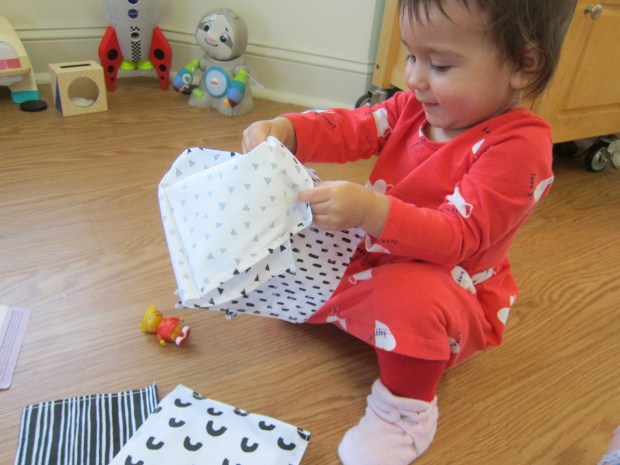
Two: Tissue Box
This soft “tissue box” comes in the shape of Poppy Panda, and has nice heft to it thanks to a bean bag-like filling in the bottom. You can use the box to hide any object, like a toy car, but it’s really meant for the fabric tissues.

Layer these in such a way that when you pull one, the next pops up.
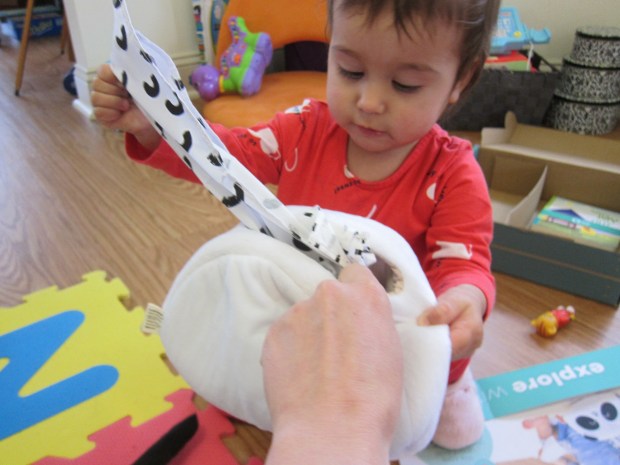
Veronika recently played this game with real tissues, so I appreciated that now we can do it without the waste of paper! It’s also a great object for self-directed play since you can leave the box out with the tissues dangling tantalizingly.
Three: Bead Maze
Panda’s version of this classic toy had a few fun twists. We could talk about the colors and shapes of the beads and you canuse directional words related to the little Poppy Panda at the base.

“The beads are above panda,” I said to her, or, “Panda is below the beads.” Since Veronika is older, I challenged her to follow directions too, like moving the yellow bead from one side to the other.
Four: Coin Box Puzzle
This item was the biggest hit in the crate. Veronika loved fitting the “coin” circles into the box, both through the large opening on top and the smaller slit on the side, which took a few tries.
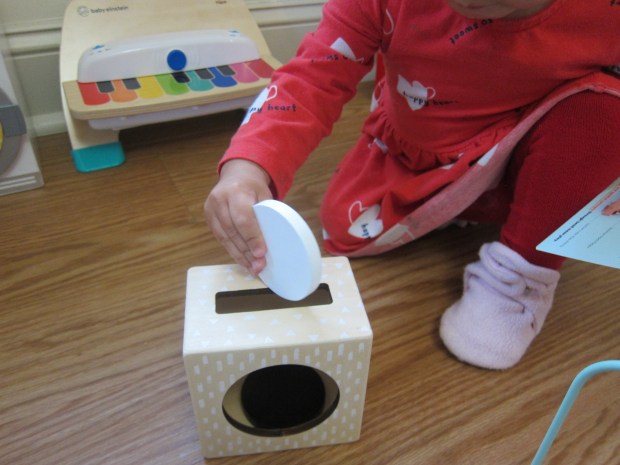
Then I challenged her to get the coins out. Dump! The toy is also good for counting out up to four, as the coins go in the box.

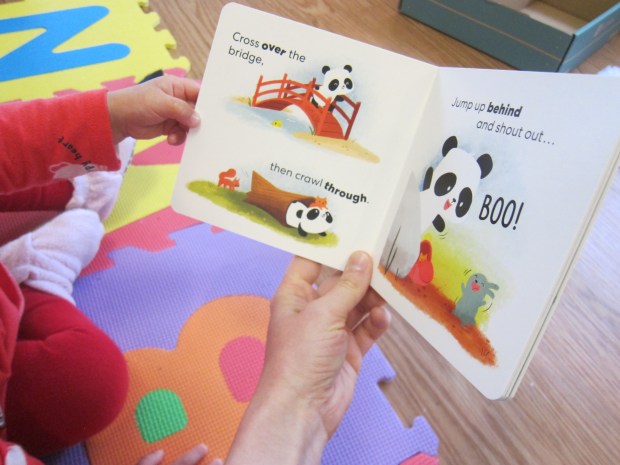
Five: Board Book
The board book this month featured cute illustrations and was all about directional words (up, down, around, over). It would have been nice if the book included cut-outs and grooves to trace or flaps to lift; as it was, there was nothing really novel about the book for Veronika.
Wonder Magazine contained stage-by-stage developmental advice, and reminded us of past games we’ve played having to do with body awareness, spatial language, textures and spatial objects. There was a useful article about making safe spaces for little crawlers and walkers, including the idea to rotate toys and game ideas like a Tupperware drawer.
The online singalong for this crate was to Itsy Bitsy Spider, featuring lots of spatial words of course!
Beyond the Crate suggestions included those we’ve already done, like What’s In the Bag?
Of course we had to play peek-a-boo, but with a twist: a Peek-a-Boo Parachute! I lay Veronika down and let a scarf fall onto her head gently. Where’s Veronika?
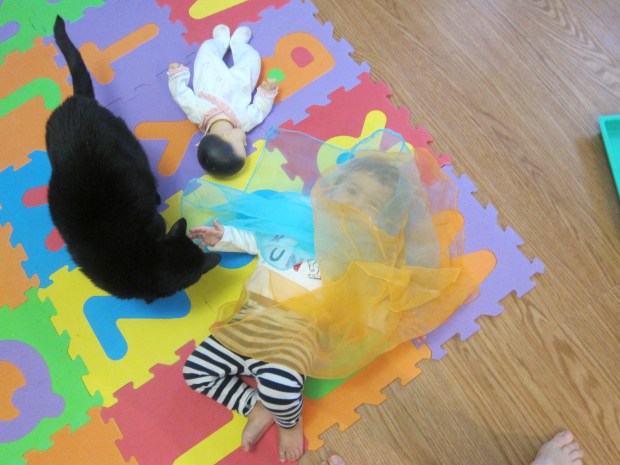
Peek-a-boo!

She giggle giggle giggled for this version, and then needed to cover me…

…and her Baby!

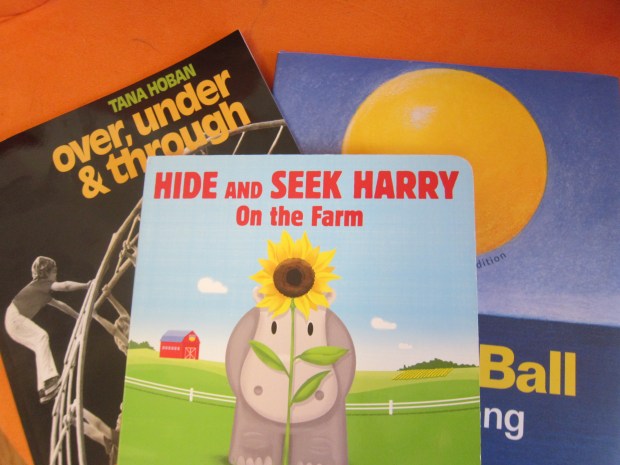
For books, we read:
- Over, Under & Through, by Tana Hoban
- Yellow Ball, by Molly Bang
- Hide and Seek Harry: On the Farm, by Kenny Harrison