Bird Busy Box

Busy Box Turkeys (5)

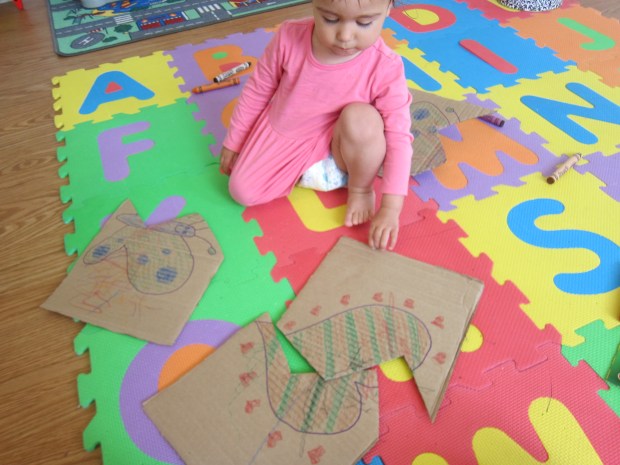
If you’re not familiar with “busy boxes”, the idea is to fill a small craft bin with just a few supplies, from which a toddler can keep occupied solo for a time. Veronika was a bit too young for this particular box to be a true busy box, but we did have fun with it together! The bird theme felt just right for springtime.

As prep, I glued wiggle eyes to several small Styrofoam balls, then placed them in a bin along with the following: little pieces of pipe cleaner and feathers.

Busy Box Turkeys (1)

I showed Veronika how to poke a piece of pipe cleaner into each face as a beak.

Busy Box Turkeys (3)

Then the feathers can be inserted any which way to complete your birds! Older toddlers could take it from here as a busy box, but Veronika needed help with the mechanics of poking in the sharp point of the feather. “Yellow bird!” she said with delight to one that featured predominantly yellow feathers.

Busy Box Turkeys (4)

We mixed and matched colors, and then started experimenting with the placement of the feathers. If they stuck upright, the birds looked like turkeys. (In fact, you could consider this as a busy box around Thanksgiving and design all the birds with upright feathers!).

Busy Box Turkeys (9)

If the feathers trailed towards the back, the birds looked like peacocks.

Busy Box Turkeys (11)

Out to the side and they looked like little song birds or eagles.

Busy Box Turkeys (10)

Big brother Travis was the one who came up with the idea of adding additional pipe cleaner pieces to be feet.

Busy Box Turkeys (8)

Soon we were fluttering and tweeting our birds through the air.

Busy Box Turkeys (6)

These brought such a big smile to her face!

Busy Box Turkeys (12)

So a fantastic craft, whether as a true busy box to entertain your toddler solo or to engage in together.

Busy Box Turkeys (7)

Match My Picture

Match My Picture (3)

Here’s a fun game for your toddler that feels simply like playing, but will also boost cognitive skills. It’s easiest to play if you have a set of something (for example, we used Veronika’s toy tool set). But you could also play with random toys, so long as you have a picture of each (whether from the original packaging, or a picture from a catalog).

I purposely cut the images of her toy tools from the original box, which made things easy. Then, I simply set out the tools and the pictures, and challenged her to find each one in turn.

Match My Picture (1)

She looked so delighted realizing that each cardboard picture corresponded to one of her tools. She would trot over, grab the real thing, and then look from one to the other almost with wonder.

Match My Picture (2)

This was great for clean-up, too. As we found each item, she placed it back in the toolbox!

Match My Picture (5)

You could also turn the game into a hunt by hiding some of the toys, then handing your toddler the picture as a clue. Or your toddler might be the one who wants to hide the items, and you go seeking! 

Match My Picture (4)

This is definitely a game we’ll repeat and play in various ways.

Jumbo DIY Cardboard Puzzle

Giant Puzzle (6)

This easy project can be your toddler’s first jigsaw puzzle! With just two pieces, it introduces the notion of interlocking pieces, and your child can proudly solve it all alone.

To start, I cut a cardboard box into pieces and saved the two largest sides. I drew an outline of a simple picture on each, choosing two of Veronika’s favorite things: a butterfly and a heart.

Giant Puzzle (1)

I invited her to help me color them in! Now the process of making the puzzle was just as fun as the final play. She loved talking about colors as we used crayons side by side.

Giant Puzzle (2)

Then I cut a big zig-zag shape down each of our two drawings. Voila: We had two-piece puzzles!

Giant Puzzle (3)

“What happened to butterfly?” I asked her, coaxing her to realize the cardboard was now in two parts. I showed her how to slide the two pieces of cardboard together again.

Giant Puzzle (4)

She echoed my words, and busily began moving the cardboard pieces apart and then back together again.

Giant Puzzle (5)

It hadn’t occurred to me, but because we made two puzzles, she did some mixing and matching as well. She was confused when the heart wasn’t the other half of the butterfly until I helped her solve it.

IMG_0039

I loved that I could really see her brain at work here!

Giant Puzzle (8)

In sum, this is a fantastic first jigsaw puzzle, and so easy to make.

Giant Puzzle (7)

Fabric Free Play

Fabric Free Play (4)

Veronika is legitimately obsessed with stars, so when I found a swatch of star-print fabric in my craft bin, I knew I had to let her play with it. It prompted the idea to let her play with lots of fabric scraps, and this turned into great sensory and solo play!

Fabric Free Play (9)

First, I showed her how to simply pile the fabric scraps in and out of a small box. She needed no further demonstration, and loved moving the scraps in, out, into smaller boxes, back to bigger boxes… You name it!

Fabric Free Play (12)

Inevitably, your toddler will probably let the fabric rain down like confetti!

Fabric Free Play (6)

She then had a game going in her head with the big star-print piece, pretending it was her bed.

Fabric Free Play (5)

For some learning fun, point out any different colors and patterns you might have. I showed her the difference between big dots and little dots. Or between polka dots and stripes.

Fabric Free Play (14)

You can help your child sort them by color or pattern, too. Finally, you can turn this into movement and music play! I took the longest strips of fabric and tied them to a jingle bell ring from our music bin.

Fabric Free Play (8)

She loved shaking this in the air.

Fabric Free Play (16)

Later in the day, I turned to find her busy with the fabric swatches again. So busy in fact that I had time to bake a cake!

Fabric Free Play (13)

So before you toss any fabric scraps, don’t forget that they make a fantastic toddler toy.

Fabric Free Play (11)

Food-Coloring Fingerpaint

Food Color Fingerpaint (9)

Go figure! I’ve been trying method after method to encourage Veronika to keep her fingers out of the paint, but when I tested out this neat idea that actually encourages finger painting, she wanted to use a brush! Luckily she did switch to hands eventually, and I was glad she did. This is goopy glorious toddler art at its best.

Food Color Fingerpaint (7)

To start, I set a thick piece of white paper on her highchair tray and drizzled on a little corn syrup. Squirt a few different colors of food coloring into the corn syrup blobs; the colors will instantly run and bleed in a beautiful way!

Food Color Fingerpaint (2)

Veronika began cautiously dabbing at this with a paint brush. She was so intrigued as she lifted up a drop of colored syrup, then transferred her brush over to another section of paper to press down.

Food Color Fingerpaint (3)

I love watching when she concentrates on art this way.

Food Color Fingerpaint (4)

Well, eventually it was up to me to get my hands dirty first! I showed her how she could rub a finger through the mixture, swirling the color and corn syrup together for a glossy paint-like effect.

Food Color Fingerpaint (6)

At last! The fingers went into the finger paint.

Food Color Fingerpaint (8)

“Goopy!” she squealed with delight. “Squishy!” This girl is not afraid to get her hands dirty. She loved smearing it, rubbing sticky hands together, and watching the colors mix.

Food Color FIngerpaint (12)

The painting looks quite shiny and pretty once the corn syrup dries! Definitely one to display.

Duplo Printing

Duplo Printing (11)

This novel painting method is an easy way to mix up art projects with a toddler. It’s also an ideal introduction to the process of “stamping”, since Duplo fit perfectly in those toddler-sized hands.

I squirted a few blobs of paint into a shallow tray, and set out some of Veronika’s Duplo pieces, along with sheets of thick white paper. I showed her how to dip the Duplo into the paint (ideally with the bumps down) and press on to the paper.

Duplo Printing (7)

The first mark will probably come out splotchy but as you continue to dot, the bumps become clearer. “Bump bump bump!” she said with excitement.

Duplo Printing (8)

She grabbed for a piece, and – not surprisingly – didn’t quite get the bumps in the paint on her first try, so I assisted a little bit.

Duplo Printing (5)

Instead, her prints tended to be of the sides, bottoms, or edges of the Duplo pieces, but this gave nice variety to our pages. She looked so proud of herself, and at the process of making this art!

Duplo Printing (10)

Meanwhile, I continued to dot the bumpy side of Duplo pieces more clearly around her work, to show her the effect. A full length “train” piece gave nice variety.

Duplo Printing (3)

You can let the paint colors overlap for subtle color mixing, or just let your toddler run wild with the project.

Duplo Printing (1)

One note of caution: Be sure to wash the paint off soon after ending the project, especially if your child will be upset at favorite Duplo pieces being soiled.

Duplo Printing (9)

We knew we were done when she dipped in her hands, not the Duplo pieces!

Louder, Softer Please

Louder Softer (5)

At around a year and a half old, your toddler probably has one volume these days, and that volume is set on loud. Whether playing excitedly or having an epic meltdown, toddlers sure do know how to make noise. So here are a couple ideas for playing with dynamics, and teaching them when to be quieter!

First, we pulled out a variety of instruments that naturally lend themselves to dynamics. Drums were for loud, and soft maracas were for quiet noises.

Louder Softer (1)

A fun song to sing for this game was Yankee Doodle because, well, he rides away on his horse! Starting loud, I drummed along during the first line:

“Yankee Doodle came to town riding on a pony!”

Then I dropped my voice to a whisper and shook a gentle maraca; Yankee Doodle was riding away.

“Stuck a feather in his cap and called it macaroni.”

Louder Softer (6)

She joined in on the dynamics with sticks on the drums, and even shouted out “Loud!”

Louder Softer (3)

Beyond just learning vocabulary, there are many benefits to teaching your toddler dynamics. Because we’re inside so much these days, I talked with Veronika about how we have two voices, just like she has two arms, two legs, two eyes, etc. The outside one can be loud!

We headed outside to find examples. Loud trucks! Loud birds! Loud airplanes! Veronika happily squealed along.

Louder Softer (8)

Inside, I demonstrated a whisper instead. This was perfect for the “good night!” game my kids have taken to playing (which simply involves lying down on a pillow and saying “good night!” to each other.

Louder Softer (9)

So Veronika is definitely starting to get the concept of loud vs. soft, and when to use each. Bonus points: if you teach these lessons now, you might just trick your kids into whispering while adults work from home during the coronavirus!

A Tape Road

A Tape Road (3)

I’ve designed lots of little roads made from tape for the kids before, but this one was different: one big tape road that inspired all sorts of different ways to play!

For starters, Veronika loved watching me lay down long strips of tape, and loved running along them as I did so!

A Tape Road (1)

Now she had a grand avenue that was just begging for our biggest toy cars to drive along it.

A Tape Road (2)

Although smaller cars were fun, too!

A Tape Road (8)

I added two stop signs at one “intersection” for a little early learning about road safety, though of course I didn’t expect Veronika to understand this part.

A Tape Road (9)

These wide boulevards were also fantastic just for running along, a me-sized road!

A Tape Road (4)

She then was busy driving her dolly stroller down it. It would be the perfect size for any ride-on kid cars, too. In sum, an easy and fun way to play indoors.

A Tape Road (6)

Body Songs

Body Songs (2)

As soon as I pick her up from the crib each morning, Veronika recites my features to me, almost like she’s checking to make sure everything is still there! “One ear, two ear, nose, eyes…” she says. So today we took special time to recite lots of rhymes about body parts.

First up was a little ditty called Two Little Eyes:

Two little eyes to look around,

Two little ears to hear each sound,

One little nose to smell what’s sweet,

 One little mouth that likes to eat. 

Point to each feature on this one, of course, either on yourself, your child, or a favorite toy.

Body Songs (1)

Next up we sang Head, Shoulders, Knees and Toes, a classic that always gets big smiles!

Body Songs (3)

We followed this up with Twinkle Twinkle Little… Toes? Yes! To be silly, I sang:

Twinkle, twinkle little toes,

I can touch them to your nose.

Two are big and eight are small.

Count to ten you’ll count them all.

Twinkle, twinkle little toes,

I can touch them to your nose.

Body Songs (4)

With her toys already up, it was time for a round of This Little Piggy.

We finished with a game not of peek-a-boo, but peek-a-knees! Or peek-a-toes, or peek-a-ears, or any other body part you can cover up with a scarf or bean bag.

Body Songs (5)

From here, I leafed through a few magazines and cut out pictures showing facial features and other body parts like knees and toes. I added in dog and cat faces, too, because she loves to point out our cat’s ears. “Leg!” she exclaimed with delight, as we looked at the finished poster.

Body Songs (7)

We glued everything down, which turned it into a mini art project, and then we could sing our favorite body songs and point along as we sang.

Body Songs (8)

Bonus points: the leftover magazine pages were great for ripping.

Body Songs (6)

Fun with Toilet Paper Rolls

Fun with Toilet Tubes (2)

After building towers with toilet paper tubes, I helped Veronika discover another fun way to upcycle rolls today. I originally planned to tape together toilet paper tubes, but decided longer paper towel rolls were sturdier for this particular activity. Duct-tape as many as you like (or have stockpiled!) together securely in a long line.

Fun with Toilet Tubes (1)

I placed the tube line about midway up our stairs, aiming the bottom into an empty toy bin.

Fun with Toilet Tubes (4)

Depending how old your kids are, you can make this chain even longer and go all the way to the top of the stairs. But I was worried about Veronika’s safety, so we kept ours shorter. I showed her how to put a toy car into the tube, and then whee!

Fun with Toilet Tubes (3)

It landed in the bin at the bottom. As soon as she realized the cause-and-effect, she loved slotting the cars in and waiting for them to land.

Fun with Toilet Tubes (6)

What a delight!

Fun with Toilet Tubes (5)

The bucket was angled in such a way that we couldn’t see them land very well, so I rotated the tube and the cars drove out directly at the bottom of the stairs. Arguably this was even more enjoyable!

Fun with Toilet Tubes (8)

I also made a short, hand-held version that was easier for her to slot a car in and instantly see it drop through.

Fun with Toilet Tubes (9)

She loved doing this on the floor for a while, with lots of vrooming noises to go along of course. Thank goodness for upcycled tubes!

Fun with Toilet Tubes (11)