Stars and Stripes Sponge Painting

Stars and Stripes Sponge (8)

We’re gearing up for the 4th of July, and today Veronika got to make her first patriotic craft! She was too young for crafts last year at Independence Day, but there are so many fun red-white-and-blue projects that she can do now as a toddler.

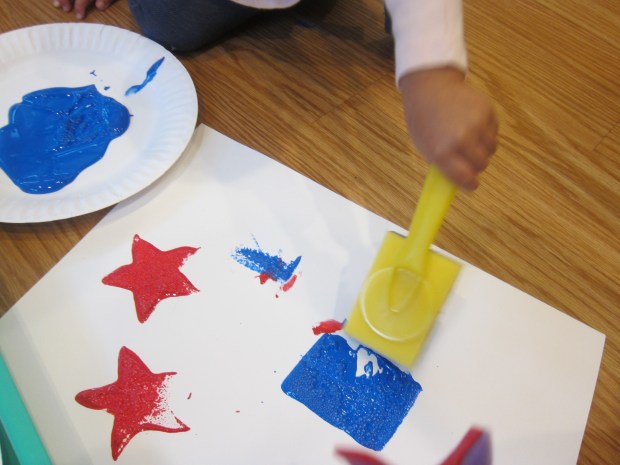
For this one, we needed sponges in the shape of stars and stripes. You can cut these yourself, but I knew my scissor skills aren’t quite that deft when it comes to cutting sponges. Luckily we have a set of shape sponges attached to handles; I used the rectangle for “stripes”, along with the star.

Stars and Stripes Sponge (3)

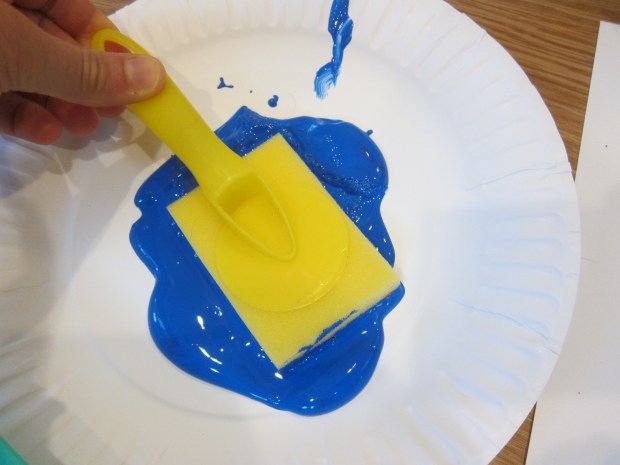
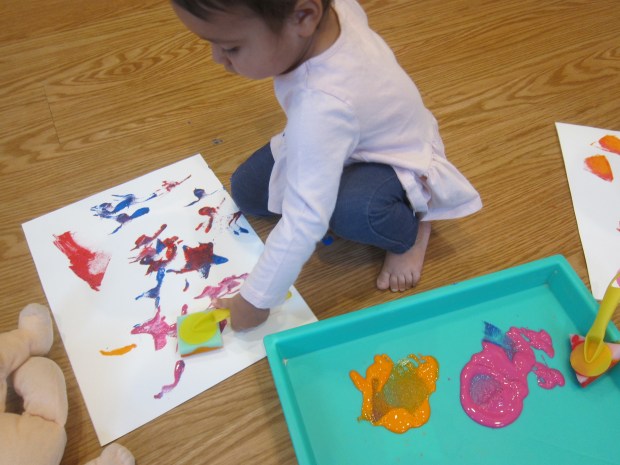
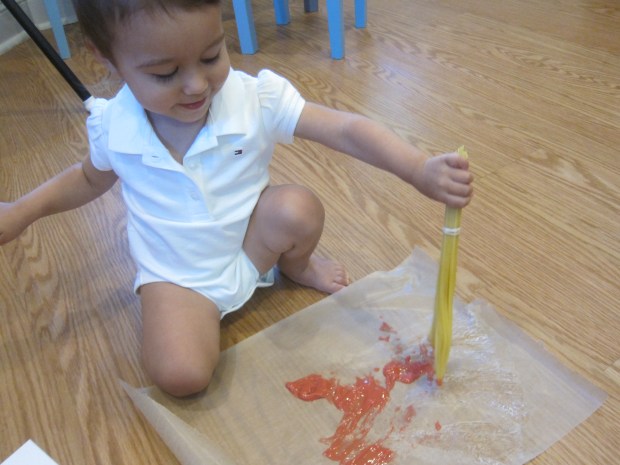
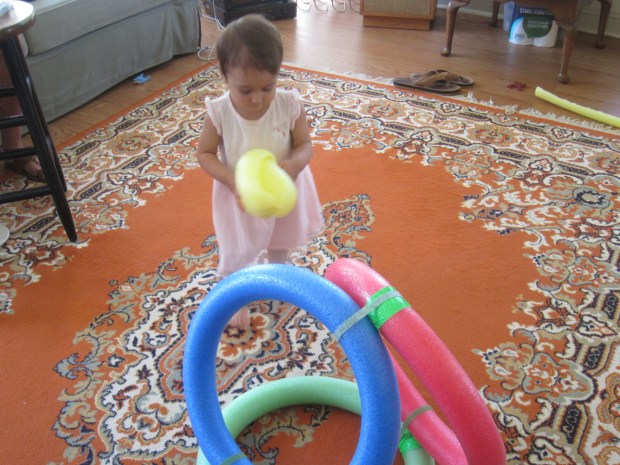
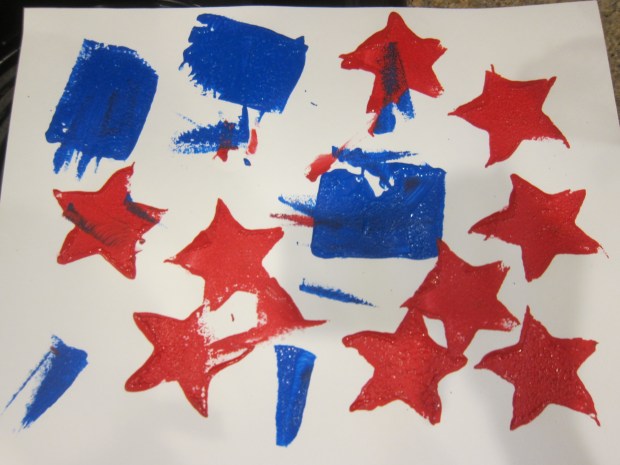
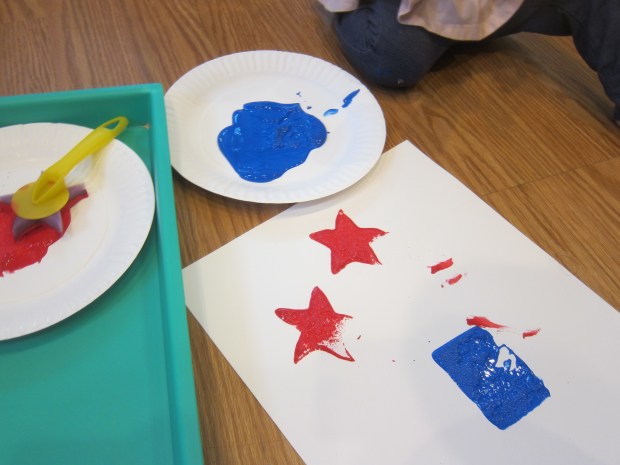
I showed Veronika how to dip each sponge in a plate of paint (use red and blue of course) and then press onto white poster board.

Stars and Stripes Sponge (1)

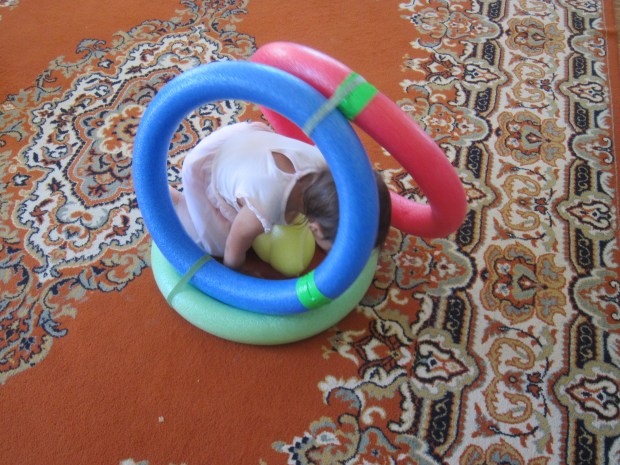
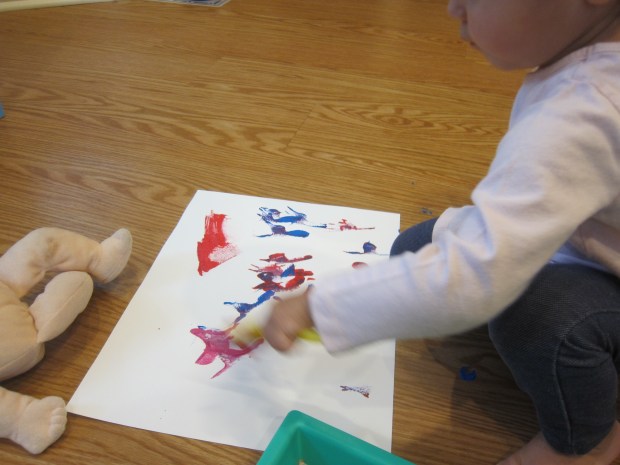
She very quickly got the hang of it and loved it!

Stars and Stripes Sponge (2)

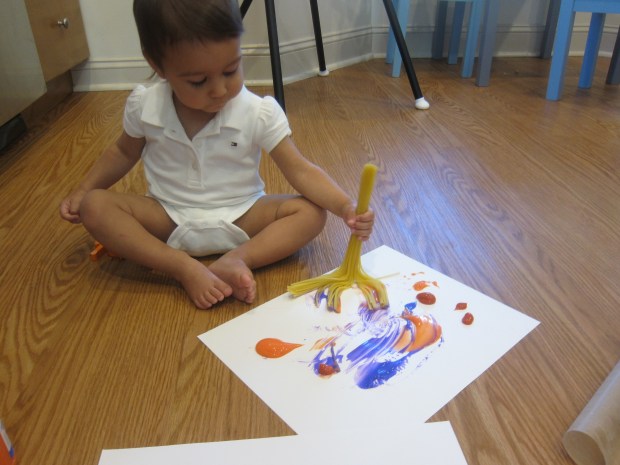
“Stripes” were far easier for her to accomplish than the star, which needed even pressure along all 5 points, so I helped with those.

Stars and Stripes Sponge (4)

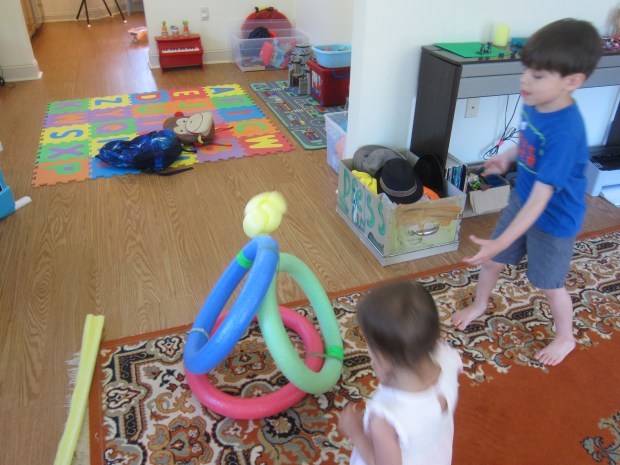
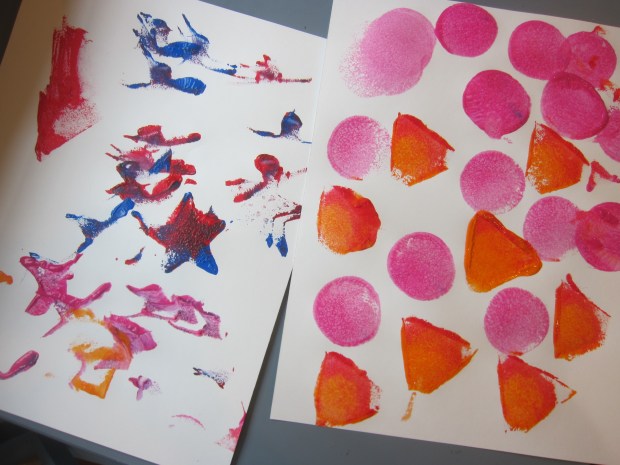
It turned out that big brother Travis wanted to try, too! So after officially making our stars and stripes artwork, we dipped and painted with other shapes for a while. I love seeing the work of an almost-2 and almost-6 year old side-by-side.

Stars and Stripes Sponge (7)

This was a great craft to fill a rainy morning.

Stars and Stripes Sponge (5)

Toddler Collage

Toddler Collage (11)

It’s near the end of the month, which means time to empty out odds and ends from the craft bin as we stock up for next month. I knew exactly who would be a willing partner in my clean-out… my toddler!

I wanted Veronika to have a large “canvas” to work with for this project, so taped a piece of contact paper, sticky side out, to the largest piece of cardboard I could find in the house. You could also do this on a smaller scale, but whether big or small, the cardboard is nice because it means your toddler can leave the project and come back to it later. The same can’t be said if you tape the contact paper to the floor.

Toddler Collage (2)

I set out a tray with all the craft bin odds and ends, including: wrapping paper pieces, tissue paper squares, cotton balls, strands of ribbon, plus some clover from outside (flowers would be pretty, too!). I also added uncooked dinosaur-shaped pasta pieces.

Toddler Collage (1)

Veronika immediately needed to investigate all of the components of the tray of course!

Toddler Collage (3)

It turned out that the dinosaur pasta was the big hit. She loved sticking it to the contact paper, either by tossing on big handfuls, or by pressing one piece in carefully at a time.

Toddler Collage (6)

The ribbon was also fun, because the ends curled up until she pressed the length of it with her finger to secure it down.

Toddler Collage (10)

She was less interested in the cotton balls and tissue paper than I thought she would be!

Toddler Collage (5)

When she initially tired of the activity, I tucked the cardboard and the tray aside, waiting for her next creative impulse.

Toddler Collage (9)

By the end of the day, we had a masterpiece.

Toddler Collage (12)

Melty Masterpiece

Ice Block Paint (5)

Veronika has already used ice as a paint brush, so now it was time to use ice as her canvas! This is a fantastic art activity for outdoors on a hot day.

Overnight, freeze a cube of ice in a large plastic food container. In the morning, I simply popped out the cube and set it on a tray for Veronika, along with 3 colors of paint.

Ice Block Paint (1)

She immediately wanted to paint “all by self,” dipping her brush into one of the colors and watching it run over the ice.

Ice Block Paint (2)

The neat trick here is that the sun will work to melt the ice at the same time your toddler works to paint it, resulting in beautiful drippy colors.

Ice Block Paint (4)

She painted until it was completely coated in paint and gleaming.

Ice Block Paint (6)

It was fun to watch the paint run down the sides together!

Ice Block Paint (7)

We were curious how long it would take to melt completely, and left her melty masterpiece outside in the sunshine. After only about an hour, we had a peach-colored puddle instead.

Ice Block Paint (3)

An ephemeral but fantastic art project for toddlers.

Ice Block Paint (8)


Ice-Dyed Pillowcases

Ice Pillow (6)

I was trying to channel old-school camp with this craft today, although it was sort of a fail for Travis. But at least it got us outside in the morning sunshine in these weeks before real camps safely reopen!

The idea was to dye pillow cases with powdered paint and melting ice, putting the heat of the sun to work for us.

I placed a disposable aluminum tray on the patio (with a garbage bag underneath to catch any paint drips), and then placed a rack in the tray.

Ice Pillow (1)

Wet your pillowcase thoroughly, then ring out and place on the rack.

Cover the pillowcase with ice. We put on latex gloves (which the kids always think are hilarious to wear), and sprinkled the ice liberally with the powdered paint.

Ice Pillow (2)

As the ice melts, the color starts to run into the fabric. Travis thought this was neat to watch for about, oh, one minute.

Ice Pillow (3)

Then we got a bit impatient and folded the pillowcase over the ice so that the color transferred to other parts of the fabric, instead of waiting to dye it section by section.

I saw pictures of this craft where it looked more like deliberate designs had been made (i.e. geometric shapes), but I have no idea how this is possible. Perhaps by folding the pillowcase into a square or triangle, and letting color seep through all the layers? If you try, let us know how it turns out in the comments!

Ice Pillow (4)

Note: Because I didn’t want the paint to stay on the pillowcase, we used washable powdered paint. Be sure to use a fabric paint or permanent powder, if you want your design to last beyond the “camp” day.

Ice Pillow (5)

Paint with Spaghetti Brooms

Spaghetti Brooms (7)

The kids have payed with cooked spaghetti, but never before have we used it to paint. Veronika loved that these looked like miniature brooms!

To make a broom “paintbrush”, secure a bundle of uncooked spaghetti together with a rubber band near one end.

Spaghetti Brooms (1)

Cook the spaghetti bundles in boiling water, but use caution only to heat the bottom portion of the noodles, not the “handle”. I held on to the part with the rubber band so the rubber wouldn’t melt or singe, and let the “broom” tips soften in the water for only about 2 minutes. This is definitely a grown-up step, and make sure to avoid the steam. You can cook your noodles longer, but I knew Veronika would have an easier time painting if they were a bit firm.

Spaghetti Brooms (2)

Once cooled, I showed Veronika the brushes. She loved exploring them before there was even paint.

Spaghetti Brooms (3)

We then blobbed craft paint onto poster board, and I showed her how to “sweep” the color. My little happy helper took right to this version of painting!

Spaghetti Brooms (4)

She loved testing out the different bundles, swirling the colors, and more.

Spaghetti Brooms (6)

The individual noodles leave neat textured tracks through the paint, an effect even Veronika could master at 20 months.

Spaghetti Brooms (8)

A cute project, with surprisingly little mess!

Spaghetti Brooms (5)

Butterfly Art

Butterfly Art (7)

You and your toddler can make one of these beautiful paper towel butterflies, or a whole bunch of them to hang on walls or windows. Younger toddlers will probably need to use a paintbrush, but consider using an eye dropper with older toddlers; it’s a great tool to hone fine motor skills.

To start, I set a piece of paper towel down on a craft tray, along with watercolor paints and a cup of water.

Then I showed Veronika how to dip the brush in the water, into the watercolor, and finally onto the paper towel to decorate her butterfly. “Dot dot dot!”

Butterfly Art (3)

I also wanted Veronika to practice with the eye dropper variation, but didn’t want to use liquid watercolors because they can stain. Instead, I mixed some of the watercolor paint with a little water in a cup so Veronika could practice dipping and squeezing that way.

Butterfly Art (1)

It was the first time she mastered the art of squeezing to release water from the dropper. She loved watching the color come out!

Butterfly Art (2)

Then she proved that she still loves to be impish, and upended the cup of water all over the paper towel. That made for one very wet butterfly!

Butterfly Art (4)

Luckily I knew it would dry eventually.

Butterfly Art (6)

As the finishing touch, fold the paper towel in half, then gather up in the center and wrap a pipe cleaner around the middle; bend the extra pipe cleaner on top into antennae. Our butterfly looked so pretty fluttering about the kitchen!


Shaving Cream Fingerpaint

Shaving Cream Fingerpaint (11)

There’s more to this activity than just the sensory fun of shaving cream or the artistic fun of colors and “painting”; half the fun was doing the activity right on the tabletop!

I squirted about half a can of shaving cream onto the kids’ table, which immediately piqued everybody’s interest, Veronika and big brother alike.

Shaving Cream Fingerpaint (1)

The curiosity grew once I added drops of food coloring throughout.

Shaving Cream Fingerpaint (2)

Now it was time for the real sensory fun to begin! I demonstrated for Veronika that she could put her hands right in the mixture, either to swirl the colors around or just to get messy.

Shaving Cream Fingerpaint (3)

Interestingly, she was hesitant at first, but soon a little finger dipped in. Foamy!

Shaving Cream Fingerpaint (4)

The sensation must have made her quite happy because it merited a little swirling dance.

Shaving Cream Fingerpaint (8)

After that, though, I couldn’t quite tell if she liked the shaving cream or was a little afraid of it. She did lots of delicate dabbing, but never got as messy as I had anticipated.

Shaving Cream Fingerpaint (9)

Big brother Travis tried his hand gladly and liked creating “animal footprints” through the shaving cream.

Shaving Cream Fingerpaint (7)

Veronika preferred just having some of the shaving cream on her palms. She smooshed her hands together and admired both the creaminess and the color left behind. Then it was time to wash! And the shaving cream mixture wipes off of the table like a dream.

Shaving Cream Fingerpaint (10)

Overall, this wasn’t the best version of fingerpainting we’ve done as far as producing art. But it was still a great sensory experience.


Pool Noodle Seahorse

Pool Noodle Seahorse (5)

It was time for the last of our pool noodle crafts this morning, and it turned out to be the biggest and best yet!

To start, curl the end of one long pool noodle so it resembles a seahorses’s curlicue tail. Secure with garden Velcro strips.

Pool Noodle Seahorse (1)

For the head, curl down the top 10 inches or so of a second pool noodle; secure with a garden strip. We then glued on two foam eyes (alternatively, use sticky-back foam and eliminate the need for glue).

Pool Noodle Seahorse (3)

Travis loved helping with the mane; snip a piece of craft foam to create fringe, then make a slit in the seahorse’s head with scissors and insert the foam.

Pool Noodle Seahorse (2)

Now tape the head and tail pieces together securely with duct tape. Our original seahorse seemed a bit too tall, so I cut about 6 inches from each noodle and then taped them. Now it was the perfect height. Travis was immediately galloping his seahorse around!

Pool Noodle Seahorse (6)

Little sister loved it so much that we needed to make a mini version from just one pool noodle!

Pool Noodle Seahorse (4)

As with the Ball Toss game we made, yes you could use the seahorse in a real pool, but the kids were ecstatic even on dry land. So don’t feel like you need to wait for water before making this craft!

Salt Painting, Two Ways

Salt Painting (6)

Today Veronika made art with salt! We tried two variations on this project, and I definitely preferred the former. But test them both out and see which one your child enjoys more!

For the first, you’ll need small empty spice containers, or any similar container with small holes in the lid. In each jar, I combined a little bit of salt with a little bit of powdered paint. Put the lid on securely and shake to combine.

Salt Painting (1)

Veronika then helped squeeze glue onto dark construction paper. Squeezing glue bottles is great for strengthening little hands, so resist the urge to help out too much!

Salt Painting (2)

Once we had a nice gluey canvas, I showed her how to shake the containers. Not only did they make a great noise, but she loved watching the colored salt sprinkle down.

Salt Painting (5)

She liberally poured, but it was easy to tip the paper and shake off the excess when it was time to set her masterpiece aside to dry.

Salt Painting (10)

Now on to version number two! This time, we made big blobs of glue on the paper. Instead of colored salt, we poured on regular salt.

Salt Painting (7)

Then we added little pools of food coloring for her to swirl through with a paintbrush.

Salt Painting (8)

Unfortunately this project got goopy very quickly. I would use less glue and less food coloring next time! But she enjoyed the messy process, and seemed very curious about the thick mixture tangled in the bristles of her paintbrush.

Salt Painting (9)

Which one did your family like best? Please share in the comments!

Pool Noodle Ball Games

Pool Noodle Ball (12)

After making marshmallow launchers with pool noodles, today we got even craftier with them, setting up two silly sports: a Ball Toss and a Golf Game.

For the former, you’ll need to first make the “hoop”. Fold three long pool noodles into a circle and secure with Duct tape. Travis was so proud helping me with this step, definitely a two person job. Repeat two times, for three rings total.

Pool Noodle Ball (1)

Use garden Velcro strips to attach the three rings together in sort of a triangle, as shown.

Pool Noodle Ball (3)

To make the ball, cut a pool noodle in half vertically. Tie each half into a knot, and fold the ends in.

Pool Noodle Ball (2)

It was a bit tricky to get the knot tight, but the tighter it is, the rounder your ball.

Pool Noodle Ball (15)

Time to slam dunk!

Pool Noodle Ball (6)

This game would of course be awesome to play in a pool, but we loved it even on dry land.

Pool Noodle Ball (9)

As you can probably guess, the ball and rings alone were great fun to play with, even when we weren’t keeping score.

Pool Noodle Ball (10)

Then we repurposed the pool noodles to set up the latter game outside. Highlights magazine billed this as golf, but it looked more like croquet to me! For your wickets, fold a pool noodle into an arc and anchor into the ground using two wooden skewers.

Pool Noodle Ball (11)

For a club, cut a notch near the bottom of one long pool noodle. Bend and secure with duct tape to hold the curvature in place. Travis thought this was fun, but then declared it too easy! We’ll have to think of ways to make it trickier.

Pool Noodle Ball (13)

Looking for other ways to get moving at home this summer? Check out some of the simple “sports” we set up last week.

Pool Noodle Ball (7)