Follow Me

Follow Me (1)

Today I focused on gross motor skills during Veronika’s play. The title of this post refers both to literally having your little one follow you (up, down, and all around an obstacle course), as well as the idea of following directions. Both are great skills for your little toddler!

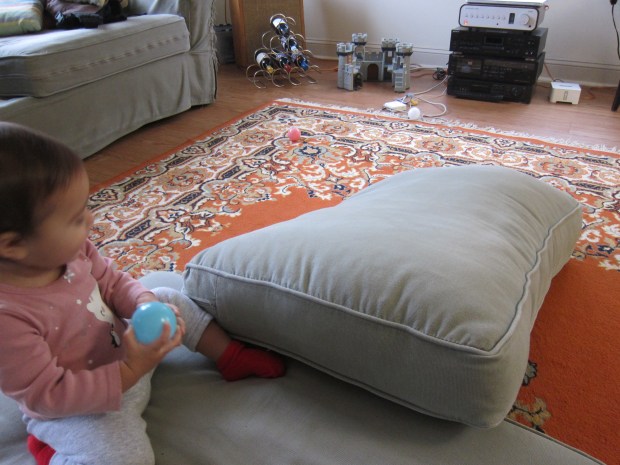
I set up a few couch cushions for a standard obstacle course, but added a few new twists today, namely a laundry basket and balls. She trotted over immediately to see what was up!

First, I showed her how to roll balls down one of the cushions. She loved doing so, with a big push.

Follow Me (2)

Next it was time to follow me, modeling how to crawl down the ramp. Crawling down can be tricky for little ones, so supervise closely.

Follow Me (3)

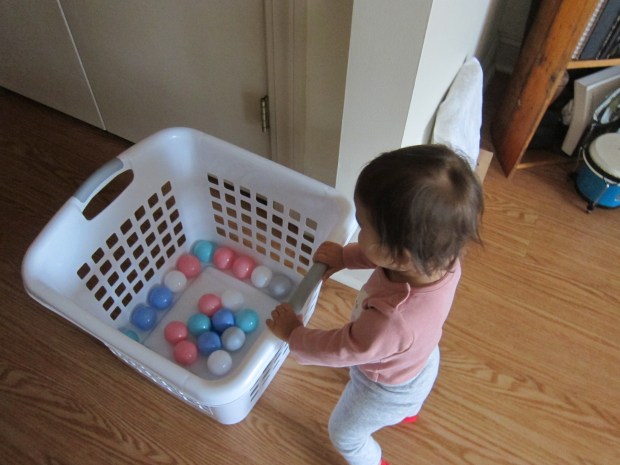
We headed back in the other direction where she followed my lead to toss balls into the basket.

Follow Me (5)

Next we upended the basket and I turned it into a choo-choo train. I went first (“Follow me!”) but soon she was the thrilled conductor.

Follow Me (6)

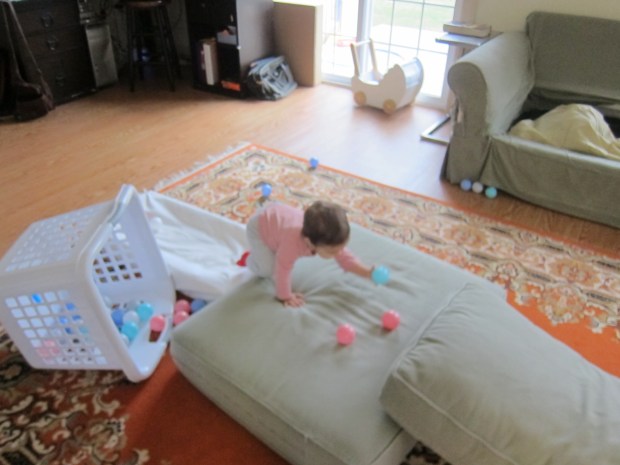
She played games with the balls on the cushions even after I stopped being the leader.

Follow Me (7)

You can add so many more elements to an obstacle course like this, whether a jump rope (to walk a straight line), a box (to scoot around the room), or just about anything else that can work your toddler’s gross motor skills.

Follow Me (4)

Make Your Own Pinata

Pinata (4).JPG

Travis has been learning about birthday traditions around the world, and one that especially intrigued him was the Mexican pinata. It seemed like a fun idea to make our own!

Full disclosure: we worked with materials from a kit, but if you’re doing this craft completely DIY, you’ll need to cut two equal-sized circles from cardboard, as well as a third strip of cardboard to be the loop between them. Tape the three pieces together, leaving a slot through which you can later add candy or other treats.

Cut strips of yellow paper, and then snip them half-way up to make fringe. Travis liked the challenge of this step.

Pinata (1)

Now begin gluing the strips onto the cardboard base, working from the bottom up.

Pinata (2)

Ours wasn’t perfect, but soon we had a fringed yellow face!

Pinata (3)

We added fun details like sunglasses and a smile cut from additional colored paper. Tape a string to the top of the pinata and loop it onto a stick. I held the stick aloft, while Travis took a swing!

Pinata (5)

For extra authenticity, kids can swing blindfolded.

If you don’t have candy, fill the inside of the pinata with fun confetti or even pom poms. Travis was ecstatic once the pinata had a tear and the pom poms rained down.

Pinata (6)

Stack Attack

Stack Attack (5)

Veronika is old enough that today I thought I’d test if she was ready to build blocks up, not focus on knocking them down.

Whether you have a classic wooden set of blocks or foam ones, or something in between, blocks are a toy that never goes out of style, and they are so fantastic for children’s development. Today we mixed her foam set (consisting of multiple shapes) and added in a few wooden square blocks.

Stack Attack (1)

I handed her a block and mimicked placing it on top of another to start a tower. To my delight, she was game to build!

Stack Attack (6)

Her towers never made it more than three high before the temptation to knock over was too great, but any building at all was a definite first.

Stack Attack (8)

Since she’s older, we also worked on some learning concepts with the blocks. First I sorted them by color…

Stack Attack (3)

…and then by shape.

Stack Attack (7)

You can add in new vocab, too, perhaps “straight” or “pointy”.

Stack Attack (2)

She really loved inserting circular blocks into the holes of square ones, which I loved watching.

Stack Attack (4)

As a final element to today’s play, I introduced the notion of imagination. What if our blocks weren’t blocks but… cars? I made one go “vroom vroom” along her play mat and she immediately took me up on the idea, running a block back and forth.

Stack Attack (9)

How about a choo choo train? She loved this version, too.

Stack Attack (10)

I can’t wait to see what she builds or imagines in the future, whether her blocks become mountains or castles, animals in a pen or something else entirely.

Stack Attack alt.JPG

How To… Help Yourself Feel Better

Keep Calm (2)

Highlights magazine appears to have a new feature, a “How To…” page each month explaining how to do anything ranging from the fun (snow forts!) to the practical. I loved this month’s tips on how kids can make themselves feel better, which made for a nice pause with Travis.

We ran through three techniques kids can use to calm down. First up: Bubble Breaths. The idea here is breathe in through your nose, then out as if blowing a big bubble. He loved practicing this one!

Keep Calm (1)

Next we practiced The Squeezer (as seen at the top of this post). Clench fists for a count of 10, then release and count to 10. Repeat as needed.

Finally, we discussed the tactic of Watch It Go, which involves imagining a cloud full of upset feelings. The cloud fades away as you count backwards from 10, until at 0 it disappears.

As an added bonus, we made a list of things Travis likes about himself or is good at.

Keep Calm (3)

What a nice self-esteem booster for him! He and I brainstormed ways he can help friends feel better, too. Overall, this activity was quite the mental health break. Thanks Highlights!

Magnetic Letters & Play Doh

Magnet Playdough (5)

I’ve hesitated to give Veronika play doh until now, full knowing she would do a taste test. But we received mini containers of it as a birthday party favor so we had some (very!) supervised play doh play today. Note: I highly recommend the all-natural eco-dough as an alternative or a homemade batch in a pinch!

Today, I pressed the vivid play doh colors into flat pancakes on her high chair tray, and showed her how she could smoosh magnetic letters down into the pile.

Magnet Playdough (1)

She tried this a few times, but then was far more into the little play doh containers themselves!

Magnet Playdough (4)

She did indeed reach her little fingers in and give it a taste, which earned a quick firm “no”.

There was lots of opportunity to talk about colors here, both in the play doh and the letters, as well as to have fun with the letter prints that appeared when we lifted a letter up.

Magnet Playdough (3)

This was a nice first intro to the material, which I know she’ll play with lots more as childhood continues! Don’t have play doh at home? Here’s another way to play with those magnetic letters!

Magnet Playdough (2)

Knight Light

Knight Light (4).JPG

Travis still complains of bad dreams, though we’ve tried everything from worry dolls to dream catchers to fancy night lights to make his room feel safe and cozy at night. The fun play on words earned a laugh when we spotted this craft in Highlights magazine, so it was worth a try to see if Sir Lights-a-Lot can guard against bad dreams!

Cut gray cardstock to size so that it fits around an empty oatmeal container. Glue on and let dry. Cut a hole through the paper and container once the glue is set.

Knight Light (2)

Cut a visor shape and a feather plume shape from additional cardstock. We used a fun bright orange for the feather! Glue these onto the container. (Alternatively, poke two brads through the visor to attach over the hole).

Knight Light (1)

Attach wiggle eyes to the ends of curled black pipe cleaners and glue on so they dangle down and show through the visor. This step was a bit tricky, and I found it was easiest to use hot glue.

Knight Light (3)

We added a few lines of blue washi tape for a decorative finish. What a brave knight!

Come nighttime, we inserted a tea light and set him to keep watch.

Clothespins + Empty Box

Clothespin Box (6)

This is one of those classic games for toddlers that checks all the boxes: only two supplies needed, great for fine motor skills, and endlessly entertaining.

For Veronika at 14-months-old, I used clothespins that simply slot on (without a hinge). Older toddlers can definitely work their pincher grip here with the kind that pinch open and shut!

I set a few of the clothespins along the rim of an empty stacking box, and she immediately began pulling them off and dumping them into the box. This was great fun!

Clothespin Box (2)

Soon she wanted to imitate my ability to hook the clothespins on. This took a bit more coordination, turning until the slot lined up just the right way. She was so proud when she made it work!

Clothespin Box (3)

It kept her busy and concentrating for quite some time.

Clothespin Box (5)

Another fantastic toddler activity that you can put together in a, well, pinch!

Clothespin Box (7)

Animal Puppet Craft Challenge

Animal Puppet (6).JPG

More and more I’m watching Travis take the lead when it comes to the monthly craft challenge in his Highlights magazine. This morning, I presented him with an empty paper towel tube, a few craft sticks, and construction paper, with the challenge to make an animal puppet. It didn’t take him long to get creative!

Animal Puppet (1)

He could immediately see how the tube would work as the body. Whereas I had envisioned the sticks only as a handle for a puppet, Travis figured his animal would need arms. As soon as he held the sticks out to the side of the tube, he declared, “A bird!”

Animal Puppet (2)

Now we knew we needed construction paper “feathers” for the wings.

Animal Puppet (4)

I helped him cut these out, along with a head and beak.

Animal Puppet (5)

A second little winged creature looked a bit different without the circle face. Travis declared this one was a bat! He couldn’t wait for them to dry so he could flap his puppets around.


Animal Puppet (3)

What animal will your kid come up with using only these materials? Please share in the comments!

Small Toys in an Empty Wipes Container

Toys in Wipes (4)

Today Veronika and I circled back to a game we played when she was much smaller, back then using fabric scraps. Now, with strong toddler hands, it was time to put toys in an empty wipes container!

Toys in Wipes (1)

To kick off the game, I used pieces of toy fruit that Velcro together. I showed Veronika how to stuff them down into the container, and she was an eager copycat.

Toys in Wipes (2)

Then we lifted the whole lid and dumped the fruit out. Next up: magnet letters! She loved making these disappear into the container, and of course we named each letter as it went in.

Toys in Wipes (3)

We followed up with foam puzzle pieces. This time she was much more interested in taking out. Doing so requires strong hand muscles, in order to reach past the flap in the container, grip the item, and tug it out.

Toys in Wipes (5)

Don’t be surprised if your little ones gets silly and wants to see what else fits inside. A chocolate bar?

Toys in Wipes (8).JPG

Finally, we played with a set of plastic bugs. Perhaps because of all the tantalizing legs and antennae, these were her favorites to put in and out.

Toys in Wipes (6)

A very simple game that will entertain a toddler immensely!

Toys in Wipes (7)


Wish Upon a Star

Wish Upon a Star (1)

We teach babies so much about stars, whether through songs, books, nursery rhymes and more, which has always seemed strange to me. Real stars (those distant fiery balls of gas) are not something our little ones can comprehend, and let’s be honest: they rarely even see those glowing points of light since they go to bed early!

And yet stars in the night sky have great meaning for humans, and always have, so today Veronika and I devoted some play specifically to stars.

We started off with a read of a few board books about stars, namely Touch the Brightest Star and How to Catch a Star. As we read, I opened up a can of glow-in-the-dark stars for her walls.

Wish Upon a Star (2)

These were like magic to her. She loved to pick up handfuls of them and we “twinkled” them up in the air as I sang “Twinkle, Twinkle Little Star”.

Wish Upon a Star (3)

Of course put a few up on the walls, for bedtime magic!

Wish Upon a Star (4)

We finished by watching a video of “Twinkle, Twinkle”. Now when we pop outside after dark, I hope she’ll begin to make the connection with the stars we see shining in the sky.

Wish Upon a Star (6)

Before you know it she’ll be wishing on one!

Wish Upon a Star (5)