Contact Paper Chick

Contact Paper Chick (4)

We already have one cute spring chick up on our doorway to celebrate the season, and here was a second toddler-friendly version to join the first!

To start, I cut out a piece of contact paper in roughly the shape of an Easter egg, then taped it down to a piece of white paper with double-sided tape. The sticky side of the contact paper should be facing up.

Contact Paper Chick (1)

Next I set out a tray full of feathers for Veronika. All yellow would have been ideal for a chick, but we had a mix of reds, yellows, and oranges, which worked just as well.

Contact Paper Chick (3)

She loved picking which feather to use, plus the discovery that the contact paper was sticky and grabbed on to the delicate feathers.

Contact Paper Chick (2)

Once the egg shape was filled in, we transformed it into a chick with just a few final details: Two wiggle eyes, a beak cut from colored paper, and two legs drawn on with orange marker. Peep peep!

Clothespin Puppets

Clothespin Puppets (2)

It’s that time of the month when we’re emptying out the craft bin before stocking up for the month ahead, and I love projects like this that use up all the bits and bobs! Since Travis learned about puppets this month, we made one last simple type: clothespin puppets!

We wanted to decorate the body of the clothespin, but didn’t want to wait for paint to dry. The perfect solution? Strips of decorative washi tape.

Clothespin Puppets (1)

Once the tape was in place, we could decorate them in any way. Most of them received wiggle eyes, and we also glued down feathers, beads, pom poms, and more.

Clothespin Puppets (3)

All the kids had to do was pinch the clothespins to make the “mouth” of each little creature talk.

Clothespin Puppets (5)

These cute puppets are sure to make their way into all sorts of imaginative games.

Clothespin Puppets (4)

Feather Printing

Feather Printing (9)

Not to be confused with feather painting, the idea with this craft wasn’t to paint with a feather but to make images of feathers on paper. The resulting craft makes a great piece of Thanksgiving artwork!

I cut small sponges into shapes roughly resembling feathers (although I confess some looked more like leaves). Our sponges had handles, which makes it easy for Veronika to grasp them, but regular kitchen sponges would work, too.

Feather Printing (1)

Next I set out plates of paint in harvest colors, and showed Veronika how to dip in the paint and then press onto paper.

Feather Printing (3)

She loved the little images that appeared. She was so proud when she could make the sponge as flat as possible for a clear print.

Feather Printing (4)

As a variation, we then painted directly on a few craft feathers.

Feather Printing (6)

These made fun prints when pressed down onto the paper, too!

Feather Printing (5)

“Look what I made!” she proudly said when we were done, and narrated back all the paint colors.

Feather Printing (7)

I love seeing her take pride in her artwork.

Feather Printing (8)

Dancing Turkeys

Dancing Turkey (10)

If you’re starting to get in the mood for all things turkey in advance of Thanksgiving, these silly turkey puppets will kick things off on a lighthearted note.

To make the turkeys was quite complicated, and truth be told ours looked a  bit more like a chicken since I had white yarn, not brown, for the steps that follow.

For the body, wrap a ping-pong ball or golf ball in double-sided tape and then wrap with yarn. Tuck the final strand under to secure.

Dancing Turkey (1)

Next, you’ll need to make three pompoms, two for feet and one for the turkey’s head. For an easy at-home pompom, wind yarn around the tines of a fork, then tie a string tightly around the middle in the other direction. Slip off the fork and snip the loops to make pompom fringe. Make sure to leave one long strand on each pompom foot.

Dancing Turkey (2)

Cut a beak from felt and hot glue onto the head pompom, along with 2 wiggle eyes.

Dancing Turkey (3)

Now put it all together! I hot glued a length of craft boa onto the back of the body, then curved a half-length of pipe cleaner into an S shape. Hot glue the top of the S to the head, and curve the bottom of the S around the body, securing with a little extra hot glue.

Dancing Turkey (5)

Tie the long strands from each pompom foot onto the body. Finally, hot glue feathers along the boa in back for the turkey’s tail feathers.

Now to make it dance! Cross two Popsicle or craft sticks into an X and secure with yarn around the middle.

Dancing Turkey (6)

Cut three lengths of stretchy jewelry cord; you’ll need two 12-inch pieces and one 6-inch piece. Tie the long ones to the legs, and the short one to the head, and then secure them all to the Popsicle sticks.

Dancing Turkey (8)

Break out the Thanksgiving tunes and make it dance! We loved kicking off this holiday in celebration of these beautiful birds.

Dancing Turkey (9)

Feather Painting

Feather Painting (4)

It’s fun to give toddlers something other than a paint brush to paint with, whether a cotton ball, an ice cube, or even just their fingers. Today, Veronika got to try painting with feathers, plus a few other items from nature!

I had some brightly colored feathers from the craft store that were perfect for this activity. To set up, I filled three cups with different colors of paint and added a little glue to each, making the mixture slightly sticky.

Feather Painting (1)

Veronika loved dipping the tips of the feathers in the cups…

Feather Painting (2)

…and then transferring over to her paper. She loves to say “dot dot dot!” as she paints and watches the color appear. The feathers themselves fascinated her, too.

Feather Painting (3)

Whenever one became too limp and saturated with paint, we simply added it to the painting and grabbed a fresh “brush”. As the gluey paint dries, the feathers will stick and become part of the final masterpiece.

Feather Painting (8)

We then decided to try the activity with other items, this time truly from nature and not a craft store. In the yard, we found “brushes” from pine needles and leaves.

Feather Painting (6)

Time to repeat the process! Dip the edges in the paint, use them as your brush, and whenever one gets too painty, it becomes part of the artwork!

Feather Painting (7)

These turned out so pretty! I loved that the tactile feel of the different nature items was just much a part of the activity as the paint was.

Feather Painting (9)

Floating Scarves

Floating Scarf (2).JPG

This cute game is a new way to engage your baby with different fabrics and textures; it’s a step up from the dangling scarf game Veronika and I played at one month old. Now she’s a big two months old, and enjoyed this new version!

Talking to your baby, hold thin scarves a little above him or her, and let float gently to the ground. After the first few times, Veronika was looking up in anticipation.

floating scarf (1)

When the scarves landed, I quickly took them away from her face, but let her feel the fabric on hands and cheeks.

We varied the game by using feather boas…

floating scarf (3)

…and then feathers from the craft store.

floating scarf (4)

These last were super fun and tickly.

floating scarf (5)


Little White Duck

little-white-duck-2

Our recent play with a Farm kit from Koala Crate inspired this little craft. I always love crafts that feature handprints, turning the duck into a memento instead of just another crafty project.

To start, trace your child’s hands and one foot on paper; cut out.

little-white-duck-3

Glue the pieces down so the foot is the body of a duck and the hands are his two wings; toddlers will need help with this step to get the alignment right, but preschoolers can do so on their own!

little-white-duck-5

Now came Travis’s favorite part: ripping up toilet paper or tissue paper into small pieces to be the duck’s feathers. We dolloped glue all over our white duck, and pressed on his feathers.

little-white-duck-4

Once the feathers dried, Travis painted on two black eyes and orange “feet”, although he got a bit creative with the placement of the feet. Again, part of the charm of these projects is seeing the way kids interpret them!

little-white-duck-1

Overall, super cute and sure to adorn our fridge for a while.

F Week!

f-week-16

For an F week full of fun in your Letter of the Week curriculum, try out these ideas.

f-week-7

Firefighter/firetruck: Hands down the biggest hit of the week, start by pulling out any firetruck toys you have at home. Even better, I gave Travis a chance to play Firefighter with an imaginative put-out-the-flames chalk game, which merited a full blog post.

f-week-14

Flag: This word was the surprise hit of the week! We checked out a library book on state flags, and Travis couldn’t get enough of going through it and deciding which ones he liked best.

IMG_0005.JPG

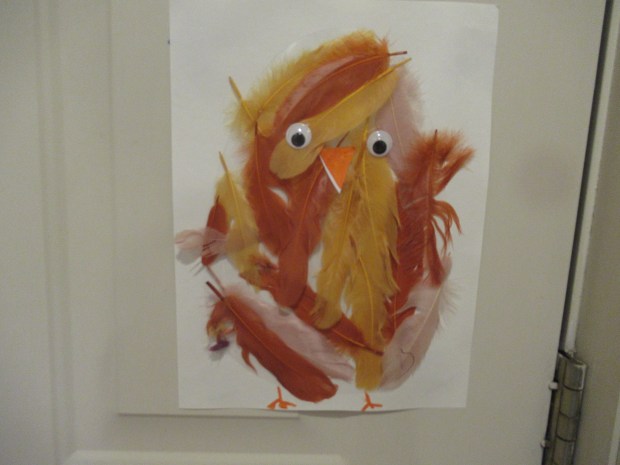
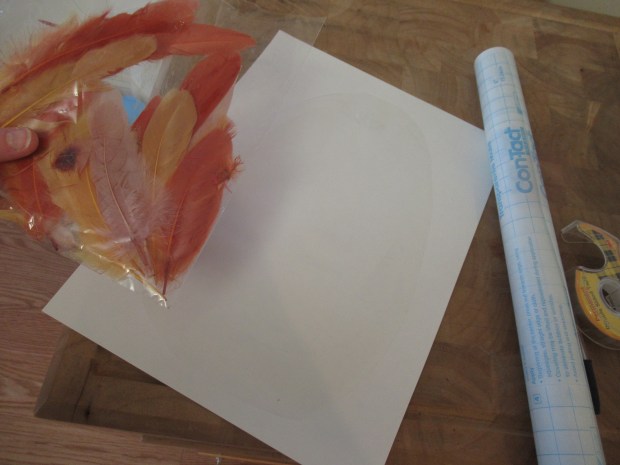
After that, we had to design our own family flag of course. Travis wanted me to do the drawing, but told me what symbols to include, and which colors to use. If you have craft items at home that begin with an F (feathers, felt), consider gluing those to your child’s flag creation.

f-week-1

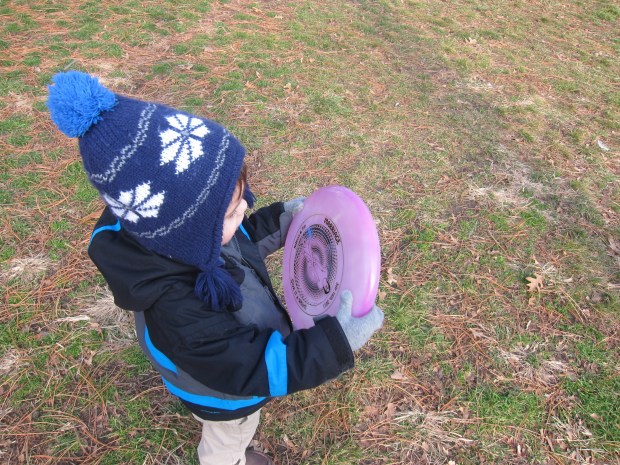
Frisbee: For our exercise this week, we got out to the park and Travis enjoyed a basic intro to the Frisbee, giving a few nice tosses! You could also toss a soft football, if that interests your child more.

f-week-13

Finger: Use fingers only to make sketches in a shallow tray of cornmeal. You can encourage your child to draw letters or shapes, although Travis mostly just loved running his fingers deep through the tray.

f-week-5

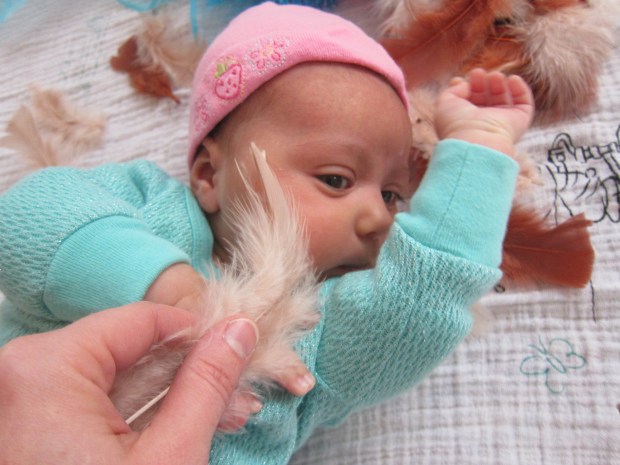
Fan/feather: Fans are a favorite around here, because it’s always fun to see how objects blow in the wind (see my post from W week for more on this idea). This week, we let feathers go over the fan and watched them flutter.

f-week-10

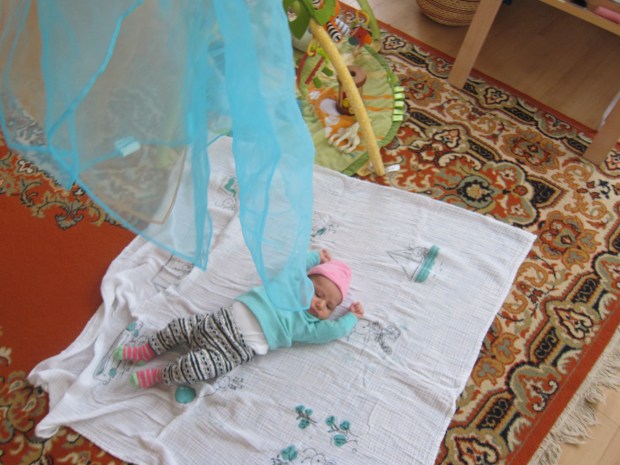
Fort: What better excuse than the letter F to take out all your pillows and blankets and build a big fort?

f-week-12

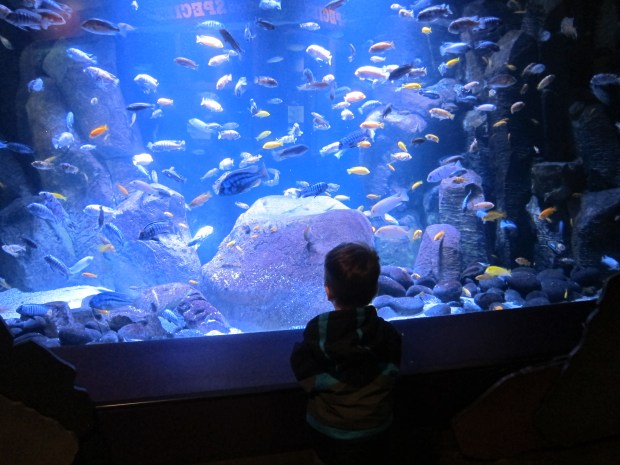
Fish: As our field trip of the week, we visited the fish at a local aquarium. Travis couldn’t get enough of a catfish nearly as big as he was. Libraries and rec centers in your area may also have large tanks of fish for children to enjoy.

f-week-17

Foot: Here’s a word I thought would be fun, but which turned out to be a flop. I tried to get Travis interested in tracing his foot and mine, to show their relative sizes, and then thought he’d enjoy painting with his feet instead of a paintbrush on a large sheet of butcher paper… But he couldn’t be bothered! Instead, we read The Foot Book by Dr. Seuss, which always produces giggles.

Our weekly extras…

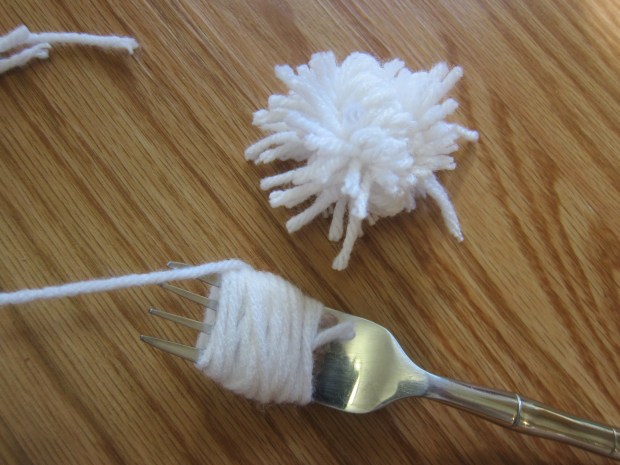
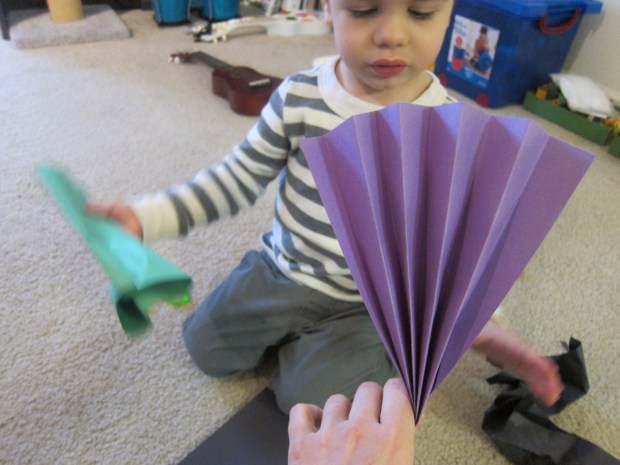
Fine art: As our art project, we folded paper fans. I showed Travis how to make them with very tight folds, and he loved flapping them to create a breeze. Although he wasn’t able to replicate the exact structure, he enjoyed folding sheets of paper in imitation.

f-week-9

Food: It was a week to dine on French fries and fruit salad… and then we had to make French toast!

f-week-15

Books: Our favorites of the week were: Little Rabbits’ First Farm Book by Alan Baker, Firefighter PiggyWiggy by Christyan and Diane Fox, Friends by Michael Foreman, and Rainbow Fish by Marcus Pfister

Songs: Although not a children’s song, a rousing rendition of Finiculi Fincula got huge laughter and clapping along. And of course there’s the children’s classic the Farmer in the Dell.

Math: Introduced fractions! A sandwich (or any food that can be sliced into portions) is the perfect opportunity to visualize fractions. Show your child the whole sandwich before cutting it in half, thirds, or quarters. Travis liked the demonstration so much that wanted his own piece of bread to practice on. As a perfect coincidence, he wound up “half” dressed in his pajamas that evening (bottoms on, top off) which he decided was hilarious.

f-week-11

Be on the lookout for an out-of-order V Week post in the coming weeks – I saved it on purpose so we could learn all about V with Valentine’s crafts.