How to Make Pennies Turn Green

Pennies Green (7)

We’re on winter break and the science fun continues! With this easy experiment, you’ll create a simple chemical reaction – and help explain to your kids why the once copper-colored Statue of Liberty is now green!

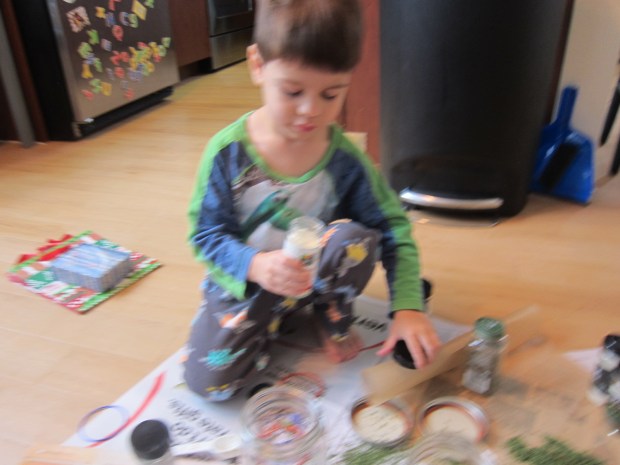
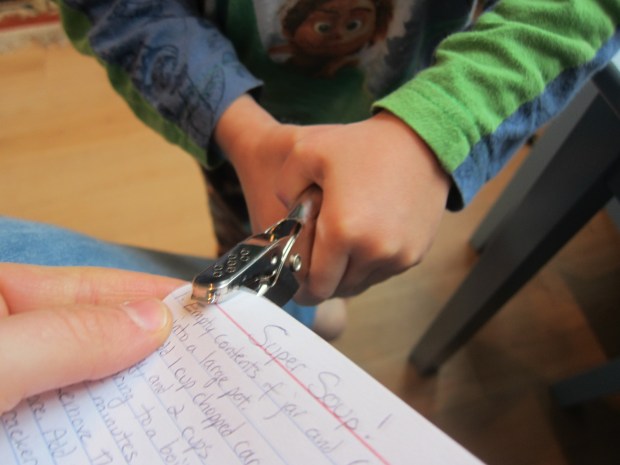
The project was fun from start to finish because first we had to break into Travis’s piggy bank. This meant using a screwdriver (under careful adult supervision of course). We separated out the pennies from the rest of the coins, making it a quick lesson in currency denominations too.

Pennies Green (1)

Place your pennies in a bowl covered with a paper towel.

Pennies Green (2)

Pour white vinegar into the bowl, making sure the paper towel is completely saturated.

Pennies Green (4)

Now observe! We were surprised when the first penny had green spots after only a few hours.

Pennies Green (6)

The next morning, several of them were quite green!

Pennies Green (8)

I honestly have no idea why some of the pennies turned green and others did not, but here’s what’s happening: The metal copper and the acid in the vinegar react with oxygen, and form a new blue material, called malachite.

Make sure to observe under a magnifying glass, too!

Pennies Green (9).JPG


Dancing Raisins

Dancing Raisins (4)

Well, school’s out for winter break and we’re stuck indoors on a rainy day. What did we do? Science experiments of course!

Don’t be daunted when it comes to science and preschoolers. The goal is not to hammer home the scientific concepts, but rather to introduce tots to the strange, silly, and downright amazing things that happen when substances mix. I love this experiment because it epitomizes the fact. It couldn’t be simpler – all you need is club soda and raisins – but has easy-to-see, immediate, and delightful results.

First, fill a glass (or two) about 2/3 of the way with club soda.

Dancing Raisins (1)

Add about 4 raisins to each glass. Now watch what happens!

Dancing Raisins (2)

We immediately observed that the raisins sank to the bottom of the glass, but were very quickly covered in bubbles.

Dancing Raisins (3)

We only needed to wait a moment before we were rewarded…. with dancing raisins!

Dancing Raisins (5)

They swim up to the top, do a pirouette or two, and then sink back down. The best raisins did this over and over again. (Honestly, I’m not sure why some raisins were more “active” than others, but we definitely had some movers-and-shakers, and a few that just stayed inert).

I asked Travis why he thought the raisins were dancing, and he answered, “The bubbles!” He’s pretty much got it: the carbon-dioxide filled bubbles coat the raisins and rise to the top of the glass like all the bubbles in the water. Once they reach the top and pop, the raisin is released and sinks back down. For kids who can’t see molecules and atoms yet, it’s a neat visual of forces at work.

Of course Travis then needed to see what would happen if we dumped his entire snack pack of raisins into a glass. As you’d expect, the raisins mostly weighed one another down, but those on the top layer still danced for us!

Dancing Raisins (6)

Honestly, you’ll be entertained watching this experiment for quite some time; raisins are adorable dancers.

Dancing Raisins (7)

Note: We tried something similar with Halloween candy in October. What other foods can you make dance in a glass? Rice? Dried pasta? If you experiment further, please share in the comments!


Make a Leak-Proof Bag

Leak Proof (3)

This simple science experiment is sure to produce wide eyes and gasps in everyone from little kids to big grown-ups. Can you really pierce a hole in a bag filled with water, but not produce any leaks? Read on and find out!

First, gather a few sharp pencils, the sharper the better. We gave an extra honing to a few pencils, and set them aside.

Leak Proof (1)

Next, fill a large zip-top plastic bag half way with water, and seal tightly. We did the experiment over the sink just in case.

Leak Proof (2)

I stood Travis up on a stool and told him I could pierce the bag without causing a leak, only half believing it myself.

The pencils slid in surprisingly easily! Bam, three in, and not a drip in sight.

Leak Proof (5)

Travis loved it… and had even more fun pulling the pencils out and watching the fountain that erupts. We had to do the experiment three times it was so much fun.

Leak Proof (4)

Why does it work? It’s all thanks to the power of polymers, long chains of molecules that make up the plastic bag (in this case polyethylene). These molecules seal around the pencils once they are pushed through, preventing any leaks. Remember playing with silly putty as a kid? That’s another example of a polymer. So give your kids a tiny science lesson, and then simply have fun dazzling them. Bonus points if you do this over the floor instead of the sink!


Cran-Raspberry Fruit Leather

Cran Fruit Leather (2)

I never would have thought to make my own fruit leather at home – those sticky strips always sold near the cash register at the market – until I spotted this recipe in Family Fun magazine. Turns out it’s surprisingly easy, not to mention the recipe will make your home smell deliciously festive as the leather slow-cooks in the oven for 4 full hours.

Ingredients:

  • 1 (14-ounce) can cranberry sauce
  • 1/2 cup frozen raspberries, thawed
  • 2 tablespoons lemon juice
  1. Combine all of the ingredients in a blender and process until smooth.
  2. Line a baking sheet with foil or parchment paper, and pour the fruit mixture onto the pan. Spread into an even layer, about 1/4-inch thick.
  3. Bake at 200 degrees F for 4 hours. The center should be set by the end; if not, continue to cook up to 5 hours if needed.
  4. Let cool on the pan, then remove from the foil and transfer to a cutting board. Cut into strips with a pizza cutter, and store in a plastic bag in the fridge up to 2 weeks.

Sponge-Print Wrapping Paper

Sponge Wrapping Paper (8).JPG

Enlist the kids help with gift wrapping this year… not just to wrap up the presents, but to make the wrapping paper first. Not only will they enjoy making this easy DIY gift wrap, but they’ll be so proud when they see gifts presented to loved ones in the paper that they made.

To start, cut sponges into shapes and glue onto old jar lids – the sponge should be cut until about the same size as or smaller than the lid. Simple shapes like triangles and squares are easiest, but get fancy if you’re handy with a paring knife!

Sponge Wrapping Paper (1)

I spread out a leftover roll of craft paper, and Travis immediately set to dipping his sponge stamps into paint…

Sponge Wrapping Paper (5)

…and dotting all over the paper. He liked making “patterns” as he worked.

Sponge Wrapping Paper (4)

Sometimes he spaced the stamps far apart, and sometimes he liked clustering them, so we ended up with a final product that was decidedly his creation.

Sponge Wrapping Paper (7)

We also had fun swirling together blue and white paint to make a light blue.

Sponge Wrapping Paper (9)

Once the paint is completely dry, it’s gift wrapping time!

Sponge Wrapping Paper (10)

What fun wrapping ideas have you used this holiday season? Please share in the comments!

Coffee Candles

Coffee Candle (6)

This is a beautiful and simple project, and to be honest was more of a craft for the grown-up in the room than for Travis! But he loved the materials involved, which were completely novel to him. Whether your little helper actually pitches in with the craft or just plays with the materials, it’s a cozy winter afternoon activity to do together.

The goal was to decorate the bottom of pillar candles with whole coffee beans – a toasty smelling and lovely touch that will add beauty to your holiday decorations or would make a great gift if wrapped up in cellophane with a big bow.

First, Travis needed to investigate the coffee beans. He loved the way that they felt and smelled – it didn’t hurt that we used an intense dark roast!

Coffee Candle (1)

The next cool object was the candles, since I don’t usually have these around the house. He loved the smooth wax, and was very curious how the wick and flame work (adult supervision required around candles at all times, of course!)

Coffee Candle (2)

To decorate a candle, you’ll need tacky glue (not white school glue) so that the coffee beans will hold in place as your little assistant helps glue them on. We decided we liked the beans best with the dimpled side facing outward.

Coffee Candle (3)

As mentioned though, Travis’s interest quickly turned simply to playing with the coffee beans. He was soon delightedly busy with a coffee bean kitchen…

Coffee Candle (4)

….while mama glued on the beans. Since it was just me, I actually switched to using a hot glue gun, which held the beans in place even better than tacky glue.

Coffee Candle (5)

Once the beans are set, place your holiday candles where friends and family can enjoy their sight and aroma too!

Coffee Candle (7)


Turmeric “Tea”

Turmeric Tea.JPG

If you’ve been looking for a warming kid’s beverage other than hot cocoa, look no further than the current trend for “golden lattes”. This caffeine-free, kid-friendly version will warm up the chilliest winter day.

Ingredients:

  • 1 cup unsweetened almond milk
  • 1 teaspoon cinnamon
  • 1 teaspoon agave nectar
  • 1/2 teaspoon turmeric
  1. Warm the almond milk in a saucepan over medium-low heat.
  2. Remove the pan from the burner and whisk in the cinnamon, agave, and turmeric. Let cool slightly, and divide evenly among mugs for serving.

Sweet Apple Latkes

Latke (2)

Just in time for the end of Hanukkah, we whipped up this dessert spin on traditional potato latkes!

Ingredients:

  • 3 Granny Smith apples
  • 1 teaspoon vanilla extract
  • 1/4 cup all-purpose flour
  • 2 tablespoons sugar
  • 2 Ener-G eggs
  • 1/4 teaspoon cinnamon
  •  2 tablespoons canola oil
  1. Peel and shred the apples; press with paper towels to remove the excess moisture.
  2. Combine the shredded apple in a bowl with the vanilla, flour, sugar, Ener-G eggs, and cinnamon.
  3. Heat 1 tablespoon oil in a large skillet over medium heat. Add half of the batter by heaping tablespoonfuls. Cook for about 5 minutes, until golden on one side, then flip and cook for an additional 2 minutes.
  4. Transfer the latkes to paper towels, and repeat with the remaining oil and remaining batter.

Latke (1)

Give a Super Soup!

Super Soup (5)

Need a gift for teachers that they’ll actually use? Assemble the dry ingredients for this warming winter soup in a jar, add a hand-made note from your child, and tie it all with a pretty ribbon for a perfect gift. Thanks to High Five magazine for the suggestion!

First, the full recipe, because you’re going to want to make a batch of this soup at home, too:

Super Soup (1)

Ingredients:

  • 1 and 1/2 tablespoons low-sodium vegetable bouillon cubes, crumbled
  • 1 tablespoon dried parsley
  • 1 tablespoon dried minced onion
  • 1/2 teaspoon black pepper
  • 1/4 teaspoon dried thyme
  • 1/8 teaspoon celery seeds
  • 1/8 teaspoon garlic powder
  • 1 bay leaf
  • 1 cup tricolor rotini or fusilli pasta
  • 1 cup chopped carrot
  • 2 chopped celery stalks
  • 1 and 1/2 cups cooked and chopped Gardein chickn
  • 1/2 cup oyster crackers
  1. In a large pot, combine the bouillon, parsley, onion, black pepper, thyme, celery seeds, garlic powder, bay leaf, pasta, carrot, celery, chickn, and 6 cups water.
  2. Bring to a boil, then cover, reduce heat, and simmer for 15 minutes.
  3. Uncover and remove the bay leaf; continue to simmer for an additional 5 minutes.
  4. Serve with the oyster crackers!

To prepare the soup as a gift, have your child help layer the ingredients from the bouillon through the pasta in a 1-quart clear glass jar. Travis loved adding in the herbs:

Super Soup (8)

And untwisting caps to smell each one before we added it!

Super Soup (11)

Place the oyster crackers in a small zip-top plastic bag, and nest atop the other ingredients. Put the lid on the jar and tighten.

Super Soup (9)

Write out the recipe instructions on a recipe card (Note: teachers will supply their own carrots, celery, and chickn when the time comes).

Super Soup (4)

Have your child decorate the index card with crayons or stickers. Of course Travis needed to help punch a hole in each index card.

Super Soup (6)
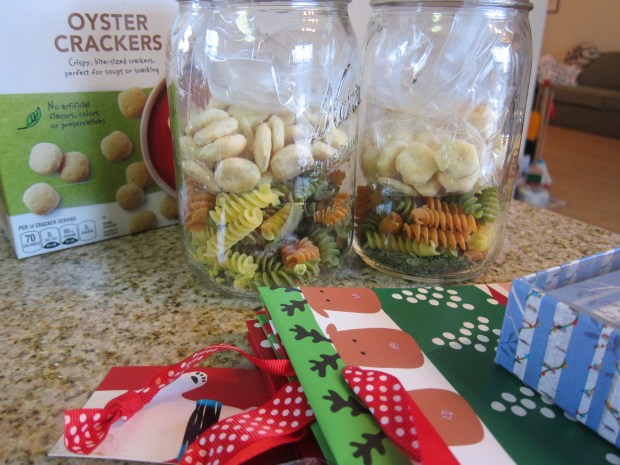
Now slip a ribbon through the hole and secure around the lid of each jar.

Super Soup (7)

Think that your kid’s teacher would prefer something sweet to something savory? Check out the Rocky Road Brownies we used for a gift mix last year!

Don’t forget to save the recipe and make a big pot of this for your own family, too.

Super Soup (2)

Coconut-y Pears

Coconuty Pears.JPG

Try these addictive pear bites either for a snack or dessert! Any nut butter will work, but we particularly like the combination of pears and almond butter.

Ingredients:

  • 1 ripe pear
  • 2 tablespoons almond butter
  • 2 teaspoons maple syrup
  • Shredded coconut
  1. Slice the pear into wedges, and divide the wedges evenly among two plates.
  2. Drizzle each plate with 1 tablespoon of the almond butter and 1 teaspoon maple syrup.
  3. Sprinkle with shredded coconut to taste.