Egg Carton Penguins

Egg Penguin (6)

We don’t buy eggs, but I do confess that egg cartons from my in-laws’ house make for fantastic up-cycled crafts. We got the idea to make these cute figures after a feature on penguins in our first issue of Ranger Rick Jr. We quickly decided we needed some adorable toy penguins around the house!

Egg Penguin (1)

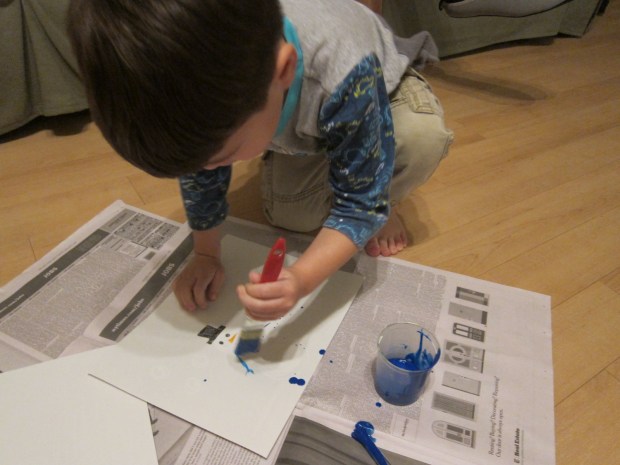
Cut an egg carton into indiviaul compartments and paint with black tempera paint. Since the carton was originally pink Styrofoam, it took two coats of paint before we hid the color underneath.

Egg Penguin (2)

Next we made sure to gave them white bellies!

Egg Penguin (5)

I cut out orange hearts to be the feet and orange triangles to be the beaks from a sheet of orange felt, and Travis helped glue these on.

Egg Penguin (4)

Googly eyes were the finishing touch!

Egg Penguin 8)

Now we have adorable penguins to march around and bring our magazine story about the animals to life!

Egg Penguin (3)

Upside-Down Mini Banana Muffins

Upside Muffin c

These inverted muffin bites couldn’t be cuter – or tastier! A few of them make a great breakfast or snack.

Ingredients:

  • 24 teaspoons Earth Balance butter
  • 24 teaspoons brown sugar
  • 1 cup flour
  • 1/3 cup brown sugar
  • 2 teaspoons baking powder
  • 3/4 teaspoon cinnamon
  • 1/3 cup canola oil
  • 2 Ener-G eggs
  • 1/4 cup non-dairy milk
  • 1 and 1/2 teaspoons vanilla extract
  • 1 banana
  1. Place 1 teaspoon butter and 1 teaspoon brown sugar in each of 24 mini muffin cups. Bake at 375 degrees F for 5 minutes; let cool slightly.
  2. Meanwhile, combine the flour, 1/3 cup brown sugar, baking powder, and cinnamon in a large bowl; set aside.
  3. In a second bowl, whisk together the canola oil, Ener-G eggs, milk, and vanilla. Add the wet ingredients to the dry ingredients, stirring until combined.
  4. Thinly slice the banana into 24 slices, and place 1 banana piece over the melted brown sugar in each muffin cup. Divide the batter evenly among the muffin cups and bake for an additional 12 minutes, until set. Let cool slightly in the pan before transferring to a wire rack.

Upside Muffin b

Happy Apple Discs

Happy Apple Discs (1)

What is it about a cored apple cut into circles that just makes you feel happy as you eat it? I remember a far-from-gourmet dinner from my childhood called Happle Apple Bagels, (a round sliced apple on a bagel with melted cheese, enough said!) and certainly that was all it took to make us happy for dinner. These Happy Apple Discs are fantastic for an after school snack or a protein boost first thing in the morning.

Ingredients:

  • 2 Granny Smith apples
  • 4 tablespoons non-dairy cream cheese
  • 1/4 cup creamy peanut butter
  • 1/8 teaspoon cinnamon
  • Non-dairy chocolate chips (such as Enjoy Life)
  • Shredded coconut
  1. Core the apples and cut each into 8 thin slices; set aside.
  2. In a bowl, stir together the cream cheese, peanut butter, and cinnamon until blended.
  3. Spread the peanut butter mixture evenly over the apple slices. Serve as is, or add mini chocolate chips and shredded coconut as toppings, if desired!

Happy Apple Discs (2)

Glowing Snowman Luminary

Glowing Snowman (10)

I wanted to make these adorable glowing snowmen to light up a dark blizzard afternoon recently. It turns out Travis wasn’t at all interested in putting the craft together (hey, sometimes it happens!) but he did love the end result. The snowman is another way to add a cozy glow to winter’s dark nights.

For best results, you’ll need an empty Pom juice bottle to create a nice curvy snowman. I couldn’t find Pom at the store, but did snag a kid-sized Evian bottle that worked just as well.

Glowing Snowman (1)

Paint your curvy bottle with two coats of white paint on all sides (but not the bottom), letting dry thoroughly after each coat.

Glowing Snowman (2)

You know that pesky tendency kids’ socks have of disappearing one from each pair? Use that to your advantage here!

Glowing Snowman (3)

Cut up any old or mismatched socks to make hats and scarves. For a hat, cut the toe off a sock. Tie with a string near one end, and snip those ends into strips to make a “pom pom.”

Glowing Snowman (4)

Cut a long, thin rectangle from another spare sock, and tie around the middle of the bottle as the snowman’s scarf.

Glowing Snowman (5)

To finish the snowman, we used sticky-back felt cut into circles for eyes, a nose, and buttons (which Travis finally acquiesced to sticking on!)

Glowing Snowman (7)

What a dapper fellow!

Glowing Snowman (8)

When you’re ready to make your snowman glow, simply place him atop a battery operated tea light and illuminate the night.

Glowing Snowman (9)


Ice Lanterns

Ice Lanterns (9)

This is a beautiful project to showcase finds from winter nature walks! It’s a multi-day project, requiring two separate rounds of freezing, but kids will love the final glowing result.

First you’ll need those winter treasures – think holly leaves, little berries, pinecones, and pine needles.

Ice Lanterns (1)

Arrange some of the items in a plastic container (or multiple containers, if you have enough nature items), and fill halfway with water. Freeze overnight.

Ice Lanterns (2)

The next day, Travis was very eager to check out the layer of ice we’d created.

Ice Lanterns (3)

Add a second layer of winter finds over the ice, and also place a glass jelly jar inside. Add water to the top of the plastic container, and freeze again overnight.

Ice Lanterns (4)

Note: If the weather is cold enough, you can even do the freezing outside!

For the final lantern, you need to release the glass jelly jar, leaving behind a hole for a candle. Fill the jelly jar with warm water just for a minute or two, and it should slip out.

Ice Lanterns (5)

Now run water around the outside of the plastic container, and release your whole ice lantern.

Ice Lanterns (6)

Note: Because our pinecone extended past the middle of our container, our jelly jar wasn’t centered. This didn’t present a problem; it just meant that our final ice lantern wasn’t going to glow as evenly! You can see in the above photo how our candle hole is on one side of the lantern, instead of directly centered.

Finally, place a battery operated tea light inside, and watch the lantern light up the winter night!

Ice Lanterns (7)

You can leave these outside, or take them inside for a warm winter glow.

Ice Lanterns (8)

Mexican Mac ‘n’ Cheese

Mexican Mac

This south-of-the-border spin on kids’ perennial favorite will help spice up mac ‘n’ cheese night! For the tortilla chips, I like to serve the white bean chips from Beanitos for a little nutritional punch.

Ingredients:

  • 1 package vegan mac ‘n’ cheese mix (such as Annie’s)
  • 1/2 cup jarred salsa
  • 1 cup black beans
  • 1 cup canned corn
  • Crushed tortilla chips
  1. Prepare the mac ‘n’ cheese according to package directions.
  2. To the saucepan, add the salsa, black beans, and corn, stirring to combine.
  3. Crumble the tortilla chips and serve on top to taste.


Snowman Wax Resist Painting

Snowman Wax (7)

It’s always fun to find new uses for that pesky white crayon in the crayon box… Sure you can draw on black paper, but this fun seasonal project has a magical feel for kids since it features a big “reveal” at the end.

First, you need to draw with white crayon on white paper, which hopefully won’t frustrate your kids. I told Travis to imagine he was drawing anything snowy – the snow fort we’ve made outside our patio, snowflakes in the air, etc.

Snowman Wax (1)

Because I wasn’t sure how much his white scribbles would turn up in the “reveal,” I made him a separate drawing with a white snowman and big puffy white snowflakes.

Snowman Wax (2)

Now the fun part: could we magically make our white pictures appear?

To prepare the paint, thin blue tempera paint with water; you want the consistency to be closer to watercolor. I actually would make ours even thinner next time, since it was a bit dark over our final result.

Snowman Wax (3)

Travis was very excited to see where the white crayon was on the paper!

Snowman Wax (4)

Then he grew impish and slathered on the paint quite thickly. A little thinning out on my part helped reveal the snowman’s three round layers a bit better.

Snowman Wax (5)

Overall, cute and nicely seasonal. Please share in the comments if you have other fun white crayon projects at your house!

Looking for more wintery indoor fun? Check out our recent shredded paper snowmen and pinecone snow owl projects!

Confetti Launcher

Confetti Launch (9).JPG

Well, we didn’t get to this one in time for New Years Eve, but there’s nothing wrong with having messy fun with leftover confetti just to fill a winter’s afternoon! Making the launcher will be a bit tough for the littlest hands, but Travis loved watching the assembly of it until it was time to make our confetti fly. Kids in elementary school on up can help with the entire process.

First, you’ll need two short cardboard tubes, such as toilet paper tubes. If they are the same size, cut one open and tape it so it is slightly narrower than the other.

Confetti Launch (1)

Cover both tubes in pretty decorative paper and set aside.

Confetti Launch (5)

Cut two slits along each side of the top of the wider tube, and thread through a rubber band. Stretch the ends of the rubber band around a jumbo craft stick.

Confetti Launch (3)

Trace the bottom of the narrower tube onto construction paper, and cut out the circle. Glue the paper to cover one opening of the tube.

Confetti Launch (2)

Now fit the narrow tube into the wider one, and glue the paper onto the craft stick. Let dry for at least one hour.

Confetti Launch (4)

Time to launch! Travis helped sprinkle in leftover New Years confetti.

Confetti Launch (6)

Little hands will likely need a grown-up’s help to pull the launcher back far enough, so I couldn’t capture a photo right in the middle of the action but…

Confetti Launch (7)

Confetti!

Confetti Launch (8)

We had to repeat over and over of course. We’ll definitely be making this for parties and celebrations to come!

Shredded Paper Snowman

Shredded Snowman (6)

January is always a good time to clear out the old and make room for the new, and that goes for even mundane things like cleaning out old bills and files. All that paper means putting our shredder machine to good use, and the end result of all that shredding? A wintery snowman craft!

To make the snowmen, save any shredding scraps you have, and set them out in a bin or sheet of newspaper to contain the mess.

Shredded Snowman (1)

You only need to press clumps of the shredded paper together with your hands and it will stick together, as all the pieces intertwine. Nothing wrong with a good old paper snowball fight at this stage, if your kids are so inclined!

Shredded Snowman (3)

Once we had “snowballs” of various sizes, we stacked them into a snowman, gluing the layers together. Admittedly this was a little inexact – the balls looked more like lumps once glued, but the basic idea was there.

Shredded Snowman (4)

We stuck in orange pipe cleaners as carrot noses, and I coiled black pipe cleaners to be top hats.

Shredded Snowman (7)

Far more rewarding than this little craft, though, was Travis’s glee for all that shredded paper simply as a material.

Shredded Snowman (2)

He played games with it for ages, pretending it was “grass clippings” (yes, we like to pretend we’re landscapers around here) and then happily cleaning it with his toy tools.

Shredded Snowman (5)

What other fun uses can you think of for all that shredded paper? Please share in the comments! What a great way to recycle last year’s boring paperwork.

Great Green Guacamole

Great Guac (5)

At a recent hotel stay, Travis’s favorite channel on the room’s TV was… Food Network! A boy after his mama’s heart. So when we got home, we staged our own “Food Network kitchen” and whipped up this recipe, care of High Five magazine.

Adults, first cut an avocado in half and remove the pit. Let your child scoop the flesh into a bowl and mash with a potato masher. Travis loved this tool!

Great Guac (1)

Next he added 1/4 cup jarred salsa:

Great Guac (3)

1 tablespoon fresh-squeezed lime juice, 1/4 teaspoon salt, 1/4 teaspoon black pepper, and 1/2 teaspoon minced garlic (adults can do the mincing ahead of time; Travis loved the way the cloves of garlic smelled!)

Great Guac (2)

We served our “test kitchen” masterpiece with cut up cucumbers, orange and red bell pepper strips, and bean tortilla chips.

Great Guac (6)