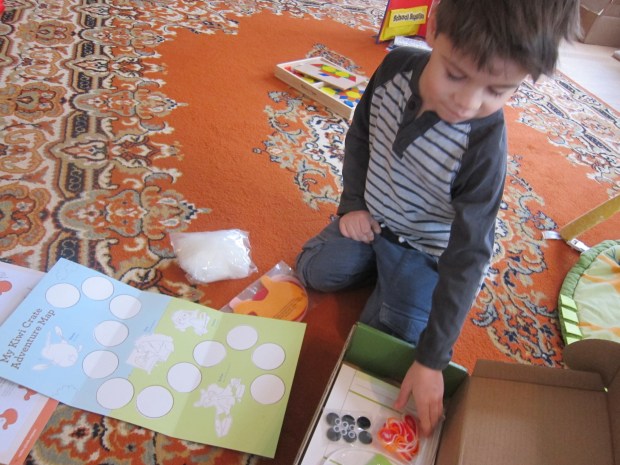
Travis is officially a Koala Crate graduate! I loved that there was even a certificate in the first Kiwi Crate he received, moving him up to this kit intended for ages 5 to 8. We can’t wait to start blogging his journey.

At four and a half, Travis is on the young side for Kiwi, but I knew he was ready – he’s been bored of his final few Koalas, either unimpressed or not challenged by the crate’s topics. His glee for this first Kiwi box spoke for itself!
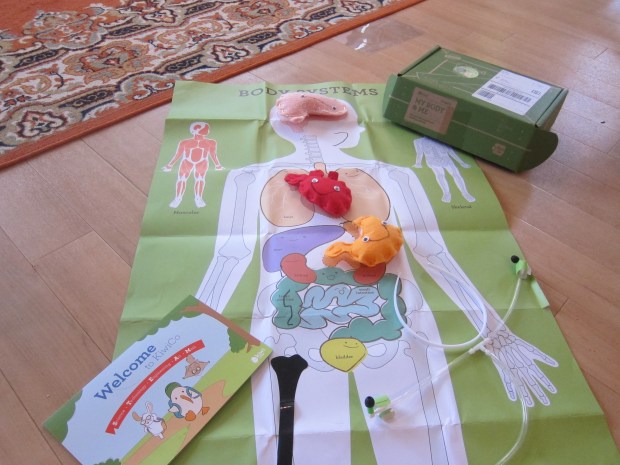
We opened it up to find a kit all about the body and anatomy – big topics for my big boy – and the projects did not disappoint.
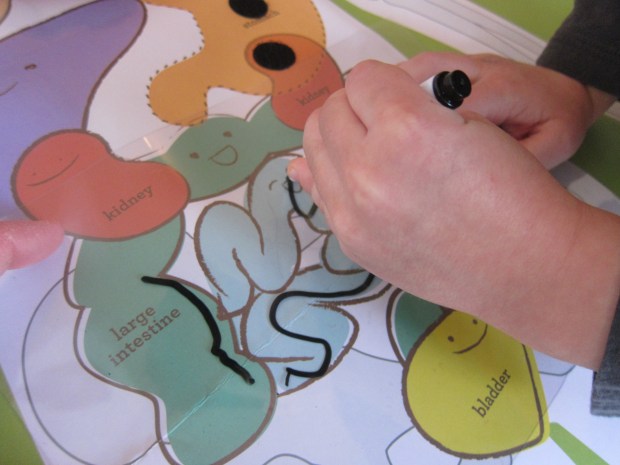
He couldn’t wait to get started on the first activity: Make Plush Organs. “Is this what my brain looks like?” he asked, pulling out the pink felt shapes. I explained it was the right shape, yes, and he wanted to know what the lines represented which got us talking about the folds of the brain, the brain’s functions, and more. Exciting stuff! There was also a felt template for a heart and a stomach.

To make the organs, we’d need to lace them together. The lacing holes are much smaller and closer together than in a Koala kit, but to my great delight, my boy not only was able to do it with hardly any assistance, but stuck with it through all three organs.
As we laced, we pretended he was a surgeon. “Is this really what surgeons do?” he asked, and I pointed out the very real similarities: patching up people’s organs, and stitching them up at the end.
When you have only about 4 or 5 holes left in each organ, take time to stuff in the provided roving. I asked Travis to divide our pile of roving into three roughly equal piles at the outset, so he’d know he had a enough. A good quick math lesson.

Now we unfolded the huge anatomy poster that came with the kit – whoa!

There was an outlined space for each organ we’d made. Velcro dots adhered them to the poster, for easy removal at any time.
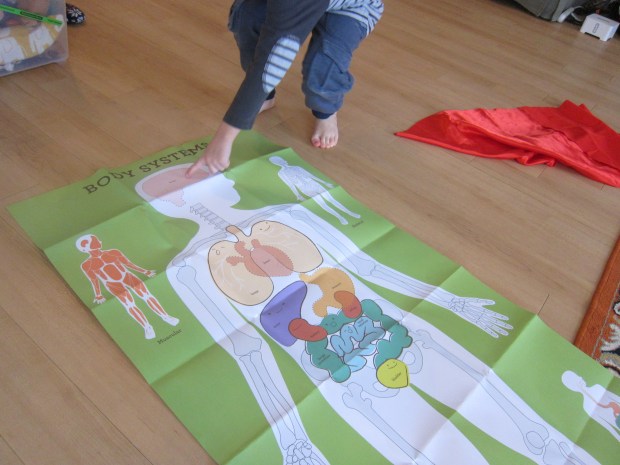
We also added smiles and stick-on googly eyes.

I let Travis decide where the smile and eyes should go on each, ceding the project to him more completely than I ever did with Koala.

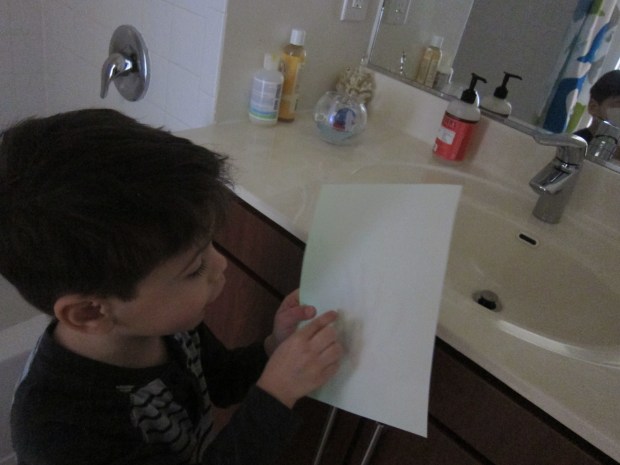
Now on to the next project: Create X-Rays.
The kit contained a clear sheet that could go over any bone on the anatomy poster, oto which your child sticks reusable bone stickers.

None of these line up with the bones exactly, but any extra space can be filled in with a provided erasable marker. This of course leaves your child free to make “breaks” in the bones.

To make the x-ray come through, place the sticker-covered sheet over specially-provided glow paper. Make sure the clear sheet goes on the rough side of the paper. Now place it in a sunny spot or directly under a lamp with the bones on top. Within 5 minutes, you’ll have a faint x-ray that shows up in a dark room.
Travis was thrilled, setting up multiple x-rays and proudly giving his doctor’s diagnosis to each.
An indication that this kit really is for bigger kids: there were many tiny metatarsal stickers for doing an x-ray of the hand, but Travis was undaunted, and needed just a bit of mommy help.

We had fun designing breaks, as well as using the clear sheet over other organs on our anatomy poster for tracing. And of course your child can draw any picture they like on the sheet, which erases in a pinch.
Finally, we experimented with other items on the sheet. Note: this is just like making sun prints, but much faster; I’m quite curious to know what is in the special glow paper! We used buttons, a key, and toys for neat shadows.

Finally it was time to Build a Stethoscope:
This project involved a lot of fine fingerwork, using three plastic tubes (two short, one long), T and L connectors (I had him look at these and tell me why they were named thus!), a funnel, and soft earbuds.

I helped Travis push the tubes onto the connectors in the proper order, then we slipped on the ear buds.

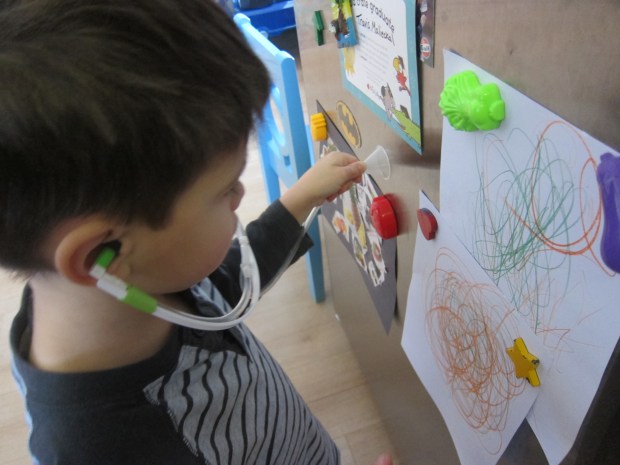
Now it was time to check our heart beats!

Travis looked so happy when he could hear his own.
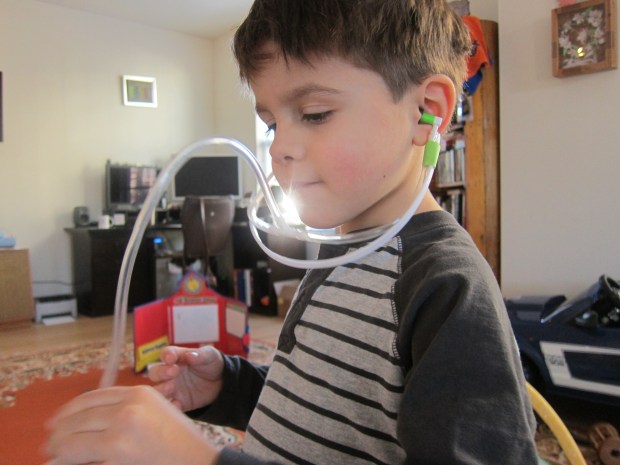
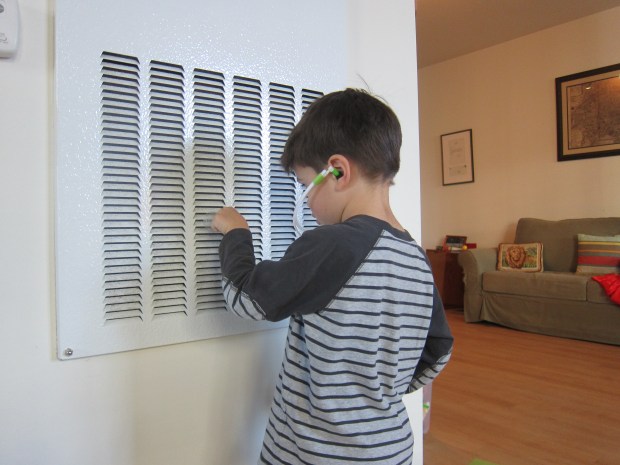
Then we tried it out in funny places around the apartment like the air vent…
…and the fridge.
Travis was frustrated when he couldn’t really hear my heartbeat, but he did love giving mock check ups. Kids will love that they can dry-ease the exam card after each “patient.” You can also get silly and use the stethoscope to listen to a tummy after a snack, and catch any stomach grumbles.
Koala came with an Imagine magazine, and now with Kiwi we have Explore magazine. It was fun to have a whole new format to check out together, with new characters in the stories.
We read the magazine together, and I helped Travis with its explanation of handedness. I challenged Travis to write and draw with both hands.
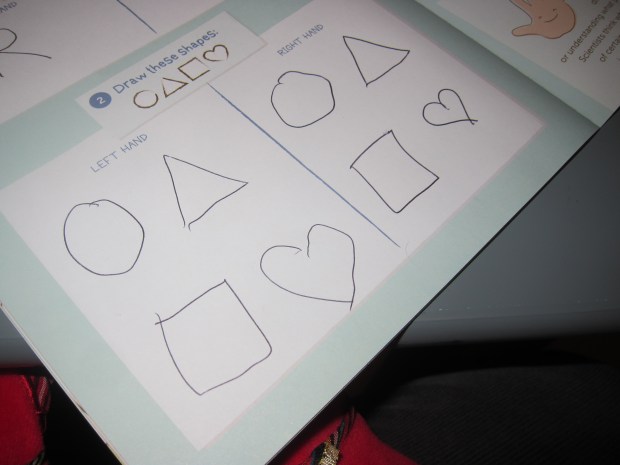
He was a bit frustrated, so I showed him my own left versus right handwriting in the booklet, and he practiced on a tablet.

Turns out he has a dominant eye, too, which the booklet explains is really a thing!
Overall, we loved this kit. We’ll be checking out the two suggested reading books: My Amazing Body by Ruth Martin and Parts by Ted Arnold. Can’t wait for the next crate to arrive!