Roly Poly Play

Roly Poly (6).JPG

It’s early for your baby to roll at two months old (although some might be able to!), but it’s not too early to introduce the sensation of rolling. Veronika is starting to get the idea – when her head is on a pillow, she can rotate her body off it to the left side, although she doesn’t get all the way around to the tummy. So it’s time to build those muscles and develop the idea!

roly poly (2)

Today, Veronika and I played around with rolling on a few different surfaces. First, I put her on her brother’s bed – a nice soft mattress to flip about on.

roly poly (3)

I started her on her back, then gently rolled her halfway…

roly poly (4)

…before finishing on her tummy. She looked quite surprised!

roly poly (5)

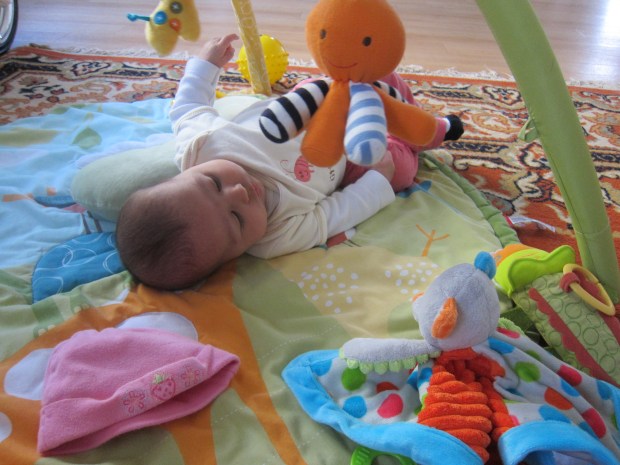
Then we tried the same game on a very soft mat on the floor. This time, I placed interesting toys on either side of her, as inspiration to roll. She loved rolling toward the mirror first.

roly poly (7)

Her favorite toy is a little soft octopus, so she was absolutely delighted when I set that off to her other side.

roly poly (8)

Got it!

Roly Poly (9).JPG

This game would be great fun for a baby if you did it outside on a soft bed of grass in warm weather… but we’re having snow today, so we kept the fun indoors!

At what age did your baby first roll solo? Please share in the comments!

Advertisement

Yummy Bones

yummy bones (6)

After a fantastic time with his first Kiwi Crate, Travis enjoyed playing doctor again to make… edible bones!

The recipe from his Kiwi Explore magazine was very loose, with no precise measurements. So let your surgeon work with the ingredients to his or her taste.

First, you’ll need a tube of breadstick dough. This can be hard to find pre-made and vegan, so I purchased a roll of pizza dough. If you have breadstick dough, check the heating and baking instructions on the package.

yummt bones (1)

For our dough, we first rolled into “bones” (the same way that you roll clay or playdough into snakes).  Travis loved deciding what was a leg bone, an arm bone etc. Squeeze the middle, so the ends are slightly thicker.

yummy bones (2)

Use kitchen shears to snip the ends of each snake, dividing them outward into a bone shape. Travis was so proud to do this step, with a little grown-up help.

yummy bones (3)

Now brush with a little melted butter (we used Earth Balance) and sprinkle with a little vegan Parmesan (we used Go Veggie).

yummy bones (4)

After 12 minutes at 425 degrees F, these bones were ready to eat!

yummy bones (5)

They’re great plain, or we discovered we also liked them dipped in marinara sauce.