Big Brother and Little Sister Shirts


Brother Sister Shirts (10)

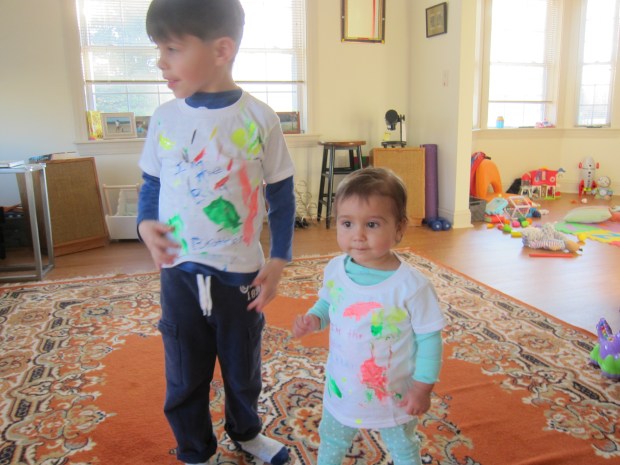
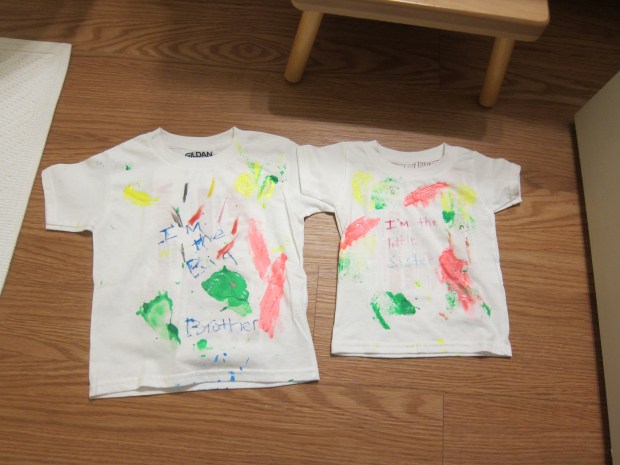
It’s such an exciting development for my kids that now they can do projects together, as was the case with these brother-and-sister shirts. Obviously you can tailor the shirts to fit your family, whether that means two brothers, three sisters, or even mommy & me shirts!

Brother Sister Shirts (1)

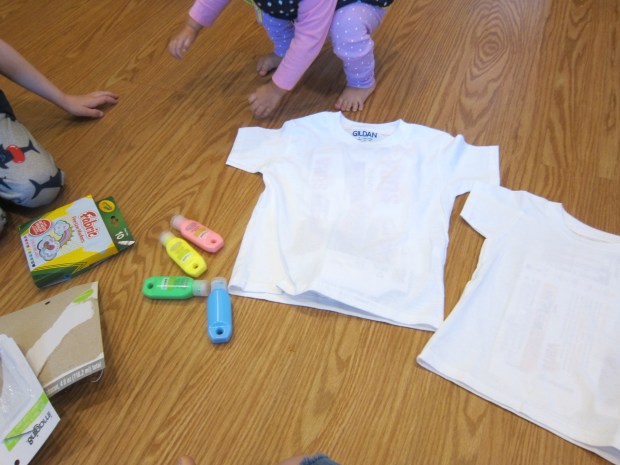
I purchased blank white tees at the craft store in the kids’ sizes, and first wrote on the front “I am the little sister” and “I am the big brother” with fabric pens. Note: This is harder than it looks, because the fabric kept pulling!

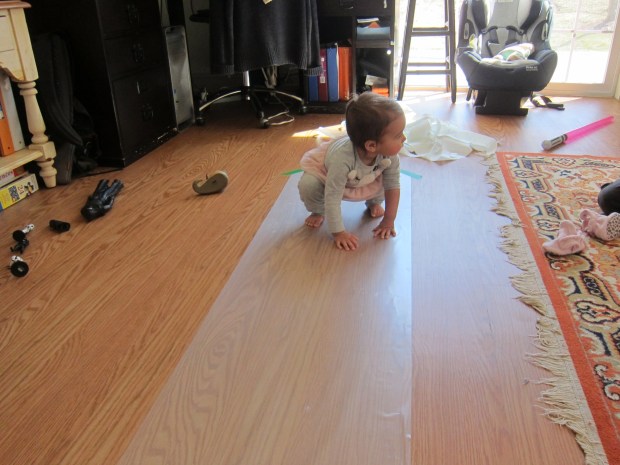
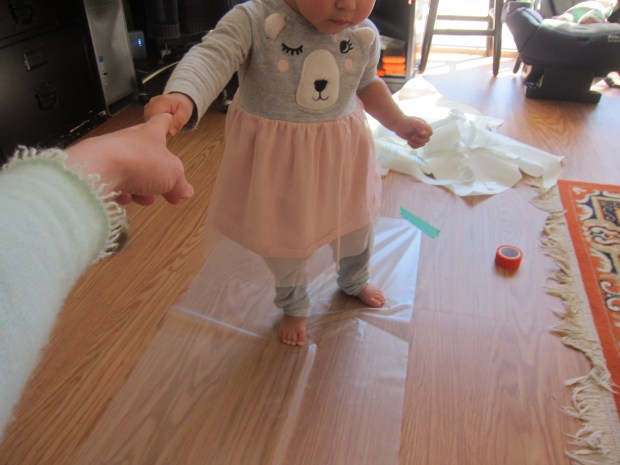
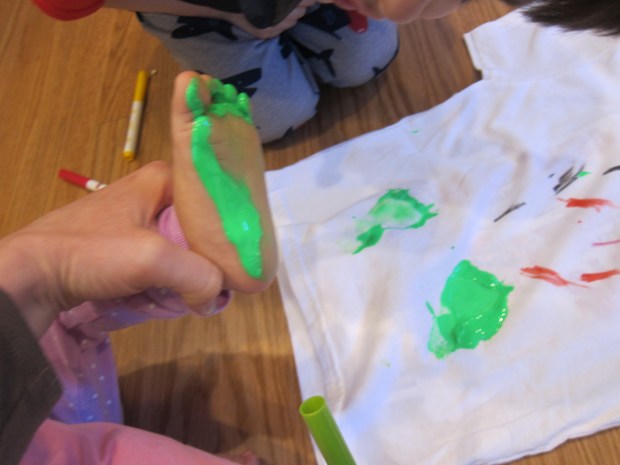
We then wanted to put Veronika’s footprint on Travis’s shirt. I squirted a little fabric paint onto a sponge and pressed it to her foot, then pressed her foot to the fabric. It didn’t come out completely clear, but Travis loved knowing it’s there! If your big kids want to, have them put handprints on the little sibling’s shirt in the same manner.

Brother Sister Shirts (3)

Then the kids loved dabbing the sponge all over the shirts, squirting it first with different colors.

Brother Sister Shirts (5)

The fabric markers were running low on ink, but they discovered that they could squirt a little fabric paint onto a shirt and use the tip of the markers as the “paintbrush”.

Brother Sister Shirts (4)

They had so much fun making these!

Brother Sister Shirts (6)

And they looked adorable wearing them.

Brother Sister Shirts (8)

Play Dough Sound Sensory Jars

Easy Sound Sensory (12)

This project took us from morning to night since we tackled different portions of the game throughout the day! It all started when Veronika had a morning of play dough play while big brother Travis did home school lessons.

Easy Sound Sensory (1)

But she’s still more tempted to eat play dough than play with it, so I clumped it into a big ball and set it aside for another day. There we were with lots of empty little jars. They were the perfect vessel for… sensory play!

I rinsed out the jars while Veronika continued to play with the lids.

Easy Sound Sensory (3)

Once clean, I started filling each one with different items. In all, I had 12 little jars with:

  • popcorn kernels
  • marbles
  • beads
  • rice
  • coins
  • bells
  • dried beans
  • ground coffee
  • salt
  • sprinkles
  • rubber bands
  • sesame seeds

Other ideas might include: buttons, water, spices, Lego pieces, or bits of foam. It was a little tricky to set these up with Veronika watching, since she wanted to touch the items and many are choking hazards.

Once lids were sealed, she could safely play! First we just had fun shaking them, or tapping two together.

Easy Sound Sensory (4)

Then we shook each one in turn and divided them into two piles, one loud, one soft.

Easy Sound Sensory (5)

I could sense her growing frustration that she couldn’t get inside the jars…

Easy Sound Sensory (5)

…so we went through them one at a time. I gave a jar a shake and opened it up so she could see the item inside. Be sure to name the item, too! Bells, beads, and marbles seemed to especially intrigue her.

Easy Sound Sensory (7)

For bigger kids, you could even turn this part into a game. Give it a shake, and have them guess what’s inside. Travis trotted over for a try!

Easy Sound Sensory (8)

Bigger kids might also like to try a sound match-up. Narrow it down to fewer items (3 or 4), and have two canisters for each item. Can your child match them up? I didn’t expect Veronika to be able to do this, but did the exercise as an illustration in all the ways she can hear.

Easy Sound Sensory (11)

We could use lots of great vocab words as we played, like “jingling” bells and the “cha cha cha” of rice.

Easy Sound Sensory (9)

Of course then your child might just keep busy with the jars themselves for quite some time, which was certainly the case for Veronika. Like I said, this is a game that can last all day!

Easy Sound Sensory (10)

Baking Soda and Vinegar with Color Fun

Baking Soda Colors (8)

This activity was intended for my toddler, but it turned out to be my kindergartner’s favorite part of the day. Since there’s some STEM involved, keep it in mind if you find yourself home schooling!

For set up, I wanted Veronika to have the option of color mixing, so I filled three cups with vinegar. I left one clear, added yellow food coloring to the second, and blue food coloring to the third.

Baking Soda Colors (1)

I then sprinkled a box of baking soda into a shallow tray. Veronika instantly liked making lines through it with the pipettes I had left out. It was sort of like an indoor sandbox for a moment.

Baking Soda Colors (2)

Then it was time to start squeezing in vinegar! I used the clear cup first, knowing the bubbly reaction was enough to get a “wow” even before we added color.

Baking Soda Colors (4)

Then we started piping in the colored vinegar. I had hoped Veronika might get in some fine motor practice with the pipettes, but that was too much for 16-month-old fingers. Big brother Travis loved using a pipette and baster, though! Then the kids poured the cups of vinegar instead, for even bigger reactions.

Baking Soda Colors (5)

The blue and yellow turned into a nice green, of course, which I’d also hoped to demonstrate.

Baking Soda Colors (9)

After that we just had a big pile of green bubbly “lava” that the kids loved scooping through with pipettes and cups for ages.

Baking Soda Colors (7)

Eventually they wanted to drip in other colors from the food coloring set, which was fine, although it didn’t look so pretty.

Baking Soda Colors (10)

A great afternoon activity!

Baking Soda Colors (6)

Peanut Butter Sculptures

Peanut Butter Sculpture (4)

This fantastic sensory activity is perfect for entertaining a toddler… and it takes care of snack time, too!

I simply spooned a large glob of peanut butter onto a shallow tray, and set out a few craft sticks (or use plastic take-out knives) and circle crackers.

Peanut Butter Sculpture (1)

Your child can use the craft sticks to make lines and movement through the peanut butter, or to build their budding knife skills by spreading it on the crackers. Once the crackers are sticky with peanut butter, you can stack them into towers and make “art”.

Peanut Butter Sculpture (3)

Veronika loved experimenting with the peanut butter, as well as nibbling the crackers and licking peanut butter right off the craft sticks.

Peanut Butter Sculpture (2)

She also was intrigued by the peanut butter jar, occasionally dipping in a craft stick.

Peanut Butter Sculpture (5)

I wouldn’t recommend this activity for a toddler solo, since it’s bound to get a little messy and you’ll want to supervise.

Peanut Butter Sculpture (6)

But a great way to keep little ones busy! Note: Use another nut butter if your child has peanut allergies, or even jam for all nut allergies!

Peanut Butter Sculpture (7)

Clothespin Poke

Clothespin Poke (6)

Much as with tape or tissues, it doesn’t take much to keep a toddler busy. For this game, I used an upcycled egg carton and spring-type clothespins for a simple fine motor activity.

Poke a hole into the bottom of each egg carton portion, just large enough for the clothespins to slot in (I poked the initial hole with scissors).

Clothespin Poke (1)

For the first round, I pushed all the clothespins in and presented the egg carton to Veronika, so it was her job to pull them out!

Clothespin Poke (2)

A few of them got a little snagged on the springs but she was very patient puzzling this out, and so proud when they came free.

Clothespin Poke (3)

Once she had a pile of clothespins next to her, of course she had to poke them right back in again.

Clothespin Poke (5)

And again.

Clothespin Poke (7)

And again.

Clothespin Poke (8)

I loved seeing her return to this throughout the day, pausing to insert a few or pull out a few and then heading off to other games. It was a great way to keep little hands busy!

Fun with Tape and Peeling Tape

Peel Tape (2)

Tape is a fantastic way to occupy a toddler – yes, just tape! Make the game especially fun by using lots of different varieties and vibrant colors.

To start out, I simply set up a tape station for Veronika.

Fun with Tape (2)

Most of the rolls were masking tape (I had a full rainbow of colors), and I also had clear double-sided tape.

Fun with Tape (1)

First I gave her two pieces of tape for her to try sticking them together.

Fun with Tape (3)

This was intriguing, as was sticking tape to her belly!

Fun with Tape (4)

She was in front of a wooden puzzle frame, which was a handy surface for layering down pieces of tape.

Fun with Tape (6)

She kept quite busy sticking the tape pieces off and on for a while.

Fun with Tape (7)

Then we moved on to a slightly more focused activity: Peeling tape. Peeling up layers of crisscrossed tape is not only a great cognitive challenge, but also excellent for strengthening finger muscles.

I laid down long strips of the colored masking tape on a wooden floor (a wooden table would work, too, if you have one large enough). Make sure there is lots of overlap and intriguing angles.

Peel Tape (1)

Sure enough, Veronika couldn’t wait to rip it up off the floor. When she encountered a spot where one piece of tape pinned down another, I could see her brain at work for how to get it all to lift.

Peel Tape (3)

She soon became adept at finding the ends that were curled up slightly in the air, and provided a handhold to start pulling.

Peel Tape (5)

Another success!

Peel Tape (4)

As she worked, I gathered up the strips until we had a big tape ball, which turned out to be fun to play with as the final variant on tape play.

Peel Tape (8)

All of this kept her busy almost all morning!

Peel Tape (7)

Sticky Figures

Sticky Figures (6)

Here’s a great way to keep little toddler hands busy… and build muscle strength!

I set up this game the night before for Veronika, using hot glue to attach the scratchy side of Velcro strips onto a piece of flat wood (about 5×7 inches). The Velcro strips were already sticky on one side, but the hot glue was extra insurance that they would stay put.

Sticky Figures (1)

I then glued the opposite side of the Velcro (the fuzzy side) to the bottom of little animal toys and figures.

Sticky Figures (2)

This game will work best with toys that have a nice flat bottom, although I did try little dinosaur figures, too.

Sticky Figures (5)

Now it was simply a matter of presenting the game to Veronika! She loved the way the animals became stuck once attached.

Sticky Figures (3)

I had worried that she would be frustrated at the challenge of pulling them off, but instead she seemed intrigued. She soon learned to pull down on the wood and up on the figure at the same time to help the two Velcro halves apart.

Sticky Figures (4)

In sum, this is a nice game for keeping little hands busy, although I can’t say it occupied her for as long as other recent projects.

Sticky Figures (7)

Chair Maze

Chair Maze (7)

This game is perfect when you want your toddler to fit in some gross motor play, but can’t get to the playground. I simply set up chairs all around her playroom, and encouraged Veronika to come on over.

Chair Maze (1)

You can see her glee!

Chair Maze (2)

I thought she might need to be enticed with a “hunt” for rings from a stacking toy, but she needed no encouragement. Instead, she just scrambled on up.

Chair Maze (3)

Once on top of the chairs, she proudly swung her legs. She knew this was big brother’s chair!

Chair Maze (5)

She still needs help with climbing down safely, so this was great practice.

Chair Maze (4)

The highchair was perfect for crawling under, of course.

Chair Maze (6)

She spent a little while scrambling up and down and all around, but then I needed to give her a way to play that required less supervision. This time, we lined the chairs up in a train with stuffed animal passengers.

Chair Maze (8)

She loved making sure everyone was in their proper seat.

Chair Maze (9)

This kept her so busy that I didn’t worry about her climbing into a chair and falling off while my back was turned. A low, soft orange chair was the perfect place to cuddle up with her train companions.

Chair Maze (10)

“Hello!” she said to the big white dog in the next seat.

Chair Maze (11)

How does your toddler get exercise indoors? Please share in the comments!

Fun with Kleenex

Kleenex Box (4)

Going stir crazy and need to occupy a toddler? Look no further than a box of tissues. Seriously, that’s it. This is what I call a “sacrificial tissue box” and sometimes it’s exactly what the doctor ordered.

Kleenex Box (1)

Put the box on the ground with the first tissue sticking out, and your toddler will immediately think they’ve gone to heaven. Veronika pulled out only a couple at first, and tried to clean the floor.

Kleenex Box (2)

Then she discovered the great joy of pulling out one after another, making a big pile.

Kleenex Box (6)

Then we got silly. I put some on my head and pretended to sneeze them off, which she quickly imitated.

Kleenex Box (8)

You can also pick up big handfuls and have them drift down like “snow”.

Kleenex Box (5)

She also lifted a tissue to her face and pretended to blow her nose just like mommy. “Mommy nose!” she said.

Kleenex Box (7)

Aside from those interactive moments together, the real beauty of the tissue box is that it can occupy a toddler solo for quite some time.

Kleenex Box (3)

The game needn’t end just because the tissues are gone. Re-purpose the box by stuffing in tissue paper. For this version, I started out with the tissue paper wadded up.

Kleenex Box (9)

These were hard for her to pull out though, so we ripped each portion into smaller pieces, which she could stuff in and pull out again.

Kleenex Box (10)

Scarves would work, too!

Kleenex Box (11)

Sticky Feet

Sticky Feet (6)

This is really an update on a game we played back in January, when Veronika was almost walking but not quite. I taped a piece of contact paper to the ground in hopes of strengthening her leg muscles and held her hand as she strained to lift her feet from the sticky surface.

Now, there is no doubt about it: she’s a walker! The purpose was more to explore all the ways she could move across the sticky surface. Once again, I taped down contact paper (make sure you give your child at least 2 feet in length to explore). When she first stepped onto it, she immediately went into a crouch so her hands could feel the sticky surprise, too.

Sticky Feet (1)

We discovered that lifting up our fingers and toes made a fantastic sound!

Sticky Feet (3)

She liked to step off of it and then back on again, as if testing the difference between the sticky and non-sticky surface each time.

Sticky Feet (8)

She also was determined to walk solo across it, although needed a hand a few times to pry her feet loose.

Sticky Feet (5)

You’ll notice it intrigued big brother, too!

Sticky Feet (4)

This game truly never gets old. The older your toddler grows, the more you can encourage him or her to dance on contact paper, run on it, or jump on it. It’s a challenge that never grows stale.