Chocolate Leaves

chocolate-leaves-10

What else do you find on a safari besides beautiful animals? Plants and leaves of course! Ok, so we didn’t really forage for leaves, but I loved the idea and replicated it at home as best I could. The project might feel more like a “safari” if you have your own garden from which to select beautiful leaves! Whether store-bought or from your home, be sure to choose leaves that are edible or non-toxic and not sprayed with any pesticides.

We made do with bay leaves from the store, so no real “foraging”, but Travis loved helping rinse the leaves off in the sink before we began, and patting them dry.

chocolate-leaves-1

Arrange your leaves on a baking sheet lined with wax paper.

chocolate-leaves-2

Meanwhile, melt your favorite chocolate in a double-boiler just until melted and smooth. We love the dark chocolate from Endangered Species Chocolate Company! Before you let your child work with the melted chocolate, make sure it isn’t too hot to the touch.

chocolate-leaves-3

We used plastic knives to spoon our chocolate over the leaves. You are going to get messy, but that’s half the fun!

chocolate-leaves-4

Once he discovered how good his chocolatey fingers tasted, it was time to use a spoon.

chocolate-leaves-6

We put the baking sheet in the fridge for the chocolate to set – it took a few hours, which turned out to be perfect timing for dessert.

Carefully peel the leaf off of each portion of chocolate – Travis was a super helper with this part, too!

Chocolate Leaves (9).JPG

And then it’s time to eat the bountiful crop from your “safari” journey.

chocolate-leaves-8

Safari Tracks

koala-safari-20

We tacked on one final craft after having fun with our recent Safari crate from Koala Crate – animal stamp foot prints!

To make the stamps, you’ll need sticky foam sheets from a craft store. Draw footprints on the sheets to look like various animals – pads with toes for lion’s paws, a hoof for a zebra, a webbed foot for a crocodile, and so on.

koala-safari-15

Travis loved playing with the sticky foam while I drew the shapes, but wasn’t interested in drawing animal prints of his own.

Help your child cut out the shapes, and attach each print to cardboard squares. Voila! You have a stamp!

koala-safari-16

Paint over the stamps with a foam brush, and press onto paper for animal tracks.

koala-safari-18

Travis got very impish splattering the green paint to begin with, but soon loved the way the brush felt over the bumpy raised footprints.

koala-safari-21

Don’t forget the binoculars to explore which animals have made tracks in your home.

koala-safari-17

Safari Crate

koala-safari-2

We had a nice leap in development when our Koala Crate arrived this month – Travis instantly recognized the company’s box and needed to know what projects were inside, before I’d even had a chance to peek at this month’s contents! Needless to say, we jumped right to it.

The crate did not disappoint. The safari theme included really only one craft, and two projects that were more games, and Travis loved it all.

First, we had to assemble our safari puppets (which you could DIY with felt and stickers from a craft store).

koala-safari-3

Although I mostly set up the animals as they should look, Travis loved attaching the googly eyes and bellies, and we talked about how each animal’s belly felt different (the bumpy crocodile, furry lion, etc.).

koala-safari-1

His favorite was the zebra!


I had to put together the cute little cardboard binoculars that were provided, although preschoolers should be able to master the folding/inserting on their own.

koala-safari-6

Once assembled, it was time for our safari! Travis couldn’t wait to get started.

koala-safari-7

I hid the 4 puppets around the living room, and Travis went off on his journey with his binocs. We needed to play four times in a row before he’d had enough, and he loved keeping tally on the checklist provided in our crate.

koala-safari-9

The final game involved cards featuring the heads, torsos, and legs of the four animals, so kids can mix and match to make silly creatures. Travis actually preferred making the animals look the way they are supposed to…

koala-safari-4

… but he giggled hysterically when I made silly creations and gave them equally silly names (Elezebracrocs).

Use the safari theme as a chance to introduce a few new vocab words, such as the groupings of various animals. Beyond a pride of lions did you know that it’s called a:

Dazzle of Zebras

Bask of Crocodiles

Herd of Elephants

Tower of Giraffes

Crash of Rhinos

Bloat of Hippos

(and my personal favorite) a Parliament of Owls

We finished our safari fun with books on the theme, including Travis peering at the book pages through his nifty new binoculars. Thanks Koala Crate!

G Week!

G week (12).JPG

I had a bunch of activities planned for G in our Letter of the Week exploration, and anticipated good fun… Little did I know there would be some great favorites that I didn’t even expect. So without any further ado…

g-week-1

Garden/Greenhouse: As luck would have it, a local greenhouse was having a midwinter festival, so we kicked off the week with a garden tour! We strolled among the lush flowers in the greenhouse gardens – and got to hear a steel drum performance too.

g-week-2

For a cute gardening story, we followed up at home by reading the Curious Garden by Peter Brown. See below for our indoor gardening project, which was our fine art activity of the week.

g-week-3

Guitar: Travis loves guitars, so I had to make sure the instrument was extra special this week. It felt meant to be that the aforementioned garden festival also featured… a guitar show for children! Travis was thrilled to watch the musicians strum the strings. Check your local listings for guitar shows; or, if you can’t find a local performance, share clips of guitar music online.

g-week-5

Giraffe: For no discernible reason, we own three puzzles that feature giraffes. Needless to say, I pulled them all out this week, and we read Giraffes Can’t Dance by Giles Andreaea to further explore the quirky anatomy of these tall giants.

g-week-10

Golf: This word was the prompt for our fantastic “field trip” of the week, to a local museum that has – go figure! – six holes of mini golf on the top floor. Travis took right to the game; I would hit the balls near-ish to the hole, and then he loved sinking them. For an easier take on the activity, you can set up shoebox golf at home.

g-week-7

Garbage: Travis has a toy garbage truck which he’s never paid much attention to… until I showed him a few YouTube clips of garbage trucks in action this week, and boy oh boy was he hooked. Garbage collectors are an oft-neglected category of “community helper,” so it was great to teach Travis about their work, and discuss the value of recycling. Then it was time to set up our town playmat; he drove his toy garbage truck around to collect the bits of “trash” we put down on the mat.

g-week-4

Goat: You could simply play with your farm toys that feature goat figures, but since we just did that with horses for H week, I also read recommend reading Billy Goats Gruff. After a cozy read, we acted out the tale with toy goats. Travis loved making them “trip trop trip trop” over a bridge.

And our weekly extras…

Fine art: We planted a grass-haired man (with a green face of course), for a delightful stint at indoor gardening. We have yet to see the grass sprout, but check back for updates on the separate blog I posted.

g-week-11

Food: Grapefruit got a firm nope as too sour, but Travis enjoyed green grapes, granola bars, and green beans… and then we whipped up homemade graham crackers!

g-week-6

Songs: Share a clip of The Green Grass Grew with your child.

Books: We enjoyed almost too many wonderful titles to list this week! Check out: Giant Vehicles by Rod Green, The Gruffalo by Julia Donaldson, Goodnight, Godnight Construction Site, by Sherri Duskey Rinker, Goodnight Moon by Margaret Wise Brown, When a Grandpa Says I Love You by Douglas Wood, If You Give a Mouse a Cookie by Laura Numeroff, and Duck and Goose by Tad Hills.

Math: Make a “greater than gator”! Technically, we used our A is for Alligator from another project, but I realized that it was easy to call him a “gator” instead and his open jaws looked just like a greater sign! I taught Travis that the gator could only eat green grapes from the plate that had a greater quantity, making for a a nice lesson on how 3 is greater than 2 and so on.

g-week-8

Hairy Head

hairy-head-6

Here’s an adorable gardening project that can be done indoors in the winter. We only just planted our grass-haired man today, so I’ll update this post when and if the “hair” appears.

First, draw a face on a Styrofoam cup using markers. Travis made great eyes, as well as lots of squiggles, and I drew a complete face on one side as well.

hairy-head-2

Travis’s favorite part of the activity by far was shoveling in the dirt. He happily would have kept doing so all day except our cups were filled.

hairy-head-4

Sprinkle grass seed near the top (we used catgrass, which means hopefully our cat can enjoy the final product as well), and cover with a little more soil.

hairy-head-5

We watered the soil and then set the cups aside – hoping to see grass sprout in a few days!

G week (11).JPG

Update: Not only did our man sprout a hairy head of grass, the grass grew so fast we could hardly believe our eyes. Here are the sprouts after a couple of days:

Hairy Head.JPG

And here is our man sporting a full head of hair!

hairy-head-alt

Travis loved running his hands through the grass blades.

hairy-head-var


Chocolate Graham Crackers

chocolate-grahams-4

It can be hard to find vegan graham crackers at the store without having to special order, but this chocolatey version is surprisingly easy to make at home. Let kids help with the cookie cutters!

Ingredients:

  • 1 cup all-purpose flour
  • 1 cup whole wheat flour
  • 1/4 cup sugar
  • 1/4 cup cocoa powder
  • 1 teaspoon baking powder
  • 1/2 teaspoon salt
  • 1/4 teaspoon cinnamon
  • 1/2 cup Earth Balance butter
  • 2 tablespoons maple syrup
  • 1/2 cup water
  • 1 teaspoon vanilla extract
  1. Combine the flours, sugar, cocoa powder, baking powder, salt, and cinnamon in the bowl of a food processor, using the dough blade. Pulse until combined.
  2. Cut the butter into small pieces and drop over the flour mixture. Process until the mixture looks like coarse meal.
  3. Add the maple syrup, water, and vanilla; process until a wet dough forms.
  4. Scrape the dough out onto a well-floured surface and pat into a flat disk. Wrap in plastic wrap and refrigerate for at least 1 hour – it will firm up considerably during this time!
  5. On a lightly floured surface, roll the dough to about 1/8-inch thick. Cut into squares, or have children help cut into circles or any other shape with cookie cutters. Transfer the graham crackers to a baking sheet lined with parchment paper.
  6. Prick each cracker several times with a fork, then bake at 350 degrees F for 15 to 18 minutes, then transfer to a wire rack to cool completely.

graham-alt

Our favorite way to eat them – aside from plain – is spread with apple butter.

chocolate-grahams-3

For extra decadence, sprinkle the tops with cinnamon-sugar before baking. My perfect sugar-to-cinnamon ratio? Keep a container in your pantry with two teaspoons cinnamon stirred into 3/4 cup sugar.

graham-fix

A is for Alligator

a-for-alligator-2

Letter-shaped animals are a cute way to bring letters to life for your little one. The letter A lends itself perfectly to the big jaws of an alligator!

I cut a letter A from green construction paper, and several triangles from white paper to be the teeth. Attach the teeth to the sides of the A with glue.

a-for-alligator-1

Travis’s favorite part of the craft was applying the glue so we could add buttons as “scales,” a task he took very seriously! We used green buttons for the scales and 2 blue buttons for eyes.

a-for-alligator-3

Voila, A is for Alligator… Watch out or he might eat extra buttons!

a-for-alligator-4

What other letter and animal pairs can you think of? Please share in the comments!


Oatmeal Pancakes

oatmeal-pancakes-3

I’ve been looking for a way to make pancakes healthier than flour and sugar, and boy does this recipe, adapted from Vegan Lunch Box, deliver!

  • 1 and 3/4 cups oat flour
  • 1/4 teaspoon salt
  • 1/4 teaspoon cinnamon
  • 3 tablespoons ground flaxseed
  • 2 cups vanilla almond milk
  • 1 tablespoon applesauce
  • 1 tablespoon maple syrup
  • 2 teaspoons baking powder
  1. Combine the flour, salt, and cinnamon in a bowl; set aside.
  2. in  blender, combine the flaxseed, almond milk, applesauce, and maple syrup; blend for about 1 minute, until well combined. Add the wet ingredients to the dry ingredients and whisk until smooth.
  3. Let the batter sit for 10 minutes while you preheat an oiled griddle or skillet.
  4. Add the baking powder, and pour the batter into the skillet. Cook until the edges are browned and bubbles cover the tops, then flip over and cook an additional minute or two.

This batter definitely works best with small pancakes – perfect for kids’ appetites anyway!

oatmeal-pancakes-1

Serve with a little Earth Balance butter and a drizzle of maple syrup

Sticky Winter Wall

sticky-winter-wall-8

We loved this idea so much from our blogging friend at D.I.Y. Unlimited Fun that I had to put the game together right away for Travis! Luckily, I keep contact paper on hand for precisely these situations.

I attached a large rectangle of contact paper to a low wall, sticky side out, and provided Travis with various “wintry” items – cotton balls, cotton pads, and white q-tips.

sticky-winter-wall-4

He barely needed me to demonstrate before avidly diving in to create a winter scene.

When we made a snowman, he came up with the cotton pad hat and q-tip arms all by himself.

sticky-winter-wall-2

I also showed him how to make snowflakes with q-tips in a pretty pattern.


sticky-winter-wall-3

His favorite discovery was that the cotton balls left behind a bit of fluff if you pulled them up off of the contact paper. He loved dabbing one onto the paper several times, leaving a “snowy” scene behind.

sticky-winter-wall-7

Thanks for the fantastic idea!

H Week!

H week (20).JPG

Here we are in H week, still loving the novelty that comes from focusing on a particular letter each week. Without any further ado, here is what we enjoyed:

h-week-2

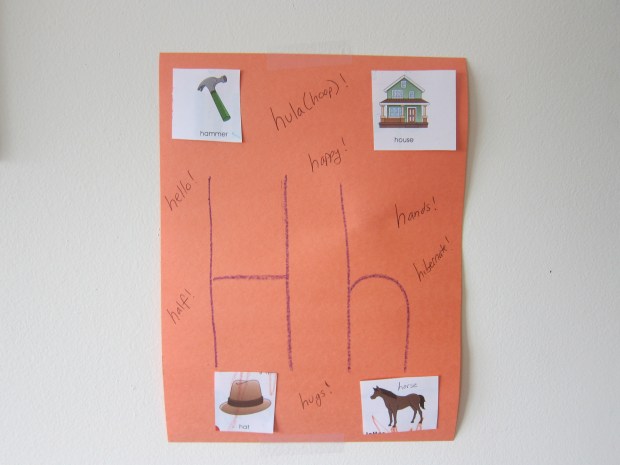
Hammers: I kicked off H week by pulling out all of Travis’s toys that involve a hammer, including some he hasn’t used in months. Some, meant for younger toddlers (including what I fondly call toddler whack-a-mole), he never paid much attention to before, but loved this week. It’s always a nice idea to bring out old toys and look at them with fresh eyes.

h-week-10

House: H is a great prompt to talk about the words “house” and “home,” including who lives in a house, and what makes a house a home. Dollhouse sets are a great way to learn the different room names or types of furniture, as well as a great prompt for the imagination. We have a neat one that assembles in different configurations and stores flat, but if you don’t have a dollhouse at home, check your local library’s play area.

h-week

Horse: Pull out any barn toys you have, with emphasis on the horses this week. Our nice variety includes a latch barn (great for fine motor skills), as well as a Playmobil set that had Travis pretending to care for and clean up after his horses. If the weather is right and there is one in your area, you might consider visiting horses at a farm or sanctuary!

h-week-16

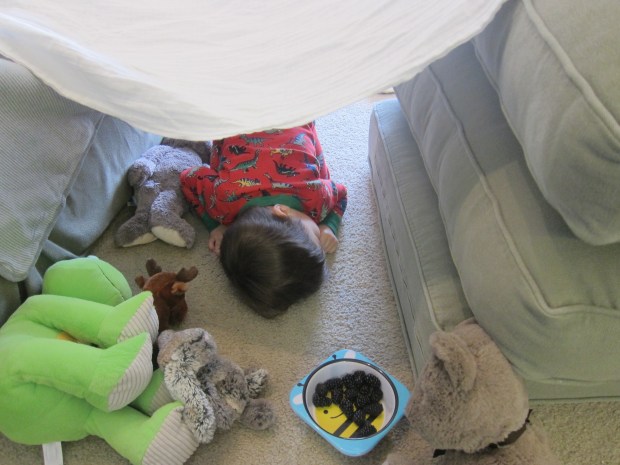
Hibernation: I snuck in a little science with this word, teaching Travis that some animals hibernate (take a long nap) during the cold winter months. We had a berry snack to fortify us, then “slept” in a cozy den of blankets and pillows. When it was “spring,” we woke up, we stretched, and dined on more berries. Invite your stuffed animals to join in for cozy hibernation fun.

h-week-7

Hula hoops/hula dance:  Hula hoops make for great play – jumping into, using in an obstacle course, or rolling around the room. Travis looped his over his shoulders and spun in a circle, an adorable first foray into using one around his waist. You can also toss bean bags inside a hula hoop for a color-matching game.

h-week-4

Following up on the word, I made Travis a rather silly hula skirt, simply attaching green crepe paper to a child’s belt. He loved the hula dance party that ensued!

h-week-5

Hats: Play a game of guess-that-hat; show your child pictures of different hats – policeman, firefighter, construction worker – and see if they can identify which profession each one belongs to. To do this, we used the hats on our Joey magnetic doll, but you could also cut pictures from magazines. Try reading the sweet book Which Hat is That by Anna Grossnickle Hines before you play the game.

And our weekly extras…

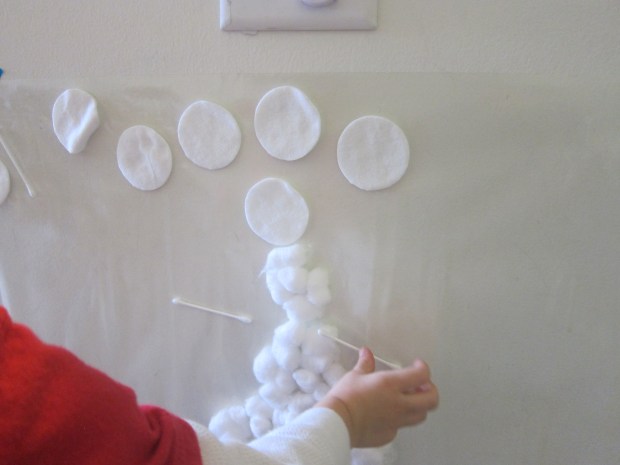
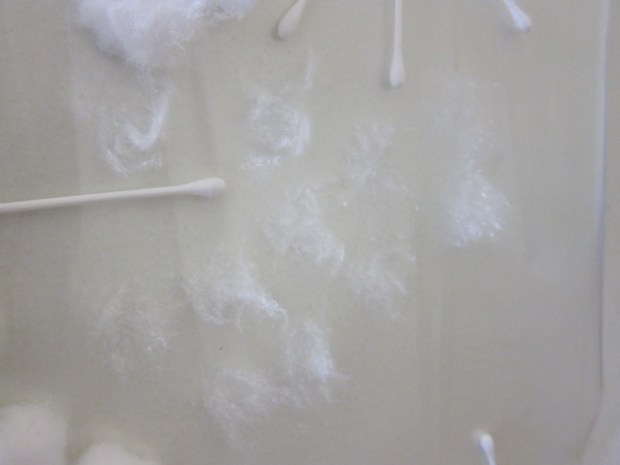
Fine art: Make handprints of course! This painting project was easily Travis’s favorite moment of the week, impishly getting his hands goopy and slapping them down to make prints.

h-week-12

He liked seeing how the paints mixed together, and turned his hands different colors.

h-week-11

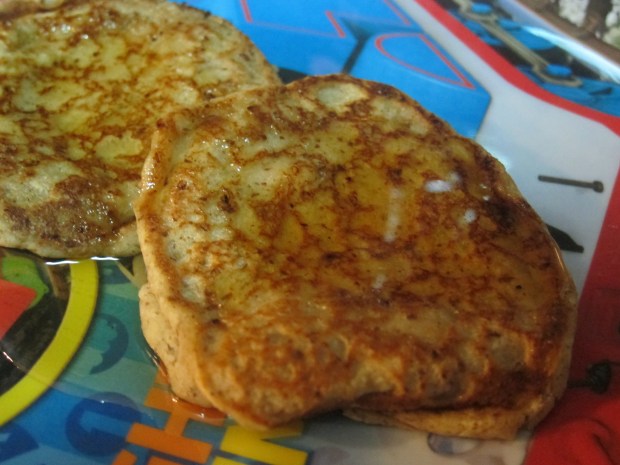
Food: Not exactly the healthiest fare, but Travis dined on Hawaiian pizza (pineapple and Tofurky ham on pizza), and hot dogs (well, tofu pups). In a healthier vein, serve honeydew melon.

h-week-13

Books: Some great picks from the library included: Hug Time by Patrick McDonnell, Hello! Goodbye! by Aliki, and Hide & Seek by Il Sung Na.

h-week-19

Songs: Two songs with H in the title are perfect for interactive and silly fun. First, teach your child the Hokey Pokey. Travis got a kick out of seeing me do the silly dance before joining in. You can also watch online, sure to elicit smiles. Then we acted out the classic If You’re Happy and You Know It.

Math: I introduced the notion of hours, thanks to a new teaching clock toy that Travis received over the holidays. Since he’s only 2 and 1/2, I stuck to hours for now and didn’t bother with the various minute positions of a clock, but Travis took right to it. Then we made a big floor clock with the numbers, and Travis was the “hands” of the clock, pointing to the hour I asked for.

h-week-17

You can also talk about halves: draw the top half of a person and enlist your child to draw the bottom half – legs, feet etc. If this seems too complicated, simply draw shapes and draw a line dividing them in half, or color the halves different colors.

h-week-15

Goodbye until G week…